Shutter Buddies
"crap Monster Buddy"
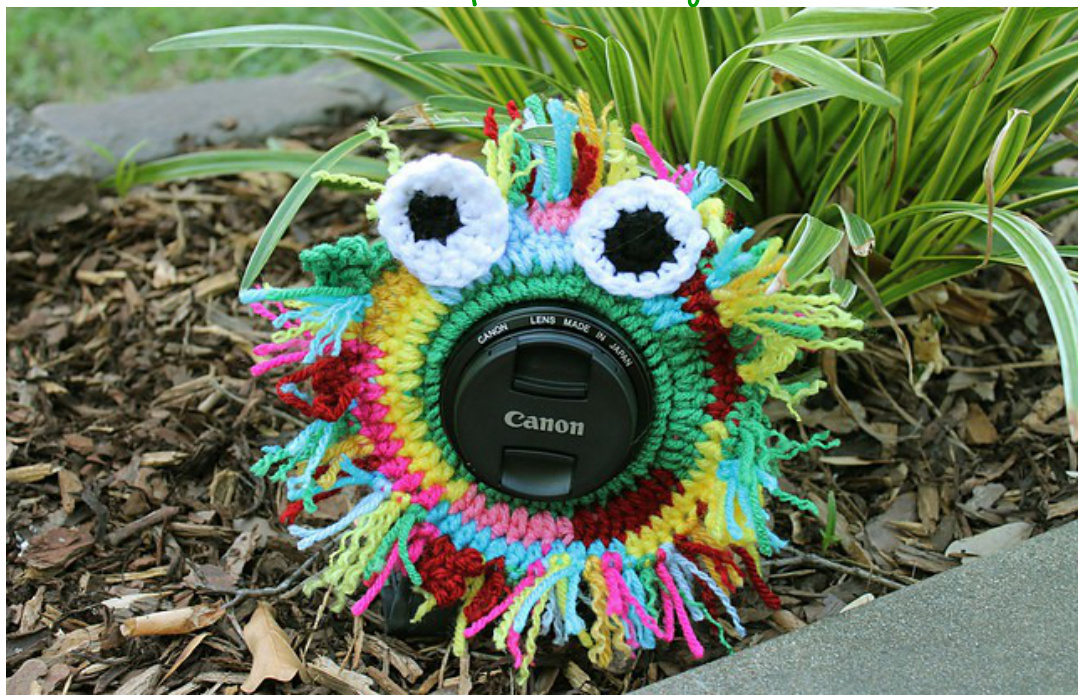
① 2014 - Carlee Fisher This "Shutter Buddy pattern is created for photographers' use. They are used to gral the attention of ifle models. ttere are three of my designs. Feel free to experiment and create your own! Thes budles are made tofit a standard ens for a DSLR. They fit my Canon Rebel kit lenses as wel as my Canon Fomm prime lens.
Materials:
- Worsted Weight Yarn - Size J/10 (6mm) Crochet Hook - Thick Ponytail Holder - Tapestry/Yarn Needle - Scissors
Notes:
- This pattern is for the body base in 3 rows. - Pattern for eyes, frog, and daisy are below. - This pattern is of my own making. Please do not copy/redistribute. You have permission to sell finished products.
Shutter Buddies
Budduy Boouy:
Attach yarn to ponytail holder, ch 1, sc 40 around ponytail holder, join. R2: Ch 2, \* 2 hdc in next st, 1 hdc in next \* repeat from \* to \* around, join. R3: Ch 2, hdc in each st around, join, finish off, weave in tails.
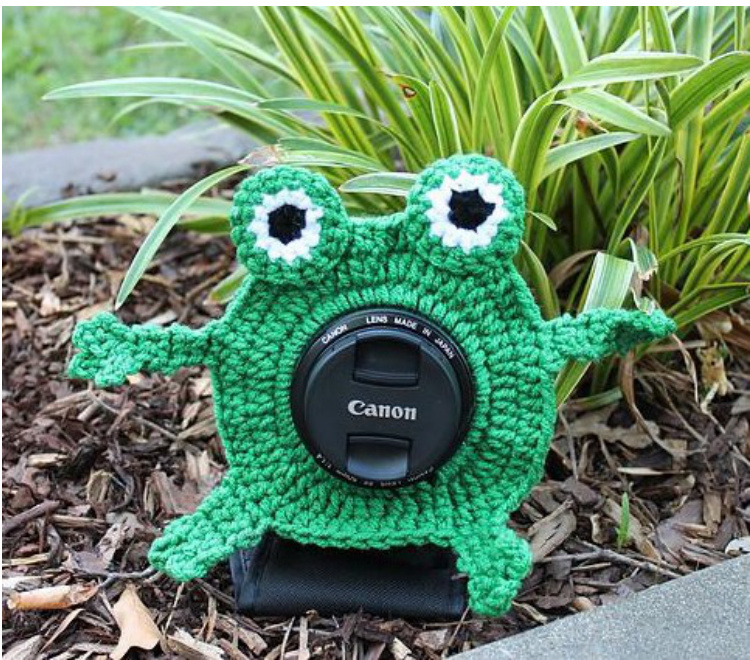
"Frog Buddy" Legs: (molke 2) N Attach yarn, ch 1, sc 4. R2-4: Ch 1, sc 4. P: Ch 4, sl in first sc, ch 6, sl in next sc, ch 6, sl in next sc, ch 4, sl in last sc, finish off. Weave in tails of arms and legs. Arms: (make 2) Note: Stretch body over lens ond use stitch markers to locate where you would like appendages to be. N Attach yarn, ch 1, sc 3. R2-o: Ch 1, turn, sc 3. 7: Ch 3, sl in first sc, ch 5, sl in second sc, ch 3, sl in last sc, finish off. Euyes: (moke 2) Note: This is for “Frog" For the monster, I did one eye as 2 rows in black and the zrd in white, then the other as I row in black and the last 2 in white. Ilke to use the "wrong" side ofthe eyes as it shows better color change. N: In black, magic loop, ch 1, 6 sc in loop. R2: Change to white in join, ch 1, 2 sc in each sc around (12 st). K3: Change to green in join, ch 1, 1 sc in same st, \* 2 sc in next, sc in next \* repeat from \* to \* around (18 st), finish off. Stitch onto body. Weave in tails.

Daisy Body:
H-2: In yellow, follow basic body pattern above. K3: Change to white, ch 1, \* sk 2, 6 dc in next st, sk 2, sc in next \* repeat from \* to \* around (10 petals) ending in a join to first ch, finish off. Weave in tails.
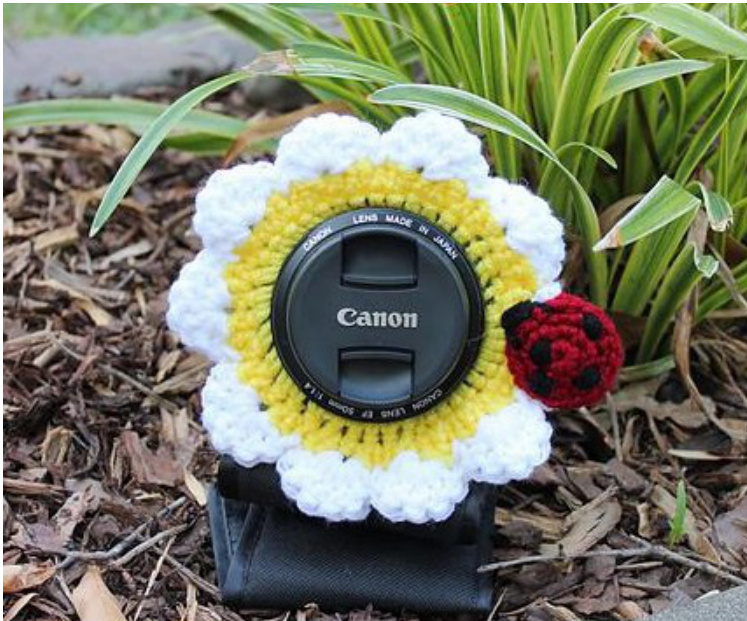
"Daisy Buddy"
Lady Bug:
N In red, magic loop, ch 1, 6 sc in loop, do not join. R2: 2 sc in each st around (12 st). 7: \* 2 sc in next st, 1 sc in next \* repeat around (18 st), sl in next (creates a seamless circle), finish off. Sew ladybug onto daisy. Embroider spots and head on with black or use small buttons for spots.


