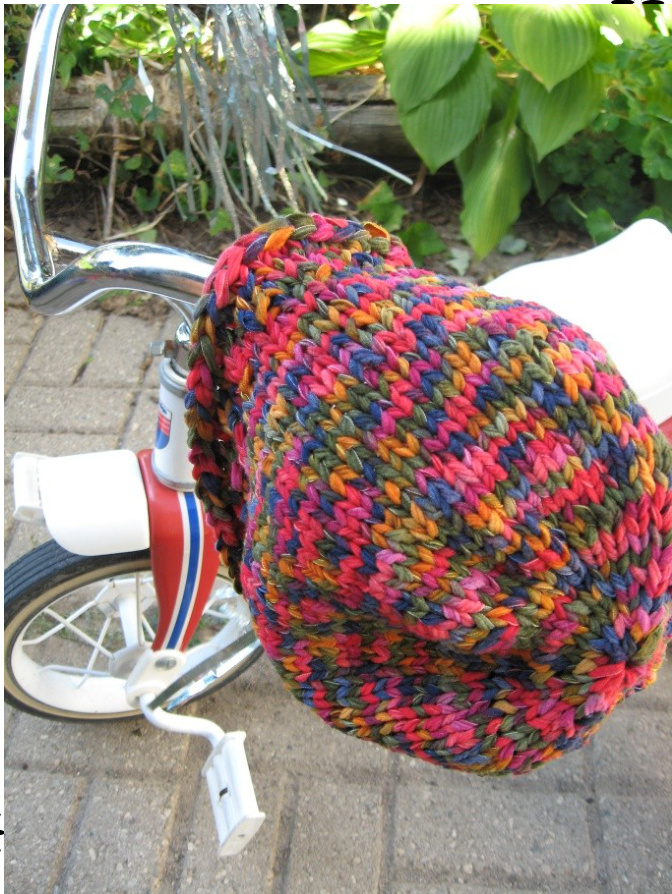
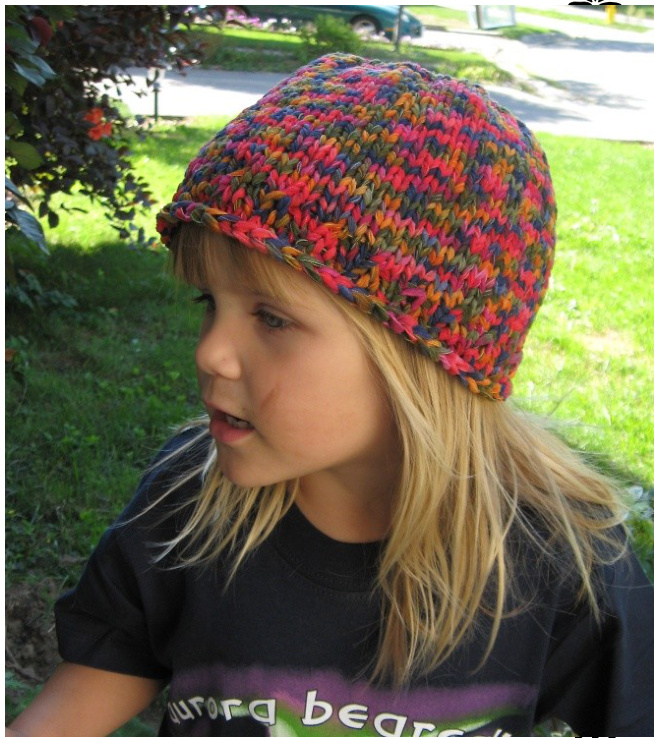
Perhaps, like me, you felt compelled to buy a skein of ribbon or ticker tape yarn. Perhaps your toddler picked it out, or perhaps you have only yourself to blame. Whatever the reason, you probably find yourself wondering what to do with it. Perhaps you've looked around on Ravelry to see what others have done with the yarn, but were disappointed that most of the projects required more than one skein—- or you didn't want to make a water bottle holder. If so, I have a pattern for you. It's quick and fun. It's practical and cute. You can make it for your own kid, or for charity, or for a friend. You only need one skein of yarn (assuming your skein is roughly the same in yardage as mine. I apologize if the supplier of your ribbon yarn makes smaller balls, but I did have leftovers, as seen above, so you can probably still do it!l) Yarn: Moda Dea Ticker Tape. 100% Nylon. 50g; 62m/67yd. My colourway is Charade, if you wanted to know. Other ribbon yarns should work just as well. Needles: 6mm / US10 You can work with DPNs or circs. Whatever you prefer. Gauge: 15 sts/ 24 rows per 4" Pattern: Using an invisible cast on method, CO 8 sts. (I like a disappearing loop method. If you are unfamiliar with an invisible cast on, a quick Internet search will provide plenty of tutorials.) R1: (K1, YO) around. [16 sts] R2: (K1, K1tbl) around. On every round that follows increases, work the YOs through the back loop to twist them. Or use an alternate, more invisible increase method on the increase round. I think the twisted YO works well with this yarn. R3: K 米米米
米米米米米米米米米米米米米米米米米米米米米米米米米米
米米米米米米米米米米米米米米米米米米米米米米米米米米
米 R9: (K1, YO) around. [64 sts]R17: increase by 5 sts randomly spaced as you knit around. [69sts] R35: (K1, C1R) around. This simple crossing of stitches will help tighten up the hat so that it Won't lose its shape. R35: (K1, C1R) around. To work the Cross 1 Right, knit into the second stitch on LHN (with working yarn coming in front of first stitch), then work first stitch. This simple crossing of stitches will help tighten up the hat so that it won't lose its shape or be too loose at the edge. As an added bonus it adds a cute diagonal line to the pattern. Make sure you keep the crossed stitches tight because the movement of the yarn has a tendency to get loose here. R36-37: K R38: (C1R, K1) around. (If you'd prefer a ribbed look, repeat R35 so that the crossed stitches stack. I preferred to keep the diagonal line.) R39: K Bind off by K1tbl, (pass stitch back to LHN, K2togtbl) around. This makes a nice clean edge that is not as tight as a standard BO, but not as loose as stretchy methods because the yarn itself is quiet elastic. If you happen to be working this in a very different yarn, then you might want a more ctretchv RN method Weave in ends. Admire. Get on to a kids' head. Mandyz Moon can be found on Ravelry as MandyzMoon or e-mailed directly at mandyz.moon@yahoo.ca Copying and sharing of this pattern is subject to Copyright Law. You're welcome to knit up hats for any purpose.