Mobius Mitts V.1
JU Myss Pcarkes http://ixelatecmushroom.logspot.com
Pattern Information
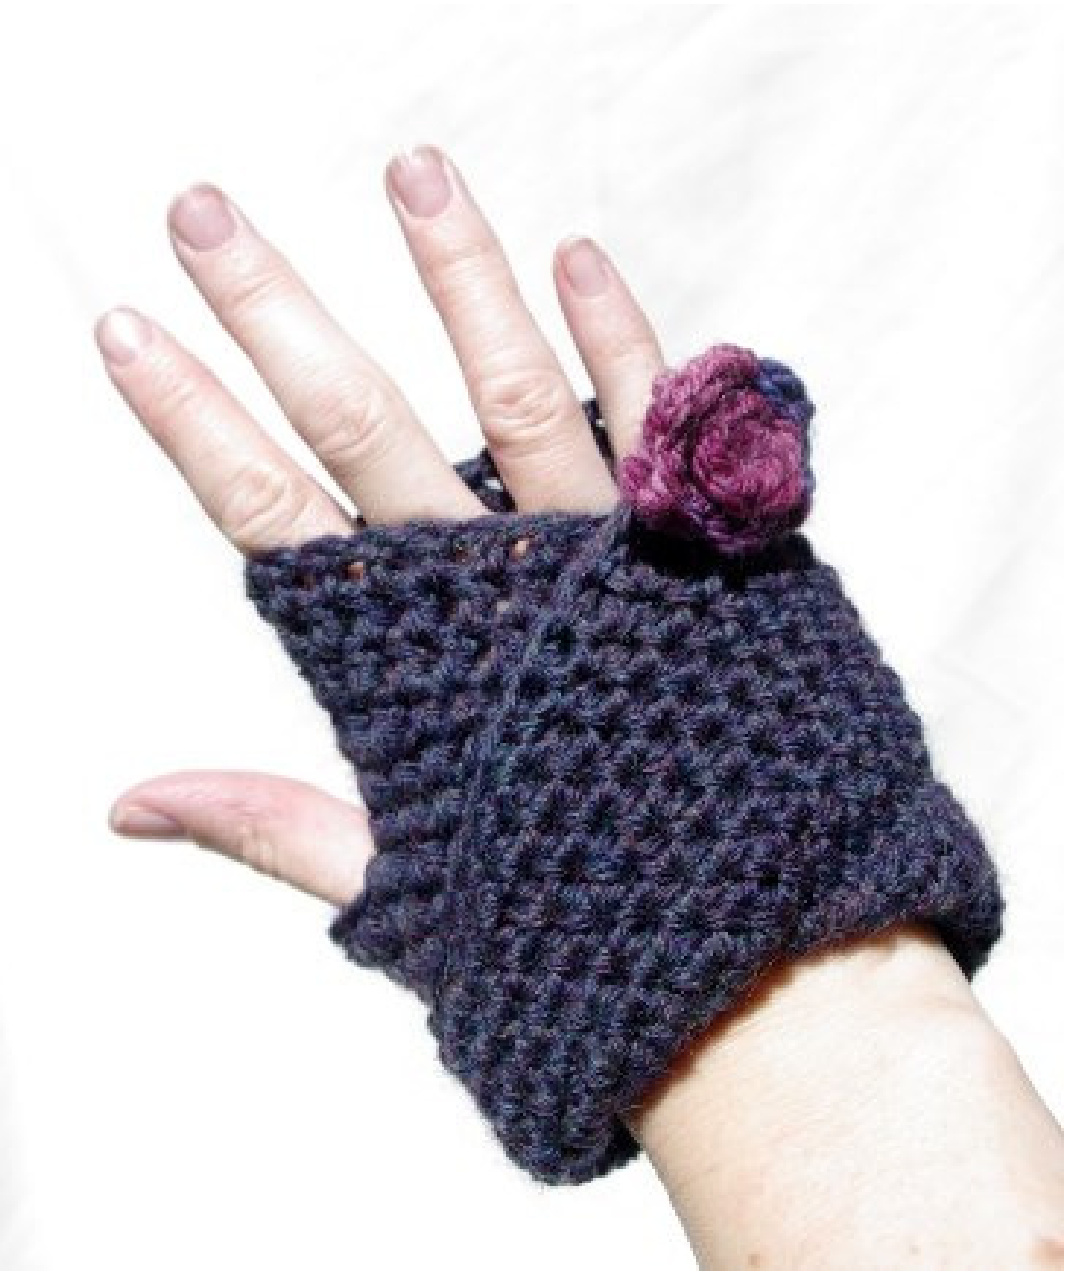
Thanks for checking out this unusual and slightly geeky creation. People will be fascinated when you hand over your mitts and let them twist and try to work them out. The beauty of the mobius loop for knitting and crochet is that you get to work either side of the foundation chain / cast on row, so that you start your work in the middle and go outwards:
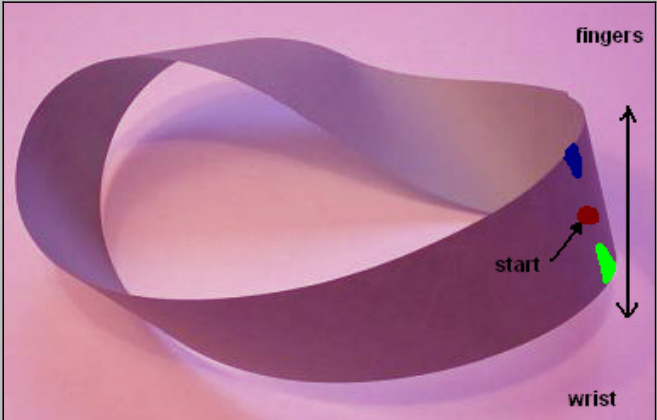
I have used a blue and a green stitch marker to keep track of rows. Each 'row' takes you the distance between the markers. To grasp the concept, take a look at the diagram above and starting at the blue marker, follow the edge around until it hits the green marker - this will be called one 'row'. Image: David Benbennick( http://en.wikipedia.org/wiki/File:Mobius strip.ipq
Abbreviations / Stitches used
Sizing
US crochet terms
St /Sts = Stitch/Stitches Chain - Chain SS - Slip stitch https://youtu.be/XVURLgzfJsM Sc = Single crochet https://youtu.be/JPSMobnmU8U Hdc = Half-double crochet https://youtu.be/DhKyDgnDldg Dc = Double crochet https://youtu.be/JkohnQzTxlA Sc2tog=Single crochet decrease https://youtu.be/JcycT1YmSSM Half-double crochet increase (i.e. 2 sc in next sc) https://youtu.be/kOJ5ElEd13Q
Small[Medium, Large]
small: 3.5in (9cm) wide, 3.5in (9cm) tall at smallest point medium: 4in (10cm) wide, 3.5in (9cm) tall at smallest point large: 4.5in (11cm) wide, 4.5 (11cm) tall at smallest point If you are finding none of these sizes match, you can add/remove an amount of stitches from the initial startingchainandfirst3rows,thencontinue following the pattern as is, trying on frequently as you go. 5 sts and 4 rows in half-double crochet per inch with the smaller of your hooks.
Materials
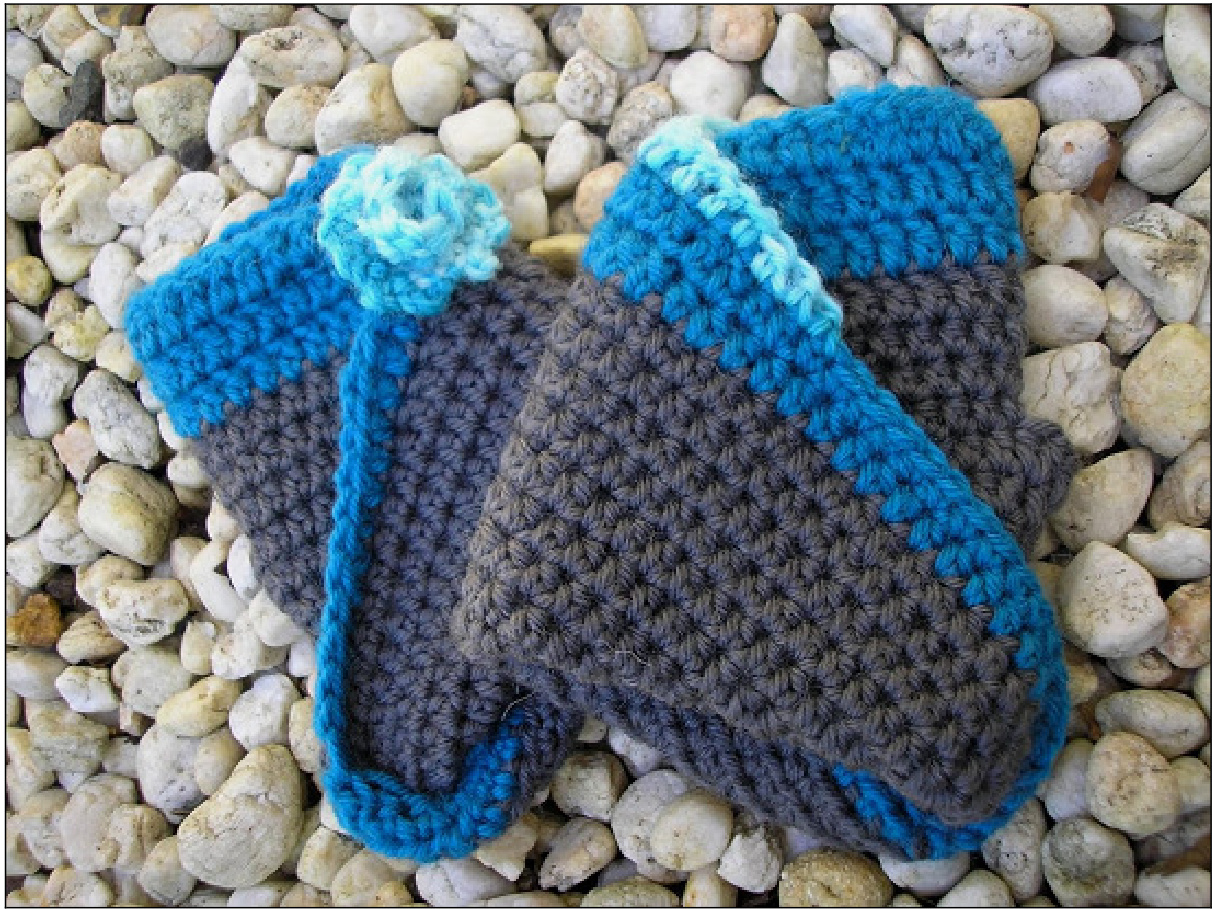
5mm crochet hook (or size to get gauge) 5.5mm crochet hook (or make your starting chain very loose) Two stitch markers Yarn: Pictured on the front of this pattern is Bendigo Woollen Mills Rustic 8 ply (DK) (Ravelry link) in 'midnight tweed'. 50 grams (1.7 oz) of DK yarn will usually make a small pair, you will need 70g-80g+ (2.4-2.8 oz) for the larger sizes. Leftover 1/2 skeins are great for the colour variations.
Version updates, contact, and permissions
The most recent version of this pattern is available from Ravelry or my Blog: http://www.ravelry.com/designers/nyss-parkes http://pixelatedmushroom.blogspot.com.au I love seeing your project photos. Feel free to attach them to your project on Ravelry. For any concerns, email pixelatedmushroom@gmail.com This isVersion3-27June2015.This version standardises the crochet language, and adds a midway check to ensure the mitts are twisting correctly. Design @ 2010 Nyss Parkes. Creative Commons Attribution-NonCommercial-ShareAlike3.0 License Australia http://creativecommons.org/licenses/by-nc-sa/3.0/au/
The Pattern
Right Mitt
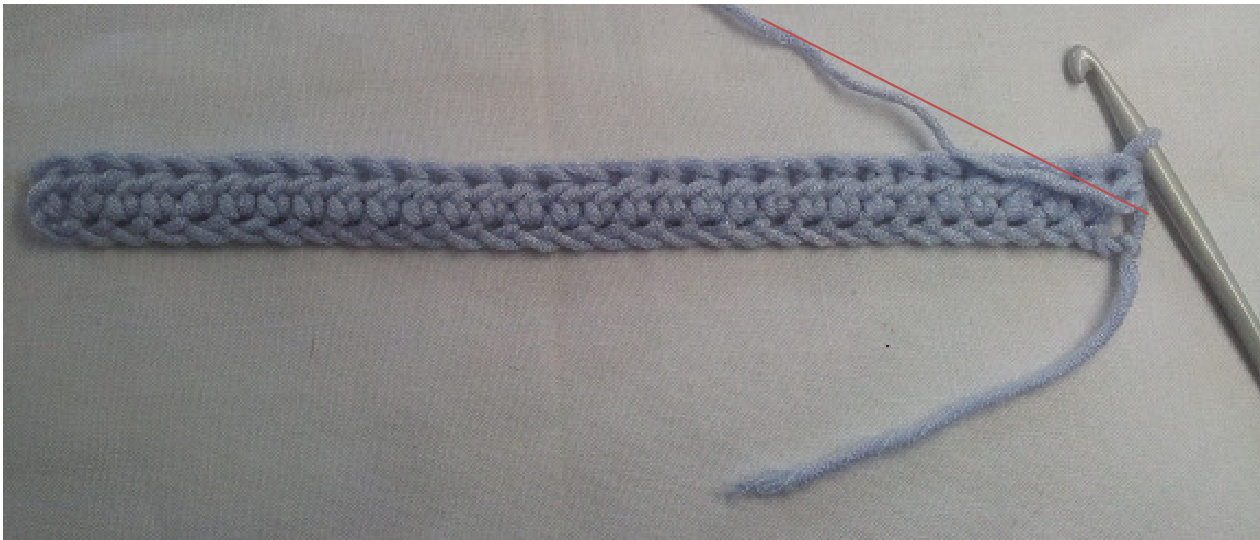
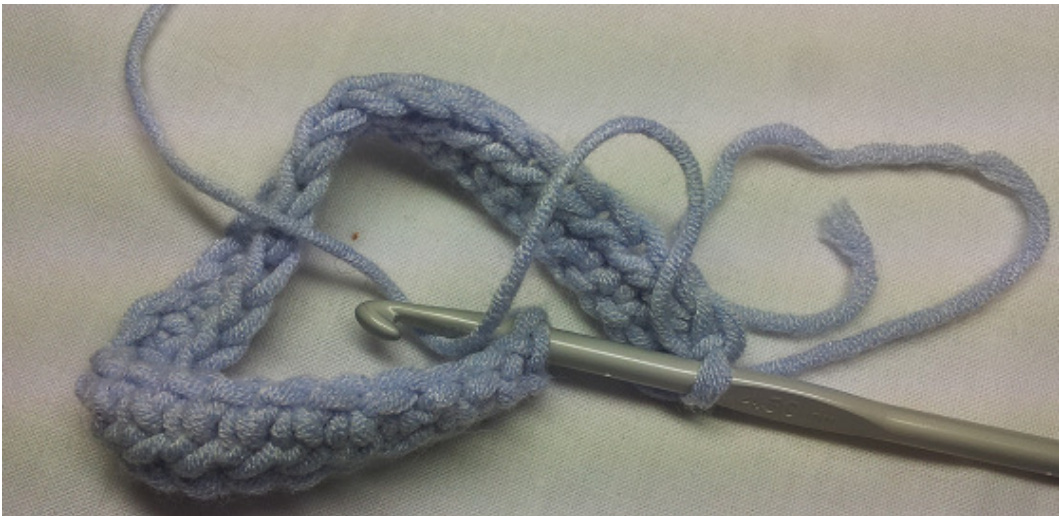
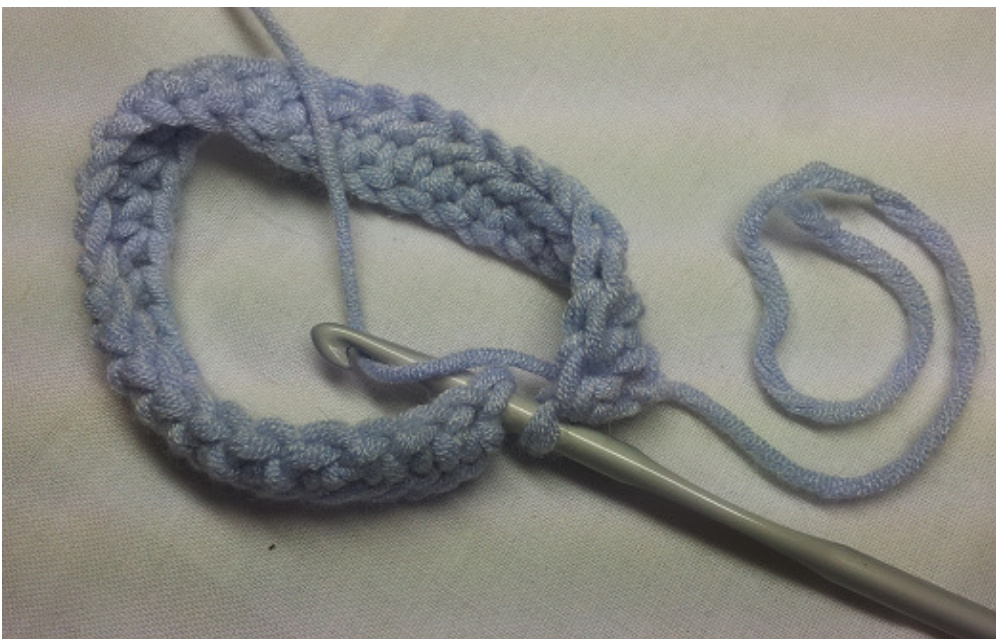
Using your larger hook, chain 30[34, 40] Change to smaller hook e 2 turning chains, then hdc into each st = 30[3 Flip the work over horizontally as if to start the next row, then lay work on a flat surface as shown below. Position working across the front of work towards the top left as shown (this step is essential).
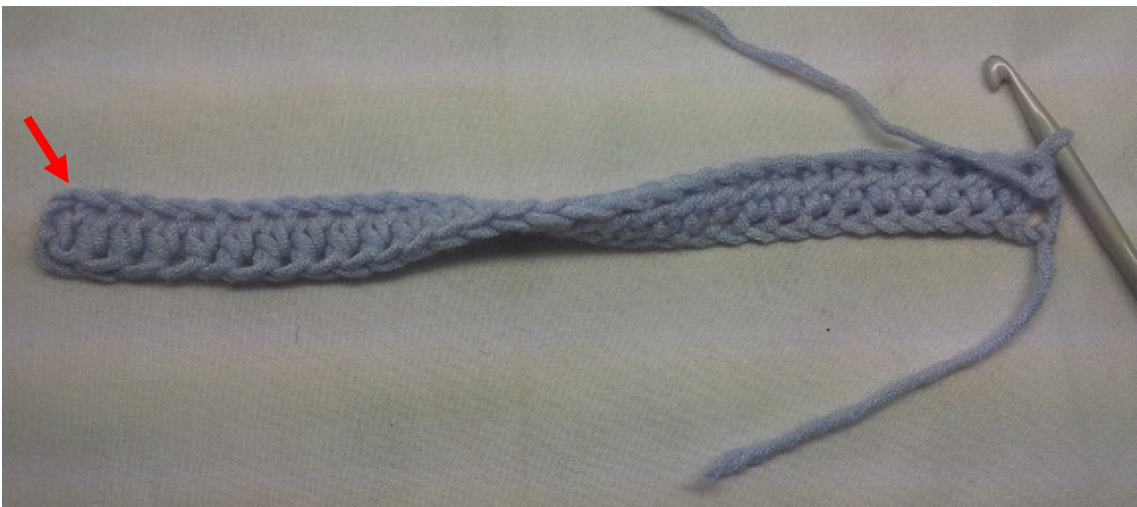
Twist the bottom left corner away from you 180deg until it becomes the top left corner.
2) Insert hook into the stitch indicated above and sc 1 (shown below).
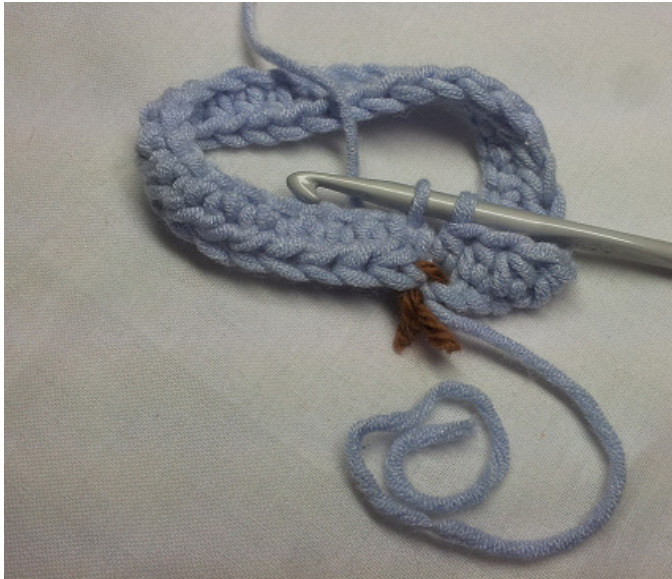
You may wish to tie / safety-pin the loose ends together as shown to ensure they do not twist further while youareworking.
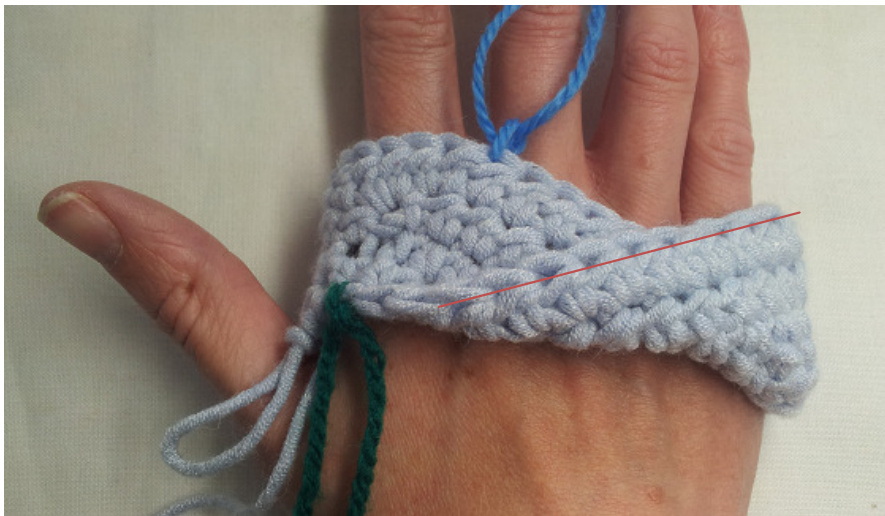
Continuing in the same direction, hdc into the next 29[33, 39] sts (note that you are working into the opposite side of your beginning chain for this row) 3) Place a green stitch marker here, then hdc into the next 30[34, 40] sts 4) Place a blue stitch marker here, make 2 hdc into the next st (twice), hdc into remaining sts to green marker (2 sts increased) 5) hdc in every st to blue marker Place work around fingers with blue marker near index finger and twist as shown below. It should be somewhat loose at this point. You may consider redoing these rows with a larger hook or going up a size if it feels too tight. To check if you have correctly twisted for a right mitt, your glove should twist like this:
ext st, hdc in next 2 sts, 2 hdc in next st, hdc remaining sts to green marker (2 sts increased) 7) hdc in every st to blue marker 8)2 hdc in next st (twice), hdc in next st, 2 hdc in next st (twice), hdc in remaining sts to green marker (4 sts increased) 9) hdc to blue marker 10) hdc in next st, chain 3[5, 9] sts, sc in 9th stitch from hook (makes thumb hole), hdc in remaining sts to green marker (5[3,0] sts decreased) 11) hdc in every st to blue marker 12) hdc in every st to green marker [Large size only: repeat rows 11 and 12] 13) hdc in every st to blue marker 14) hdc in every st to green marker 15) hdc in every st to blue marker 16) hdc in next st, dc in next 24 sts, hdc in remaining sts to green marker (start new colour now if desired) 17) hdc in next 21 sts, dc in remaining sts to blue marker 18) dc in next 24 sts, hdc in each st until two sts remain before the green marker, sc2tog (1 st decreased) 19) sc2tog, sc in next 16 sts, hdc in next st, dc in remaining sts to blue marker (1 st decreased) 20) dc in next 16 sts, hdc in next 2 sts, sc in next st, ss next st 21) turn work, sc in 2nd stitch from hook, hdc in next st, dc in each st to blue marker 22) dc in next 8 sts, hdc in next 2 sts, sc in next 2 sts, ss in next st
Finishing
Break yarn leaving a long tail, then thread tail through stitch on hook and pull tight. Sew in end. Use loose end from foundation chain to sew up the small hole near first chain. See the 'wearing the mitts' section below to arrange mitts into the right shape for wearing. Soak mitts in warm water to block. Squeeze out excess water and dry flat. Blocking evens out your stitching, gives the mitts a crisp appearance, and allows the mitts to easily return to their default position, even when they have been twisted into different shapes.
Left Mitt
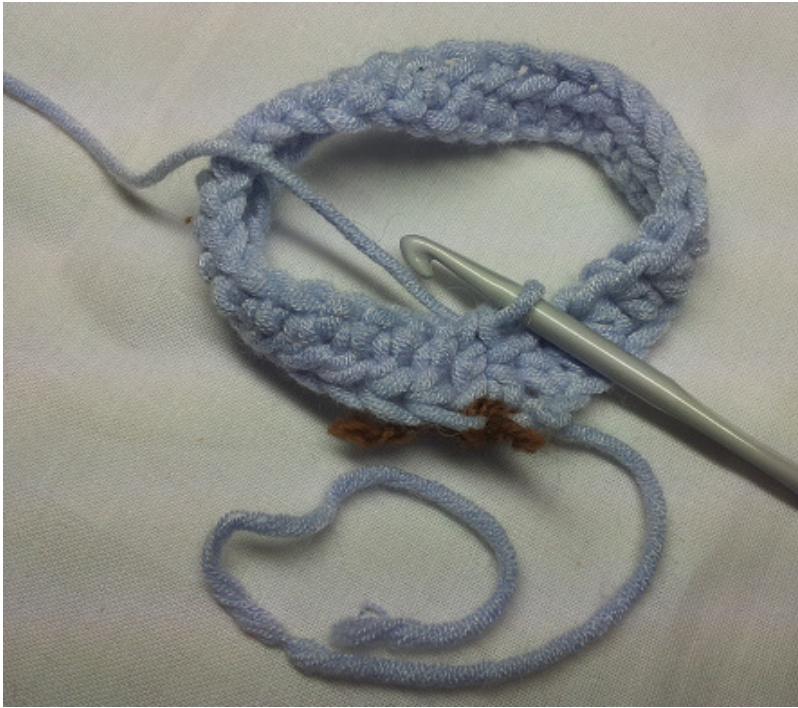
Using larger hook, chain 30[34, 40] Change to smaller hook 1) Make 2 turning chains, then hdc in 30[34, 40] sts Flip the work over horizontally as if to start the next row, then lay work on a flat surface as shown below. Arrange working yarn to top left as shown (this step is essential).
Twist the bottom left corner towards you 180deg until it becomes the top left corner

2) Insert hook into the stitch indicated above and sc1... (shown below).
You may wish to tie / safety-pin the loose ends together as shown to ensure they do not twist further while you areworking.
turn work, then in next hdc 31[35, 41] sts 3) Place a green stitch marker here, then hdc into the next 30[34, 40] sts 4) Place a blue stitch marker here, make 2 hdc into the next st (twice), hdc into remaining sts to green marker (2 sts increased) 5) hdc in every st to blue marker Place work around fingers with blue marker against index finger and twist as shown. It should be somewhat loose at this point. You may consider redoing these rows with a larger hook or going up a size if not. To have correctly twisted for a left mitt, your glove should twist look like this:
Rows 6-22) Same as for right mitt
Wearing the Mitts
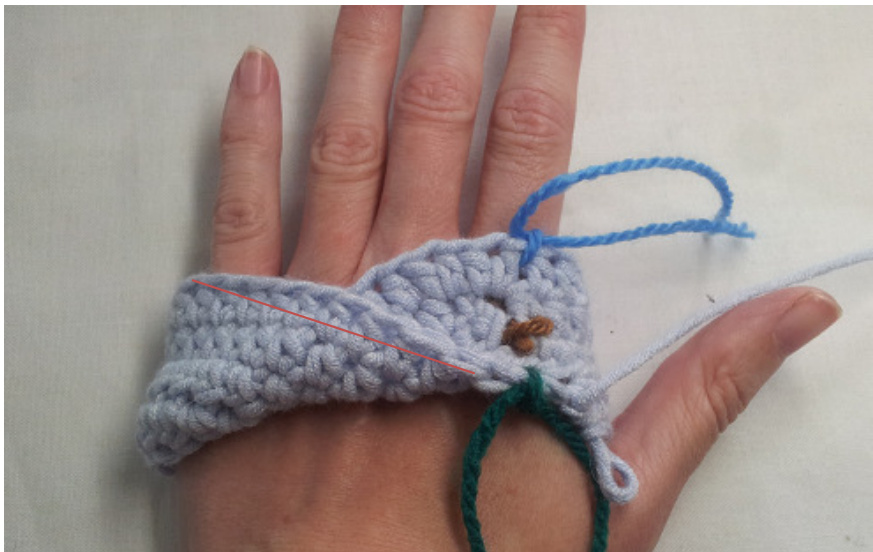
Find the thumbhole and work your hand into the opening. Then arrange the flap across the back of the hand
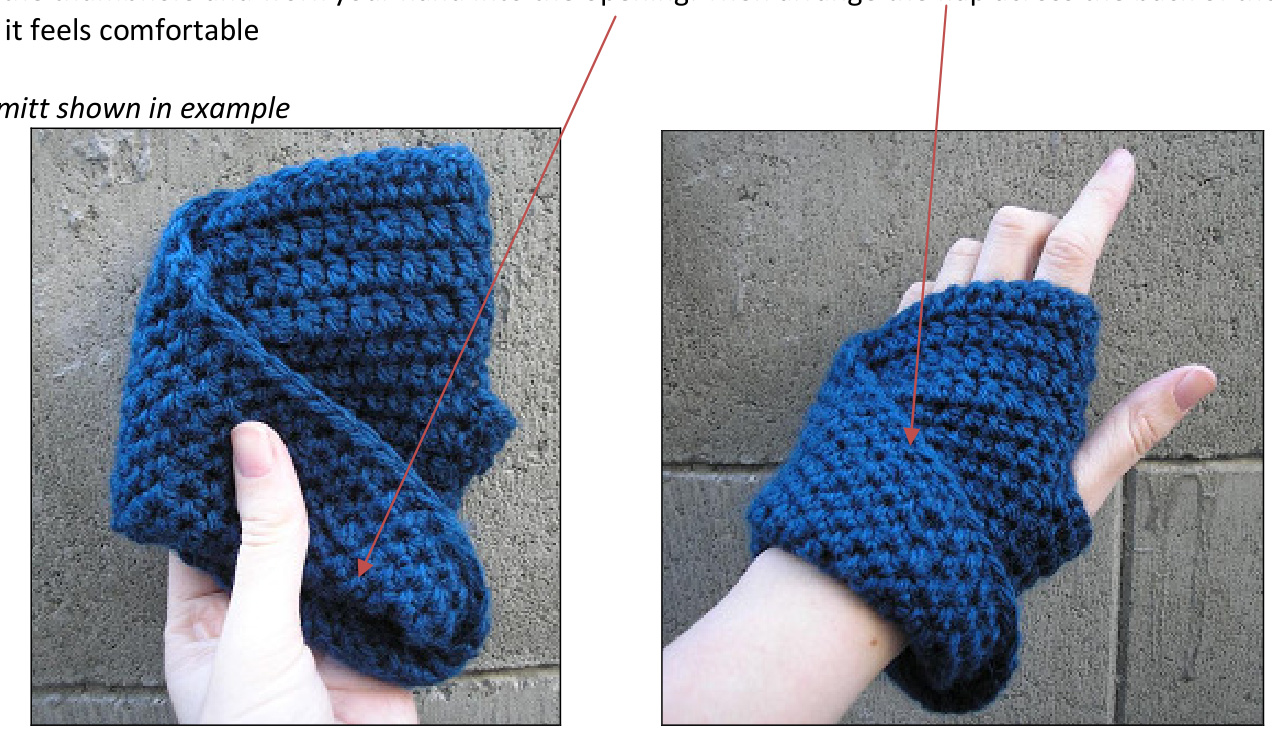
The mobius strip will twist around to adjust for the angle of your hand.
Two-colour mitts
For two-colour mitts, start the second colour before row 17 I hope you have enjoyed this pattern!


