MoUius Mitts V.1
pixelatecmushroom.logspot.com
Design @ 2010 Nyss Parkes. Creative Commons Attribution-NonCommercial-ShareAlike 3.0 License Australia Please do not sell gloves made from this pattern

Welcome!
Thanks for coming to check out this unusual and slightly geeky creation! The mobius strip has been used in the past for many cowl and scarf creations, but gloves make it just that bit more exciting and unusual! People will be fascinated when you hand over your gloves and let them twist and try to work them out! The beauty of the mobius loop for knitting and crochet is that you get to work either side of the cast on row/foundation chain, so that you start your work in the middle and go outwards:
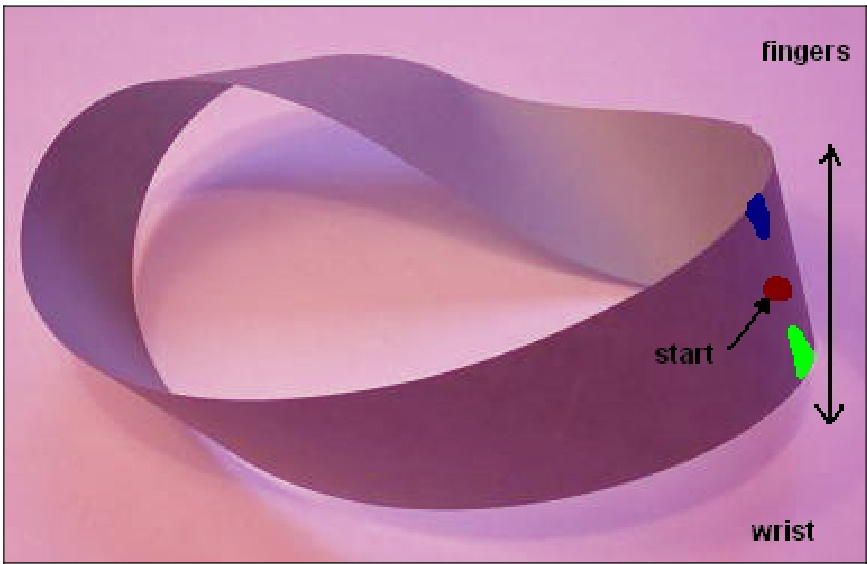
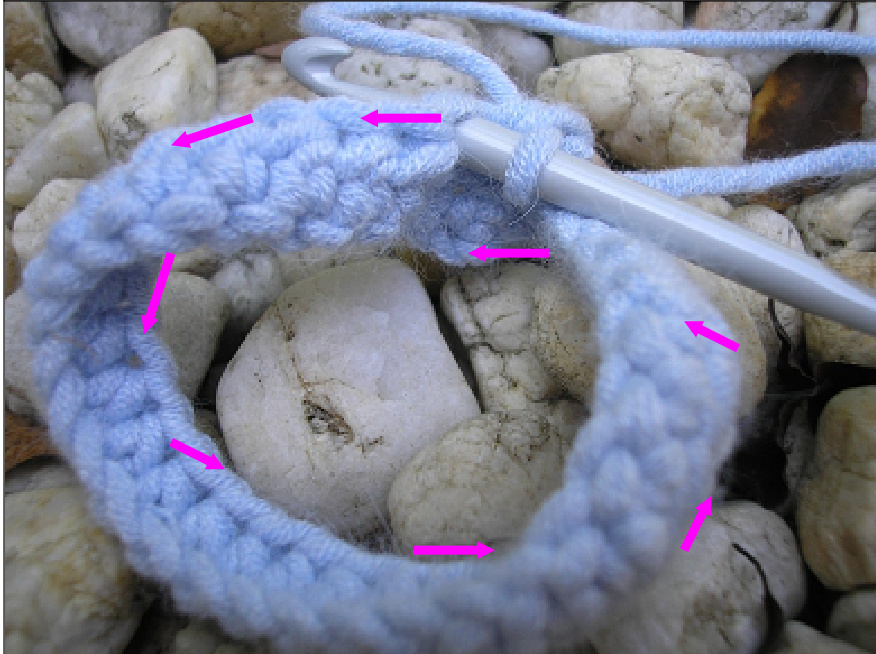
I have used a blue and a green stitch marker to keep track of rows. Because each 'row' takes you the distance between two markers it should not be too hard to follow. It's a good idea right now to look up at the diagram and starting at the blue marker, follow the edge around until it hits the green marker, this will be called one 'row' I would love to see any photos of your finished gloves if you would like to send them to me (pixelatedmushroom@gmail.com). Feel free to contact me if you have any worries or questions. Hope you have as much fun crocheting as I did designing the pattern!
Yarn
I used Bendigo Woollen Mills Classic 8 Ply (DK) (Ravelry link: _ http: //www.ravelry.com/yarns/library/bendigo-woollen-mills-classic-8-ply ) Try and match the wool of your to a hook that will match the below gauge. Some lovely projects have been made with Malabrigo Worsted. Please check your work after row 5 as indicated in the pattern. 50 grams will usually make a small pair, you will need 70-80+ for the larger sizes. Leftover 1/2 skeins are great for the colour variations Gauge Approximately 5 sts and 4 rows in half double crochet per inch.
small [medium, large]
approximate measurements depend heavily on yarn choice and gauge: small: 3.5in (9cm) wide, 3.5in (9cm) tall at smallest point medium: 4in (10cm) wide, 3.5in (9cm) tall at smallest point large: 4.5in (11cm) wide, 4.5 (11cm) tall at smallest point If you are finding none of these sizes match, you can add/remove an amount of stitches from the initial starting chain and first 3 rows, then continue following the pattern, trying on frequently as you go. Tools 5mm crochet hook A green stitch marker A blue stitch marker Stitches/Abbreviations (US crochet terms) Sts = Stitches Ch = Chain Sc = Single crochet Hdc = Half-double crochet [video] Dc = Double crochet Sc-dec = Single crochet decrease [video] Hdc-inc = Half-double crochet increase [video]
The Pattern
Left Mitt
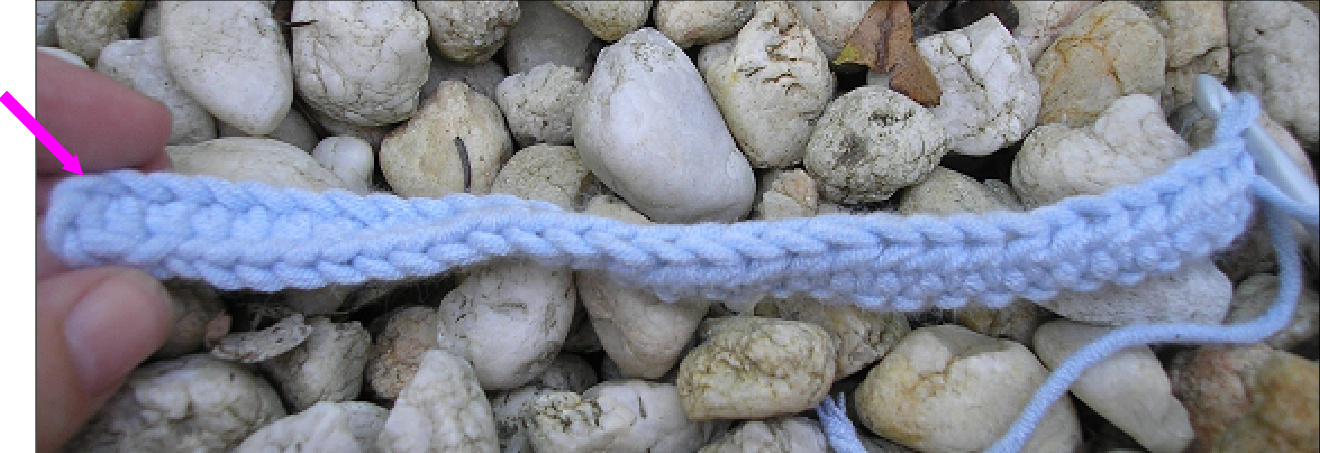
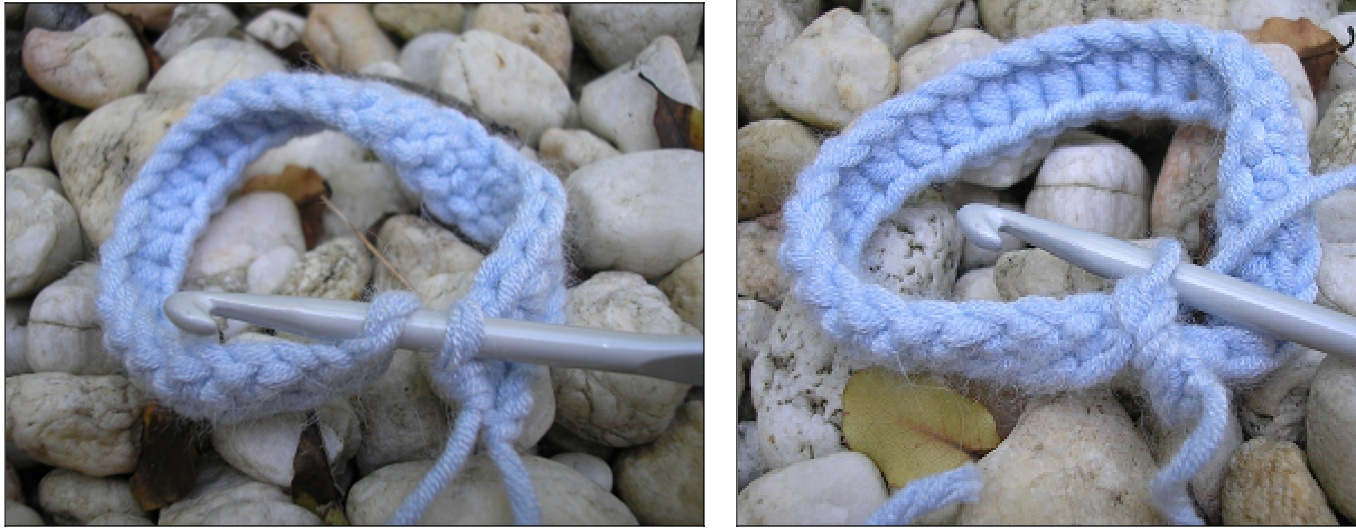
Chain 30[34, 40] Row 1) Make 2 turning chains, then hdc30[34, 40]
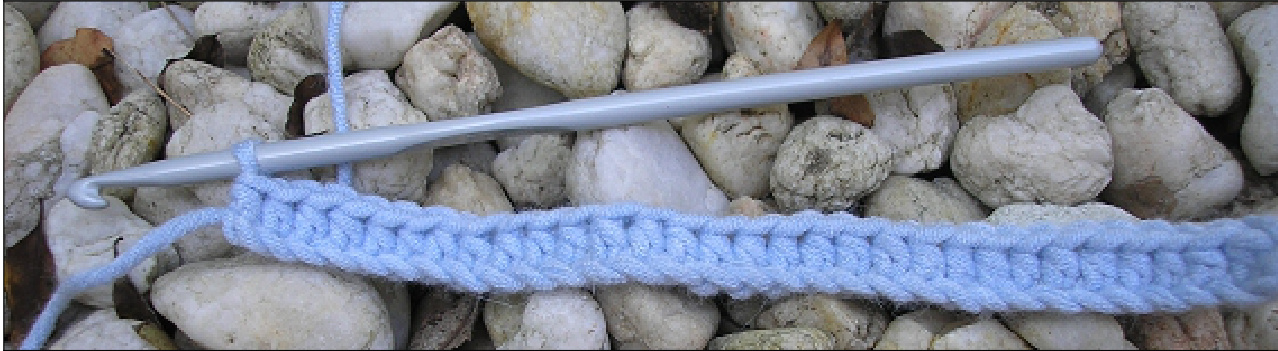
[See video help for this section] Flip the work over horizontally as if to start the next row
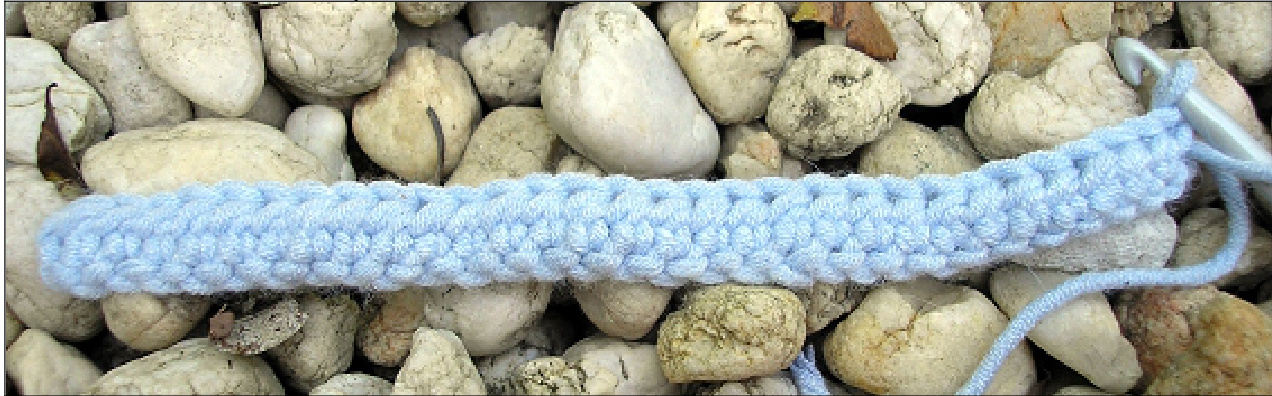
Twist the bottom left corner away from you 180deg until it becomes the top left corner
2) Insert hook into the stitch indicated above and sc1 (shown below), then continuing in the same direction hdc 29[33, 39]
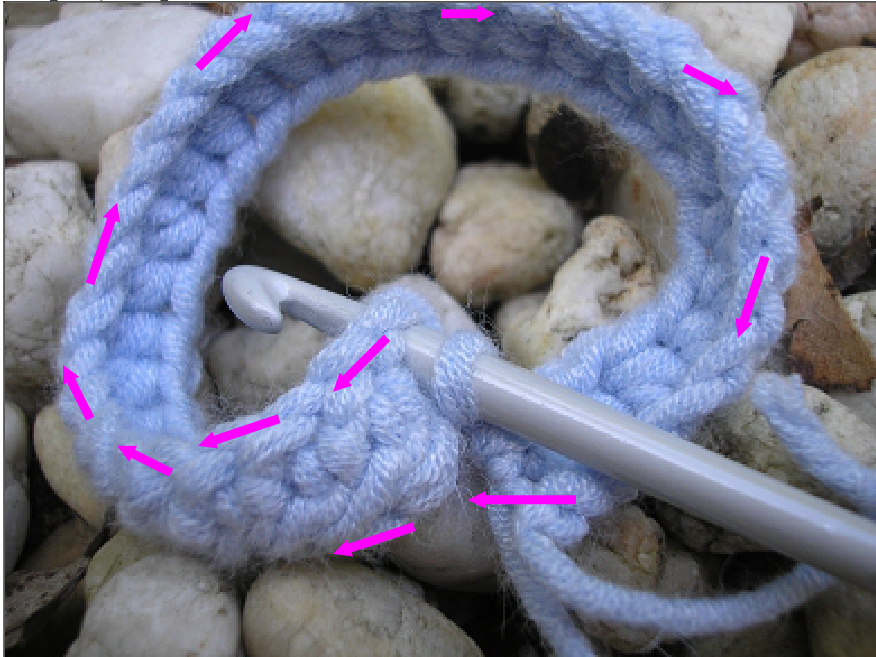
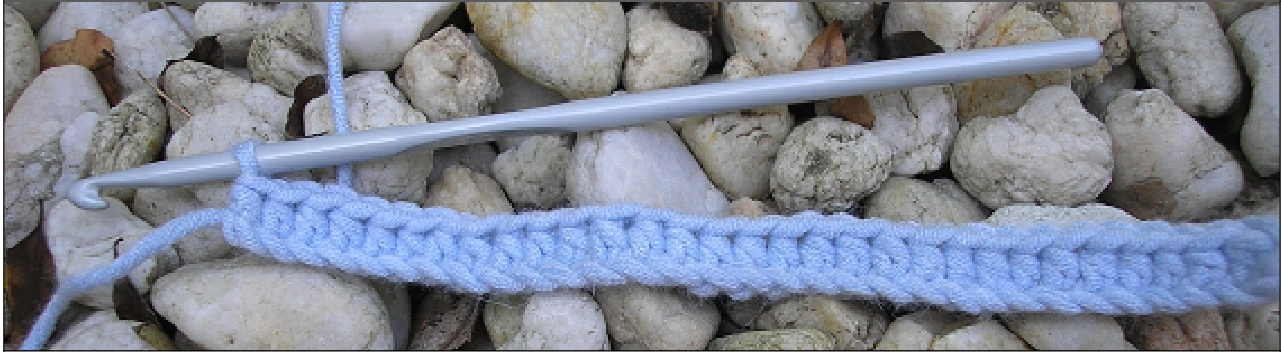
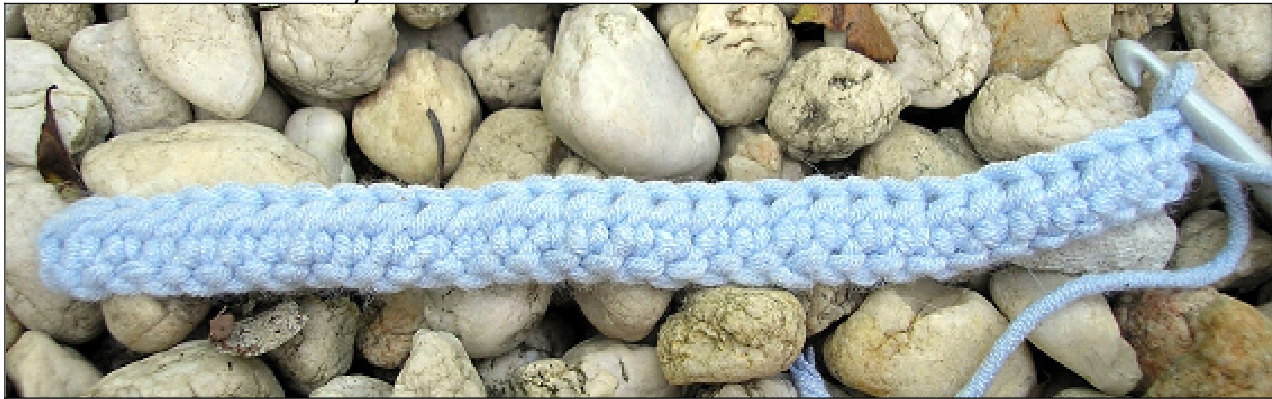
3) Place a green stitch marker here, hdc 30[34, 40] ue stitch marker here, hdc-inc, hdc-inc, hdc remaining sts to green marke 5) hdc to blue marker (place work around four fingers and check that it isn't too tight. It should be somewhat loose at this point. You may consider a larger hook or going up a size if not.) 6) hdc-inc, hdc, hdc, hdc-inc, hdc remaining sts to green marker 7) hdc to blue marker 8) hdc-inc, hdc-inc, hdc, hdc-inc, hdc-inc hdc remaining sts to green marker 9) hdc to blue marker 10) hdc1, chain 2[4, 9], sc in the 9th stitch from hook (makes thumb hole), hdc remaining sts to green marker 11) hdc to blue marker 12) hdc to green marker [Large size only: repeat rows 11 and 12] 13) hdc to blue marker 14) hdc to green marker 15) hdc to blue marker 16) hdc, dc24, hdc remaining sts to green marker (start new colour now if desired) 17) hdc21, dc remaining sts to blue marker 18) dc24, hdc to two sts before the green marker, sc-dec 19) sc-dec, sc16, hdc, dc remaining sts to blue marker 20) dc16, hdc2, sc1, slip1 21) turn work, sc in 2nd stitch from hook, hdc, dc to blue marker 22) dc8, hdc2, sc2, slip1 Break yarn leaving a long tail then thread tail through stitch on hook and pull tight. Sew in end. Use loose end from cast on row to sew up the hole between cast on chain and row 2.
Right Mitt
Chain 30[34, 40] Row 1) Make 2 turning chains, then hdc 30[34, 40]
[See video help for this section] Flip the work over horizontally as if to start the next row
Twist the bottom left corner towards you 180deg until it becomes the top left corner

2) Insert hook into the stitch indicated above and sc1..
turn work, then hdc 31[35, 41]
Rows 3-22) Same as for left hand
Colours variations and ideas
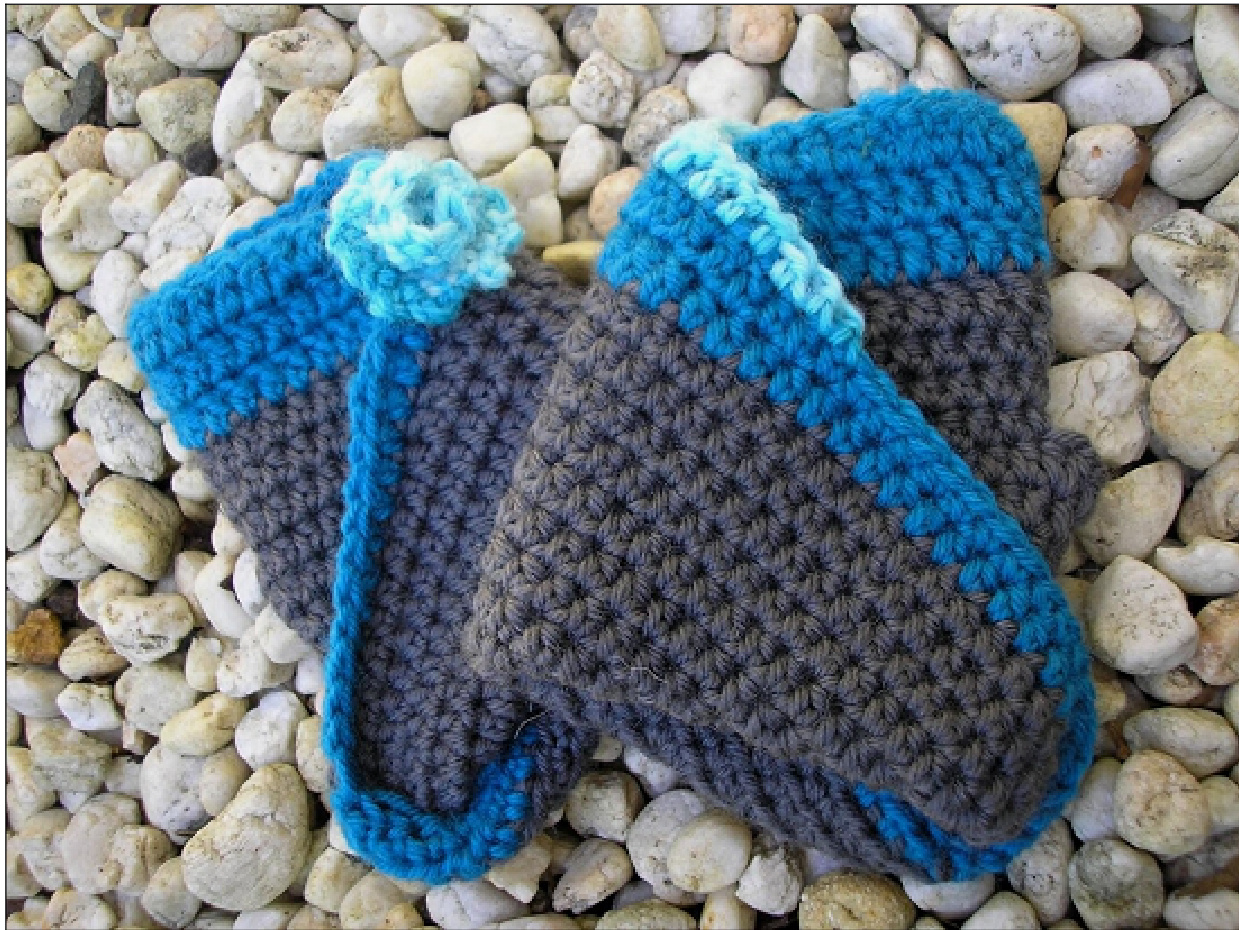
For these colour variations start the second colour at row 17
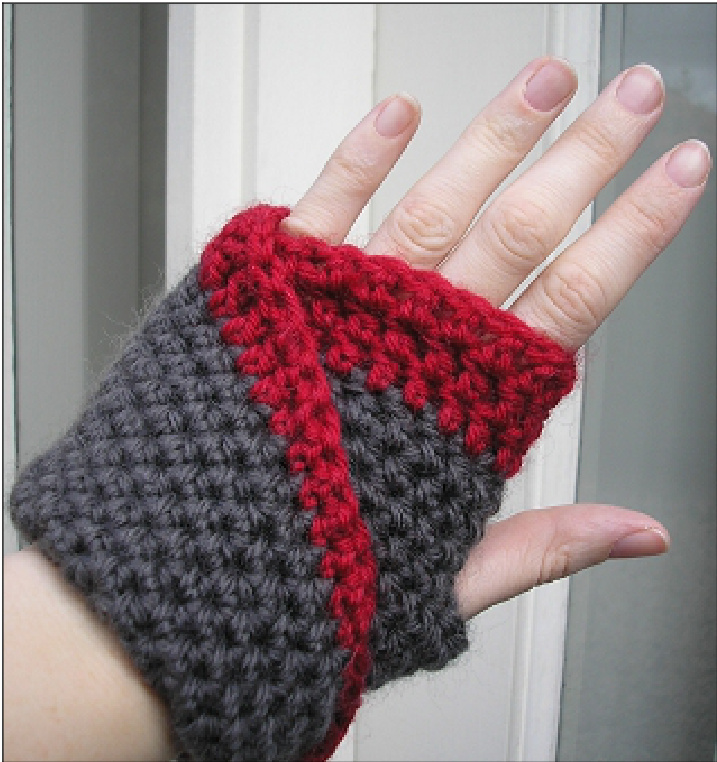
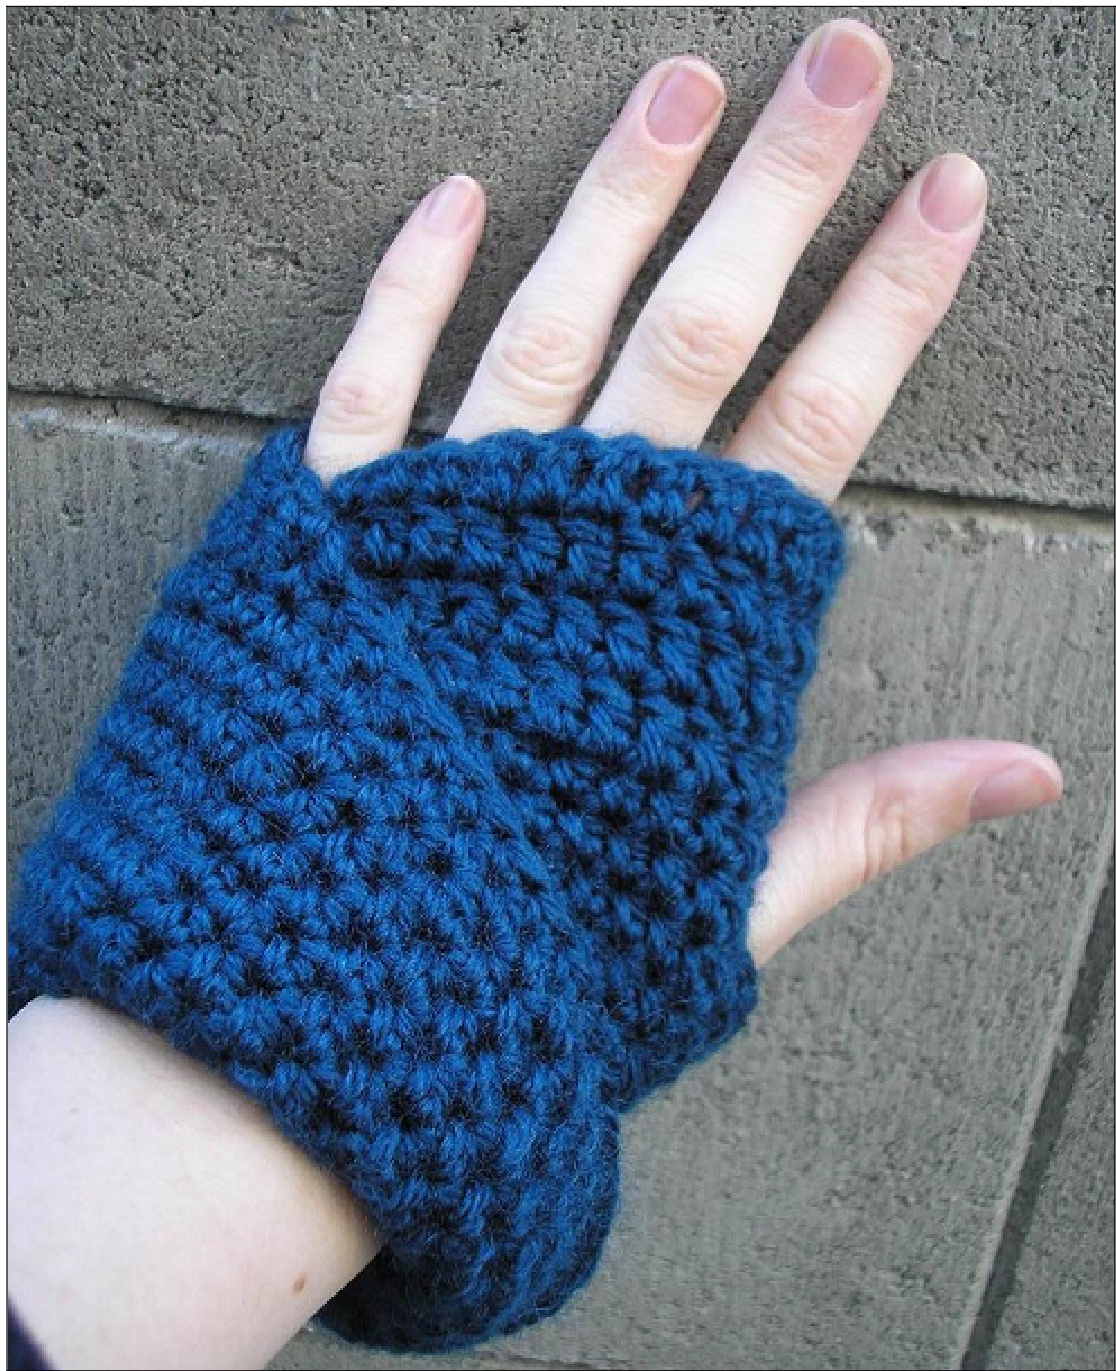
Wearing the Mitts
Find the thumbhole and work your hand into the opening. Then arrange the flap across the The mobius strip will twist around to adjust for the angle of your hand

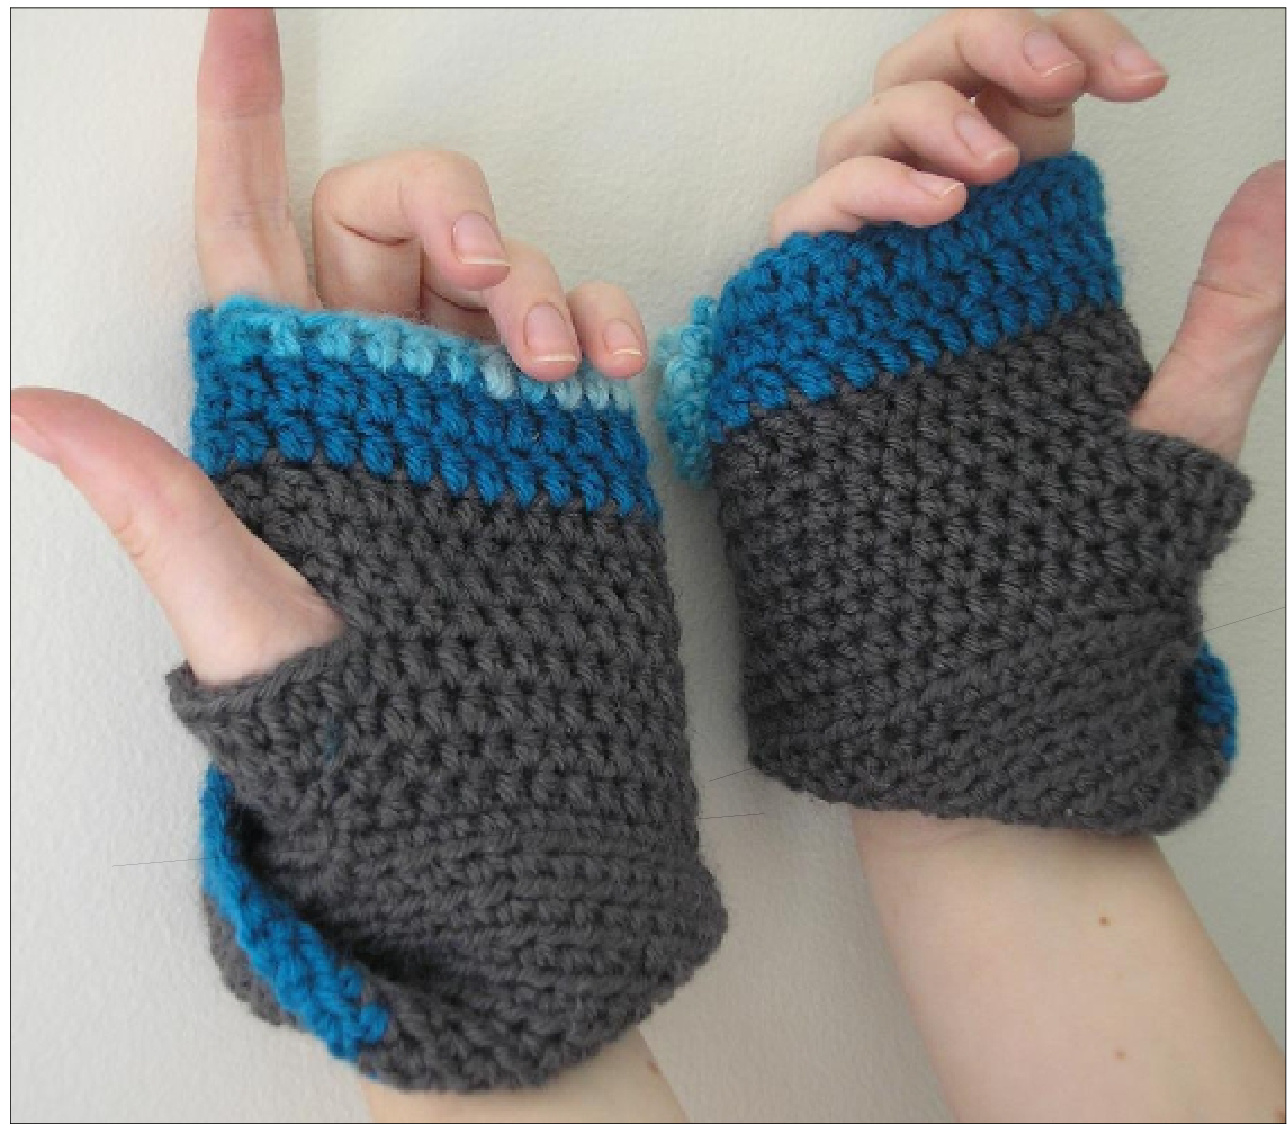
It's worth noting that crochet does have a back and a front side. Because these gloves are worked as a mobius, sides change the centre point (see above). The front of crochet looks like distinct chunky sts (above the line), the back looks like a tight slanted stitch (below the line) Mobius Mitts are designed to show one side for the majority of the gloves, with just a hint of the back side around the wrist. You can choose which you prefer, and then access your preferred side by turning your gloves fully inside out between the two options. Hope you have enjoyed this pattern!


