Helms Hood
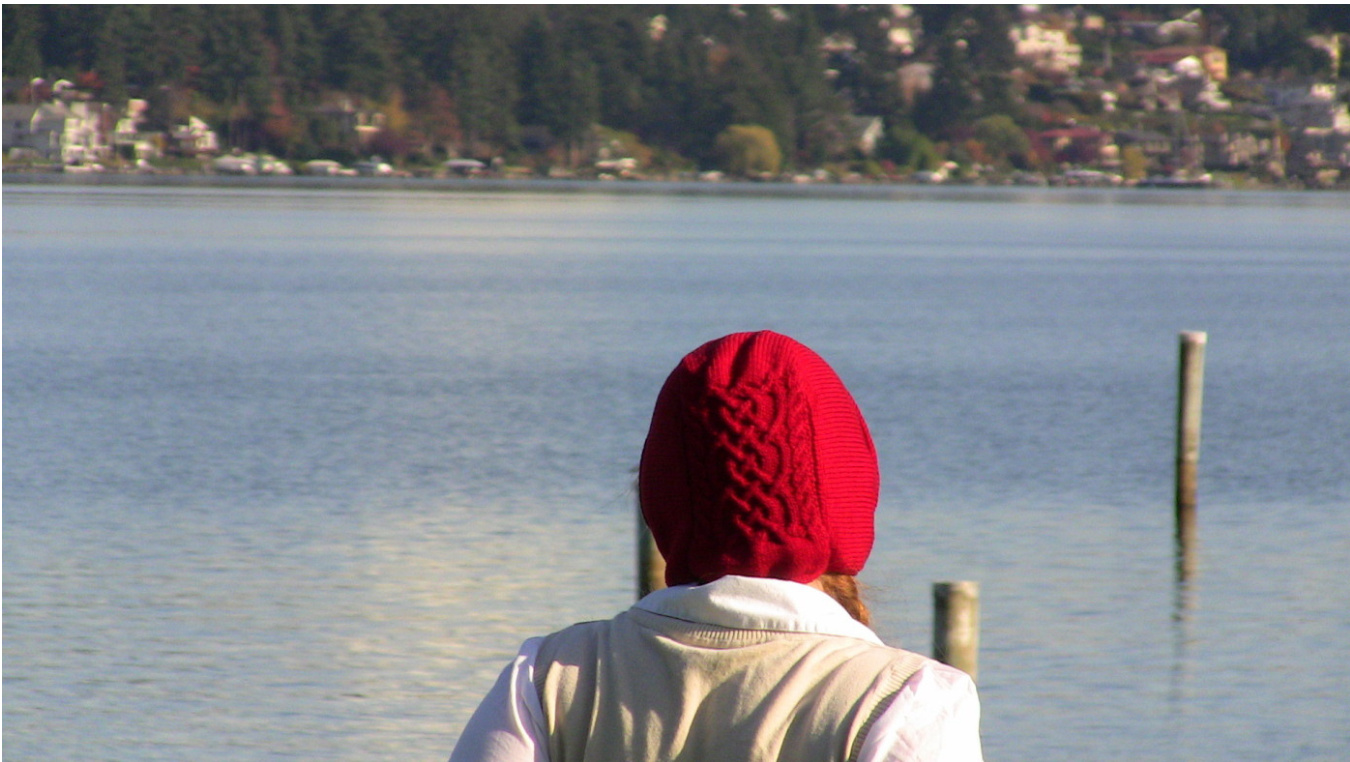
by E.A. Kelley In my spare time I like to participate in medieval recreation groups. Most of the people who do fighting in these groups wear some sort thin hood under their helm (also known as helmets). Most of the hoods are sewn, but I thought it might be nice to have a knitted alternative and so this is my result. Based on a classic construction design with a litle bit of shaping for the crown. I added cables for a little bit of visual interest. This hood is perfect for any time of the year as a little of bit cushion under any helm you are wearing or as a plain outer layer to protect you from the elements. Just pick a yan and go. Photo credit [model: E.A. Kelley/photographer: S. Benesch] SIZE One size
FINISHEDMEASUREMENTS
11 inches high by 5 inches wide by 8 inches deep
MATERIALS
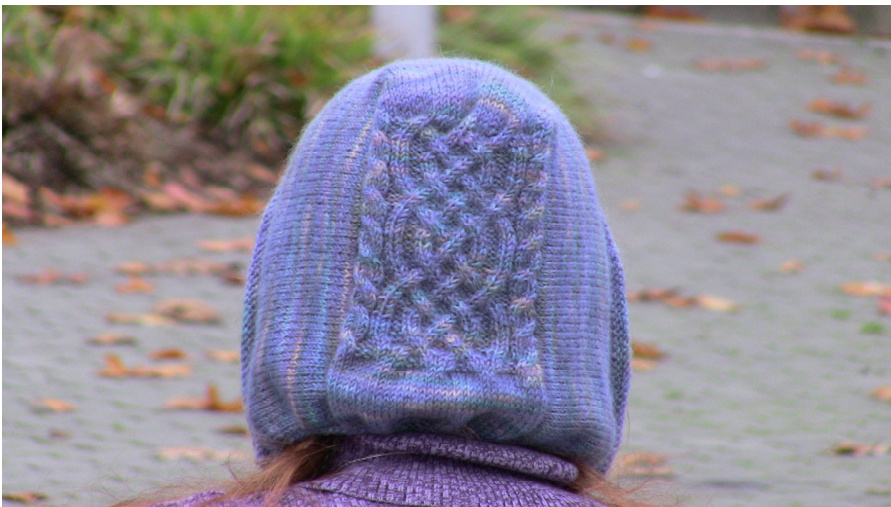
[Red hood] Tahki/Stacy Charles Inc., Cotton Classic [1o0% mercerized cotton; 108yd/100m per 50g skein]: color: 3995; 2 skeins [Multi-colored hood] Mountain Colors Hand-Painted Yarns, Mountain Goat [55% mohair/45% wool; 230yd per 100g skein]; color: Sweet Lavender; 1 skein 1 set Us #2/2.75mm double-point needles 1 set Us #2/2.75mm straight needles 1 US E/2.75mm crochet hook needle
GAUGE
24 sts/32 rows = 4" in stockinette stitch
PATTERN NOTES
Cab CO - cable cast on, information can be found here. w&t- wrap and turn: knit to designated stitch, pull working yarn forward toward yourself, sl 1 stitch knitwise, pull working yarn around stitch, away from you, slip stitch back to left hand needle, finally turn and work next row. w&tp- wrap and turn purl: purl to designated stitch, sl 1 stitch purlwise, pull working yarn around stitch, away from you, slip stitch back to left hand needle, finally turn and work next row. Working wrap and turns- with a w&t work to a wrapped stitch, pick up wrap as if to slip knitwise bringing above and behind the wrapped stitch onto the left hand needle, k2tog through the back loop. With a w&tp work to a wrapped stitch, turn to the write side of the fabric and pick up wrap as if to slip knitwise bringing above and behind the wrapped stitch onto the lefft hand needle, p2tog I-cord- a wrapped line of stitches. Using 2 dpns caste on 3 stitches, move stitches to the opposite end of the needle and knit all 3 stitches, repeat these steps until I-chord is desired length. Attached I-cord- Pick up 2 stitches along the edge, \*slip 3 stitches from Icord onto the same needle with the working yarn sandwiched between the two sets of stitches, k2, k2tbl\*, pick up another stitch with the left hand needle and repeat between \*\*

PATTERN I-shape arms
With the straight needles, using a cab CO, CO 122 stses. K even for .5 of an inch. R1: kl,p even to last st, kl R2: k even Work rows 1 & 2 until piece measures 6 inches long ending on R2 BO 42 sts,p 38 sts, BO 42 sts, Cut tail.
Shaping of T-base
K one row with the live sts. R1: kl, p34, w&tp R2: k32, w&t R3: p30, w&tp R4: k28, w&t R5:p26, w&tp R6: k24, w&t R7: p22, w&tp R8: k20, w&t R9: p18, w&tp R10: k16, w&t R1l: p14, w&tp R12: k12, w&t R13: p even, working wraps as you go, to the last st, k1 R14: k even, working wraps as you go R15: kl, p even to last st, kl
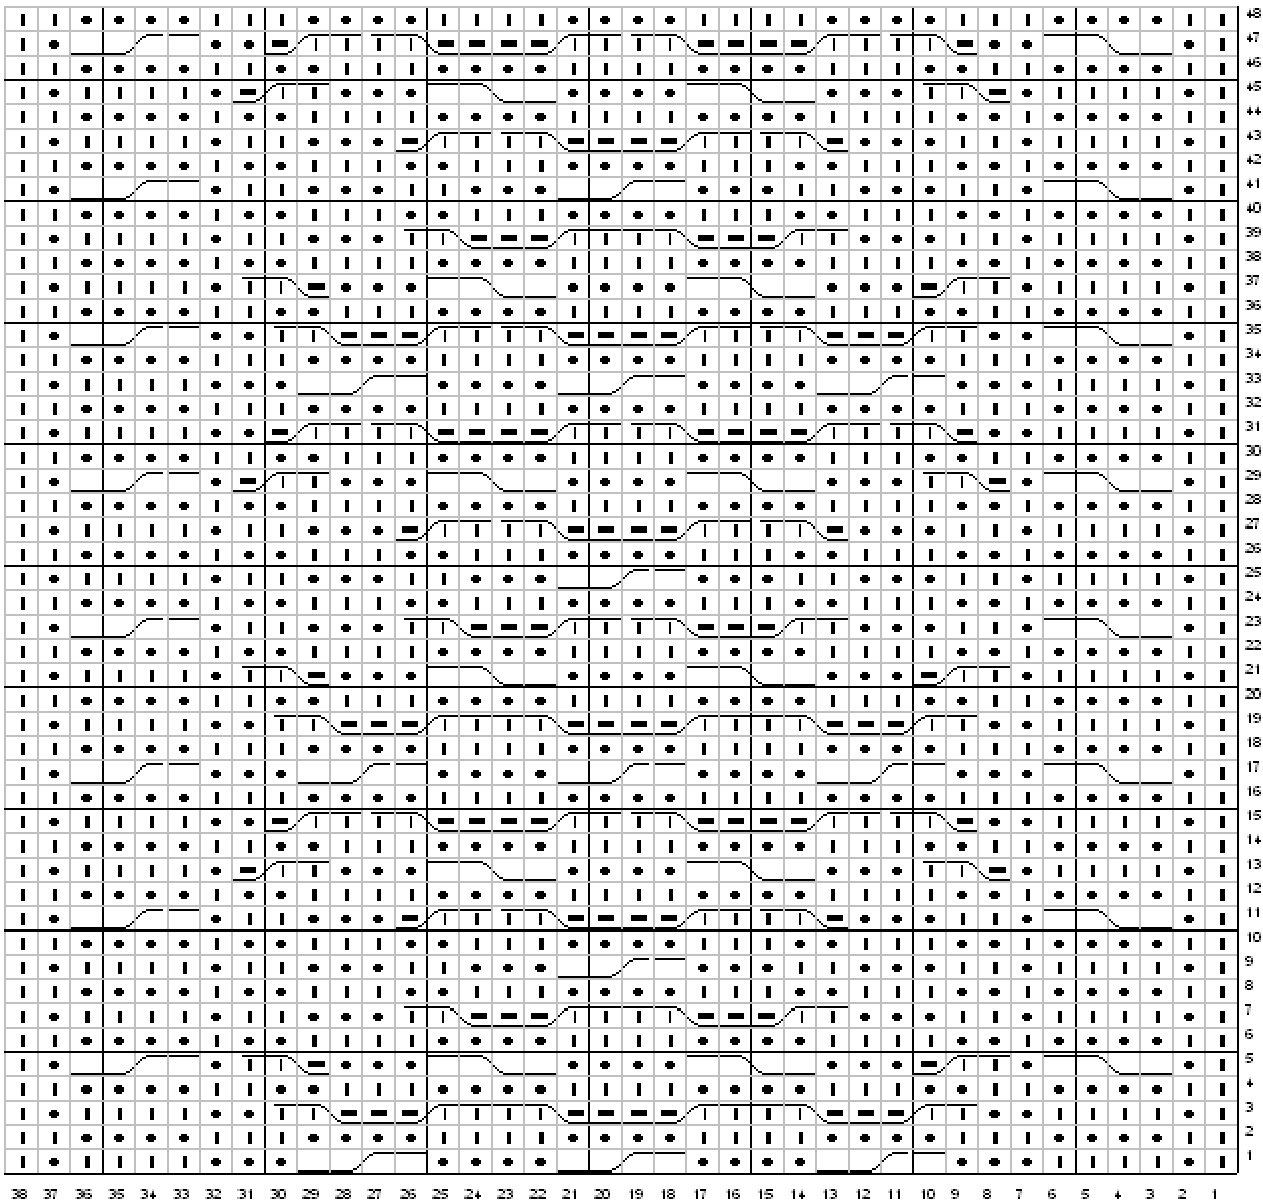
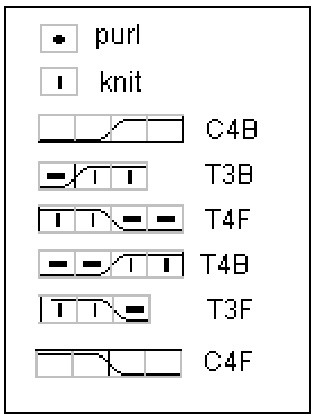
Cable accent
Rl: kl, pl, k4, p3, \*C4B, p4\* rep 2 times, C4B, p3, k4, p1, kl R2: k2, p4, k3, \*p4, k4\* rep 2 times, p4, k3, p4, k2 R3: kl, p1, k4, p2, T3B, \*T4F, T4B\* rep 2 times, T3F, p2, k4, pl, kl
E.A. Kelley, all rights reserved. Contact: oddlief@ gmail.com R4: k2, p4, k2, p2, k3, p4, k4, p4, k3, p2, k2, p4, k2 R5: kl, p1, C4F, p1, T3B, p3, C4F, p4, C4F, p3, T3F, p1, C4B, p1, kl R6: k2, p4, kl, p2, \*k4, p4\* rep 2 times, k4, p2, k1, p4, k2 R7: k1, p1, k4, p1, k2, p3, T3B, T4F, T4B, T3F, p3, k2, pl, k4, pl, kl R8: k2, p4, k1, \*p2, k3\* rep 2 times, p4, \*k3, p2\* rep 2 times, k1, p4, k2 R9: k1, p1, k4, p1, \*k2, p3\* rep 2 times, C4B, \*p3, k2\* rep 2 times, p1, k1 R10: rep row 8 R11: kl, pl, C4F, p1, k2, p3, T3F, T4B, T4F, T3B, p3, k2, p1, C4B, pl, k1 R12: rep row 6 R13: k1, p1, k4, p1, T3F, p3, C4F, p4, C4F, p3, T3B, pl, k4, pl, kl R14: rep row 4 R15: kl, p1, k4, p2, T3F, \*T4B, T4F\* rep 2 times, T3B, p2, k4, p1, kl R16: rep row 2 R17: k1, pl, C4F, p3, \*C4B, p4\* rep 2 times, C4B, p3, C4B, pl, kl R18: rep row 2 R19: rep row 3 R20: rep row 4 R21: k1, p1, k4, p1, T3B, p3, C4F, p4, C4F, p3, T3F, pl, k4, pl, kl R22: rep row 6 R23: kl, p1, C4F, pl, k2, p3, T3B, T4F, T4B, T3F, p3, k2, pl, C4B, p1, k1 R24: rep row 8 R25: rep row 9 R26: rep row 8 R27:k1, p1, k4, p1,k2, p3, T3F, T4B, T4F, T3B, p3, k2, p1, k4, p1, k1 R28: rep row 6 R29: k1, pl, C4F, pl, T3F, p3, C4F, p4, C4F, p3, T3B, p1, C4B, pl, k1 R30: rep row 4 R31: rep row 15 R32: rep row 2 R33: rep row 1 R34: rep row 2 R35: k1, p1, C4F, p2, T3B,\*T4F, T4B\* rep 2 times, T3F, p2, C4B, p1, k1 R36: rep row 4 R37: kl, p1, k4, pl, T3B, p3, C4F, p4, C4F, p3, T3F, pl, k4, pl, kl R38: rep row 6 R39: rep row 7 R40: rep row 8 R41: k1, p1, C4F, p1, \*k2, p3\* rep 2 times, C4B,\*p3, k2\* rep 2 times, P pl, kl R42: rep row 8 R43: k1, pl, k4, p1, k2, p3, T3F, T4B, T4F, T3B, p3, k2, p1, k4, pl, kl R44: rep row 6 R45: rep row 13 E.A. Kelley, all rights reserved. Contact: oddlief@ gmail.com R46: rep row 4 R47: k1, p1, C4F, p2, T3F, \*T4B, T4F\* rep 2 times, T3B, p2, C4B, p1,k1 R48: rep row 2
End of I base
R1: k even R2: kl,p even to last st, kl Rep until entire piece measures 15 inches long
FINISHING
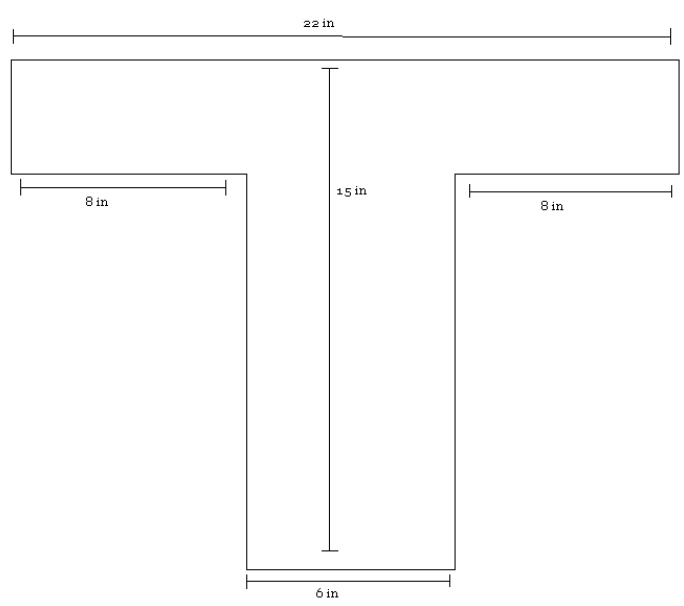
BO and weave in ends. Block to a 22-inch length and 15 inch width. Seam the arms of the T shape to the sides of the base of the T shape using a crochet seam. with 2 dpns CO 3 sts leaving a 5-10 inch tail and start an I-cord. when the Ichord is 6-10 inches long beg an attached I-cord by picking up 2 sts at a time along the bottom edge of the hood. Cont working the attached I-cord all the way around until you reach the opp edge. Work another 6-10 inch Ichord, and BO leaving a 5-10 inch tail.
Jane's Hood
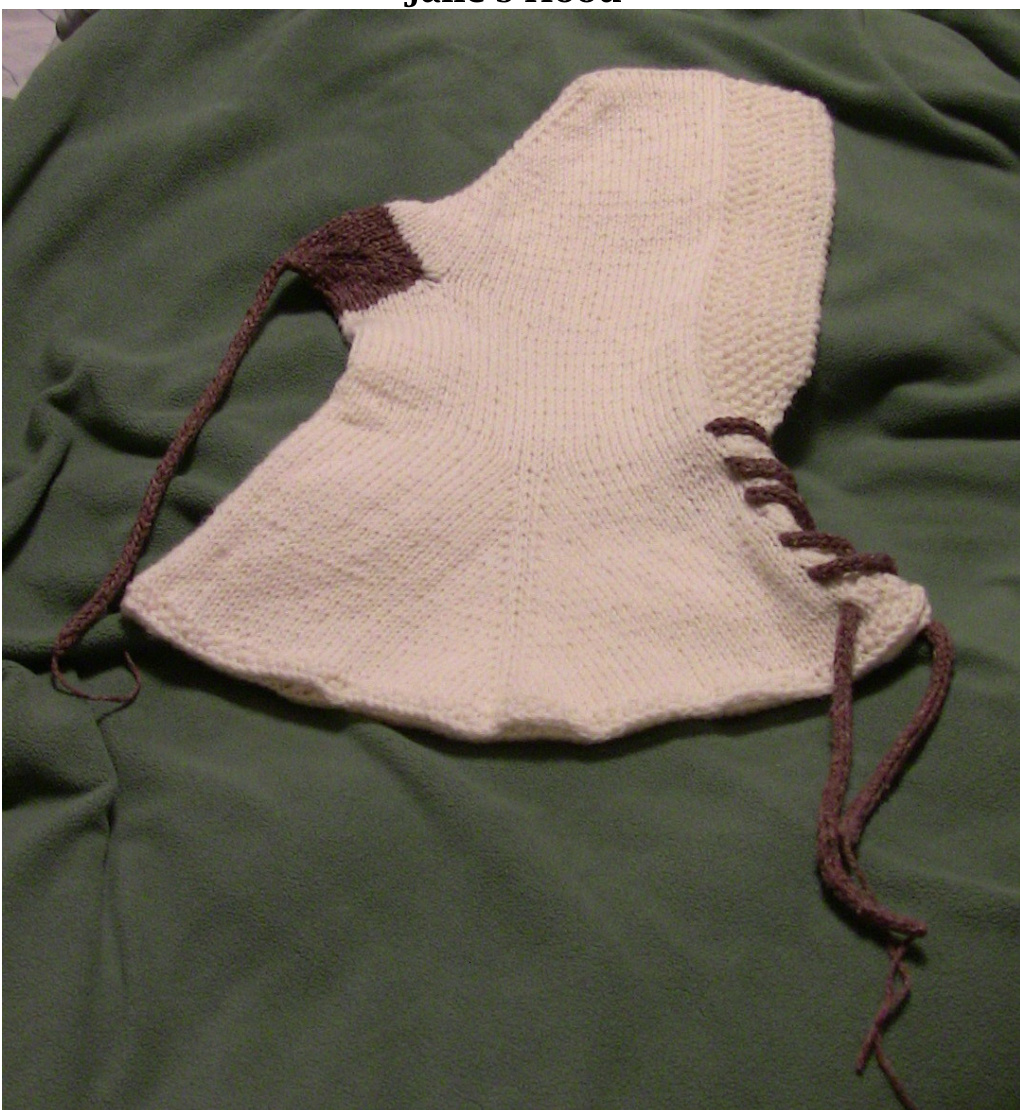
Jane, one of my kind commenter on Dunlavy, had said she would like to see an addition of the classic “"tail" to Dunlavy. This pattern is an attempt to satisfy that request. By E.A. Kelley
Materials
Main color: 3 skeins of Kilcarra Aran; color: white (100% pure new wool; 50 gram skein) Contrasting color: 1 skein of Tahki Chelsea Silk; color 131 (65% Silk/35% wool; 100 gram skein) 1 set of 5 US #7/4.5mm DPN 1 29 inch US #7/4.5mm circular needle 14 stitch markers Tapestry needle Waste yarn
Gauge
5 stitches by 6 rows in 1-inch stockinette Hood Using dpns, CO 50 stitches using a figure 8 CO. R1: \*kl, p1\* repeat 5 times, place marker, k3, pick up a new needle and k12, pick up new needle, kl2, pick up new needle k3, place marker, \*p1, k1\* repeat 5 times R2: turn and \*k1, p1\* repeat 5 times, slip marker, p30, slip marker, \*pl, k1\* repeat 5 times R3: turn and \*kl, p1\* repeat 5 times, k to the last stitch on 2nd needle, right lifted increase, k2, right lifted increase, k to marker, \*p1, k1\* repea1 5 times R4: turn and \*k1, p1\* repeat 5 times, slip marker, p to next marker, \*p1, k1\* repeat 5 times R5-44: repeat rows 3-4 (92 stitches) Work 37 stitches. Knit 18 stitches using waste yarn, put stitches back onto left needle and knit 18 stitches. Continue working even the last 37 stitches. Transfer to circular needles and work even until piece measures 9.5 inches from Co. Neck Starting on a right side row R1: k2tog, \*kl, p1\* repeat 4 times slip marker, k to next marker, slip marker, \*p1, k1\* repeat 4 times, SSK R2: work even in established pattern R3: k2tog, \*p1, k1\* repeat 3 times, pl, slip marker, k to next marker, slip marker, \*pl, k1\* repeat 3 times, pl, SSK R4: work even in established pattern R5: k2tog, \*kl, p1\* repeat 3 times slip marker, k to next marker, slip marker, \*p1, k1\* repeat 3 times, SSK R6: work even in established pattern R7: k2tog, \*p1, k1\* repeat 2 times, pl, slip marker, k to next marker, slip marker, \*p1, k1\* repeat 2 times, pl, SSK R8: work even in established pattern R9: k2tog, \*kl, p1\* repeat 2 times slip marker, k to next marker, slip marker, \*p1, k1\* repeat 2 times, SSK R10: work even in established pattern Skirt R11: \*kl, p1\* repeat 2 times, pl, slip marker, knit to next marker, slip marker, pl, \*pl, kl\* repeat 2 times R12: work even in established pattern R13: \*k1, p1\* repeat 2 times, pl, slip marker, k2tog, yo, k14, place marker, kl, place marker, right lifted increase, place marker, kl, place marker, right lifted increase, place marker, k1, place marker, k34 place marker, kl, place marker, right lifted increase, place marker, kl, place marker, right lifted increase, place marker, kl, place marker, k14, yo, ssk, slip marker, pl, \*pl, k1\* repeat 2 times R14: work even in established pattern R15: \*kl, p1\* repeat 2 times, pl, slip marker, kl6, slip marker, kl, slip marker, knit to next marker, right lifted increase, slip marker, kl, slip marker, right lifted increase, k to next marker, slip marker, kl, slip marker, k34, slip marker, kl, slip marker, knit to next marker, right lifted increase, slip marker, kl, slip marker, right lifted increase, k to next marker, slip marker, kl, slip marker, kl6, slip marker, pl, \*p1, k1\* repeat 2 times R16: work even in established pattern R17: repeat row 15 R18: work even in established pattern R19: \*kl, p1\* repeat 2 times, pl, slip marker, k2tog, yo, k14, slip marker, kl, slip marker, knit to next marker, right lifted increase, slip marker, kl, slip marker, right lifted increase, k to next marker, slip marker, kl, slip marker, k34, slip marker, kl, slip marker, knit to next marker, right lifted increase, slip marker, kl, slip marker, right lifted increase, k to next marker, slip marker, kl, slip marker, k14, yo, ssk, slip marker, pl, \*p1, kl\* repeat 2 times R20-47: repeat 14-19 R48-50: repeat rows 14-16 Rl: \*kl, pl\* repeat to end of the row R2: \*pl, kl\* repeat to end of the row R3: \*kl, pl\* repeat to end of the row BO in rib/seed stitch. Tail Using contrasting color, starting in the lower right corner, removing waste yarn, pick up 36 stitches across the top and bottom of opening with 2 DPNs. Pick up 1 extra stitch after needle 1 & 4 (38 stitches) and divide stitches as such; 9, 10, 9, 10, across 4 needles. R1: starting in lower right corner, k2tog, knit to last 3 stitches on needle 2, SSK, k1, k2tog, knit to last 3 stitches on needle 4, SSK, place marker, kl R2: knit even R3-16: repeat rows 1 and 2 (6 stiches) Combine needle so that there are 3 stitches on the bottom needle and 3 on the top needle. Line up the stitches, and k2tog through the first stitch on bottom and top needle, continue doing this until there are 3 stitches on one needle. Knit I-cord to desired length and BO. Weave in ends, and block. Make an I-cord to desired length and thread it through the yo loops to close.
Dunlavy
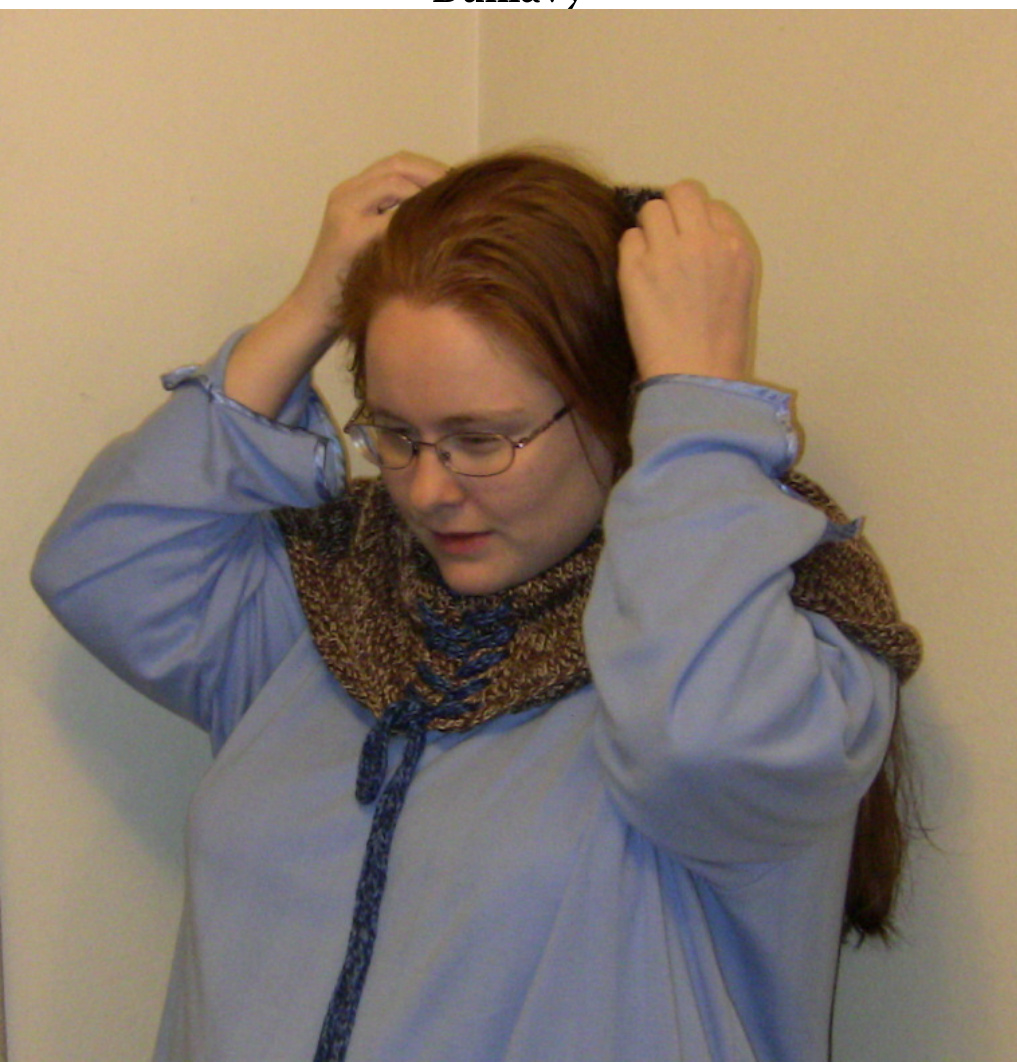
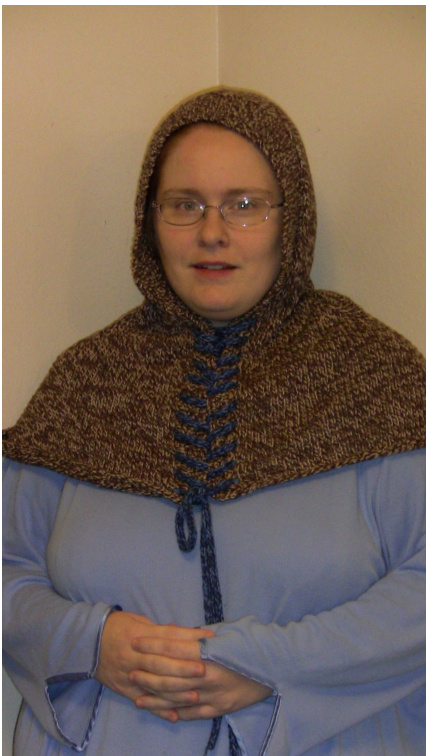
Named for one of my favorite songs ever, Dunlavy's Castle: by Jen Hamel. This hood is intended to inspire thoughts of the medieval period, just as the wonderful song does. By E.A. Kelley
Materials
Main color: 3 skeins of Cascade Yarns, Sierra Quatro; color 412 (80% pima cotton/20% wool; 191 yards per 100 gram skein) Contrasting color I-cord: 1 skein of Cascade Yarns, Sierra Quatro; color 413 (80% pima cotton/20% wool; 191 yards per 100 gram skein) This yarn is only for contrasting purposes. It is possible to complete the pattern without this yarn. 1 set of 5 US #7/4.5mm DPN 1 29 inch US #7/4.5mm circular needle 14 stitch markers Tapestry needle
Gauge
5 stitches by 6 rows in 1-inch stockinette Hood Using dpns, CO 50 stitches using a figure 8 CO. R1: \*kl, p1\* repeat 5 times, place marker, k3, pick up a new needle and k12, pick up new needle, k12, pick up new needle k3, place marker, \*pl, k1\* repeat 5 times R2: turn and \*kl, pl\* repeat 5 times, slip marker, p30, slip marker, \*pl, k1\* repeat 5 times R3: turn and \*kl, pl\* repeat 5 times, k to the last stitch on 2nd needle, right lifted increase, k2, right lifted increase, k to marker, \*p1, k1\* repeat 5 times R4: turn and \*kl, pl\* repeat 5 times, slip marker, p to next marker, \*p1, k1\* repeat 5 times R5-44: repeat rows 3-4 (92 stitches) Transfer to circular needles and work even until piece measures 9.5 inches from Co.
Neck
Starting on a right side row R1: k2tog, \*k1, p1\* repeat 4 times slip marker, k to next marker, slip marker, \*p1, k1\* repeat 4 times, SSK R2: work even in established pattern R3: k2tog, \*p1, k1\* repeat 3 times, pl, slip marker, k to next marker, slip marker, \*p1, k1\* repeat 3 times, pl, SSK R4: work even in established pattern R5: k2tog, \*k1, p1\* repeat 3 times slip marker, k to next marker, slip marker, \*p1, k1\* repeat 3 times, SSK R6: work even in established pattern R7: k2tog, \*p1, kl\* repeat 2 times, pl, slip marker, k to next marker, slip marker, \*p1, k1\* repeat 2 times, pl, SSK R8: work even in established pattern R9: k2tog, \*k1, p1\* repeat 2 times slip marker, k to next marker, slip marker, \*p1, kl\* repeat 2 times, SSK R10: work even in established pattern Skirt R11: \*kl, p1\* repeat 2 times, pl, slip marker, knit to next marker, slip marker, p1, \*pl, kl\* repeat 2 times R12: work even in established pattern R13: \*kl, p1\* repeat 2 times, pl, slip marker, k2tog, yo, k14, place marker, kl, place marker, right lifted increase, place marker, kl, place marker, right lifted increase, place marker, kl, place marker, k34 place marker, kl, place marker, right lifted increase, place marker, kl, place marker, right lifted increase, place marker, kl, place marker, kl4, yo, ssk, slip marker, pl, \*p1, k1\* repeat 2 times R14: work even in established pattern R15: \*kl, p1\* repeat 2 times, pl, slip marker, kl6, slip marker, kl, slip marker, knit to next marker, right lifted increase, slip marker, kl, slip marker, right lifted increase, k to next marker, slip marker, kl, slip marker, k34, slip marker, kl, slip marker, knit to next marker, right lifted increase, slip marker, kl, slip marker, right lifted increase, k to next marker, slip marker, kl, slip marker, kl6, slip marker, pl, \*p1, k1\* repeat 2 times R16: work even in established pattern R17: repeat row 15 R18: work even in established pattern R19: \*k1, p1\* repeat 2 times, pl, slip marker, k2tog, yo, k14, slip marker, k1, slip marker, knit to next marker, right lifted increase, slip marker, k1, slip marker, right lifted increase, k to next marker, slip marker, kl, slip marker, k34, slip marker, kl, slip marker, knit to next marker, right lifted increase, slip marker, kl, slip marker, right lifted increase, k to next marker, slip marker, kl, slip marker, kl4, yo, ssk, slip marker, pl, \*p1, k1\* repeat 2 times R20-67: repeat 14-19 R68-70: repeat rows 14-16
\*kl, pl\* repeat to end of the row for 2 rows.
Finishing
BO in rib/seed stitch. Weave in ends, and block. Make an 1o0 inch I-cord and thread it through the yo loops to close.


