Butterflies Shetland Shawl
Introduction I was fascinated by Shetland Shawls the day I first caught a glimpse in Meg Swansons fabulous book $^{1\!}\mathrm{A}$ Gathering of Lace". From that moment on I wanted to do a shawl in the Shetland fashion. The only problem was no pattern seemed to be quite right. There was always something I didn't like in a particular pattern. It took me a while to finally make the attempt of designing a unique piece completely on my own. With the tremendous help of Sharon Miller's "Heirloom Knitting" and "The Harmony Guides 450 Kniting Stiches Vol. $2^{*}$ my shawl took shape. This shawl was a Christmas present for my mother. It serves as a tablecloth. The durable linen yarn fits that purpose well and it sure looks nice on the dark wooden dining table in my parent's home. On the other hand, done in a fine wool this piece might as well make a beautiful christening shawl. Or just imagine the butteflies, ferns and trees done a rich shade of green or olive. I don't think this pattern relies on a lace weight yarn. Done in a fingering weight with somewhat larger needles the pattern will considerably grow in size and make a real shawl. You see, the possibilities are endless :-) Happy knitting and Enjoy!
Material and Size
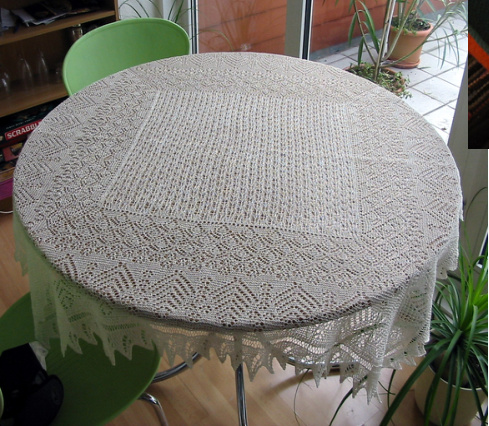
Yarn: $250\ \mathrm{gr}/8.8$ oz Linen yarn 20/2 (605 $\mathrm{m}/100\mathrm{\g}=\overline{{662}}$ yds/3.5 oz), halfbleached (off-white);slightly thinner than $\#10$ crochet cotton Needles: $80\;\mathrm{cm}/32^{\prime\prime}$ Circular Knitting Needle and 1 double pointed needle size 3 $\mathrm{mm}\,/\,\mathrm{US}\,2.5\$ Size: My shawl/dishcloth came out $1\,1\,8\;\mathrm{{cm}}$ in square, which is about $46\times46$ inches.
1. Center Square
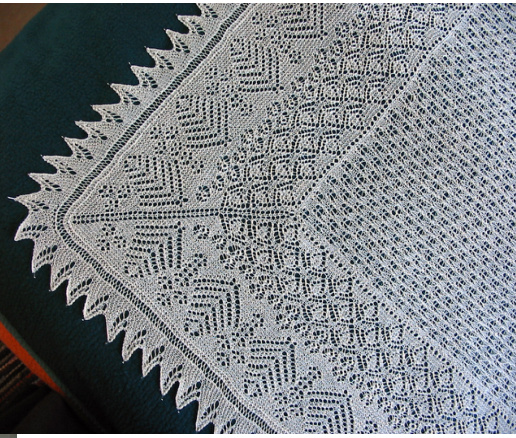
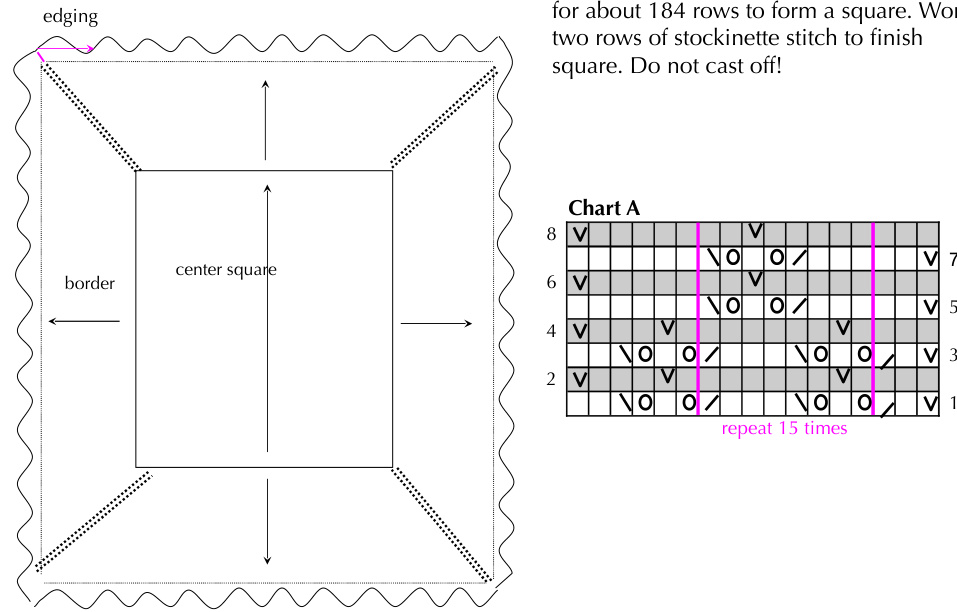
This shawl consists of a center square knitted back and forth, a border knitted outwards in rounds and an edging attached sideways. The stitches forming the border are picked up from the selvedge and the cast on row of the center square. (see drawing) The border is about half the width of the center square.
Construction
Cast on 129 stitches. You can either do a regular cast-on or a provisional one. I don't like doing a provisional cast-on so I just did a longtail cast on and picked up sttiches for the border out of the cast on row. Nobody is ever going to notice. In either case purl the second row. Start pattern with row 1 according to chart A. Work pattern repeat 15 times across, end row as indicated in chart A. Work chart A
2. Border
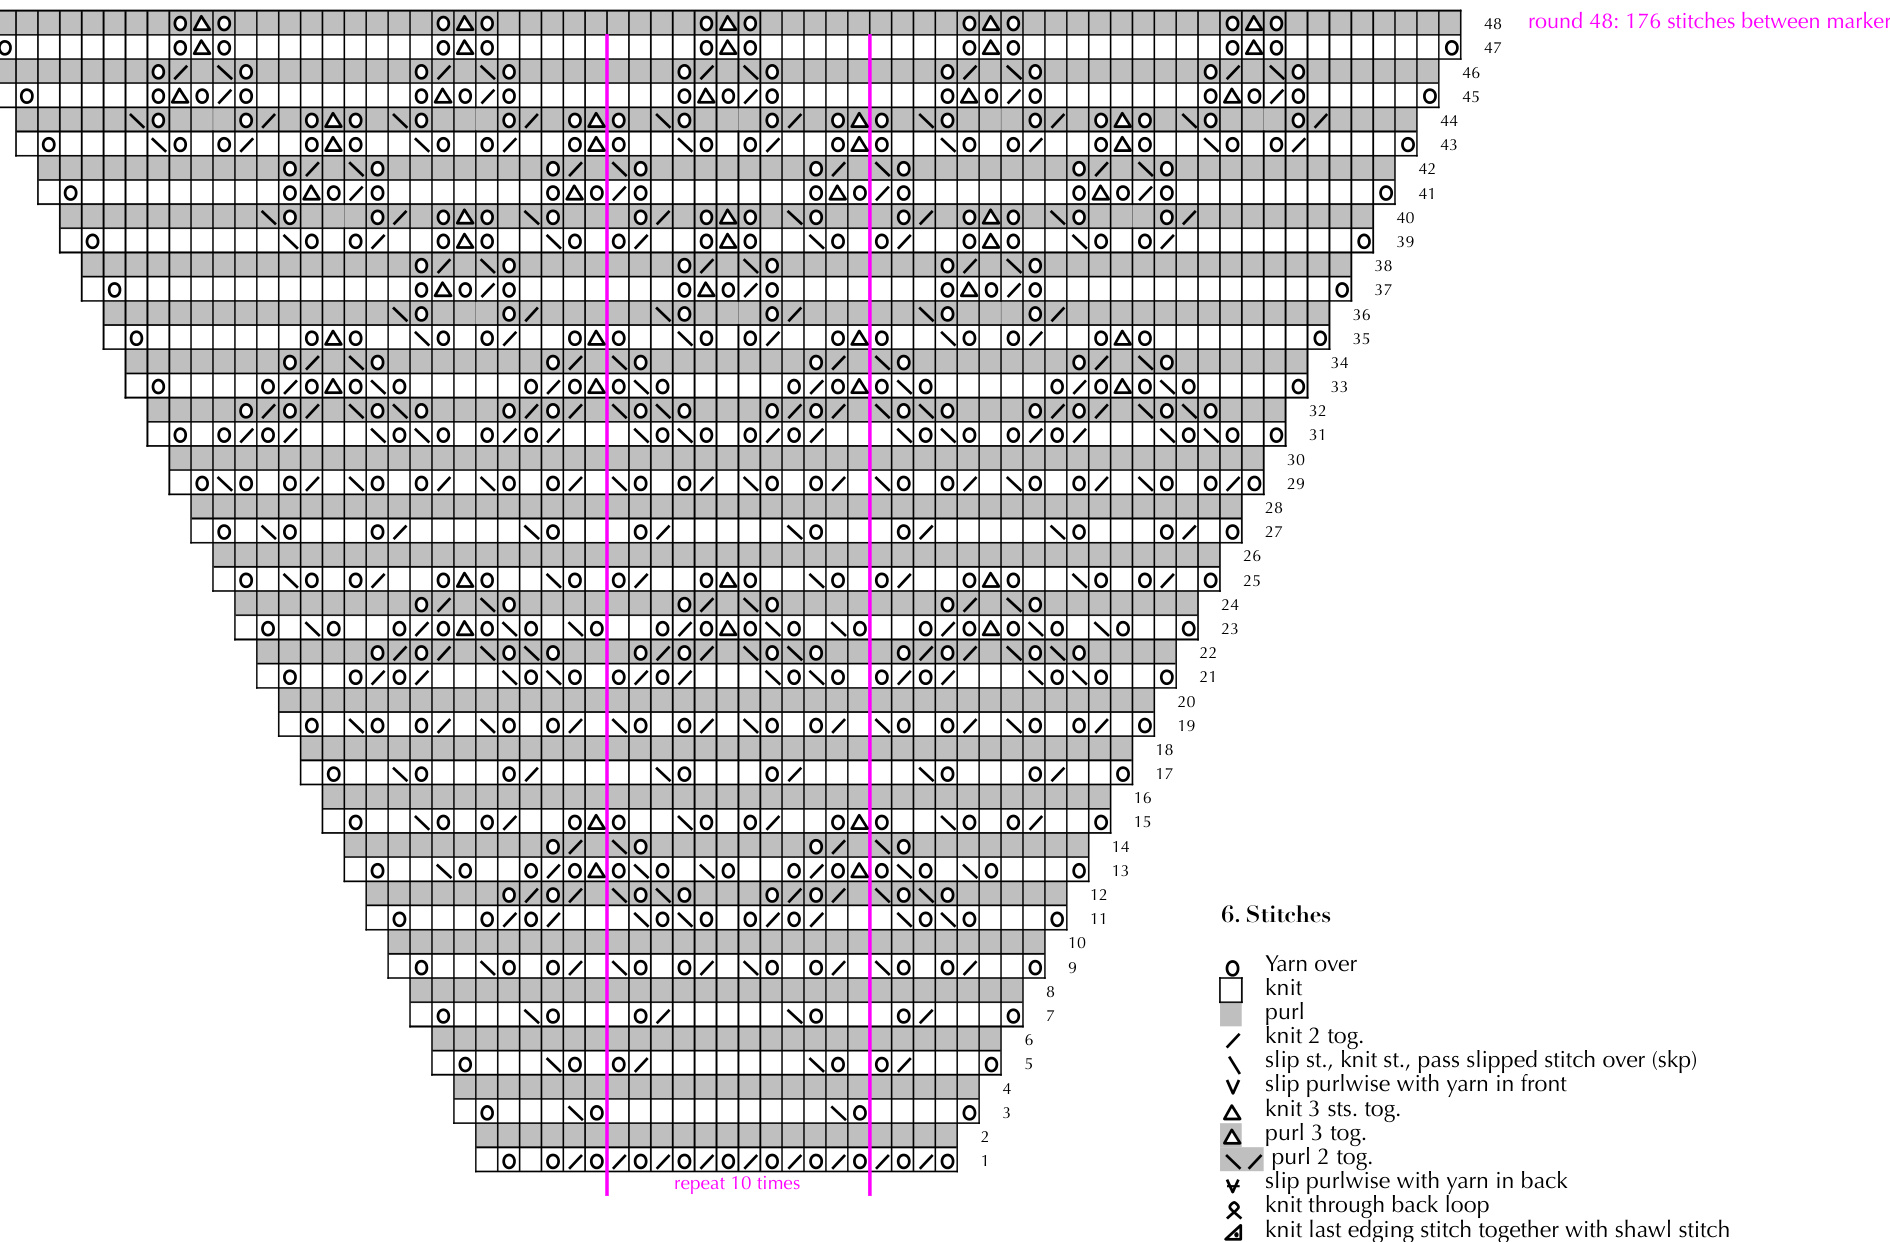
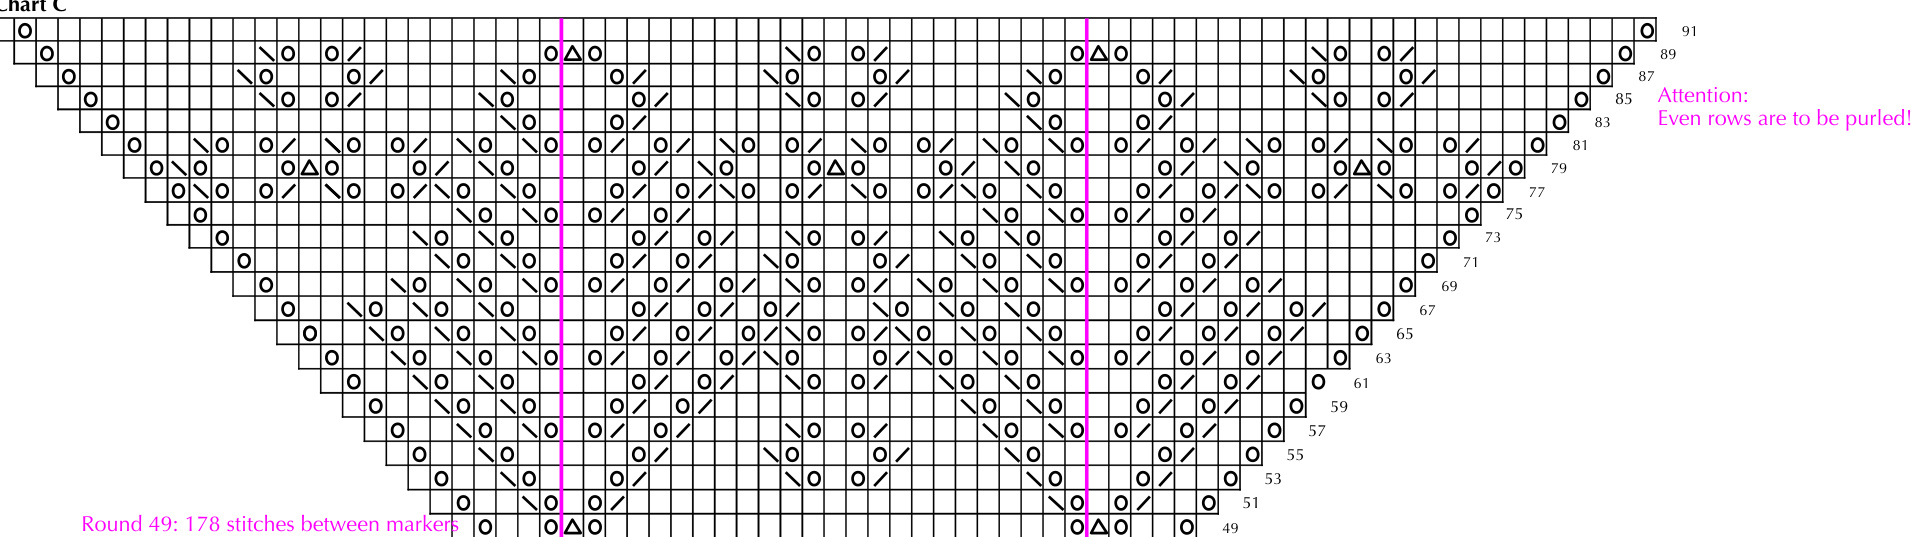
Place marker and start picking up stitches from left selvedge for border. Make sure to pick up 2 sts from every third edge loop. Place marker and continue with pickingup 128 sts from cast on row. Alternative: undo provisional cast on and pick up resulting stitches. Again, place marker and pick up stitches from right selvedge the same way as on the left side. Place one last marker. Purl one round and make sure you have got 128 stitches between each marker (127 border sts plus 1 corner stitch). If necessary increase evenly as much sts as needed. Start working chart B (page 3). Even rounds are to be purled to create a garter stitch ground that does not curl. After working chart B - you should have 176 sts between each marker - continue with chart C.
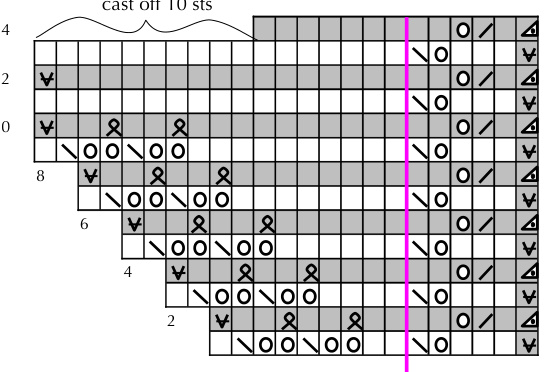
The edging is worked clockwise. Cast on 13 stitches with contrasting piece of waste yarn on a separate double pointed needle. Work 1 row knit stitches with the project yarn. Work back row knit stitches, knit together last stitch of edging with shawl stitch. Continue following chart D until you reach first corner.
Start working short rows 2 or 3 stitches before you reach corner stitch of the center square. \* Don't work a complete even row but turn edging at the pink line drawn in chart D instead. Slip first stitch with yarn in back, work uneven row to the end. Work next even row completely to the last stich. Work following uneven row completely. Continue from \* until you've worked the corner stitch plus 2 or three more stitches. This short rowing might result in litle holes between the fern patten and the faggot panel but this willeven out after washing and blocking.
5. Pattem reference
4. Finishing
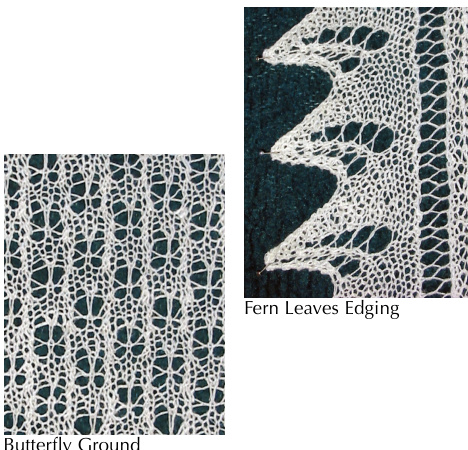
Undo the provisional cast-on and graft together end and beginning of edging carefully.Weave in remaining ends but do not cut them. Wash and block first. Make sure there are no dropped stitches and the ends are woven in securely. Cut loose ends. 13 Miller, Sharon: Heirloom Knitting; Shetland Times 2002 11 - Fern Staggert Repeat, page 83 - Spiders, p. 145 9 - Tree of life, p. 133 - Field of flowers, p. 49 7 - Fern Leaf Edging p. 127 5 Harmony Guides: 450 Knitting Stiches 3