Cast On: 56 (64, 72) stitches (multiple of 4). Be sure to use a stretchy cast on or use the long tail method but cast on over 2 needles held together in your right hand to give you a little more stretch in your cast on edge. Join your cast on stitches to form a ring being careful not to twist (as always!). Place a beginning of round marker at join. Ribbing: Work K1 x P1 Ribbing for 10 rounds.
Leo Pattern:
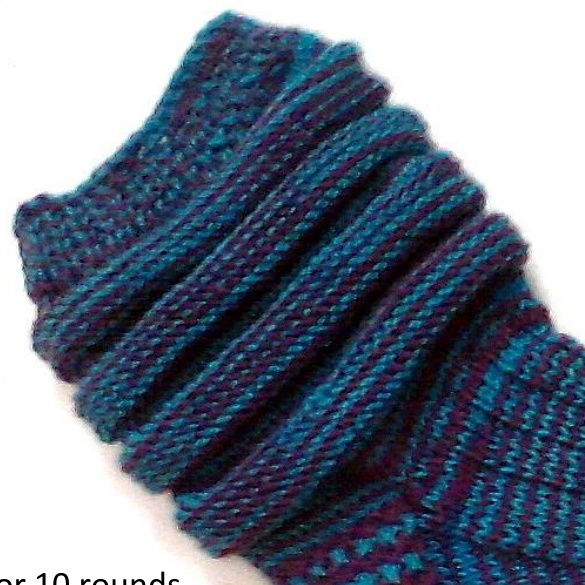
For the leg pattern you will alternate bands of stockinette and reverse stockinette stitching. You will have finished the leg when you have 5 bands of stockinette alternating with 4 bands of reverse stockinette. Each band is made by working 10 rounds. There are 2 ways to achieve this effect:
Method 1 - The No Holes Method:
Step 1: Work 10 rounds of stockinette by knitting every stitch for 10 rounds.
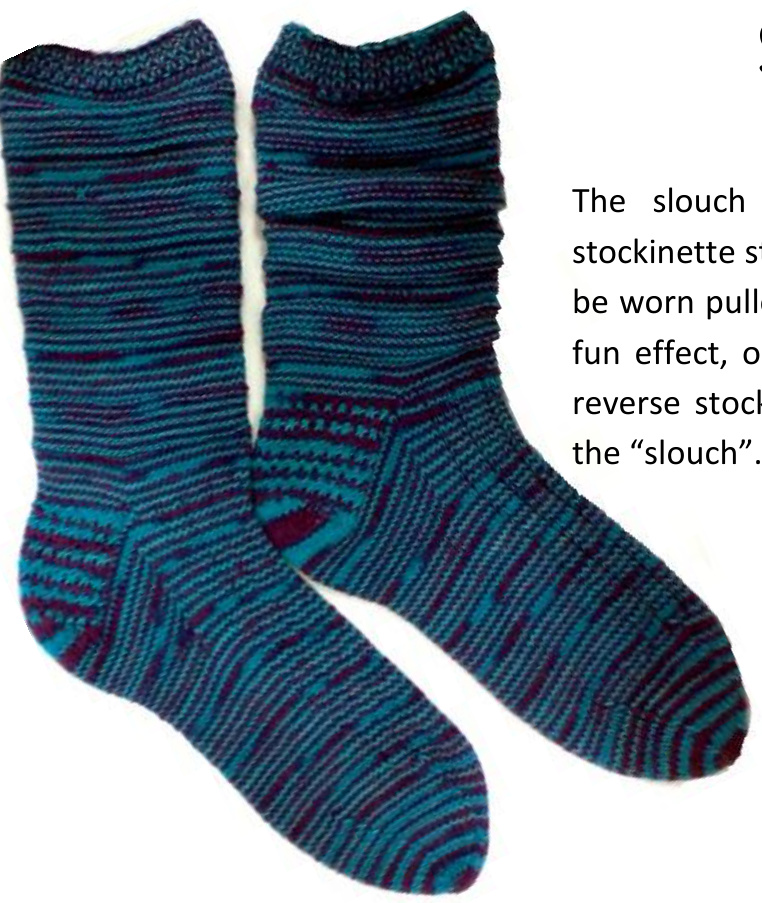
SlouchySocks
By Heather Robinson
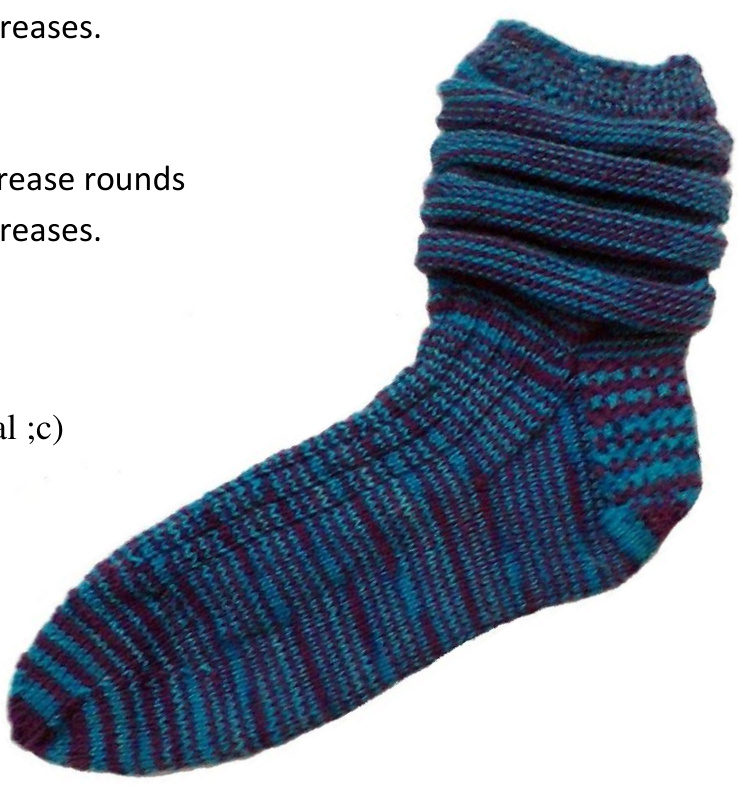
The slouch effect is created by combining alternating bands of stockinette stitch and reverse stockinette stitch on the leg. The sock can be worn pulled up the leg showing off the alternating bands to create a fun effect, or when desired the sock can be scrunched down and the reverse stockinette bands will overlap the stockinette bands to create Yarn: Approximately 400 yards fingering weight sock yarn. The crazier the color the better!
Gauge:
8 stitches per inch gauged working "in the round". Use needle size needed to obtain gauge. Pick your needle style; they will all work for this sock pattern. Stitches in pattern are divided into halves: Instep (top of sock) and Sole (bottom of sock). K = Knit P=Purl SSK = Slip, Slip, Knit P2tog = Purl 2 together K2tog = Knit 2 together Sl1 = slip 1 stitch (always purlwise = as if to purl) Sl1-K1-PSSO = Slip 1 stitch purlwise, knit the next, pass the slipped stitch over the stitch knitted.
Step 2: Work 10 rounds of reverse stockinette by purling every stitch for 10 rounds. Step 3: Alternate Steps 1 & 2 until you have the desired number of bands (5 bands stockinette, 4 bands reverse stockinette).
Method 2 - Make the Holes / Fill the Holes Method:
Step 1: Work first 10 rounds following the ribbing in stockinette by knitting every stitch for 10 rounds. Place a marker somewhere in this section. This marker will NoT move but will be used to denote that this is the right side of the sock. Step 2: Turn your sock wrong side out.. we'll call this part "flipping". Yup, flip that sock inside out! The working yarn is now attached to the "left" needle and the working yarn is in the "front". You are looking at a field of "purl" bumps. (You may find that the sock wants to curl up into your way, grab another locking stitch marker to pin ribbing closed so that it stays out of your way. Lock the marker in place just below the ribbing, you will end up moving this marker every time you finish a band of the leg pattern.) Step 3: Get over the shock of doing this but you're now going to working 10 rounds of knitting with your sock wrong side out!\*\*\* When you're done with this band you will have stockinette on the wrong side and reverse stockinette on the right side of the fabric but there's no purling involved! Step 4: Unlock the marker that was keeping your sock pinned shut, flip your sock right side out, and pin the opening shut again. You're now ready to work another band of stockinette but this one puts the stockinette on the right side and reverse stockinette on the wrong side.\*\*\* Step 5: Repeat Steps 2-4 until you have 5 bands of stockinette and 4 bands of reverse stockinette when looking at the right side of the sock.\*\*\*
\*\*\*But wait!
If you just start knitting in the round again there will be holes at the start of every band!
Here's how to fix those holes:
After you flip your sock we're going to close the gap you just created. We'll close that gap by wrapping the first 2 stitches from the new RIGHT needle (Bonus... there's no need to pick these wraps up later! Yay!): 1. Move the yarn from the front to the back by going between the LEFT and RIGHT needles. 2. Slip the FIRST stitch on the RIGHT needle to the LEFT needle without twisting it (this is Stitch #1). 3. Move the yarn from the back to the front by going between the LEFT and RIGHT needles. 4. Slip the NEXT stitch on the RIGHT needle to the LEFT needle without twisting it (this is Stitch #2). 5. Move the yarn from the front to the back by going between the LEFT and RIGHT needles.
Now we're going to work those 2 stitches back over, wrapping them again:
6. You're yarn is still in the back, that's where we want it.. Slip the FIRST stitch on the LEFT needle back tc the RIGHT needle without twisting it. (Stitch #2 has been moved back to the RIGHT needle). 7. Move the yarn from the back to the front by going between the LEFT and RIGHT needles. 8. Slip the NEXT stitch on the LEFT needle to the RIGHT needle without twisting it (Stitch #1 has been moved back to the RIGHT needle). 9. Move the yarn from the front to the back by going between the LEFT and RIGHT needles. You're now ready to knit the next 10 rounds without a hole, without purling, and no picking up wraps! Every time you flip your sock to make a new "stockinette" band you will do this wrapping to close the hole. Once you've completed the desired number of bands, remove your start of round marker. You're ready to work the Heel Flap. You will work the heel flap on % of the total number of stitches. These are going to be the Sole Stitches.
Heel Flap:
With right side of sock facing you and working on Sole Stitches only (Note: all slipped stitches are slipped purlwise which means you slip them as if you were going to purl but you do not actually work the stitch, this moves the stitch without twisting and gives a smooth edge to your heel flap and also gives you a dense heel): Row 1: (Right Side) Sl1. K the next stitch. \*Sl1, K1. Repeat from \*across to end of row. Turn. Row 2: (Wrong Side) Sl1, P all stitches. Turn. Row 3: (Right Side) Sl1. \*Sl1, K1. Repeat from \*across to end of row. Turn. Row 4: (Wrong Side) Sl1, P across all stitches. Turn. Repeat Rows 1-4 7(8,9) times for a total of 28(32,36) rows.
Heel Turn:
Row 1: (Right Side) Sl1, K18(20,22) stitches, SSK, K1, turn (every time you turn you'll create a gap). Row 2: (Wrong Side) Sl1, P until 9(11, 13) stitches remain. P2tog, P1, turn. Row 3: (Right Side) Sl1, K to 1 stitch before the gap, SSK, K1, turn. Row 4: (Wrong Side) Sl1, P to 1 stitch before the gap, P2tog, P1, turn. Repeat Rows 3&4 until all stitches are worked. End with Row 4, turn, right side is facing you. Knit to center of heel. This is the new start of round. Place marker. Gusset: (optional, work K3 x P1 ribbing across Instep stitches): Round 1: Knit remaining heel stitches. When you are at the edge of the heel, pick up and knit 14(16,18) stitches on the side of the heel flap. Pick up 1 stitch from the row below last picked up stitch and 1 from the row below the 1st stitch on the next needle (this is going to be 1 stitch below the instep stitches), knit these 2 stitches together (to close the gusset gap). Knit across the Instep stitches in pattern. Pick up 1 stitch from the row below the last Instep stitch knitted and pick up 1 stitch from the row below the 1st slipped stitch of the help flap side, knit these 2 stitches together (to close the gusset gap). Pick up and knit 14(16,18) stitches on other side of heel flap. Knit across remaining Sole stitches to reach start of round. Round 2: Knit all stitches Round 3: Knit to 3 stitches before Instep Stitches. K2tog, K1, knit across Instep Stitches. K1, SSK, knit remaining stitches to reach start of round. Repeat Rounds 2 & 3 until you have 56(64, 72) stitches.
Foot:
Work in pattern until sock measures 2(2-% ,3) inches from desired length.
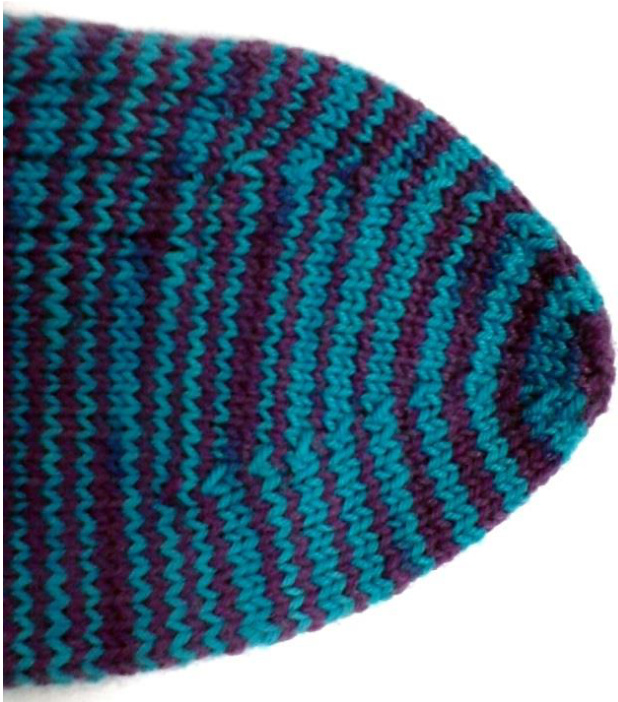
Toe Shaping:
We'll now begin decreasing 4 stitches per decrease round to shape the toe:
64 stitch sock: 72 stitch sock: Decrease Round: K7, Sl1-K1-PSSO, \*K16, Sl1, K2, PSSO. Repeat from \* 3 times, knit to beginning of round. Knit 2 rounds. Decrease Round: K7, Sl1-K1-PSSO, \*K15, SI1, K2, PSSO. Repeat from \* 3 times, knit to beginning of round. Knit 2 rounds. Continue working these three rows eliminating 1 stitch between decreases on every decrease row. When 7 stitches remain between decreases work only 1 round between decreases round until 3 stitches remain between decreases. Then work decrease round every round until 8 stitches remain. To finish: cut yarn, thread into a darning needle and draw through 8 remaining stitches to close toe. Work as above but begin decrease rounds with 14 stitches between decreases. 56 stitch sock: Work as above but begin decrease rounds with 12 stitches between decreases. YAY! You have a sock. Making 2nd sock is always optional ;c)
Enjoy!


