FIGURE/GROUND SOCKS
by Ellen Wixted
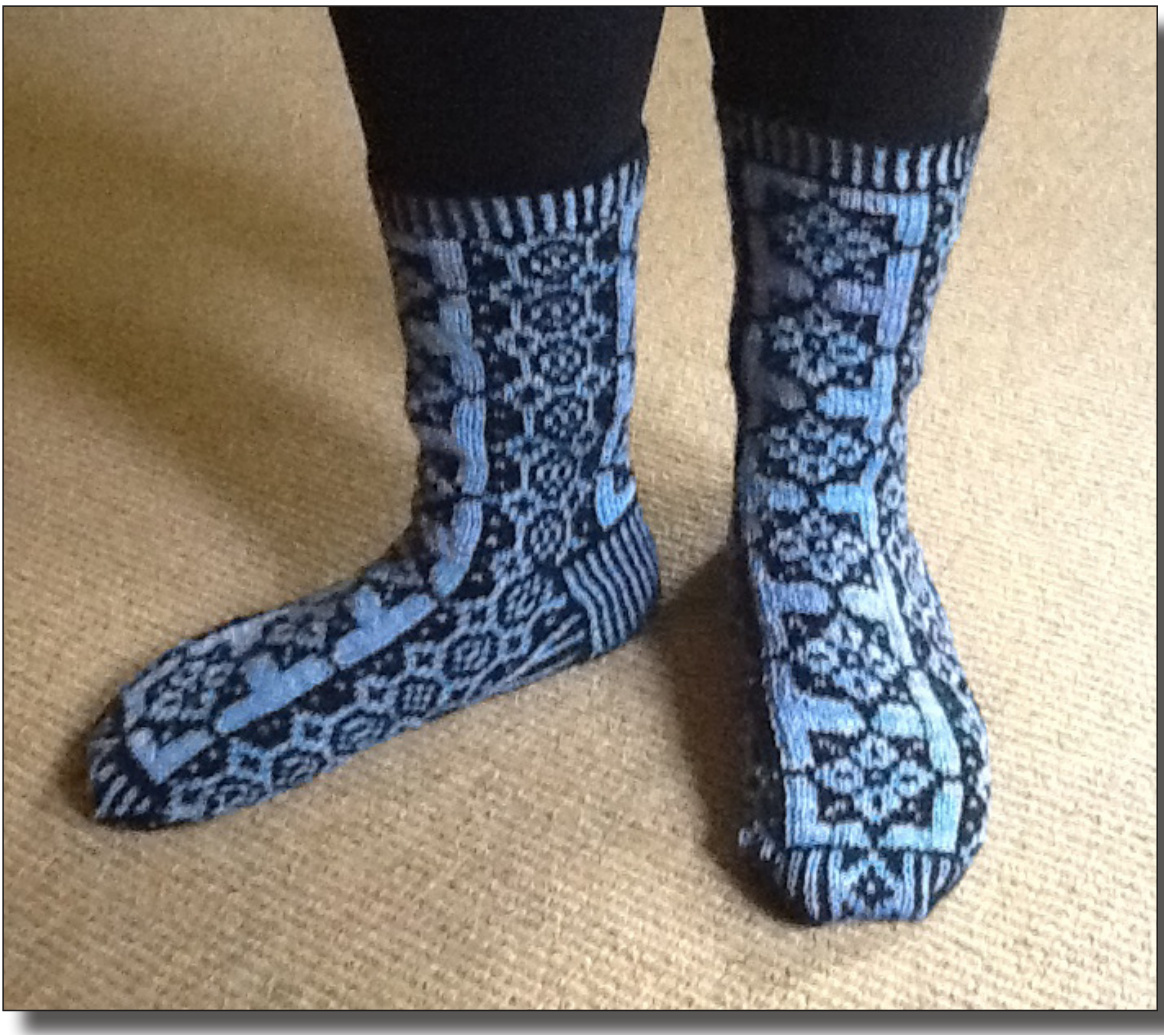
These socks grew out of time spent looking at tile patterns and knitting charts. I liked many of the horizontal band designs, but I like vertically oriented patterns. And I liked the idea of playing vertical panels off one another: a strong pattern against an all-over one, a light field against a dark one. These figure/ground socks, with their slightly medieval or perhaps Arabic-inspired feel, are the result.
Materials
· 80-85g of light color fingering weight sock yarn; recommend machine washable. I used 77g of Socks that Rock (half a skein) from Blue Moon Fiber Arts. 80-85g dark color fingering weight sock yarn; recommend machine washable. I used Angora Merino by Regia for this, and used a 50g ball plus \~10g leftovers from another project. I was a little surprised that the black weighed less than the lighter blue, as it is far more visually dominant. However, the lighter color yarn had a much heavier hand.... · 2 16 or 24 inch circular needles in size required to get comfortable guage (probably 1.75 to 2.5; I used size 2.25, and have a size 11 foot. Instead of two circular needles, you could use 5 dpn, but I find it faster and easier to use two circulars tapestry needle for sewing in ends, scissors to trim ends
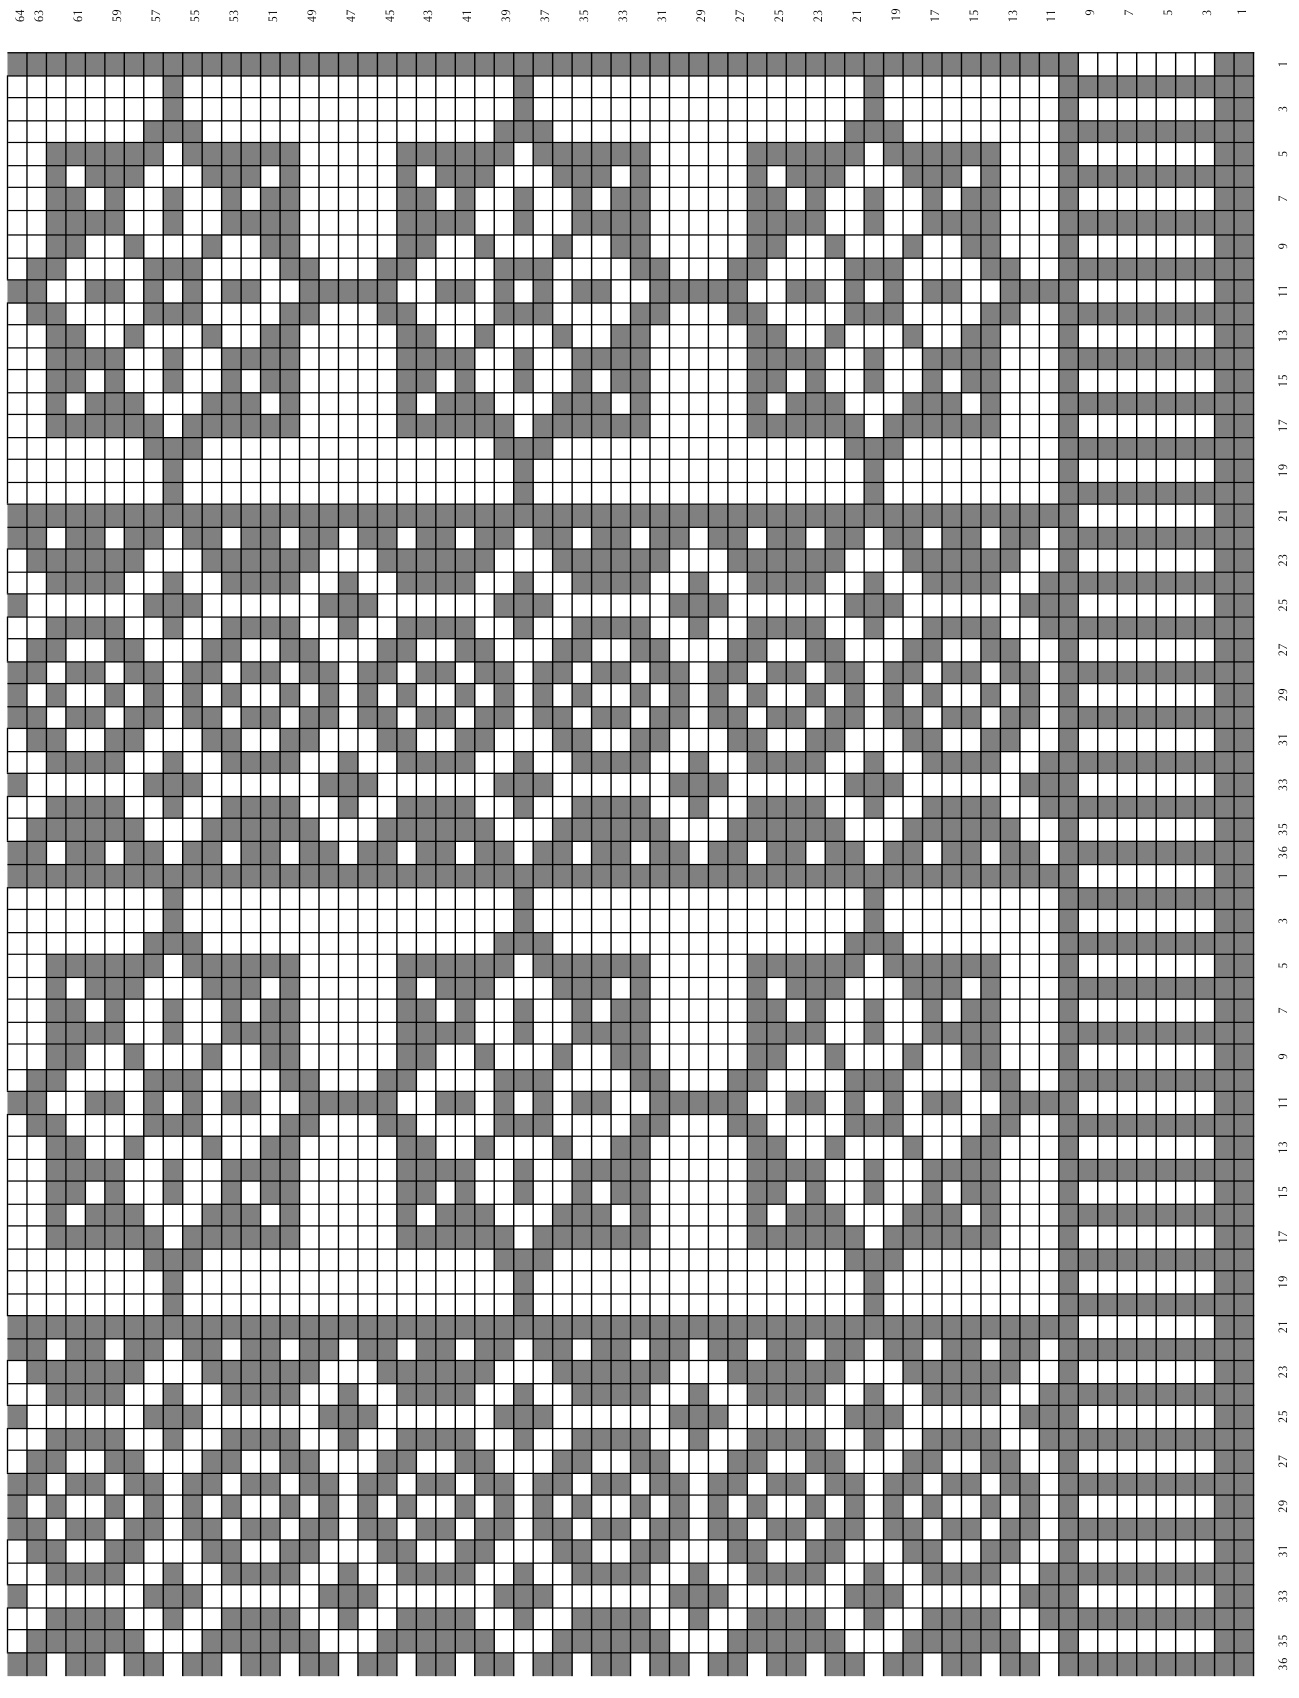
Start with the leg.
Cast on 72 sts in the dark color (36 on each needle), then knit one round k1/p1 ribbing. Starting with the next row, follow chart for leg. For the first 7 rows, purl the light color stitches for the vertical stripes to create corrugated ribbing. Be sure to not let either color yarn float for more then 4 or 5 stitches without looping over contrasting color. Finish the leg pattern chart...
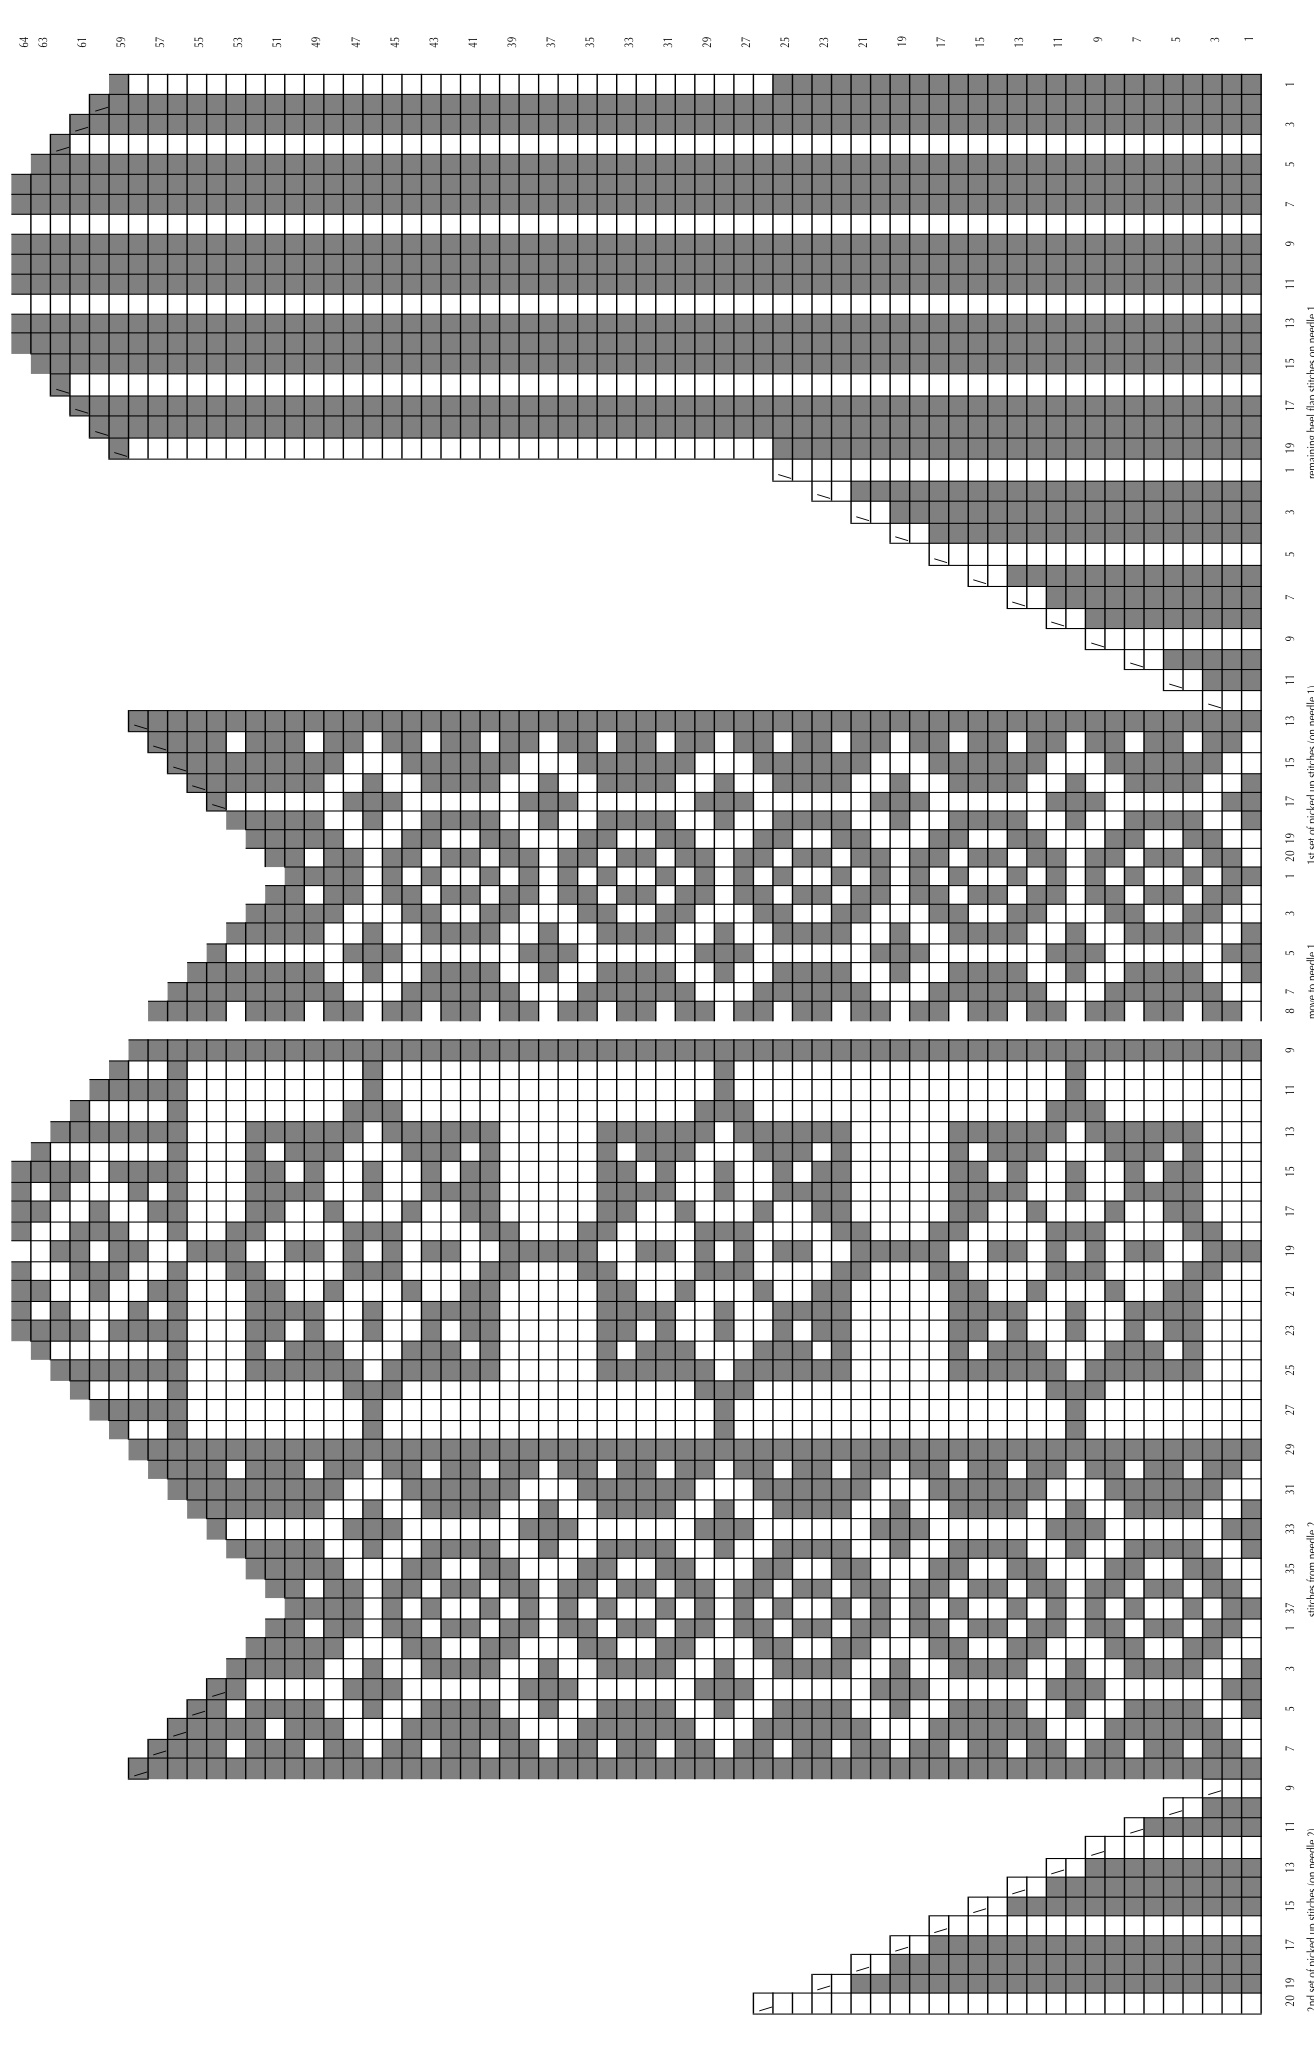
...then shape the heel.
Move the stitches around so that the light panels are centered on each needle. The front needle should have 37 stitches and the back (the heel) should have 35 stitches. On the back needle only, knit one row of black, then purl one row of black. On the next row, starting with a dark stitch, k1 dark, k1 light, and repeat to end of row. Purl back, taking care to wrap the colors at the end of each row. Knit 18 rows in this way, ending with a purl row. Next, shape the heel as follows: 1. Knit 20 stitches, knit 2 tog, knit one, turn. 12 stitches should remain on right needle after turn. 2. Slip 1st stitch to right needle purlwise, then purl 6 sts, purl 2 tog, purl 1, turn. 12 stitches should remain. 3. Slip 1st stitch to right needle, then knit until one stitch before the gap. Knit the stitches on either side of the gap together, knit 1, turn. 4. Slip 1st stitch to right needle purlwise, then purl until one stitch before the gap. Knit the stitches on either side of the gap together, knit 1, turn. 5. Repeats rows 3 and 4 until you have completed the heel shaping; you will have 19 stitches left, ending with a knit row.
Finish with the foot.
Pick up 20 stitches from the left edge of the heel flap, following the color pattern on row 1 of the foot pattern. Knit the front needle using the first row of the foot pattern, then pick up an additional 20 stitches from the other edge of the heel flap, following the color pattern on the chart. Refer to the numbers on the chart to see which stitches go where. Follow foot chart. I used the chart to show how I arranged stitches on the two needles (it's a bit unconventional), but feel free to improvise. If you are making these for someone with small feet, stop after 5 medallions, and instead improvise a striped toe panel. When 13 stitches remain on each needle, use Kitchener stitch with dark yarn to bind off. Weave in ends, then make another sock.