Luck & Love Bookmark Mini CAL - Part 1 of 3
Learning Basic Filet and Chart Reading Guide By: BG Designs

Materials:
-50 Yards Size 20 Crochet Thread -Size 10 Steel Hook -Scissors
Notes:
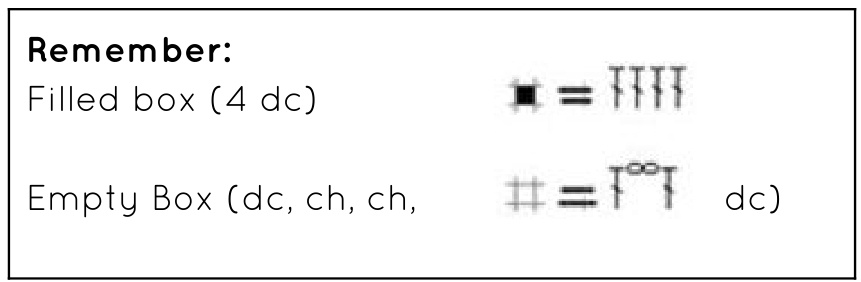
The image in the guide shows some symbols and w hat they mean for our pattern and filet crochet in general. Our pattern will be based off a graph. Using the “Filled Box' or “Empty Box" Read on for first bit of instruction...
Guide:
Filet Crochet Symbols we will be using here. Chain stitch Double crochet Stitches to make a filled and emptybox.
Special Stitch
Double Triple Crochet (dtrc): YO 3 times, draw up loop in base of last dc made, (YO, draw through 2 loops on hook) 4 times
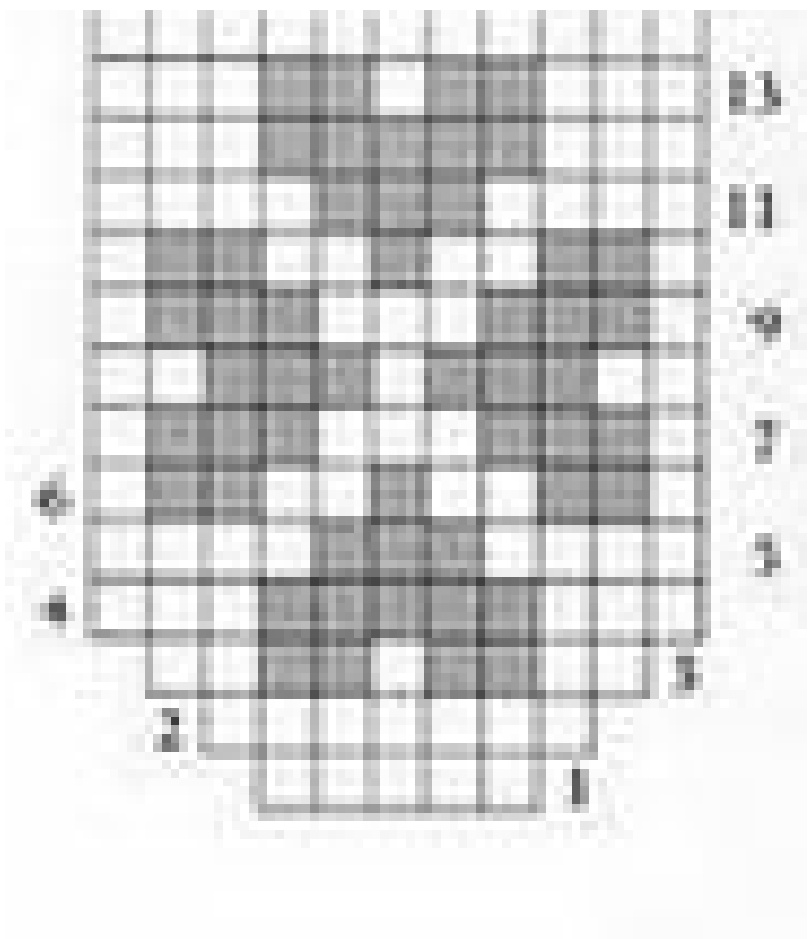
Part 1 Graph - Rows 1to 14. This is a “Graph". We are using it to guide us with our filet piece. Graphs like this can be used for other things such as, crochet or knit intarsia (which is working with different colors), Embroidery, crochet bubble designs and even perler bead projects. To read this Graph you start at the "1 " and work across the row, row 2 will start where you left off and work back across the other way, snaking your way up the graph. \*Keep track of your row by checking or crossing out the completed rows. I apologize for the blur, i wanted to get this larger than the original pattern.
Starting our Project:
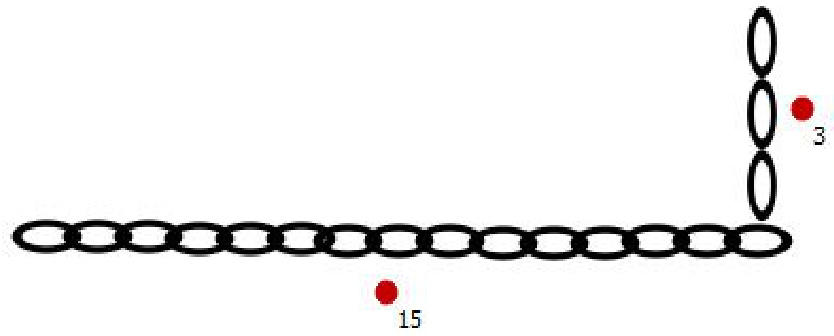
Reading from our graph you will see that there are 5 boxes in the first row... Our guide tells us that we need 4 stitches in every box. The first stitch makes up a "wall" and the 4th stitch makes a "wall", ALwAYS. To figure out how many we need to chain to start off, we will need multiply the starting number of boxes by 3 (3 because the end wall will be the begining wall of the next box) So 3 x 5 + 15. The last "wall" will be the movement up to the next row, usually a double crochet in filet which is equivalent to 3 chains.
So Chain 15 + 3.
this is what you have formed →
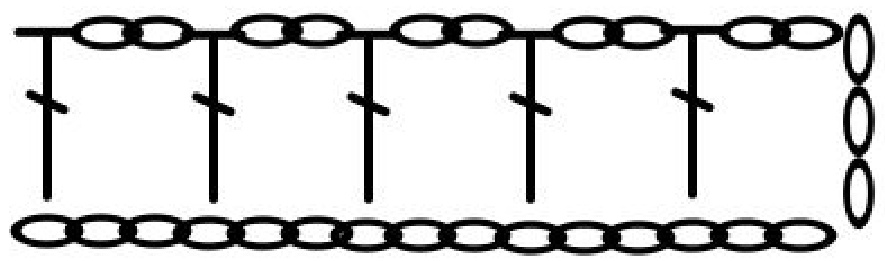
Row 1: There are 5 empty boxes, you already have your first wall, next ch2 and dc into the 3rd bottom chain, (7th ch from hook), follow the graph to the end of the row. This is what is should look like at the end of row 1 →
Row 2: There are 7 empty boxes in row 2. You need to add a box now and at the end of this row. To add a box, Ch 7 (This counts as the ch2 space, the dc wall, and the next ch 2 space. ) Turn, dc in next dc,follow graph to end of row. To add box at end dtrc (see special stitch on Page 1)
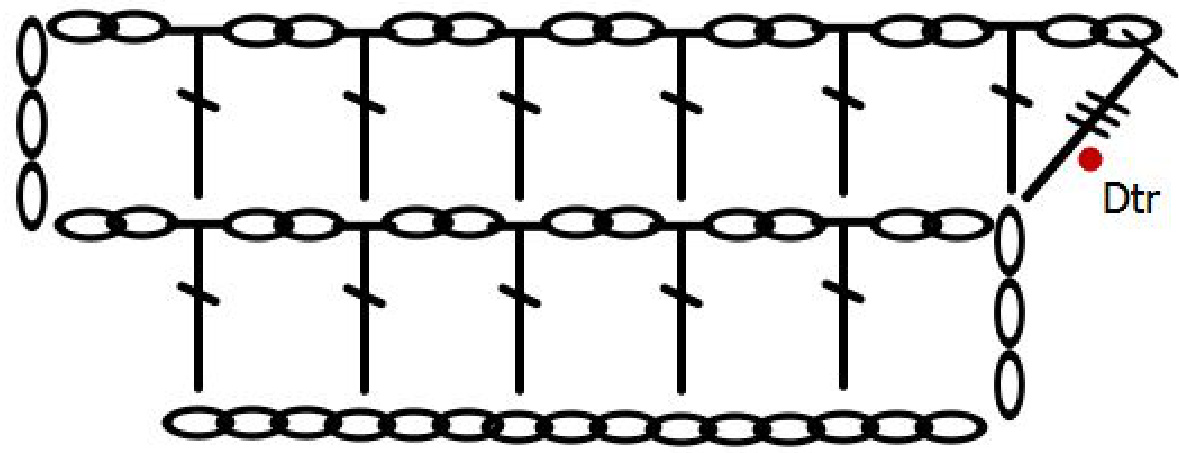
The Dtrc (dtr) Appears to be a diagonal line instead of a box corner in the diagram but because of the length of the stitch is makes up for the ch 2 and wall. An easy way to remember the stitch symbols...the lines crossing the T are the "YOs" soon you will be so familiar with the symbols you wont have to think too hard. Row 3: There are 9 boxes in this row, Empty and Filled and also 2 added boxes. Start off by adding the first box Ch 7. Turn, dc in next dc, ch 2, sk next ch-2 space, dc in next dc (2dc in next ch space, dc in next dc) x2, ch 2, sk next ch-2 space, dc in next dc, (dc in next ch-2 and next dc) x2, (ch2 sk next ch-2 space, dc in next dc) x2, Dtrc. There are 1l boxes in this row. Empty, Filled and 2 added boxes. Follow the graph and the skills you have learned so far to complete this row. Row5-14 Follow the graph. For help and assistance please visit the facebook group " Cals by BG Designs" Part 2- Tuesday, May 3rd Part 3 -Thursday, May 5th


