Outlander Claire's ‘Rent' Shawl
Designed by Grace Petersen
The design of the shawl worn by Claire in the 'Rent' episode of Outlander is quite brilliant in its elegant simplicity. Below is my interpretation of this design, with the garter ridges angling downward from the center back. I offer two versions of the shawl - the simpler single color version which is equally lovely in solid or selfstriping yarns, and the tri-color version, as seen in the Outlander 'Rent' episode, which is knit using intarsia in garter stitch. Casting on only 3 stitches, the back is a reverse mitered square increasing to the desired back width and length. The front panels are then knit out from the back, each in turn, decreasing until only 3 stitches remain to be bound off. (See Notes for suggested alternate increases.)
Outlander Claire's 'Rent' Shawl - Single color shawl
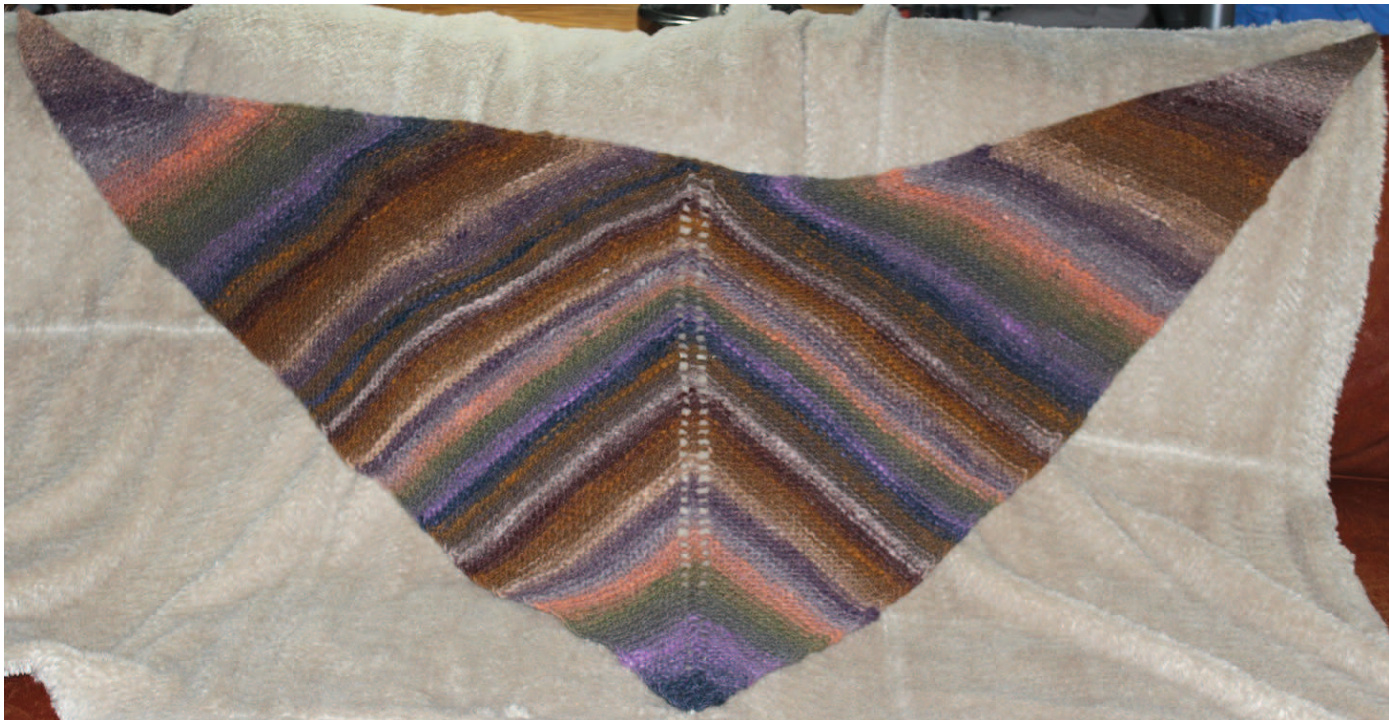
Suitable for advanced beginner. Shawl is knit from the center back upwards. Yarn - Knitter's choice of yarn; DK, Worsted or Aran weight recommended. Approx. 450 yards needed Sample was knit using Noro Kureyon, 4 balls. 2s - 12-14 inch straight needles or 24-30 inch circular needle, size appropriate for yarn used Additional materials - stitch markers, stitch holder.
Stitches -
garter stitch - knit every row YO - yarn over Sl1 - slip stitch purlwise k2tog - knit 2 together ssk - slip slip knit Back - Starting at center back point, CO 3 stitches. Row 1 - knit. Row 2 - Sl1, place marker (this marker will indicate the beginning of an increase row), YO, place marker (to indicate center stitch), K1, YO, K1. (5 Sts) Row 3, and all odd number rows - Sl1, K to end, slipping markers. Row 4 - Sl1, slip marker, knit to next marker, YO, slip marker, K1, YO, K to end. Repeat Rows 3 and 4, until there are 121 stitches on the needle, Repeat Row 3 one more time. Start left front: next row - Sl1, slip marker, K55, K2tog, place marker, K1, K2tog (removing center st marker). Place remaining 60 sts on stitch holder. Row 1, and all odd number rows - Sl1, K to end, slipping markers. Row 2 -Sl1, slip marker, K to 2 stitches before next marker, K2tog, slip marker, K2. Repeat rows 1 and 2 until 3 stitches remain. BO. Start right front - Slip stitches from holder back to needle. Starting at center back, Sl1, K1, place marker, SSK, K to end. Row 1, and all odd number rows - Sl1, K to end, slipping markers. Row 2 - Sl1, K1, place marker, SSK, K to end. Repeat rows 1 and 2 until 3 stitches remain. BO. Finishing - Weave in all ends, and block. NOTEs - If you prefer a 'solid' center back (i.e., no yarn over holes), you can substitute a different increase. Increases, such as M1L and M1R on either side of the center stitch (see https://www.youtube.com/watch?v=gGbOilvWLic), or working 2 increases in the center stitch - Kfbf - (see https://www.youtube.com/watch?v=IHxXhiTzD-M) would yield the same shape without the holes.
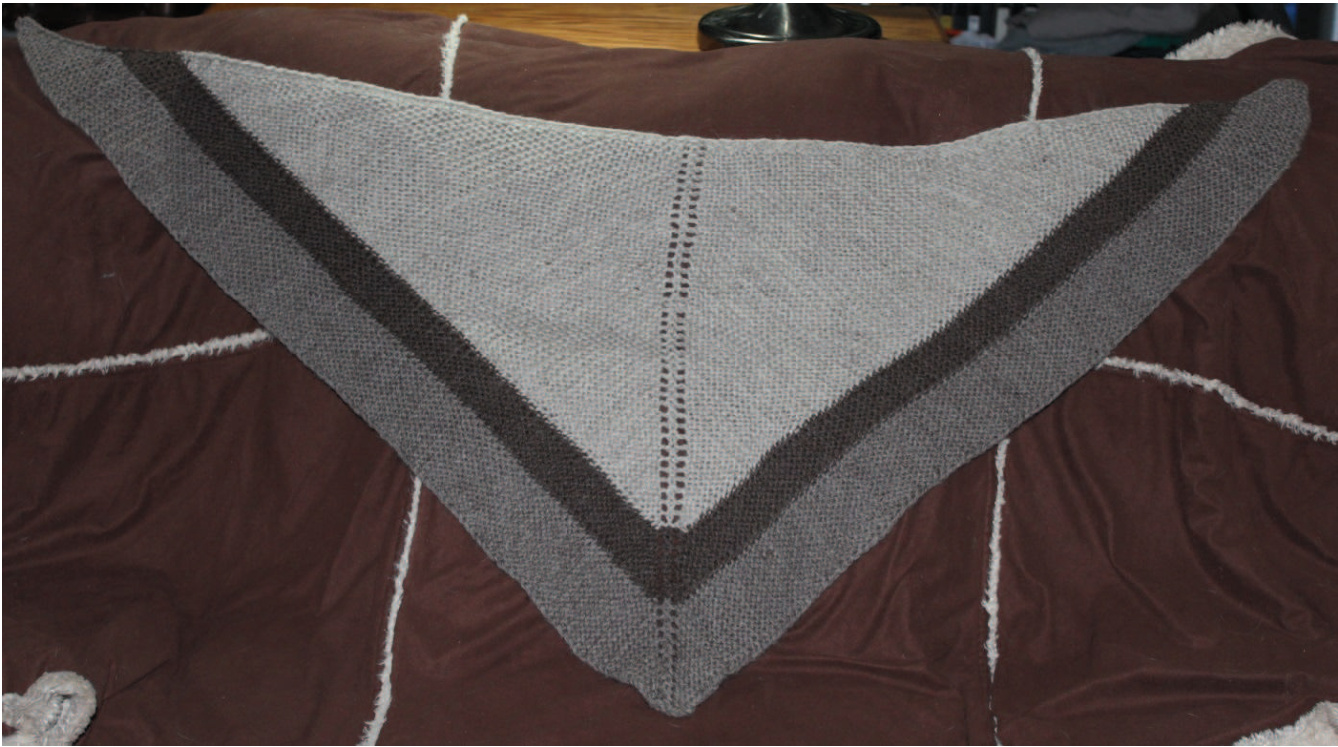
Suitable for intermediate knitter. Shawl is knit from the center back upwards. Color changes are done using intarsia. Yarn - Knitter's choice of yarn; DK, Worsted or Aran weight recommended. Sample was knit using "I Love This Wool Naturals" from Hobby Lobby, 1 ball each color, Biscuit, Umber and Cocoa. Approximately 450 yards total are needed, divided as follows: 200 yards MC (Main Color) - Light Taupe, Grey, or Brown 150 yards C1 (Contrast 1) - Medium Taupe, Grey, or Brown 100 yards C2 (contrast 2) - Dark Taupe, Grey, or Brown Divide C1 and C2 each onto 2 bobbins es - 12-14 inch straight needles or 24-30 inch circular needle, size appropriate for yarn used Additional materials - 4 bobbins, stitch markers, stitch holder. Stitches - garter stitch - knit every row YO - yarn over Sl1 - slip stitch purlwise k2tog - knit 2 together ssk - slip slip knit For intarsia in garter stitch, these tutorials are recommended - https://www.youtube.com/watch?v=9AJkri-qcQo https://www.youtube.com/watch?v=rxBOutAvgXY http://pumora.de/?p=769 http://mimoknits.typepad.com/knitting/2005/02/garter intarsia.html http://www.happyelastic.co.uk/2011/05/garter-stitch-intarsia-wip-wednesday.html Starting at center back point, CO 3 stitches with C1 - Row 1 - knit. Row 2 - Sl1, place marker (this marker will indicate the beginning of an increase row), YO, place marker(to indicate center stitch), K1, YO, K1. (5 Sts) Row 3, and all odd number rows - Sl1, K to end, slipping markers. Row 4 - Sl1, slip marker, knit to next marker, YO, slip marker, K1, YO, K to end. Repeat Rows 3 and 4, until there are 25 stitches on the needle, Repeat Row 3 one more time. Add in C2 - Row 1 - Continuing with C1, Sl1, k11; attach C2, YO slip marker, K1, YO; attach 2nd bobbin of C1, K to end. Row 2 - Sl1, K across, changing colors to maintain pattern. Row 3 - With C1, Sl1, K11; With C2, K to marker, YO, K1, YO, K to color change (last 12 sts); With C1, K12. Row 4 - Sl1, K across, changing colors to maintain pattern. Repeat Rows 3 and 4, until there are 37 stitches on the needle, Add in MC - Row 1 - With C1, Sl1, k11; With C2 K6; Attach MC, YO slip marker, K1, YO; With C2, K6; With C1, K12. Row 2 - Sl1, K across, changing colors to maintain pattern. Row 3 - With C1, Sl1, K11; With C2 K6; With MC, K to marker, YO, K1, YO, K to color change; With C2, K6; With C1, K12. Row 4 - Sl1, K across, changing colors to maintain pattern. Repeat Rows 3 and 4, continuing in pattern, until there are 121 stitches on the needle, Start left front - Next row - Maintaining color changes, Sl1, slip marker, K55, K2tog, place marker, K1, K2tog (removing center st marker). Place remaining 60 sts on stitch holder. Row 1, and all odd number rows - Sl1, K to end, slipping markers. Row 2 -Sl1, slip marker, K to 2 stitches before next marker, K2tog, slip marker, K2. Repeat rows 1 and 2 until 3 stitches remain. BO.
Start right front -
Slip stitches from holder back to needle. Starting at center back and maintaining color changes, Sl1, K1, place marker, SSK, K to end Row 1, and all odd number rows - Sl1, K to end, slipping markers. Row 2 - Sl1, K1, place marker, SSK, K to end. Repeat rows 1 and 2 until 3 stitches remain. BO. Finishing - Weave in all ends and block.

NOTEs - If you prefer a 'solid' center back (i.e., no yarn over holes), you can substitute a different increase. Increases, such as M1L and M1R on either side of the center stitch (see https://www.youtube.com/watch?v=gGbOilvWLic), or working 2 increases in the center stitch - Kfbf - (see https://www.youtube.com/watch?v=IHxXhiTzD-M) would yield the same shape without the holes.


