Itchy Fingers Shorties and Longies Pattern
Details...
Abbreviations Used
K - knit P- purl K2tog - knit two together
Materials Needed
Wool yarn in a weight sufficient to give you a thick, fairly firm fabric. Worsted weight is the most commonly used but you can choose what you like! Some people choose superwash wool because it can be washed and dried in your washing machine. However, it does not work as wellfor a diaper cover so I do not recommend it. Make sure you do not use a blend with something that is absorbent.. like a wool/cotton blend. A little mohair blended in never hurts and actually lends a little sturdiness to the fabric. Knitting needles in two sizes - one $16^{\circ}$ Circular for your main fabric (usually a US7), and needles 3 sizes smaller for the ribbing at the waist. 12" Circular or double-pointed needles for the legs, same size as body Double Pointed Needles, same size as body Stitch markers Yarn darning needle
Preparations
1. Make a gauge swatch from the yarn and needles that you have chosen. Count stitches and rows in $4"$ increments and divide to give stitches & rows per inch. Keep all fractions (don't round it to a whole number). Insert your results in the appropriate spaces on the worksheet. 2. Measure the baby over the diaper (or use general sizing guidelines), and enter the results on the worksheet. The beauty of this pattern is the ability to custom size to your baby. One thing to keep in mind is that youll want to add in some ease. I suggest adding an inch to an inch and a half to the rise and the same to the hip. \*Note: If you are not going to use this over cloth diapers, you may want to only put In 1-2 short rows. You also wilnot need as much ease. 3. Complete the calculations needed for your project.
Worksheet 1
Measurements 1. Stitches per inch using the yarn & needles you have chosen. 2. Rows per inch using the yarn & needles you have chosen. 3. Hip measurement over diaper in inches plus ease. 4. Rise in inches - Measure from the top edge of the diaper in the back, through the crotch,to the top edge of the diaper in the front. Add in desired ease, then subtract 1" for NB,SM or $1.5^{\circ}$ for MD-LG. 5. Desired inseam (crotch to ankle for pants, desired length for shorts) in inches. 6. Desired cuff length in inches. ('d recommend at least 1 inch)
General Sizing Guidelines
Size Hip Inseam Rise NB 17" 5” 14” SM 19" 6.5" $15.5^{\circ}$ MD 20" 8” $17^{"}$ ML 21” 9” 18" LG 22" $10^{\circ}+$ 19"+ \*Inseam for LG varies quite a bit.
Worksheet 2
Calculations Use your measurements to complete the following calculations. Any letter enclosed in brackets (i.e. [Dl) refers to a previously completed calculation. A. Stitches needed to go around the body: [#1] $\mathsf{x}$ [#3]. (round to even number) SR. This is the number of short rows you want to add to the bum of your shorts or pants. This is $1\%$ to 2 inches depending on size. Don't forget... each short "row" is really two rows. [#2] $\mathsf{x}$ [3/4 (NB,SM) or 1 (MD,L)]. Round up if you get a fraction.

D. Division for gusset/legs: $[\mathsf{A}]\div2$ [D1. Division for short row spacing. $[\mathsf{D}]\div2$ GS. Width of gusset in stitches: [1% (NB,SM) 2.5 (MD - LG)] $\mathsf{x}$ [#1] Round to nearest odd number. GR. Rows needed for gusset: [GS]-1. BRF. Length of body in rows in front before beginning gusset. {[LF] x[#2]} - [GR]. Round up to nearest whole number. I. Length of legs in inches before working cuff:[#5]-#6].
The Pattern
Waistband On needle(s) 3 sizes smaller than that used to knit your gauge swatch, cast on [A stitches. Note: If designing for baby with an extra small waist, or the yarn won't compress, you. can subtract out an inch or so of stitches and add them in spaced evenly on row 1 of the body. Join, placing stitch counter or marker at the beginning of the round. Work whatever ribbing you prefer (as long as it's divisible by 4) until work measures 1.5 inches for NB, SM or 2 inches for MD-LG.
Body
Switch to larger needle(s). Row 1: You will now work in stockinet stitch until you get to the cuffs. Place Markers for Short Rows Knit [D1 J stitches, place marker. Knit [D J stitches, place marker. This is where your short rows will begin with the exception of Row 3. Row 2: Knit [SR1a J stitches, place marker. Knit [SR1 ] stitches, place marker. This will be your first short row location which is shorter than the rest Row 3: First short row. (You may remove markers for this row after it's complete - make sure to leave the other markers!) Row 4 and beyond. now you are going to knit away placing your short rows as you should until you reach [BRF 1. You will add in your short rows every [SRs rows from here on out. I find it helpful to work out the locations for each short row. That way you can turn off your brain and just knit! There is a slot on the worksheet that willhelp you do that. [SRS2]). Keep in mind this is in reference to the front side or [BRF], NOT the backside where the short rows actually are. SR Locations At each short row you willslide your markers in towards the middle of the bum. [SR2 J stitches each time. (that means closer to one another) If you want a looser fit (perhaps for a boy), simply omit this part and leave the markers where they are. Work your short rows with any method that you like. One is included at the end of the pattern.
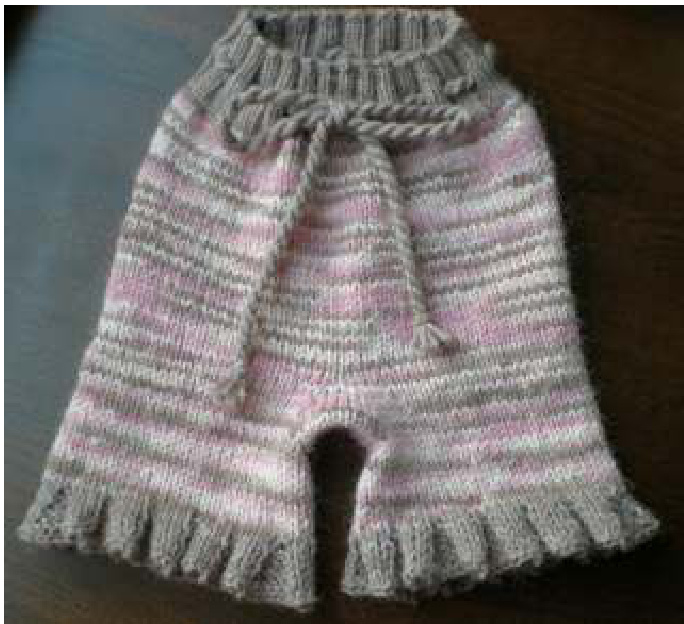
Gusset
Knit [D minus 1 J st, place marker, k1, place marker\* Repeat between \*\* once. (You should have an equal number of stitches on either side of your markers centered on the front and back. If they're not, adjust so that they are.) Increase round: $^{\star}\mathsf{k}$ to marker, sl marker, inc right, k to marker, inc left, sl marker\* Repeat between \*\* once. \*Work 1 round plain & 1 inc round\* until there are [GS ] stitches between the markers. Knit 1 round
Graft & Begin Legs
You can work the legs in whatever method you choose, DPN's, 12" circ's, Magic Loop... Kto marker [D minus 1 J st. With same-size double-point needle, k to next marker [GS ] st. On $12^{\mathfrak{p}}$ circular needle (or DPN's, etc..) k to next marker [D minus 1 ] st, then with another double pointed needle, finish the round [GS ] st. Break the yarn end, leaving a fairly long tail. Thread a large darning needle with the yarn end, and graft together the stitches on the 2 crotch-gusset needles. If you followed the instructions above, you will have your first leg on the $16^{\circ}$ circular used for the body and the second leg on the $12^{\mathfrak{p}}$ (or dpn's). Work your second leg first then when you go back to the first, you can knit the first round onto your 12" circular. Before beginning the knitting of the legs, pick up several stitches (you can tellfrom looking what is needed - more is better than less) from the side of the crotch gusset, to keep a gap from forming at the crotch. Join yarn at this point, and begin kniting, placing a marker when you get to the crotch to mark the inseam. (Or live dangerously and just guess - you won't really be able to tell any difference by the time you get all the way down the leg.) K in stockinet until legs measure [I J inches.
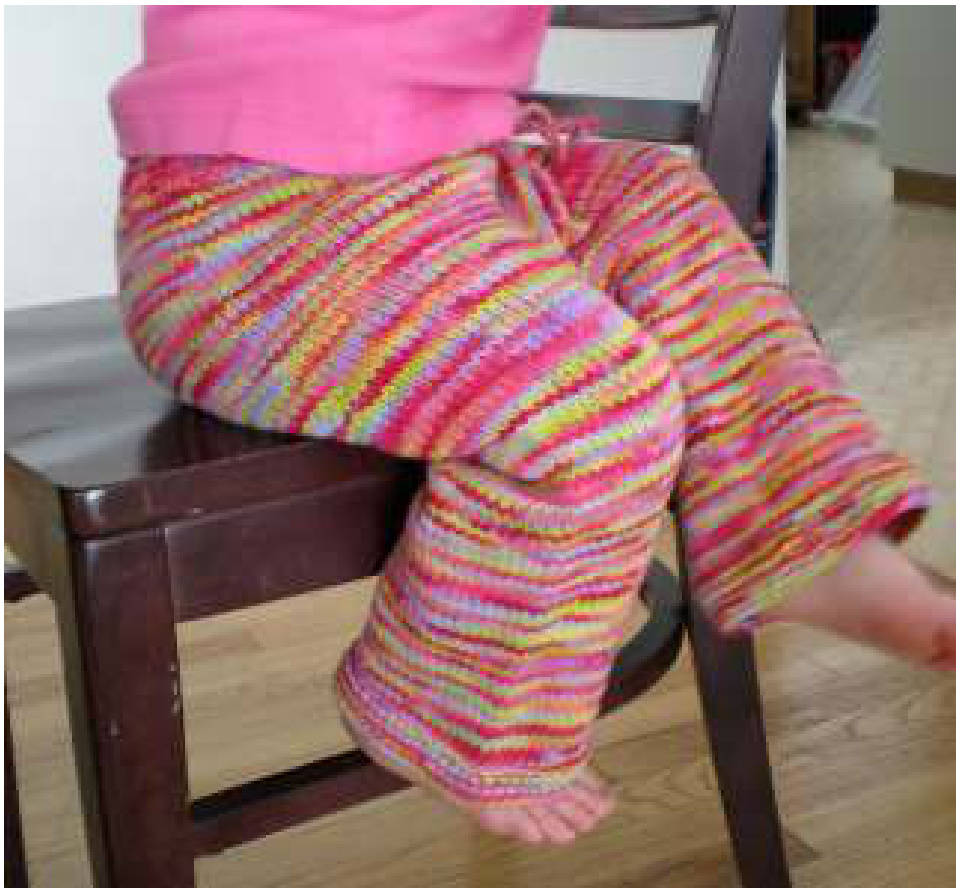
Cuffs
You can work your cuff in any pattern you like... ribbing, seed, moss, garter, and even ruffles! You could also make a flare at the bottom of the legs by sizing up your needles or adding stitches in evenly. Use your imagination! \*If working cuffs in $_{2\times2}$ ribbing, be sure that your number of leg stitches is divisible by 4. If not, increase or decrease (if it's only a stitch or two) or choose something else. \*If working $1\!\times\!1$ rib or seed-stitch cuffs, be sure your leg stitches are an even number. If not, decrease out one stitch on your last round. Work in desired cuff pattern for [#6 J inches. Bind off. Work second leg as the first if you did not choose Magic Loop method.
Finishing
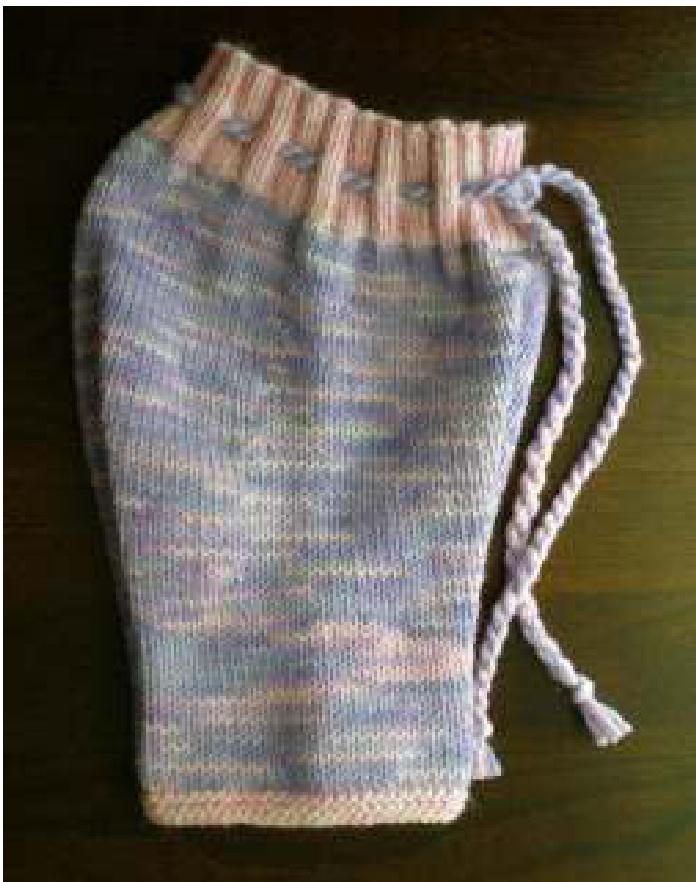
Weave in all yarn ends. Using two DPN's make an I-cord long enough to function as a drawstring for the waistband. Weave the I-Cord through the middle of the waist ribbing. Wash and Lanolize wool for diapering use and block to dry.

Wrapped Short Row Method
Pass the first short row marker and Knit to one stitch before your second marker. Slip the next stitch to the R needle, bring yarn to the front, slip the stitch back to the L needle, then move the yarn to the back. Turn and purl to one stitch before your first marker. Slip the stitch to the R needle, move yarn to the back, slip the stitch back to the L needle and then move the yarn to the front. Turn and knit.. when you come to the wrapped stitches, insert your needle into the wrap and the stitch and knit them together. You might have to pull on the stitches a bit to make them truly invisible.