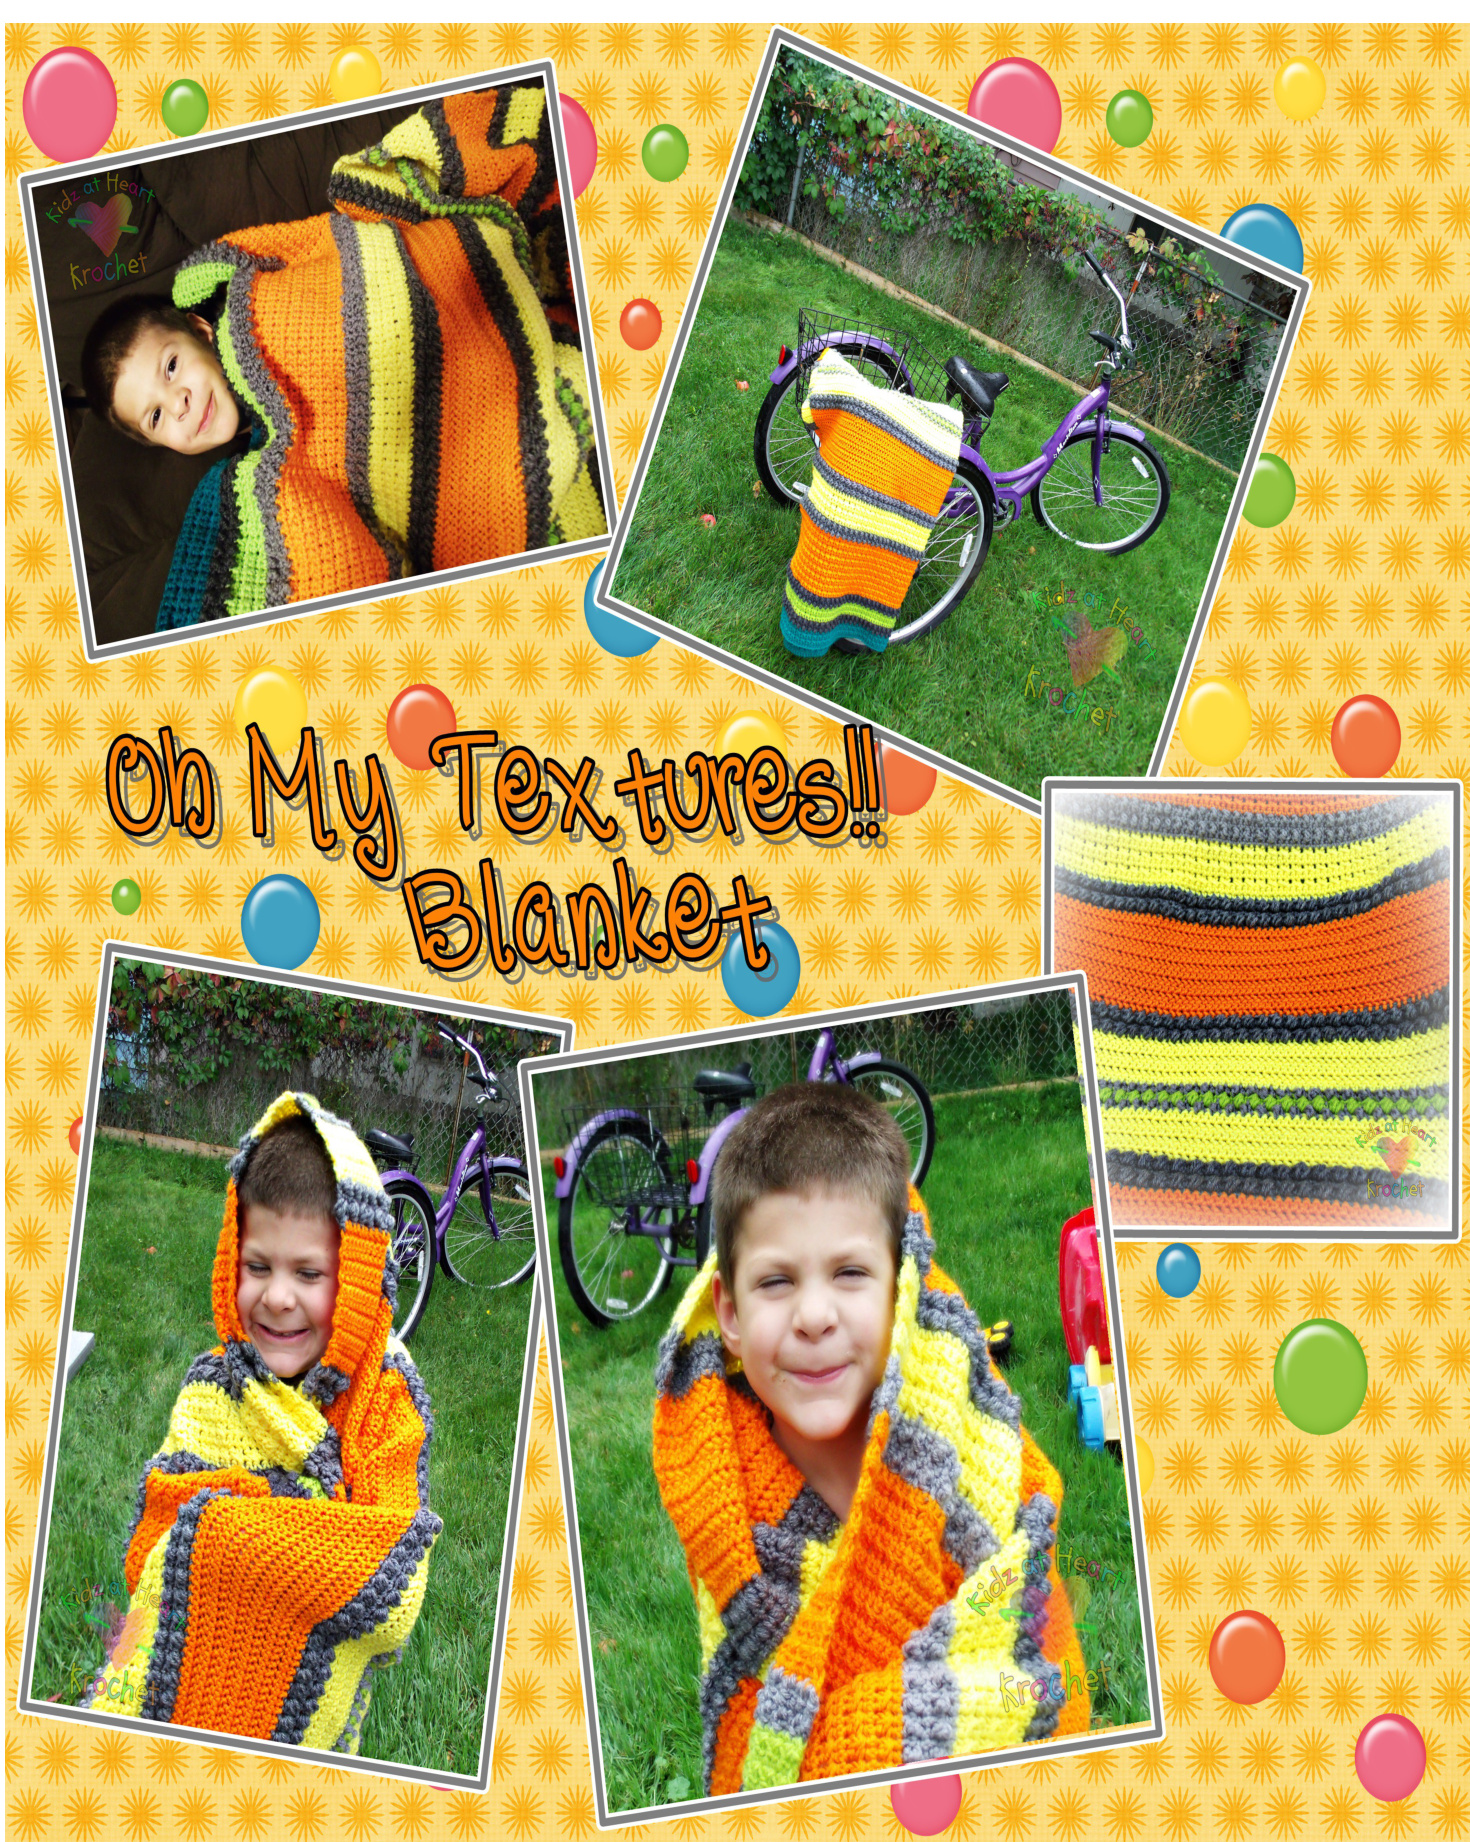
Oh My Textures! BYO Blanket by Kidz At Heart Krochet
Oh My Textures! Blanket: Build Your Own
This is a “Build Your Own" Textured/Sensory Blanket Pattern. You choose which “Main” stitches and which “Divider”′ stitches you want to use. You can use 1 Main & 1 Divider (Sample 2), 2 Main stitches & 1 Divider, 1 Main & 2 Dividers or even 2 Main & 2 Dividers. Once you decide which stitches you want to use, you then choose how big you want each section and how many repeats. This allows your creativity to flow and you can customize it for the person it is being made for.
Sizes:
Lovey: 10"x10" Security: 14"x17" Stroller: 30"x35" Receiving: 40"x40"' Swaddle: 47"x47"\* Toddler: 42"x52" \*\*I wanted a little bigger than toddler, but not quite a throw or lapghan. So I am made mine 43"x56" Items Needed: Yarn: any yarn size (I would recommend at least 2 colors) This blanket is a bit of a yarn eater, so make sure you get enough. Hook: any corresponding hook size Common Terms: sc=single crochet, hdc=half double crochet, trc=triple crochet, sk=skip, ch= chain
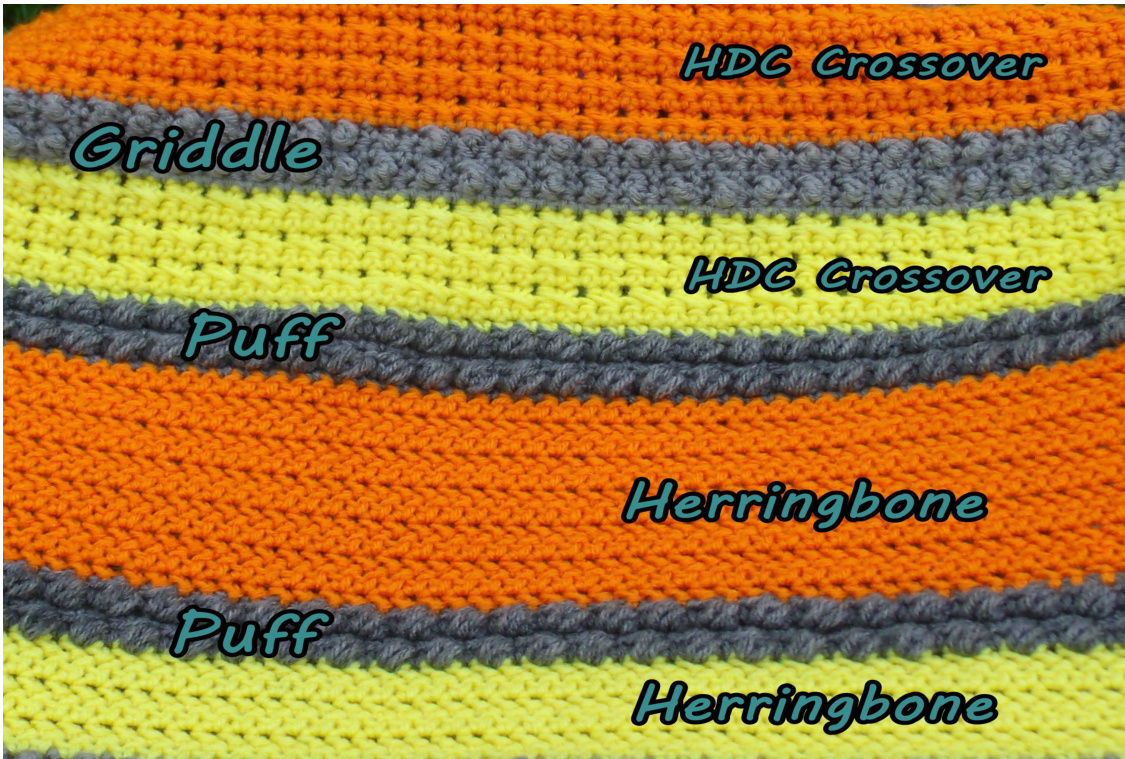
4 Special Stitches:
"Hdc Cross-over Stitch" (aka Hdc CO): skip 1st stitch, sc in next st, hdc in the skipped stitch (you will need to cross over in front of sc and work into the skipped stitch. You will want to be a little "loose” on this hdc part of this stitch. If the stitch is too tight, you can't see the diagonal aspect of it, which is what gives the stitch it's unique look. http://stream.rallytube.me/en/video/3gqqeMVMgAI/Simple-Crochet-How-to-make-the-Crochet-XCrossOver-Stitches This video uses dc for both stitches, But it shows how to do cross over. Just remember, we will be using sc & hdc instead of dc. "Herringbone Hde" Stitch (HHDC)- Yarn over. Insert hook into next stitch. Yarn over and pull up loop. You will have 3 loops on hook. Pull 1st loop through 2"d loop on hook. Now you have 2 loops on hook. Yarn over. Pull through both loops on the hook. To see a picture tutorial : http://crochetnirvana.weebly.com/blog/learning-the-herringbone-half-double-crochet "Griddle” Stitch (GS): ch3, sc, trc . It is okay if the bean appears on the wrong side, you can just push it through to right side. "Puff Stitch (Ps)-Yarn over hook (wrap yarn from back to front around the hook) once just below hook opening. Insert hook into indicated stitch, yarn over and pull through a loop. You should have 3 loops on your hook. Yarn over again in preparation to insert the hook into the very same stitch once again. (4 loops on hook) Insert the hook into the same stitch, yarn over and pull through a loop. You should have 5 loops on your hook. Yarn over again in preparation to insert the hook into the very same stitch once again. (6 loops on hook) Insert the hook into the same stitch, yarn over and pull through a loop. You should have 7 loops on your hook. Yarn over again and draw the yarn through all the loops on the hook. This completes the puff stitch. You can work an extra chain to secure the stitch. (Picture tutorial available at http://www.stitchdiva.com/tutorials/crochet/puff-stitch
PATTERN:
Make a chain to the width or length of blanket size of choice. Make sure you end on an even number. Add 1 more chain to count as “ch1". Start with a “Main” Section
Main Sections
Section 1-HDC Crossover Stitch Section 1) ch 1,sc in each stitch across, turn 2) ch1, skip 1st stitch, sc in next st, hdc in the skipped stitch (you will need to cross over in front of sc and work into the sk 1), \*sk 1, sc in next st, hdc in \*, repeat from \* to \* until end of row, turn 3) ch1, sc across, turn 4) ch1, skip 1s stitch, sc in next st, hdc in the skipped stitch, repeat Hdc CO stitch until end of row, turn 5) ch1, sc across, turn very other row HAS to be a SC row (sc rows will alwavs be on “wrong" side in this section) Section 2-Herringbone Hdc Stitch Section 1) ch1, hhdc in first stitch, hhdc in each stitch across, turn 2) ch1, hhdc in each stitch across, turn :\*Make sure the last row is done on the “wrong"” side
Divider Sections
Section A- Griddle Section 1) ch3, sc in next stitch, trc next stitch,\*sc, trc\*, repeat from \* to \* until end of round. Turn 2) ch1, sc across, turn 3) ch3, sc in next stitch, trc next stitch,\*sc, trc\*, repeat Griddle Stitch until end of round. Turn \*This section will always begin & end on a Griddle row, not sc row
Section B- Puff Stitch Section
1) ch1, sc in each stitch across, turn 2) ch1, sc in first stitch, PS in next, \*sc, PS\*, repeat from \* to \* until end of round. Turn 3) ch1, sc in each stitch across, turn 4) ch1, sc in first stitch, PS in next, \*sc, PS\*, repeat from \* to \* until end of round. Turn \*Always begin on a sc row. \*\*SC rows will be done on "right side"' of work. The PS automatically "puffs" on the other side of work so you will do them on the “"wrong side so the “puff' will show up on the front. At this point you can repeat the different Sections as many times as you want. Continue until you reach the length/width of your chosen blanket size.
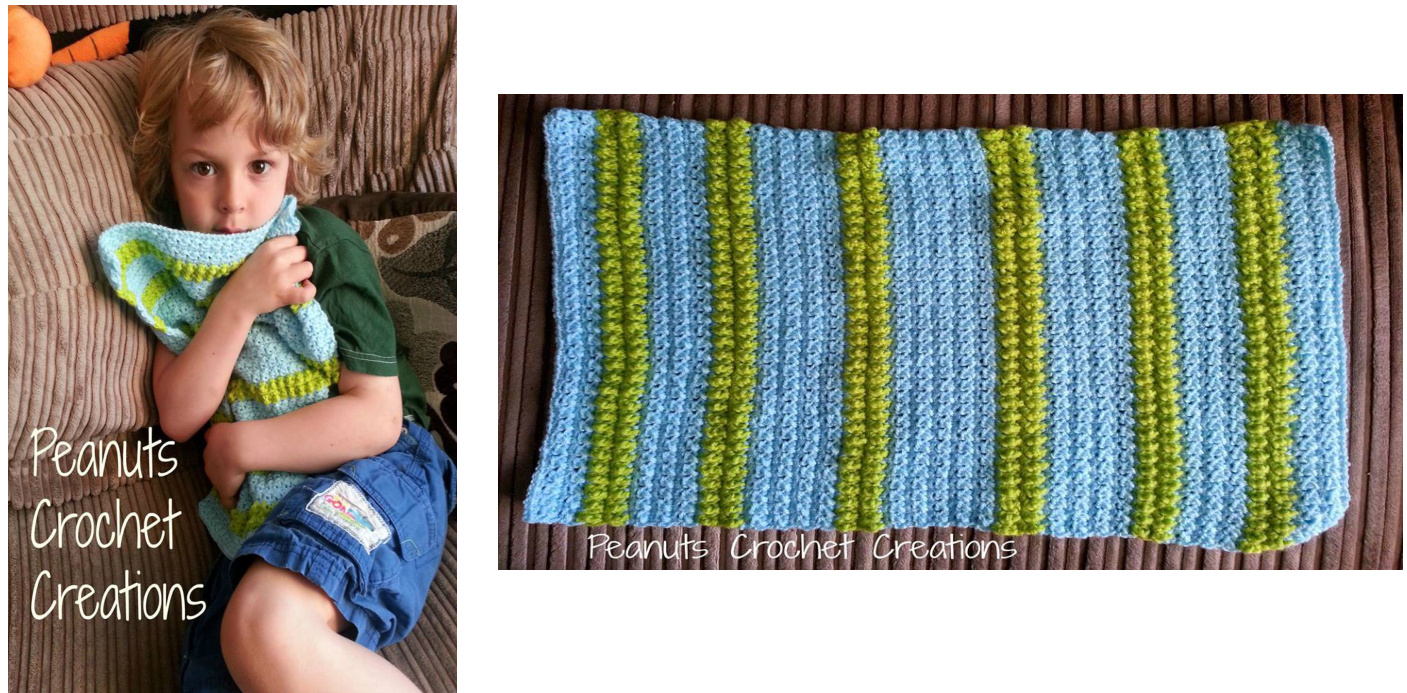
Sample 2 provided by Peanuts Crochet Creations This pattern is copyrighted to Kidz at Heart Krochet and may not be copied for resale in part or whole. Items created from this pattern MAY be sold. Please include a link to https://www.facebook.com/Kidz.At.Heart.Krochet if selling your finished item online. You must use your own images when advertising your item.


