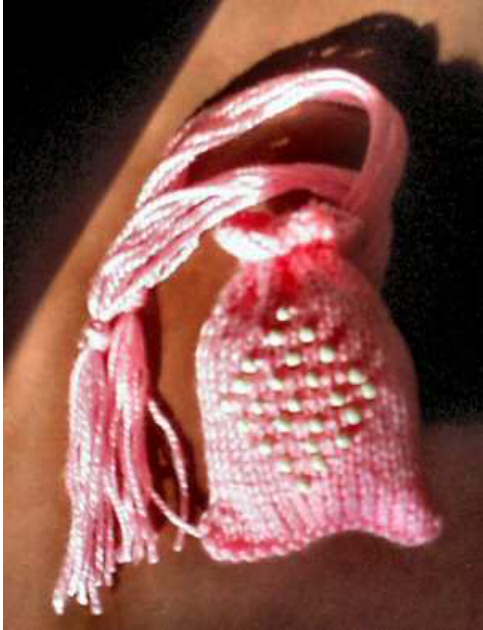
Little Beaded Bag
In a former creative life, I was a beader and I've been thinking about beaded knitting for a while now. Yesterday, things finally acquired critical mass. So, while Myria plumbed the depths of Morrowind, I worked out this little gem. It's easy as falling off a log and only takes a couple of hours to do. And I think it's really cute!
Little Beaded Bag
Materials
Fingering weight yarn One pair US 4 needles 50 size 6 (or “E") beads (Michael's or Wal-Mart for the cheapies, your favorite bead shop for better quality)
Measurements
Finished bag measures about $4.25^{\circ}\mathrm{~x~}2.5^{\circ}$ The first thing you have to do is string the beads on your yarn. What I did, because I used synthetic yarn, is hold a length over (not in) a candle flame. When it starts to soften and melt, pull it apart gently. This creates a nice, stiff, narrow end that you can then thread the beads onto easily. When all your beads are threaded, snip the melted end off the yarn and you're god to go. You'll have to keep sliding the beads back as you work so they don't interfere when you're not actually placing them. Ready? Note: $\mathrm{SB}=\mathrm{Slip}$ bead. Yarn forward (as if to purl) and slip the next stitch purlwise. Move a bead up to the surface of your work. You want this to be snug. Then bring the yarn back between the needles, leaving the bead on the surface of the fabric covering the slipped Sstitch. Cast on 19 stitches. Do 4 rows of stockinette, ending ready for a right side row. Next row: K1, [K2tog, YO] 8 times, end K2 Next row: Purl Do 6 rows of stockinette, ending ready for a right side row.
Bead Diamond
1. K9, SB, K9 2. Purl 3. K8, SB, K1, SB, K8 4. Purl 5. K7, [SB, K1] 2 times, SB, K7 6. Purl 7. K6, [SB, K1] 3 times, SB, K6 8. Purl 9. K5, [SB, K1] 4 times, SB, K5 10. Purl 11. K6, [SB, K1] 3 times, SB, K6 12. Purl 13. K7, [SB, K1] 2 times, SB, K7 14. Purl 15. K8, SB, K1, SB, K8 16. Purl 17. K9, SB, K9 18. Purl Work 4 rows of stockinette, ending ready to do a right-side row. One side of the bag is completed. \*Purl the next two rows. Now, just reverse through the directions for the second side of the bag. Bind off sew up the sides and tuck in the ends. \*This is a matter of taste. The purled rows make a nice little “fold" line on the inside of the bag but you can just as easily substitute a couple of rows of stockinette if you prefer.
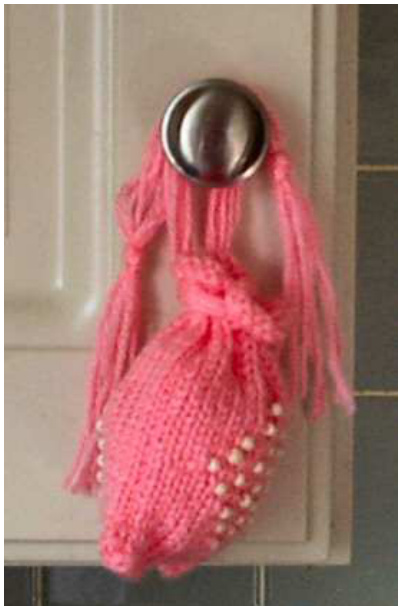
I just used yarn for the ties because it was all I had at hand and because I was too tired to do anything else at that point :) But you could do an I-cord thing, or crochet a tie. Ribbon would be pretty too. Now, fillit with anything you like. Place a few candies (or one big one) in it and give it to a friend. Put in your personal good-luck charm and tuck it in your purse or pocket. Use it to hold your subway tokens. You can vary this any way you like Iused synthetic yarn and cheap beads because it's what I had handy but nice yarn and good beads could create a really spectacular little piece. Post pictures - I'd love to see what all your fertile imaginations can come up with!


