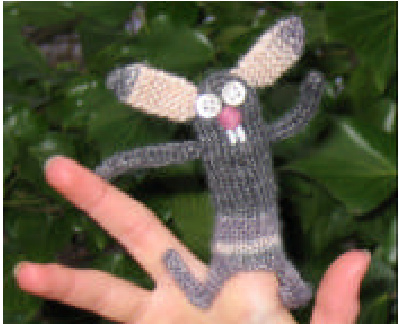
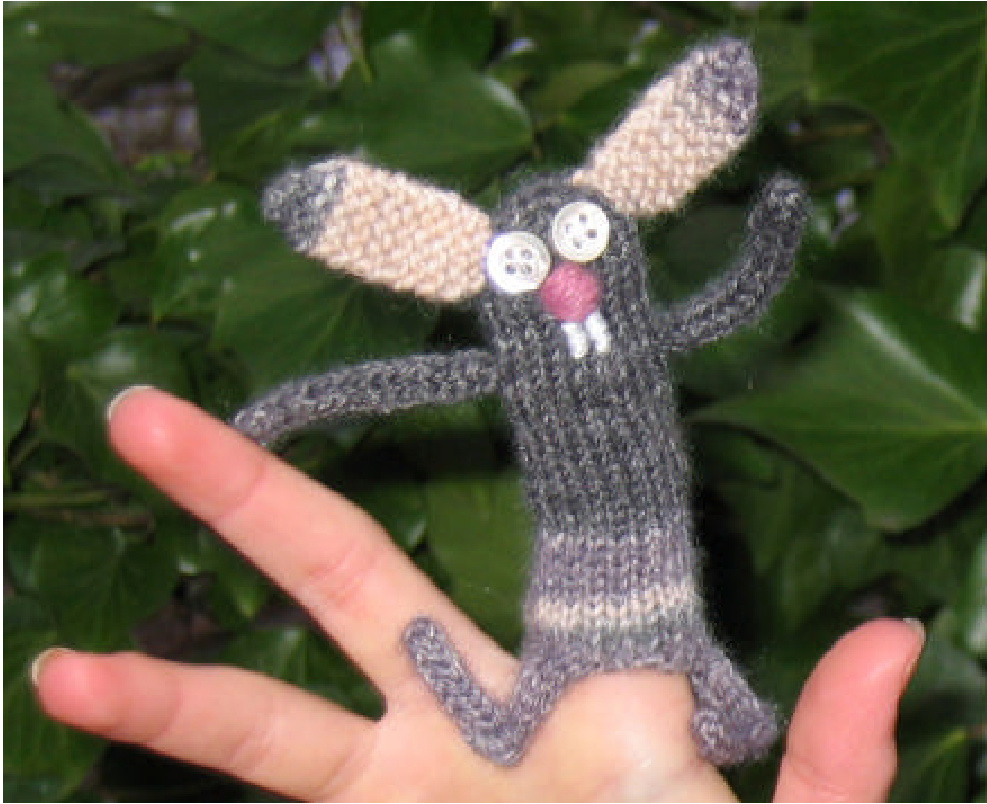
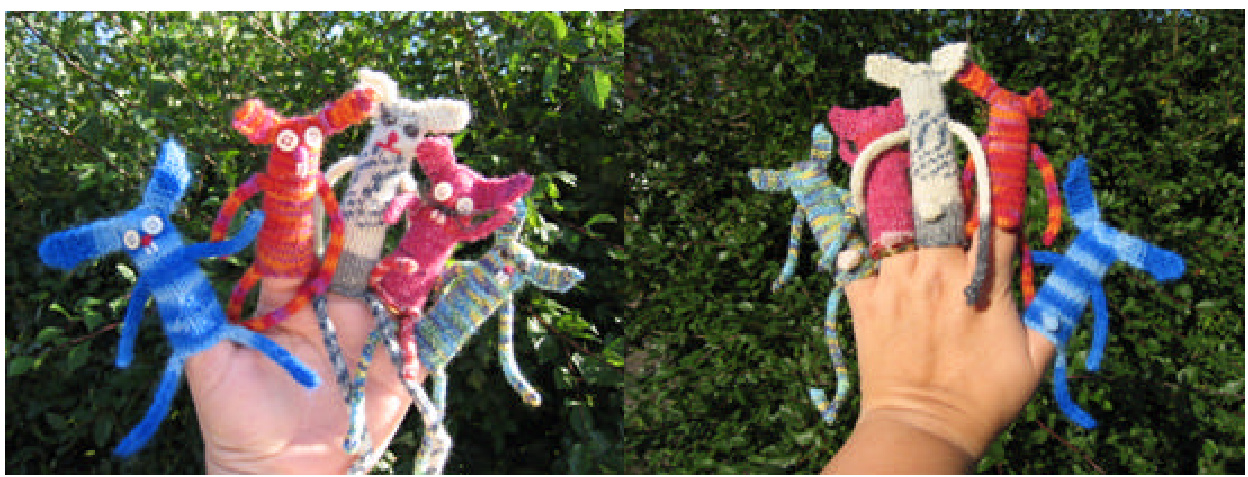
Skinny Rabbits
Pattern by Isobel Parr aka izzyknits Skinny rabbits are finger puppets, knitted in the round on double point needles using scraps of sock yarn. Their arms and legs are i-cord, tails are knitted bobbles and their faces can be embroidered however you wish. Each skinny rabbit will be unique. I like them best knitted up in self-striping sock yarn, with huge ears, a big nose, long legs and buttons for eyes. An embroidered face without buttons may be more suitable for younger children. Skinny rabbit was born out of the need of my youngest daughter to have “"a bit of mummys' knitted gorgeousness" with her for times of need. The original skinny rabbit or Reginald as he became known helped her through many maths lessons in year 3. Skinny rabbits can be hidden in pockets and slipped surreptitiously onto small fingers for a bit of comfort or shared with friends at play time.
Sizes
The size given should fit most children and small/medium sized adult fingers. The pattern can be very easily re-sized by casting on more or less stitches to alter the width of the rabbit, and knitted as tall or short as you like. Tension Tension is not critical to this project.
Materials
Small amount of sock yarn - 5g approx 2.5mm double point needles (DPNS) set of 4 Small buttons or beads for eyes (optional) Pom-pom for tail (if not making a bobble tail) Embroidery thread or wool oddments to embroider face Large sewing needle Abbreviations Sts $=$ stitches K2tog $=$ knit 2 stitches together Techniques Knitting in the round i-cord Bobble (optional)
Pattern
Body
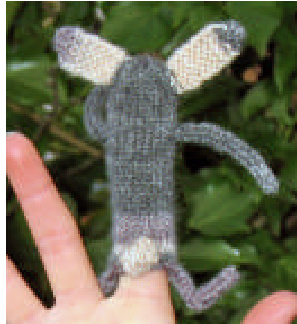
\*Cast on 18 sts and divide over 3 DPNS, 6 sts on each needle \*Join the yarn and being careful not to twist the sts begin to knit in the round \*The positioning of the bobble tail is often dependant on the colour sequence of sock yarn - if you want to use a white or particular colour for the tail you need to knit until that colour comes into play on the needles $\star_{\mathsf{A}}$ good position is about round 5 \*Continue knitting in rounds until the body measures 5-8cm (depending on finger length) $\star_{\mathsf{O n}}$ the next round K2tog - 3sts remain on each needle \*Using the large sewing needle draw the yarn through the remaining 9 sts to close the tubular body, fasten off Arms \*Make two 4 stitch i-cords 4-8cm long (limb length is a personal choice)
\*Pick up and knit 4 sts from the cast on edge with the right side facing you \*Knit these sts as an i-cord 4-8cm long (limb length is a personal choice) \*Construct the $2^{\ n d}$ leg in the same way (leaving a gap of 3-5 sts in between the legs)
Ears
\*Using a DPN pick up and knit into 6 sts on side of Skinny Rabbits head (pick up the vertical bars between sts), repeat on the other side for the $2^{\mathsf{n d}}$ ear \*Knit at least 8 rows of garter stitch (ear length is also personal choice) $\star_{\mathsf{A t}}$ the beginning of the next and following rows K2tog then knit to end of row, fasten off when you get to the last stitch
Finishing
\*Weave in loose ends \*Attach arms (and bobble tail - if needed) to body \*Embroider face, sew on eyes and tail (if required) \*Feet can be made by bending the last 1cm of each leg to a 90 degree angle and sewing into position
Instructions for i-cord and bobble construction
4 stitch i-cord
\*Cast on 4 sts \* Instead of turning work to knit the stitches, slide sts to other end of DPN, pass the yarn across the back of the sts and knit the 4 sts, the first stitch you knit is at the opposite end of the sts from the working yarn \*Again slide the stitches to the other end of the needle and knit, tug the yarn across the back of the stitches at the beginning of each row to ensure an even tension in the cord as it forms, continue sliding and knitting until the i-cord is the correct length
Knitted in bobble
\* Increase the number of stitches by knitting into the front and back of the stitch until instead of one stitch you have five in its place \*Work the five sts in stocking stitch for5 rows, ending with the wrong side facing \*Slip the sts used to make the bobble over the top of the first (back to 18 sts in this case) and continue knitting in the round \*The bobble willook and feel more secure when the next round is completed
Separate bobble
\*Cast on 5 sts \*Work 6 rows in stocking stitch, end with wrong side facing \*Slip all of the stitches over the first stitch and cut the end of the yarn leaving a 20cm tail \*Thread the end of the yarn onto the large sewing needle and sew a running stitch through the edge stitches of the bobble, pull the yarn tight to form the round bobble and fasten off