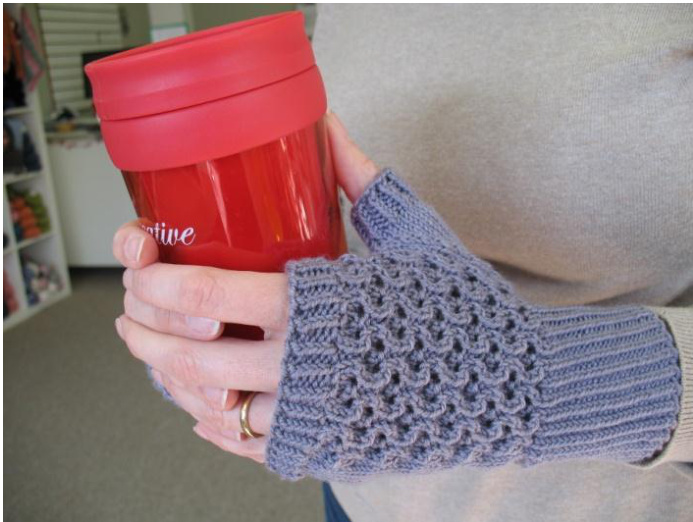
Beverly Mittso
By Jean Riedlinger
MATERIALS:
Yarn: One skein Frog Tree Pediboo, or any fingering weight yarn, especially sock yarn. You will need approximately 120 yards. Needles: No. 2 (2.75mm), 32" or 40" for Magic Loop Gauge: 7.5 sts per inch Size: 7" circumference; this is a stretchy pattern that will fit most women's hands. A smaller or larger needle can be used to adjust fit.
ABBREVIATIONS:
Beg = beginning CO = cast on K = knit K2tog = Knit two stitches together (right-slanting decrease) Kfb = Knit into the front and back of the stitch (1 stitch increased) M1 = make one stitch (pick up the strand between stitch just worked and next stitch from front to back, knit into the back of the stitch) P = purl Pm = place marker (optional) Rnd = round Ssk = slip, slip, knit (left-slanting decrease: slip next 2 stitches knitwise, knit stitches together through the back loops) St st = stockinette stitch Sts = stitches
RIGHT GLOVE:
CO 54 stitches, divide with 27 stitches on each side of the circular needle, and join for working in the round on a MagicLoop. Note: “"Needle 1’" holds the first half of the stitches and will be the back of the hand; “needle 2" holds the second half of the stitches and will be the palm side of the hand.) Work in twisted ribbing (\*k1tbl, p1, repeat from \* to end) for 2.5". You can also work in 1x1 rib if desired (k1, P1) Next round: Work first row of chart pattern (see last page for chart) across all stitches on needle 1. On needle 2, m1, knit to end of row (55 total sts). Next round: Work next row of chart pattern across all stitches on needle 1. Knit all stitches on needle 2. Repeat this row once more, or until glove reaches the base of your thumb (with ribbing ending at top of wrist).
Shape thumb gusset:
Row 1 (increase rnd): Work next row of chart across stitches on needle 1. On needle 2, m1, k1, ml, pm, k to en of rnd (3 sts before marker on needle 2). Row 2 & 3: Work next row of chart across stitches on needle 1, k all sts on needle 2. Row 4 (increase rnd): Work next row of chart across stitches on needle 1. On needle 2, m1, k to next marker, m1, slip marker, k to end of rnd (5 stitches before marker on needle 2). Repeat last 3 rows (work two rnds even, then work an increase rnd) 7 times more (19 sts before the marker on needle 2). Next round: Work next row of chart across sts on needle 1. Put next 19 thumb stitches on a piece of scrap yarn or a stitch holder, CO 1 stitch using backward loop method to cover gap; k to end of rnd (55 sts total). Next round: Work next row of chart pattern across sts on needle 1 to last stitch, slip last stitch onto needle 2, k to end of rnd. Next round: Work next row of chart pattern across sts on needle 1. On needle 2, k2tog, k to end of rnd. Continue working in pattern - work chart pattern across stitches on needle 1, k all sts on needle 2 - until glove measures 4", or desired length (about /2 before your knuckles). Work in twisted rib for /2". BO all stitches.
Thumb:
Put 19 thumb stitches on needle and divide sts as evenly as possible over both needles. Pick up and knit 2 stitches over gap between thumb and hand; join for working in the round (21 stitches). Next round: Knit all sts. Next round: Knit to last 2 sts, k2tog (20 sts). Work 1/2" in twisted rib. BO all sts.
LEFT GLOVE:
The left glove is essentially the same as the right glove, except that the thumb and thumb gusset will be worked on the end of needle 2 rather than at the beginning. Cast on and work twisted ribbing as for right glove.
After you finish the ribbing:
Next round: Work chart pattern across all stitches on needle 1. On needle 2, knit all stitches, m1 (55 total sts). Next round: Work next row of chart pattern across all stitches on needle 1. Knit all stitches on needle 2. Repeat this row once more, or until glove reaches the base of your thumb (with ribbing ending at top of wrist).
Shape thumb gusset:
Row 1(increase rnd): Work next row of chart across stitches on needle 1. On needle 2, k to last stitch, pm, m1 k1, m1 (3 sts after marker). Row 2 & 3: Work next row of chart across stitches on needle 1. Knit all sts on needle 2. Row 4 (increase rnd): Work next row of chart pattern on needle 1. On needle 2, knit to marker, slip marker, m1, k to end, m1 (5 sts after marker). Repeat last 3 rows (work two rnds even, then work an increase rnd) 7 times more (19 sts after the marker on needle 2). Next round: Work next row of chart across sts on needle 1. On needle 2, work to marker and put 19 thumb stitches on a piece of scrap yarn or a stitch holder, CO 1 stitch using backward loop method to cover gap. Next round: Work next row of chart across sts on needle 1 . Knit all sts on needle 2. Next round: Work next row of chart across sts on needle 1 to last two stitches. On needle 2, kto last 2 sts, k2tog. Work the rest of the hand and thumb as for right glove.
FINISHING:
Weave in ends. Use yarn ends to close up any holes at base of thumb. Blocking is optional.
CHART
| 8 | |||||||||||||||
| 0 | 0 | · | 0 | 0 | 7 | ||||||||||
| . | 6 | ||||||||||||||
| 5 | |||||||||||||||
| 4 | |||||||||||||||
| 0 | . | 0 | 0 | ·/ | 0 | 3 | |||||||||
| 2 | |||||||||||||||
| . | 1 |
Work first two stitches, repeat section inside dark lines 3 times, work last 7 stitches Key to chart symbols: Blank = knit ·= purl \=ssk / = k2tog 0= yo ? 2012 by Jean Riedlinger. Photos @ 2012 by Ted Nigrelli. Pattern is for personal use only. Please do not reproduce or sell this pattern.


