Mrs U Makes... Apphia Blanket
Mrs U Makes
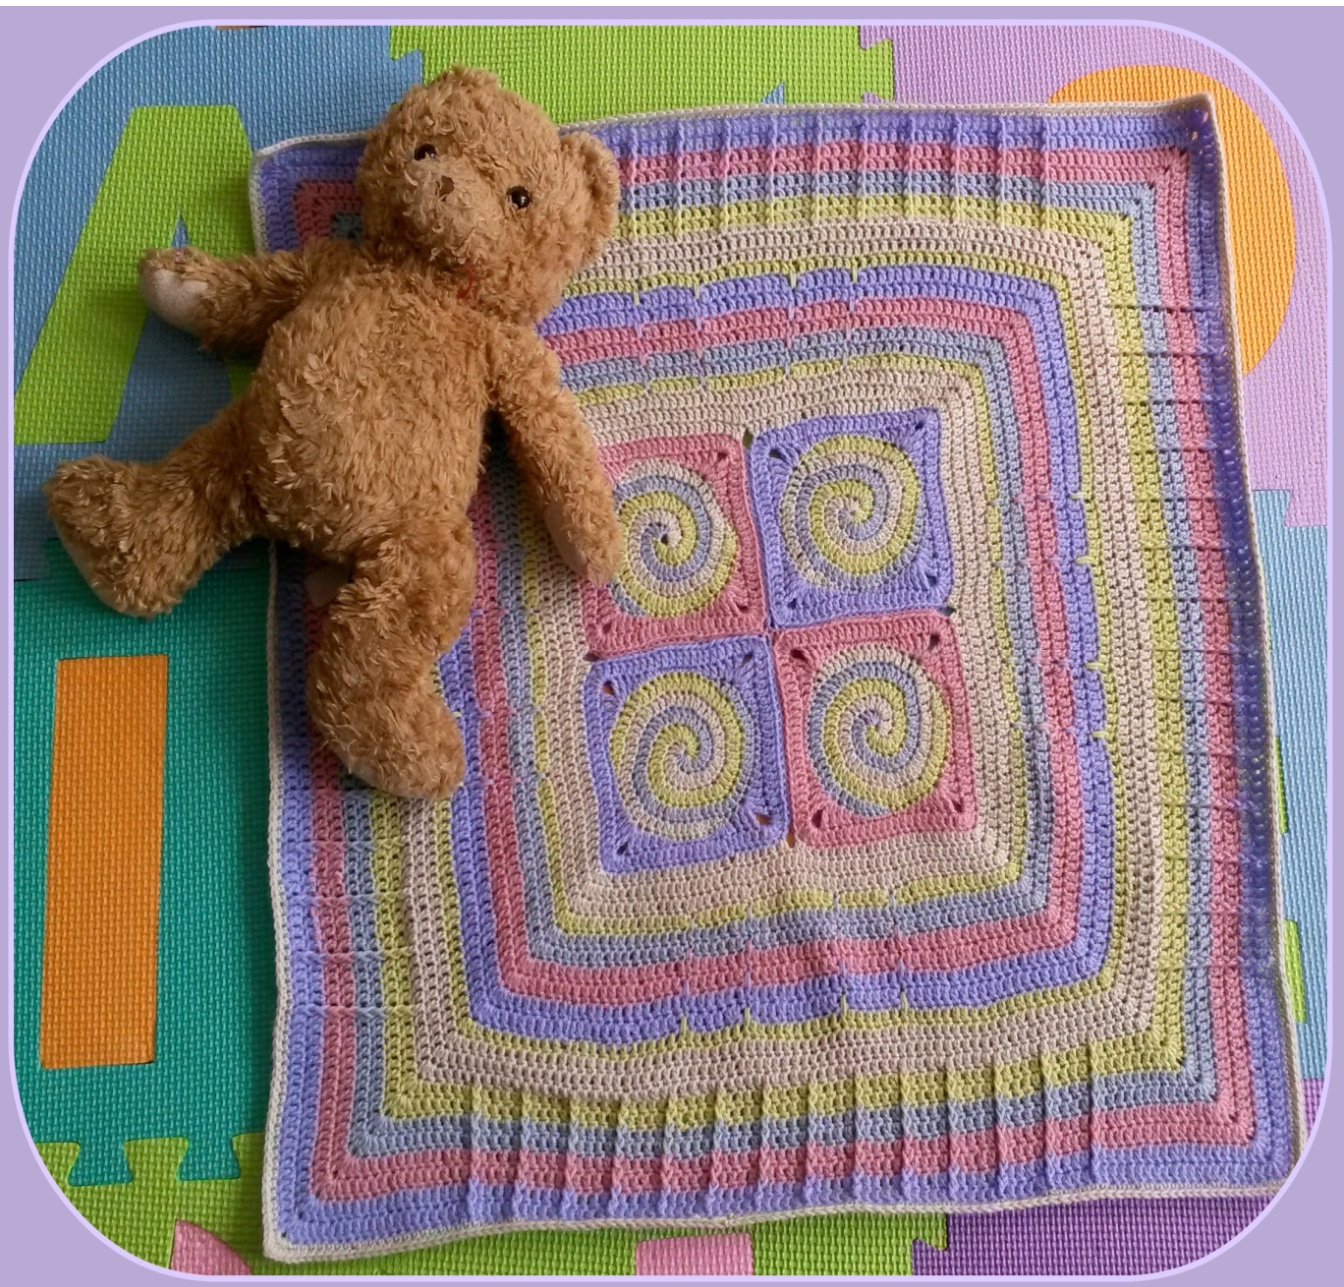
Apphia Apphia is dedicated to my fourth child who is also my first and (most likely) only daughter. The front post double crochet and long double crochet stitches add texture to the blanket, whilst the spirals add a fun factor making it look more complicated than it actually is. This pattern is a great way to use up stash yarn as you won't need much, I've recommended a 100g ball but even that is a greatly over estimated. Have fun with the spirals, adding colour combinations which will complement the litle person who will hopefully enjoy this blanket for many years to come. Finished size Approx. 23"/59cm x 23"/59cm Yarn One 100g ball of any DK yarn will be more than enough. Shade A: Cream, B: Blue, C: Green, D: Pink, E: Purple Hook & Gauge Size required to obtain gauge, though gauge is not important. 4"/10cm = 22st x 12rows Abbreviations St/s: stitch/stitches Sl st: slip stitch Ch: chain Ch sp: chain space Sc: single crochet Hdc: half double crochet Dc: double crochet Tc: treble crochet Ldc: long double crochet Sk: skip Fpdc: front post double crochet
Pattern Instructions
The chains at the beginning of each round do not count as a st. This blanket can grow along with the bundle of joy it is being made for. Repeat the instructions from round 15 onwards in order to increase the size or you could even add your own stitches to the mix to give it a personal touch.
The Pattern
For the Spirals (make 4)
With shade A, make a magic loop and ch1 Round 1: 1sc, 1hdc, 2dc. Attach shade B, ch1, 1sc, 1hdc, 2dc. Attach shade C, 1sc, 1hdc, 2dc (3 x 4sts) Round 2: With shade A, 2dc in each of the next 4sts of shade B. With shade B, 2dc in each of the next 4sts of shade C. With shade C, 2dc in each of the next 4sts of shade A. (3 x 8sts) Round 3: With shade A, work \*1dc in the next st, 2dc in the next st\*. Repeat from \*to\* 3 more times. Repeat \*to\* 4 times with shade B and C. (3 x 12sts) Round 4: With shade A, \*1dc in the next 2sts, 2dc in the next st\*. Repeat from \*to\* 3 more times. Repeat from \*to\* 4 times with shades B and C. (3 x 16sts) Round 5: With shade A, \*1dc in the next 3sts, 2dc in the next st\*. Repeat from \*to\* 3 more times. Repeat from \*to\* 4 times with shades B and C. (3 x 20sts) End spiral: With shade A, 1dc, 1hdc, 1sc, 1 sl st. Repeat with shades B and C. (3 x 23sts)
Make into squares
Round 1: With shade D, attach yarn to a sl st on one of the spirals, ch2 (does not count as dc), \*1dc in this and the next st, 2tc in the next st, ch3, 2tc in the same st, 1dc in the next 2sts, 1hdc in the next 2st, 1sc in the next 6sts, 1hdc in the next 2sts.\* Repeat from \*to\* 3 more times, join to first dc with sl st. Round 2: ch2 (does not count as dc). 1dc in each st, 5dc in each ch sp, join to first dc with sl st.
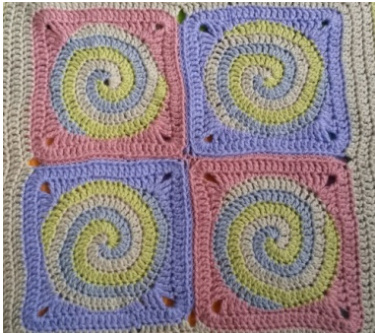
Repeat rounds 1 & 2 with shade D on the second spiral and with shade E on the last two spirals. Seam the four squares together to make one large square.
Outer Blanket
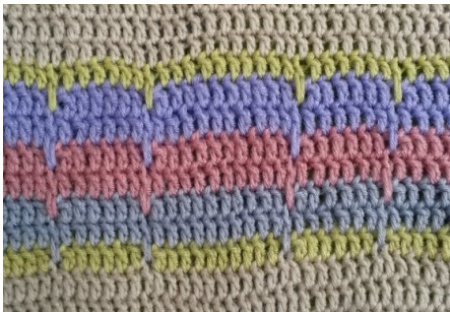
Round 1: Attach shade A to the 4" dc worked in one of the corners, ch1 (does not count as dc), \*1dc in each st across, 2dc in the 3rd dc of the top left corner of the small square, 2dc in 3rd dc worked in the top right corner of the next square, 1dc in each st, 2dc, ch1, 2dc in the 3rd dc worked in the ch sp of the previous row\*. Repeat from \*to\* all the way round, join to first dc with sl st. Round 2 & 3: ch2 (does not count as dc), 1dc in each st, 2dc, ch1, 2dc in the ch sp. Join to first dc with a sl st. Round 4: Attach shade c to the second st of the 3dc corner sts of the previous row, ch2, 3dc in the same st, \*^1dc in the next 14sts, ch1, sk1, 1dc in the next 6sts, ch1, sk1, 1dc in the next 10sts, ch1, sk1, 1dc in the next 6sts, ch1, sk1, 1dc in the next 14sts^, 3dc in the next st.\* Repeat from \*to\* twice more. Repeat from ^to^, join with a sl st. Round 5: Attach shade b, ch2, work as follows: 1dc in each dc, 1 ldc in the st below the ch1 of the previous row, 3dc in the second dc of the 3dc corner sts of the previous row all the way around. Join with sl st ch2 and work as follows: 1dc in the same st and each dc st, chl and sk the ldc 3dc in the second st of the 3dc corner sts. Join with a sl st. Round 7: Attach shade D and repeat round 5 Round 8: Repeat round 6 Round 9: Attach shade E and repeat round 5 Round 10: Repeat round 6
Mrs U Makes
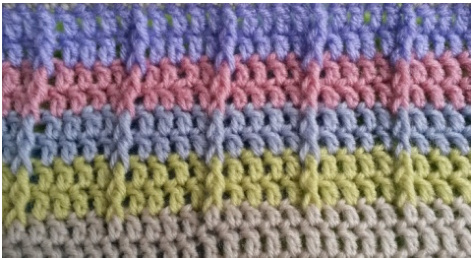
Round 11: Attach shade C and repeat round 5. Round 12: Attach shade A, ch2, 1dc in the same and each st across, 1dc in the 2"d st of the 3dc corner sts. Join with a sl st. Round 13 & 14: Repeat round 12. Round 15: Attach shade C to the 2"d st of the 3dc corner sts. Ch2, \*2dc ch3 2dc in the same st, \*^1dc in the next 5sts, (1 fpdc in the next st, 1dc in the next 4sts) 13 times, 1dc in the next 5sts^, 2dc ch3 2dc, in the next st,\* Repeat from \*to\* twice more. Repeat from ^to^, join with sl st. Round 16: ch2, 2dc ch3 2dc in the same st. \*1dc in each dc, 1 fpdc in each fpdc, 2dc ch3 2dc in each ch sp around. Join with sl st. Round 17 & 18: Attach shade B, ch2. work from \*to\* as in round 16. Round 19 & 20: Attach shade D and repeat rounds 17 & 18. Round 21 & 22: Attach shade E and repeat rounds 17 & 18.
Round 23: Attach shade A, chl, 1 sc in the same st, \*1 sc in each st, 5 sc in each ch sp around. Join to 1" sc with a sl st.\* Round 24: ch1, work from \*to\* as in round 23 Cut yarn, sew in tails and block. Show and Tell I would love to see your finished pieces, please email pictures or share them online with the hashtag #mymrsumake Further Information If you have any questions about this or any other pattern, please contact me at mrsumakes@yahoo.co.uk
Mrs U Makes...
For more information about Mrs U Makes, visit the blog at www.mrsumakes.blogspot.com or the Facebook page at www.facebook.com/mrsumakes. You can also follow Mrs U Makes on twitter (@MrsUMakes), Google+ (MrsUMakes), Craftsy and Ravelry (Yummy Triplet Mummy) and Instagram (mrsumakes). To see other items available from Mrs U Makes, head over to the online stores: MISl: http://www.misi.co.uk/handmade/mrsumakes.html Etsy: http://www.etsy.com/shop/mrsumakes


