Ingrid Nodtvedt
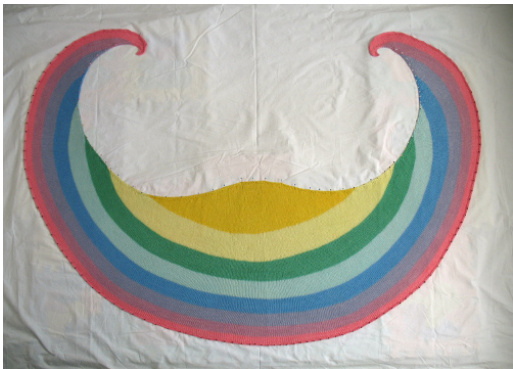
Yarn: ColourMart Merino/Silk/Cashmere 2/28NM lace wt (Diamante) held tripled (701 m/767 yd per 150 g) or any yarn with 450 to 700 m (490 to 765 yd) per 100 g. Yardage: First colour 100 m/110 yd, second colour 120 m/131 yd, last colour 190 m/208 yd and the rest of the colours 160 m/175 yd (yarn held as is, not tripled). The yardage will depend on the yarn: the heavier the yarn, the more metres/yards you'll need. Gauge: 27 sts and 32 rows per 10 cm, but gauge is not important. Needles: 3 mm/US 2.5. Sateenkaari is a crescent shaped top-down shawl with stripes. The shawl is designed for eight colours, but you can knit it using fewer colours and either stop earlier or knit wider stripes. After the cast on, there are increases on both ends of each right side row, three stitches per side. There is a two stitch garter edge on both sides. The instructions are for knitting the shawl in stockinette stitch, but you can use garter stitch equally well. Note that garter stitch will eat up many more metres/yards than stockinette stitch. If you are knitting in garter stitch, knit according to instructions of measurements in centimetres/inches instead of rows, otherwise the shawl will become very shallow.
Abbreviations
st(s) - stitch(es) k - knit p- purl WS - wrong side (of the work) RS - right side (of the work) m1 - make 1 by increasing a stitch with a backwards loop around the right needle k2tbl - knit two stitches together through the back loops
Instructions
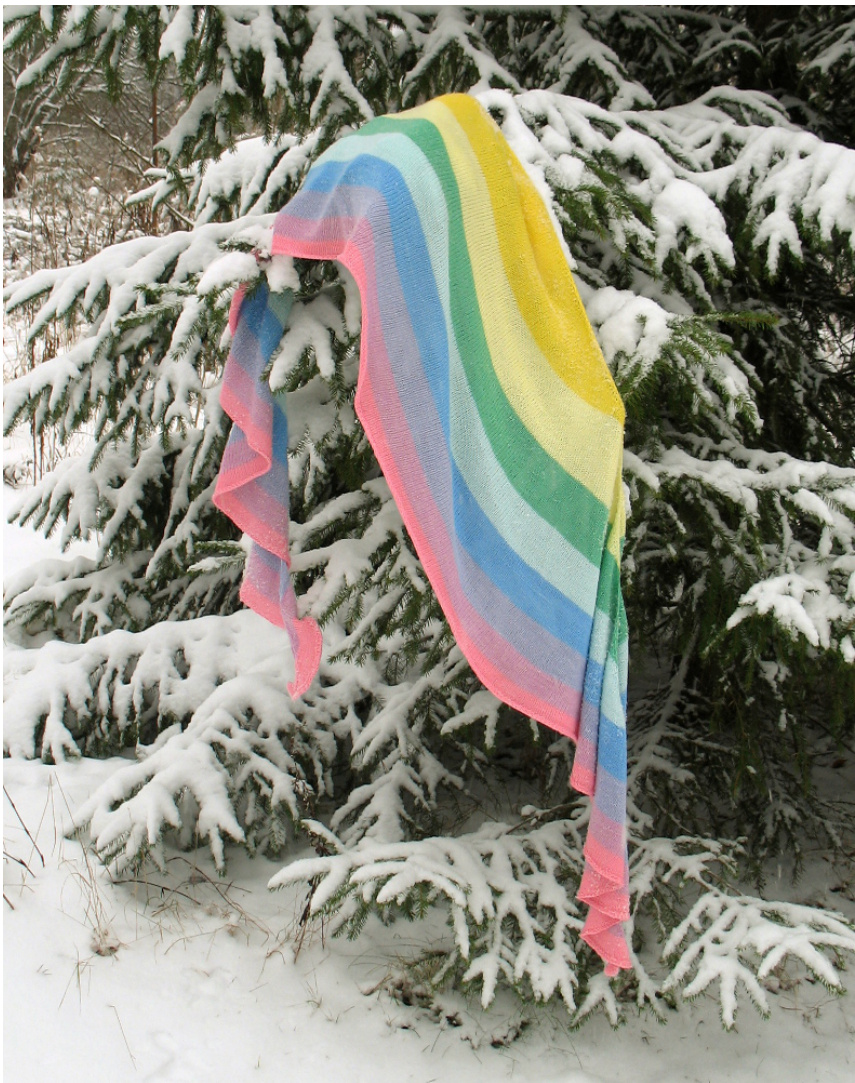
CO 2 sts. Turn. Knit 2 sts and turn again. Make a loop around the right needle, and knit the two sts that are on the left needle. (Increased one st, hence 3 sts on the needle.) [Turn. K2, turn. Make a loop around the right needle, k2.] There are now 4 sts on the needle. Repeat instructions in [], until you have 12 sts on the needle. Next row: k2, knit in the front and back of the next 10 sts, pick up and knit 2 sts from the CO edge. (24 sts on the needle) Row 1 [WS]: k2, p20, k2. Row 2 [RS] and all other RS rows: k2, m1, [k1, m1]x2, knit until 4 sts remain, [m1, k1]x2, m1, k2. Row 3 [WS] and all other WS rows: k2, purl until 2 sts remain, k2. Repeat rows 2 and 3 using the first colour (warm yellow) until the depth from the neck (center back) measures 18 cm/7 in (or 60 rows). Note: Always change colour only after a WS row, meaning the first row in new colour is a RS row. Otherwise the colour change looks a bit messy at the garter edges (and at the entire row if you knit the whole shawl in garter stitch). Change to second colour (cool, pale yellow). Continue repeating rows 2 and 3 for 9 cm/3.5 in (or 30 rows). Repeat rows 2 and 3 from now on, unless instructed otherwise. Colour 3 (green): work for 8 cm/3.1 in (or 24 rows). Colour 4 (blue-green): work for 7 cm/2.8 in (or 22 rows). Colour 5 (blue): work for 6.5 cm/2.6 in (or 20 rows). Colour 6 (blue-purple): work for 6 cm/2.4 in (or 18 rows). Colour 7 (red-purple): work for 5 cm/2 in (or 16 rows). Note: If you are knitting with yarn that only contains wool or another fiber that springs back, you may want to work the entire final colour in garter stitch to prevent the bottom edge from curling. The yarn of the model shawl contains 20 % silk, so fewer garter stitch rows are needed. Change to eighth and final colour (pink). Work for 3.5 cm/1.4 in (or 12 rows) and knit 5 rows in garter stitch, increasing near the edges as before, apart from the final RS row (you won't need any more sts at this point and it looks better without them). On next row, bind off: Russian Bind off: k2, pass the sts back to the left needle, k2tbl. [K1, pass 2 sts back to the left needle, k2tbl.] Repeat instructions in [] until 1 st remains on left needle: k1, pass the previously knitted stitch over the last one. Break yarn leaving a 15 cm/6 in tail. There will be one stitch left on your needle. Pull the loop. (The loop will get bigger and bigger.) Keep pulling until the end comes through. Pull it tight. This works as a knot. Weave in the ends. Wash the shawl, roll it in a towel to remove excess water and block it lightly. To avoid making the edges too tight, the shawl should curve as in the photo below.