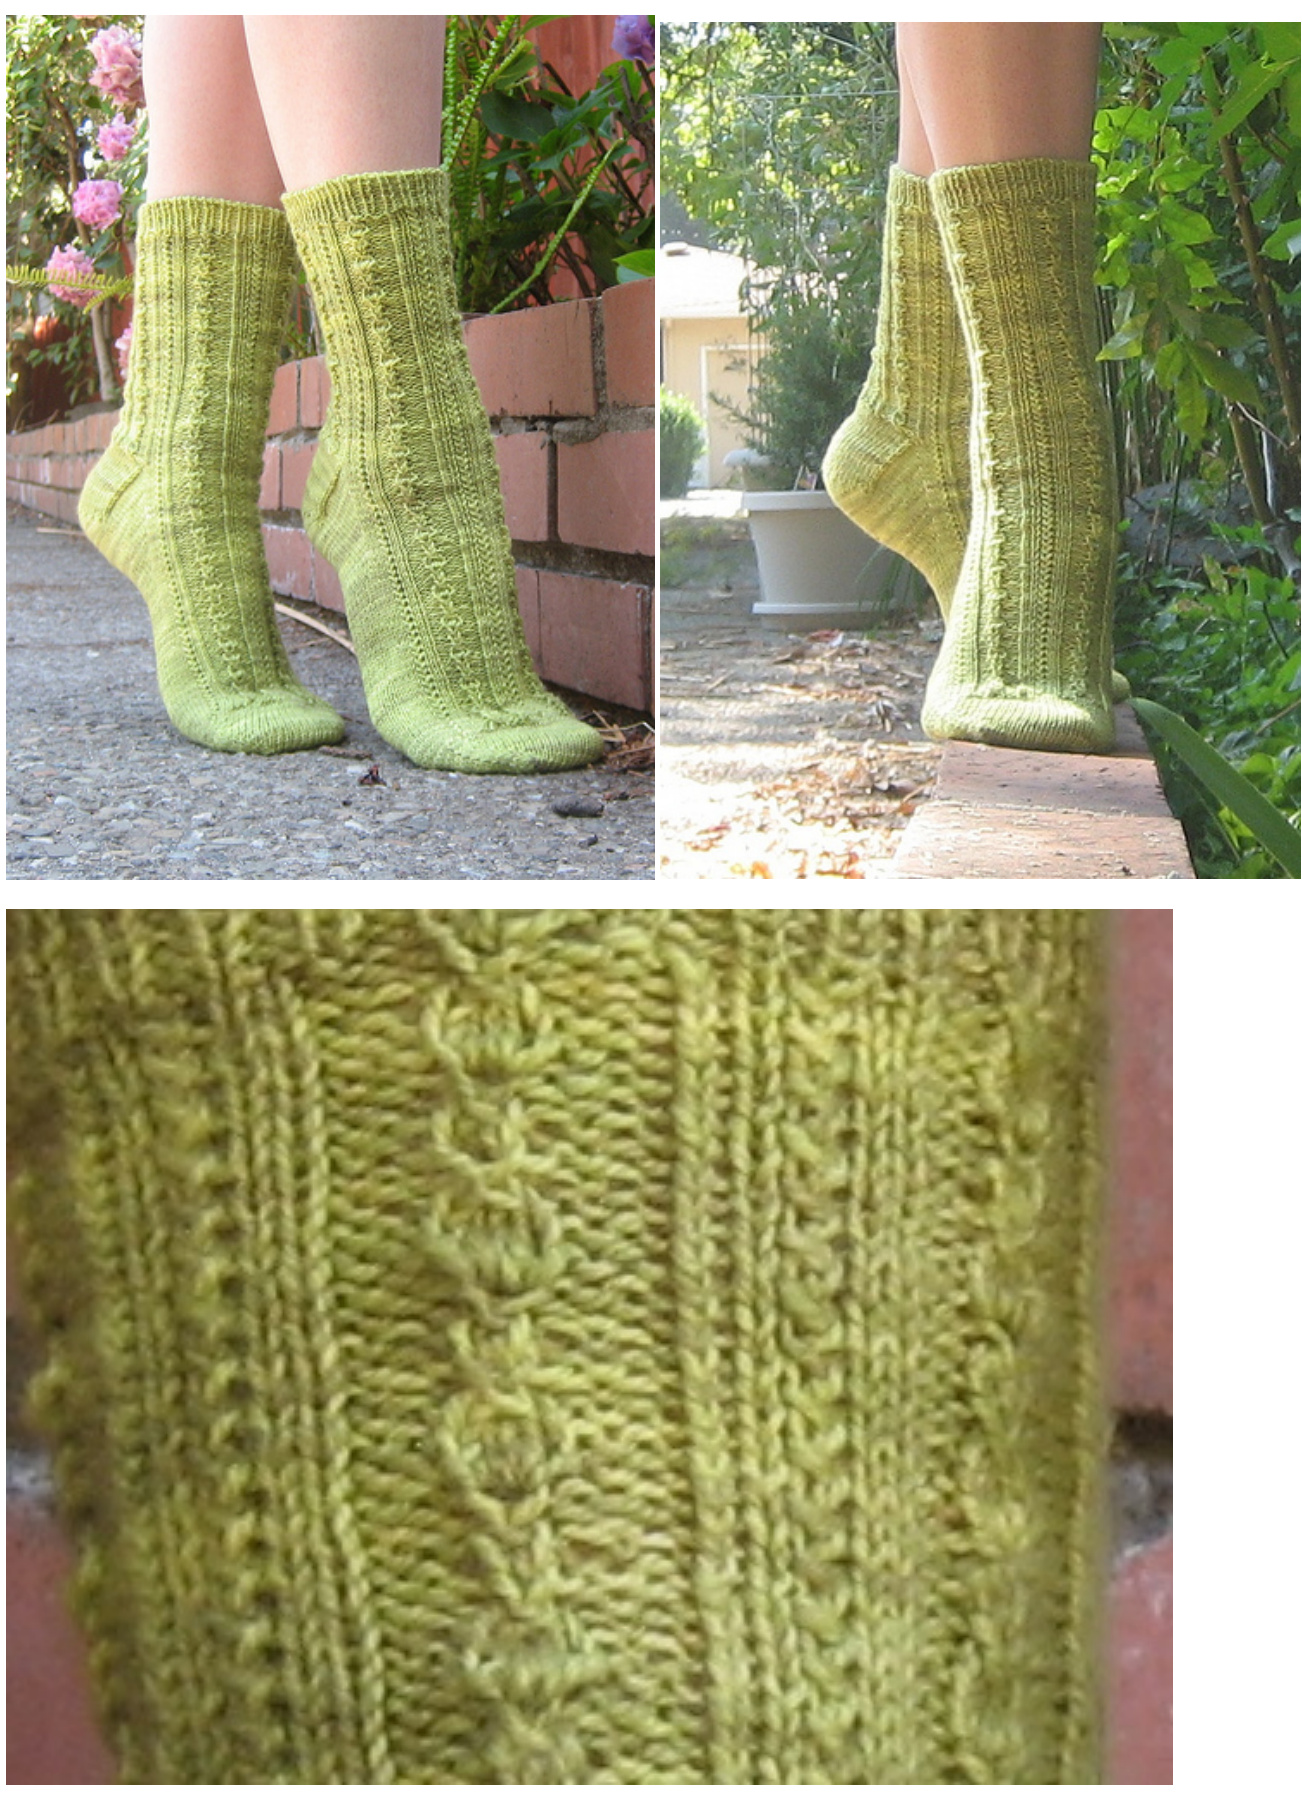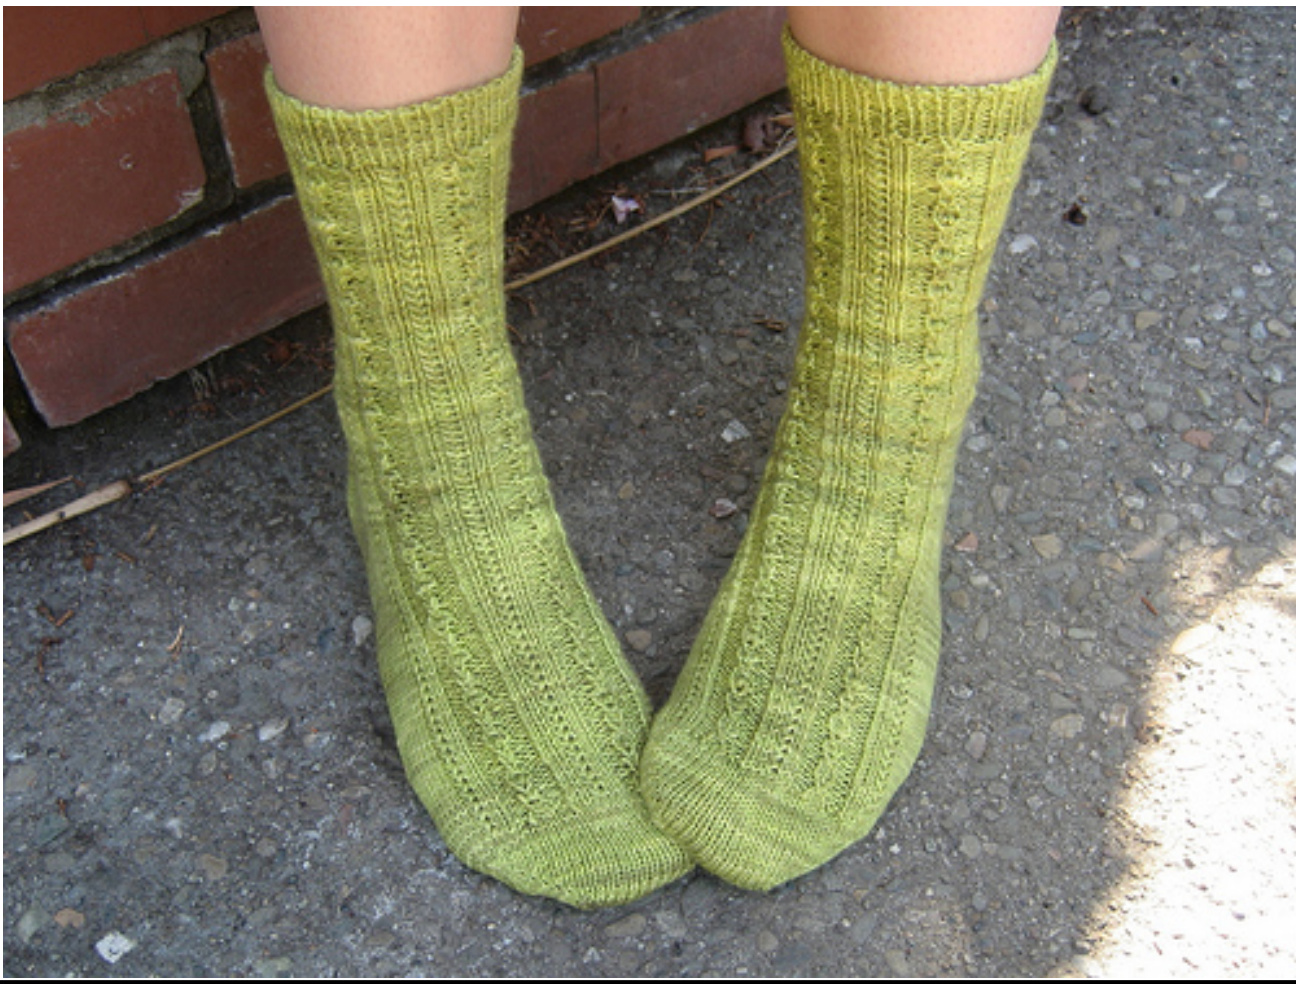
Prickly Pear Socks
These socks are worked from the toe up with two different patterns, and a gusset heel. This pattern is largely tailored for working with magic loop, assuming that you have divided the stitches evenly between the front and back halves of the socks. Gauge: 32 st, 46 rows 0ver 4" in st st Yarn: Any fingering weight sock yarn, pictured here in Sundara Sock Yarn, colorway "Prickly Pear," a bit less than 350 yards used to make a US Women's size 8. Needle: 2.5mm (US size 1.5) or as required to obtain gauge Toe: Using the Turkish cast-on (or other toe-up cast-on of your choice) cast on 24 stitches. Increase every other row as follows: Row 1: knit all Row 2: (for each half of the foot) k1, m1, knit until last 2 stitches, m1, k1 (4 stitches increased each increase row) Continue until you have 64 stitches total. Foot: For the top of the foot: Set-up row: \*k6, p2, k3, p2\* rep between \*s, end k6 Subsequent rows: Work herringbone rib, then pear pattern, alternate until all stitches are worked. Knit all stitches for the bottom of the foot The herringbone rib pattern is worked in two rows as follows: Row 1: k2, sl 1, k1, yo, pass slipped stitch over k and yo, k2 Row 2: k all The pear pattern is worked as follows: Row 1: p2, sl1, k2tog, psso, p2 Row 2: p2, k1 p1 k1 all in the same stitch, p2 Row 3-5: p2, k3, p2 Row 6-7: repeat rows 1-2 Row 8: rep row 3 inue in pattern until foot measures about 3 14" less than the desired lengt Gusset: To make the gusset increases, continue working the top of the foot in pattern. On the half of the stitches for the bottom of the foot, k1, m1, knit until last 2 stitches, m1 k1. Increase every other row a total of 12 times, or 12 increased stitches on either side (24 rows total). Heel: The heel begins with short rows. Work the stitches for the top of the foot in pattern. Work half the stitches for the bottom of the foot. Place a marker. The next section of instructions begins from this marker at the center of the heel. Row 1 (RS): knit 14, move working yarn to front of the work, slip the next stitch onto the right needle, move the yarn to the back of the work, then slip the stitch back to the left needle—so 14 stitches knit, then the next stitch wrapped. w 2 (WS): purl 28 (or 14 past the marker), wrap the next stitch, and turn Row 3 (RS): knit 26 (12 past the marker), wrap next stitch and turn Row 4 (WS): purl 24 (12 past the marker), wrap next stitch and turn Continue in this pattern, decreasing the number of stitches worked past the marker by 2 each set of 2 rows (so 10 past the marker knit side, 10 past on the purl side, etc.) until you're working 2 stitches past the marker on either side. Stop when you have purled 2, wrapped and turned. Now we build the heel flap-- With right side facing you, begin knitting the stitches from the short rows. When you get to a wrapped stitch, pick up the wrap and knit it along with the stitch. Continue until you have knit all the wrapped stitches, and there are 13 stitches left for the bottom half of the sock (the 12 gusset increases, plus 1). Skp the next two stitches, then turn. With wrong side facing, slip the first stitch, then purl across the row. Pick up the Wrapped stitches when you reach them on the other side of the heel. When you have 13 stitches left, p2tog, then turn. Slip first stitch, knit until you reach the last stitch before the gusset increases (12 stitches left), skp, and turn. Slip first stitch, purl until the last stitch before the gusset increases (12 st left), skp, and turn. Continue like this, decreasing on either side, until on a right side row, you decrease the last two stitches from the gusset. Do not turn. Instead, work the top of the foot. Once you finish the top, the next two stitches will be the ones you have not yet decreased from this side of the gusset. Knit these two together. As you knit across the back of the leg, continue the pattern from the front of the Sock. Leg: Continue working the pattern until the leg reaches the desired length. Cuff: Work 10 rows of k1 p1 ribbing. Cast off with the tubular bind-off