10 Stitch Blanket for Loom Knitters
This pattern is worked in continuous rounds. There is no sewing together needed. All joining together is done as you go.
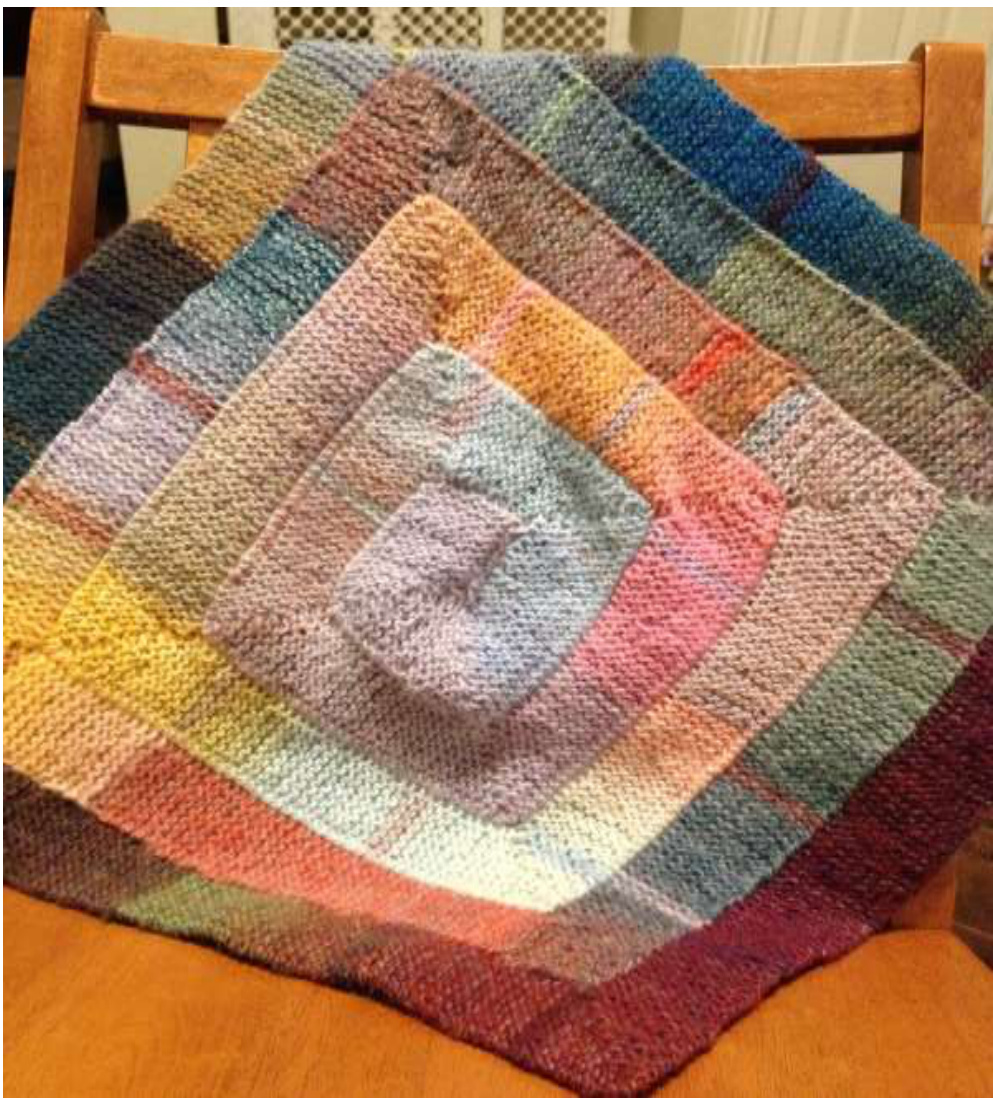
This pattern can be made on any gauge loom which is appropriate for your yarn. The pattern is written for 10 stitches at a time. This pattern can become a dishcloth, or a King Size Afghan. You can carefully plan out every color of every row, or you can let it all come together as you work it. This is your project and it can be anything you want it to be. I contacted Frankie Brown and requested permission to convert her amazing pattern to a loom knit version. She agreed! Thank you Frankie Brown! As stated on the original needle knit pattern - patterns are for personal use only and should not be used to knit items for sale. The original pattern can be foundHERE.
Pattern Notes:
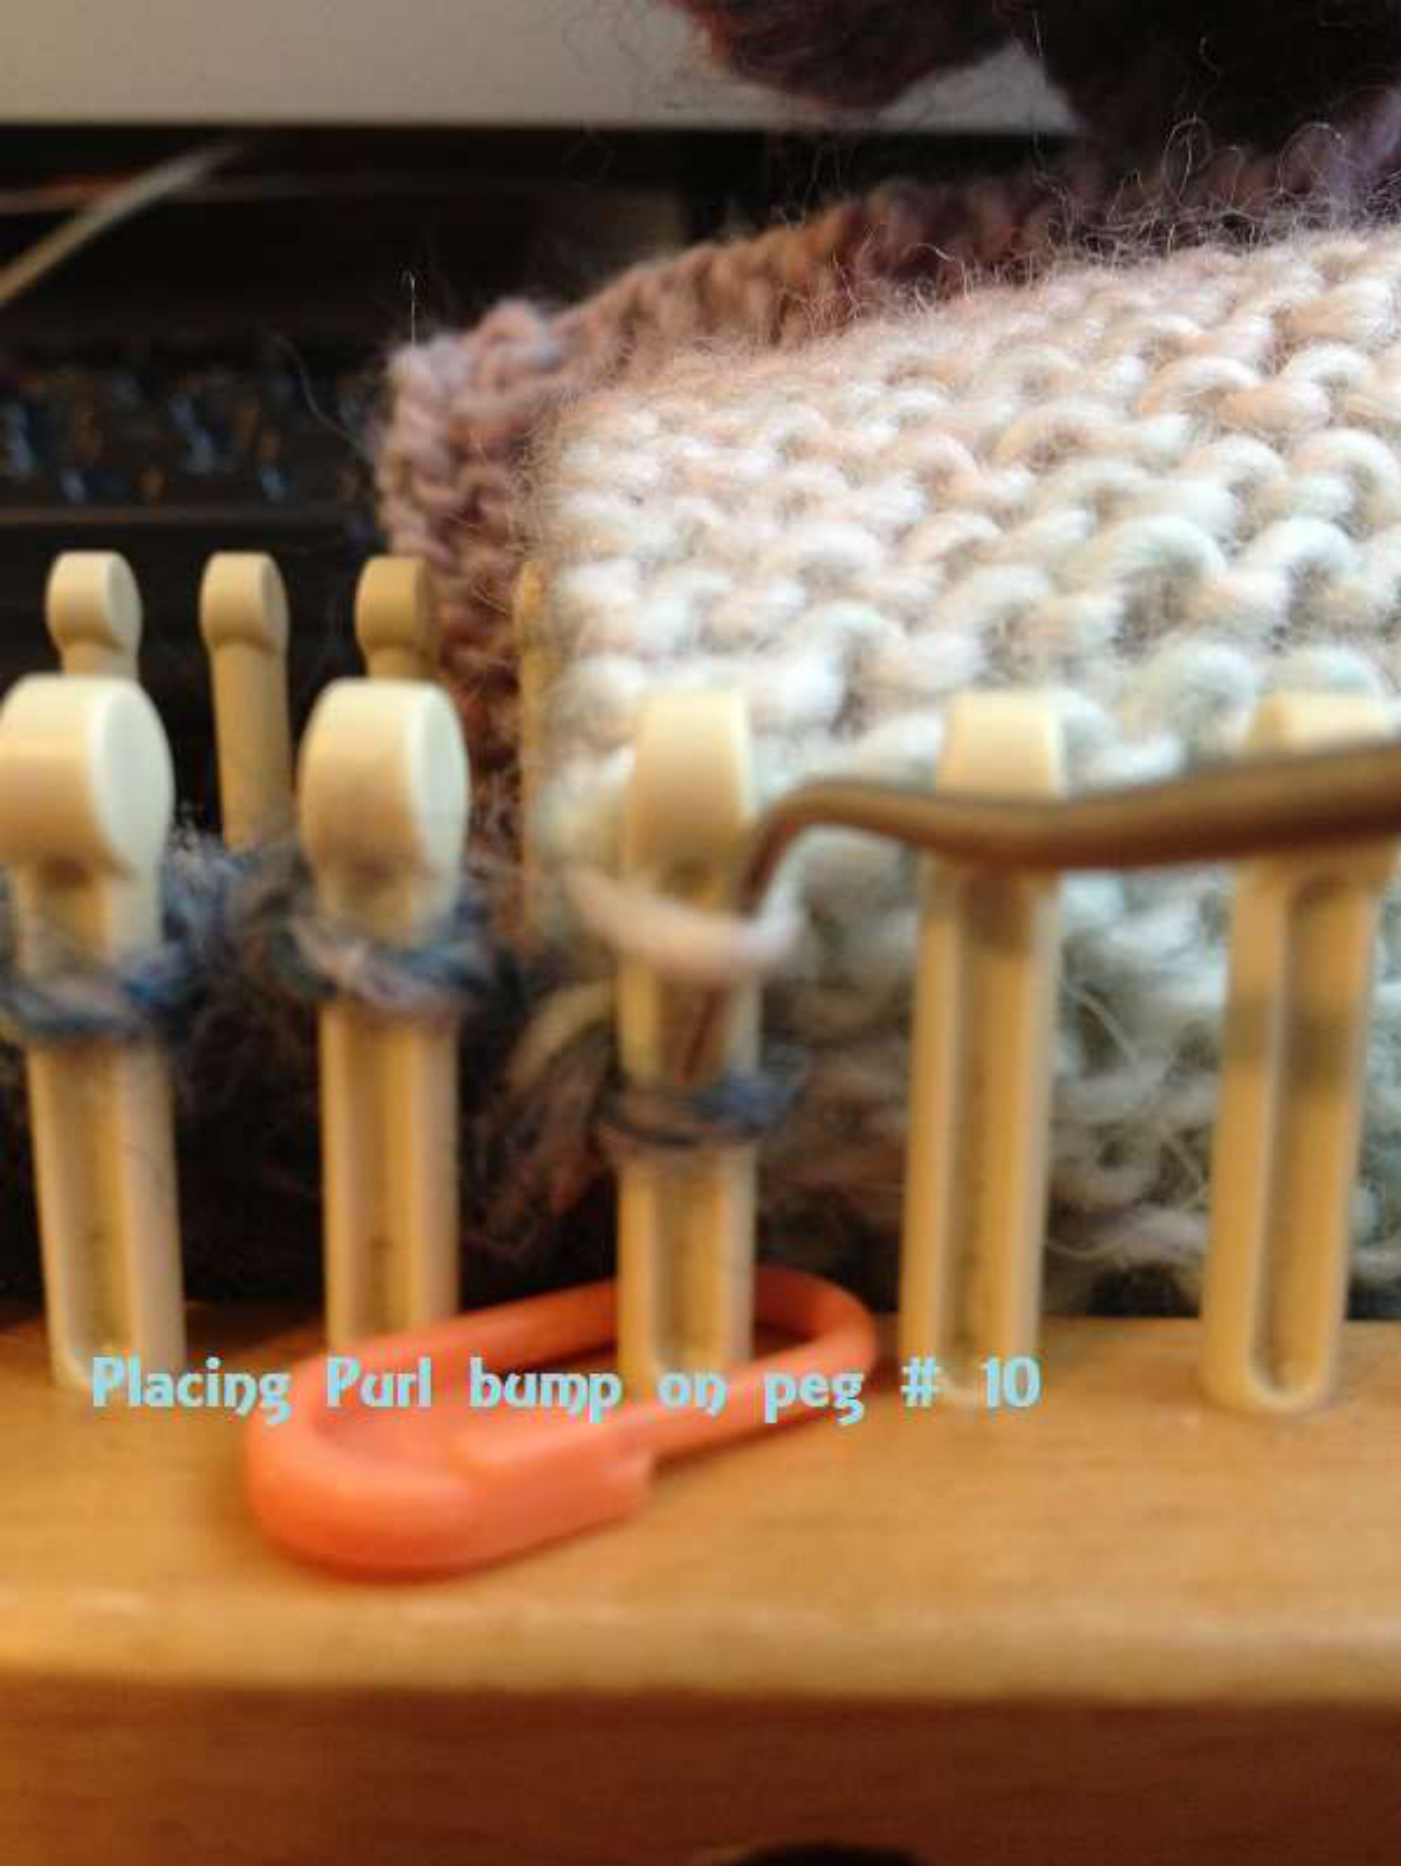
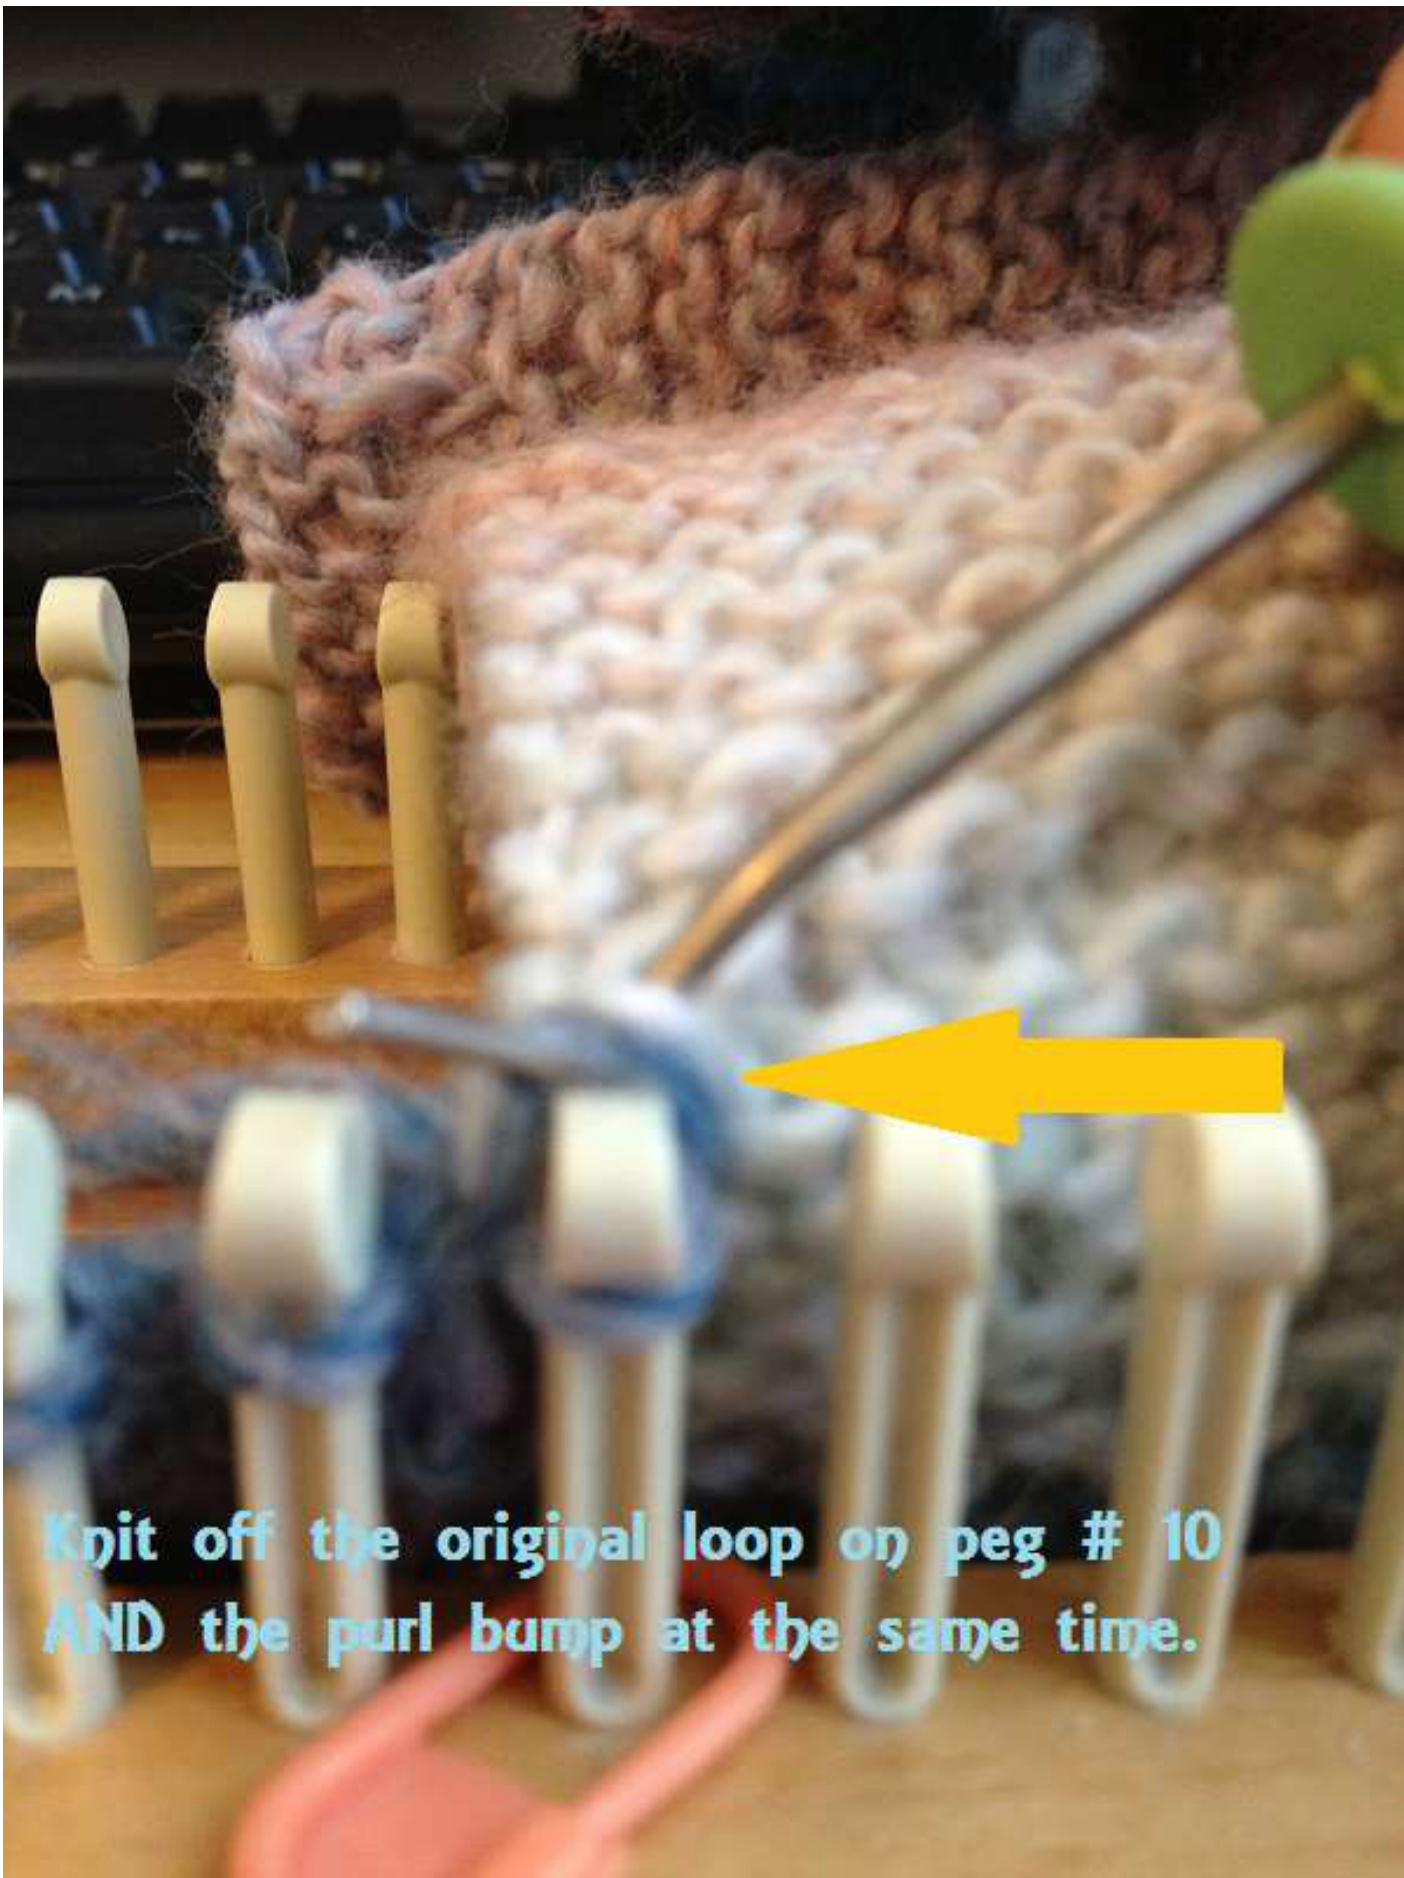
K = u-wrap stitches P = Purl W&T = Wrap and Turn: lift existing loop off of peg, wrap the working yarn around the back of the peg to the front. Place existing loop back on peg on top of the loop you just created. When you come to a peg that has been wrapped and it is time to knit it over, you will knit 2 stitches over 1. PPPK= Place Purl bump on Peg and Knit: Place purl bump from prior section onto peg 10 and knit off (bottom 2 loops over 1 loop) Corner (worked in short rows - all pegs not mentioned are skipped):
| Corner Part 1: | Corner Part 2: |
| K9, W&T | K2 |
| P9 | Sk1, P1 |
| K8, W&T | K3 |
| P8 | SK1, P2 |
| K7, W&T | K4 |
| P7 | SK1, P3 |
| K6, W&T | K5 |
| P6 | SK1, P4 |
| K5, W&T | K6 |
| P5 | SK1,P5 |
| K4, W&T | K7 |
| P4 | SK1, P6 |
| K3, W&T | K8 |
| P3 | SK1, P7 |
| K2, W&T | K9 |
| P2 | SK1, P8 |
| K1, W&T | K10 |
| P1 | SK1, P9 |
Corner Part 1
· Knit pegs 1-9. Wrap and turn peg 10 · Purl pegs 9-1. · Knit pegs 1-8. Wrap and turn peg 9 · Purl pegs 8-1. · Knit pegs 1-7. Wrap and turn peg 8 · Purl pegs 7-1. · Knit pegs 1-6. Wrap and turn peg 7 · Purl pegs 6-1. · Knit pegs 1-5. Wrap and turn peg 6 · Purl pegs 5-1. · Knit pegs 1-4. Wrap and turn peg 5 · Purl pegs 4-1. · Knit pegs 1-3. Wrap and turn peg 4 · Purl pegs 3-1. · Knit pegs 1-2. Wrap and turn peg 3 · Purl pegs 2-1. · Knit peg 1. Wrap and turn peg 2 · Purl peg 1. All pegs except peg 1 should have two loops on them. Corner Part 2: (lf a peg has two loops, knit those two loops over one.) Knit pegs 1-2 · Purl peg 1 · Knit pegs 1-3 · Purl pegs 2-1 · Knit pegs 1-4 · Purl pegs 3-1 · Knit pegs 1-5 · Purl pegs 4-1 · Knit pegs 1-6 · Purl pegs 5-1 · Knit pegs 1-7 · Purl pegs 6-1 · Knit pegs 1-8 • Purl pegs 7-1 ·Knit pegs 1-9 · Purl pegs 8-1 · Knit pegs 1-10 · Purl pegs 9-1 \*alternative wording for corners was submitted by Jennifer Reese.
Starting Square:
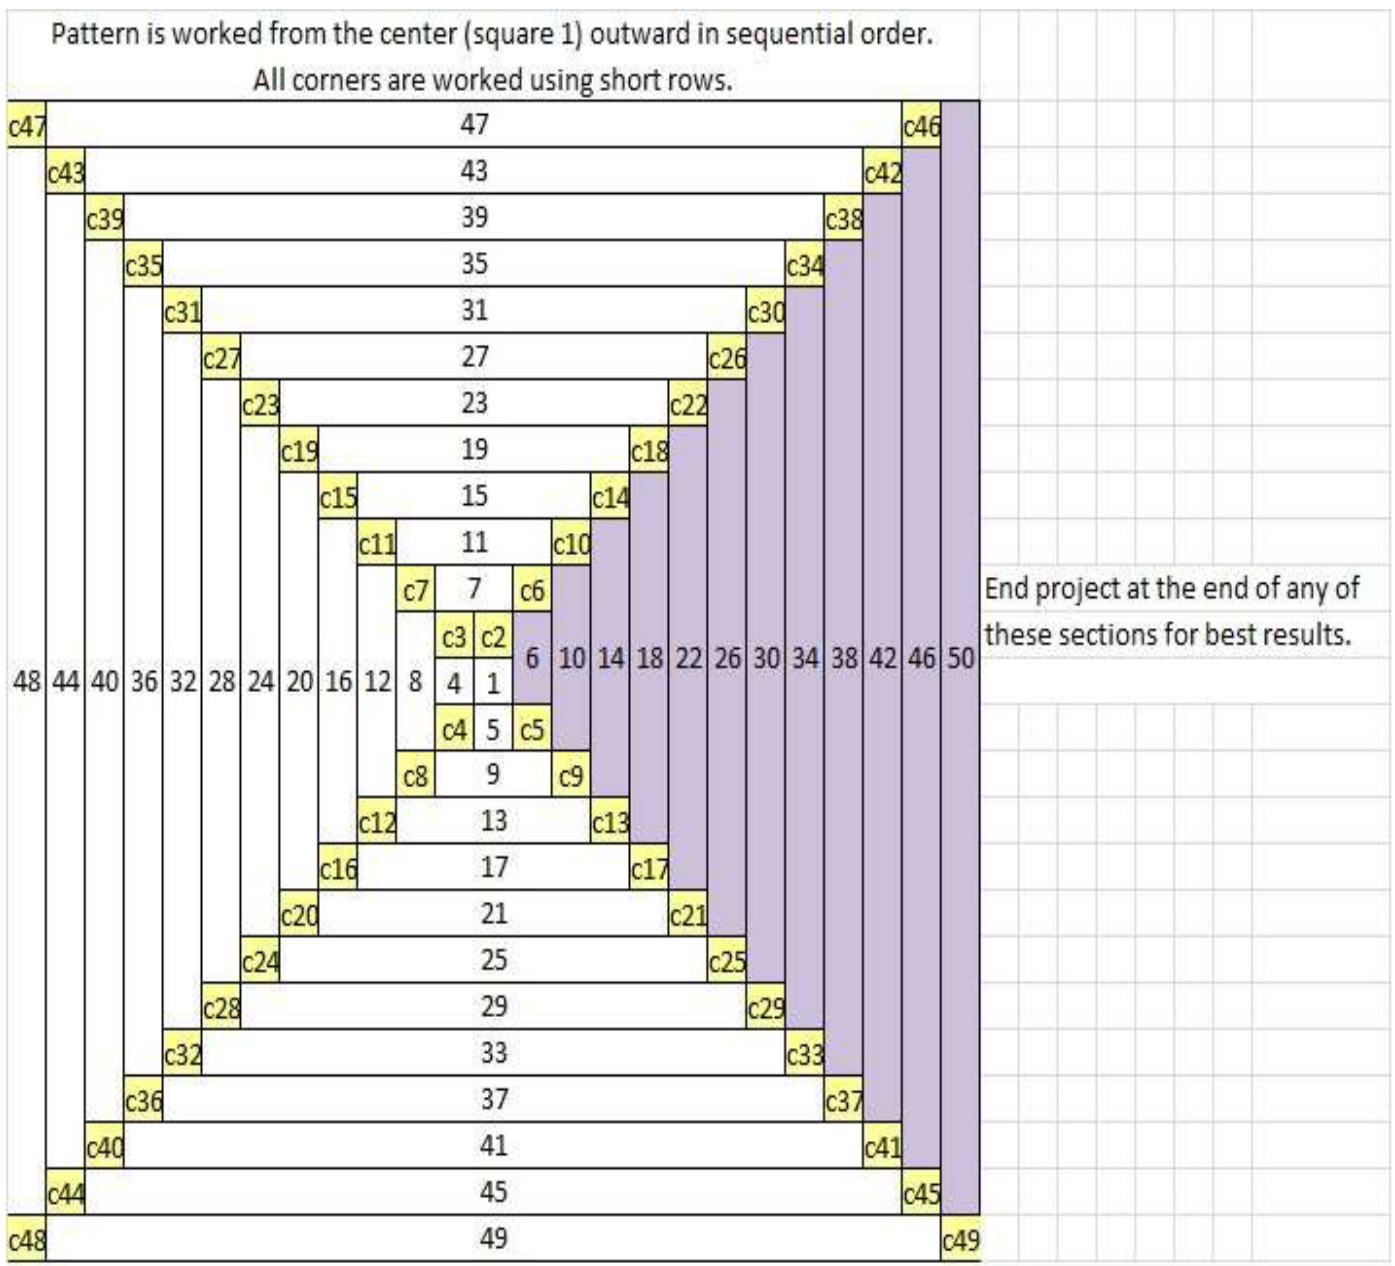
Cast On 10 pegs (from peg 10 to peg 1) \*Row 1: K Row 2: P\* eat from \* to \* 8(eight) more times until you have a total of 18 rows (9 garter ridge: 10 Stitch Pattern: \*K9, PPPK SK1, P9\* Until you have reached the end of the section
Directions:
Work Starting Square Work Corner Parts 1 and 2, repeat \*Work 10 Stitch Pattern until you reach the end of the section Work Corner Parts 1 and 2\* Repeat 10 Stitch Pattern until your project has reached the desired size. End the project at the end of a section BEFORE working the corner. The end of sections 6, 10, 14, 18, 22, etc. are ideal place to end.
How to PPPK: This is the parl bump that you will place on peg #10 This is how your project will Jook when you bave jast completed turning a corner and are ready to begin working along a Dew side.