Tardis Pillow
Designed by Rachael Sundell
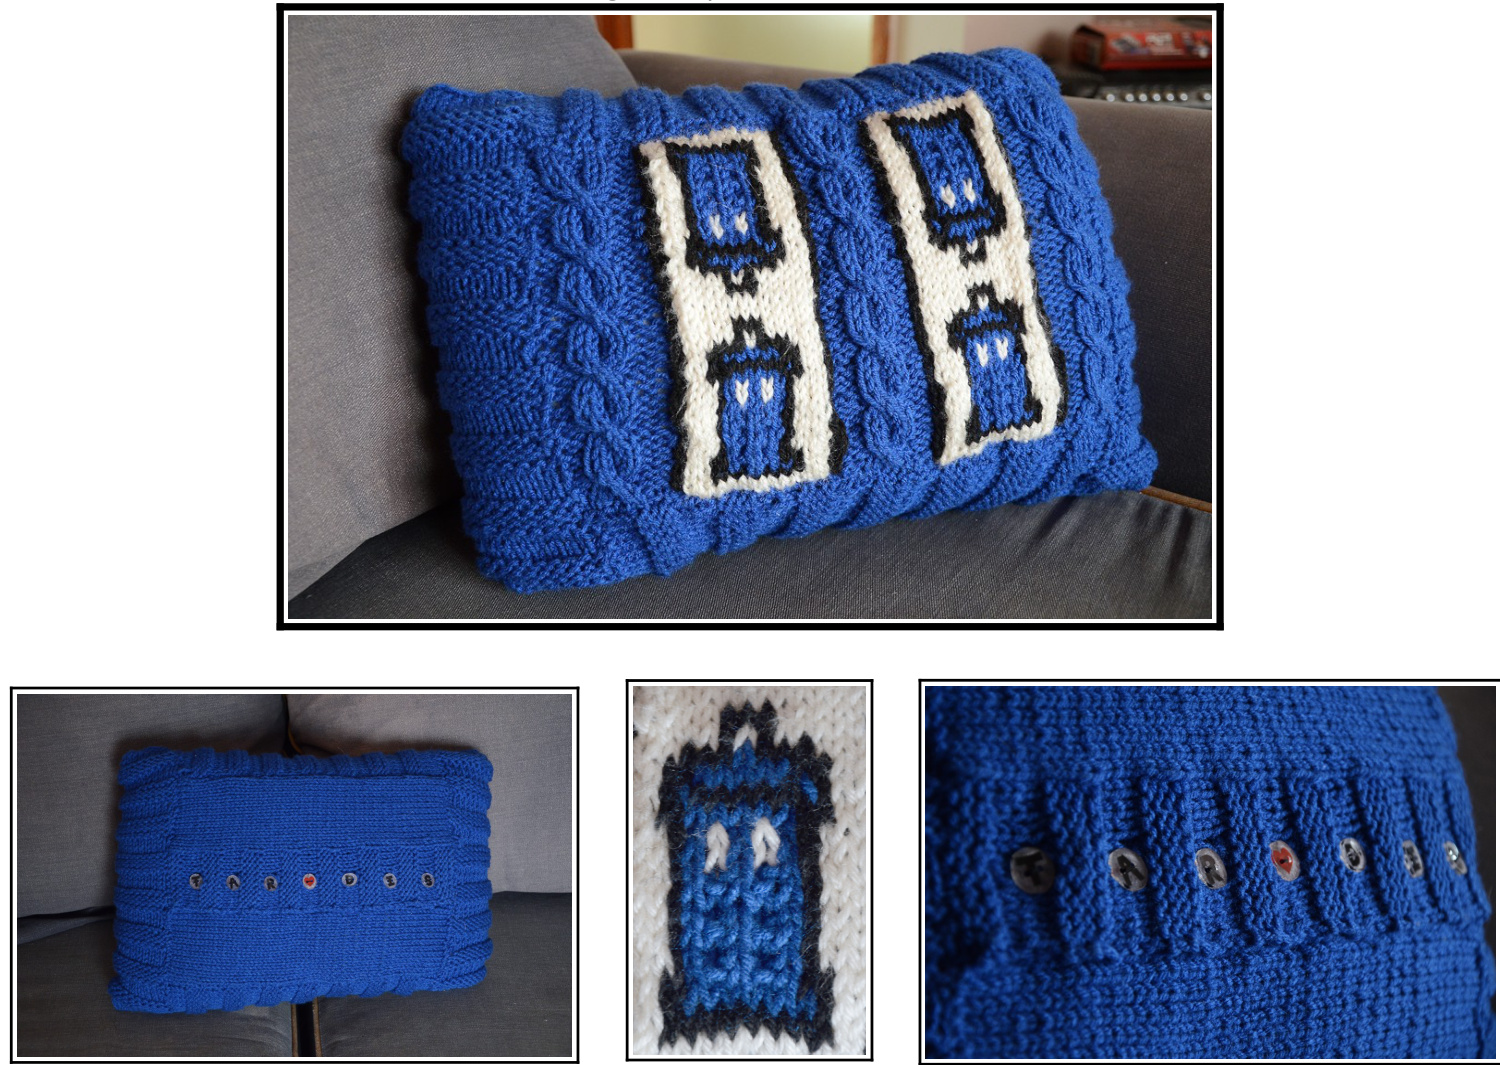
This pattern will fit a 12" x 18" (30.5cm x 45.7cm) pillow.
Supplies:
[ ] 100g worsted yarn in white and black [ ] 300g worsted yarn in tardis blue [ ] Us 7 (4.5mm) knitting needles [] cable needle [ ]] 1 large sewing needle [ ] 7 buttons of half inch diameter (1.3cm diameter) NOTE: I made the buttons for this pattern out of shrink plastic using the following tutorial: How to Make Clothing Buttons from Shrink Plastic
Abbreviations:
k-knit RS - right side yo-yarnover p-purl WS - wrong side cbk1p2 - slip 2 sts onto cable needle and hold to the back, k1 then p2 off the cable needle. cfp2k1 - slip 1 st onto cable needle and hold to the front, p2 then k1 off the cable needle. cfk4 - slip 2 sts onto cable needle and hold to the front, k2 sts then k2 off of the cable needle.
Cable Pattern:
These are the knitting instructions needed to do the sides and middle cables on the front of the pillow, given on just the 10 stitches (one cable). Row 1: p2, k2, p2, k2, p2 (RS) Row 2: k2, p2, k2, p2, k2 (WS) Row 3: repeat Row 1 Row 4: k2, cbk1p2, cfp2k1, k2 Row 5: p3, cfk4, p3 Row 6: k2, cfp2k1, cbk1p2, k2 epeated another 5 times plus one more repetition of rows 1 and 2
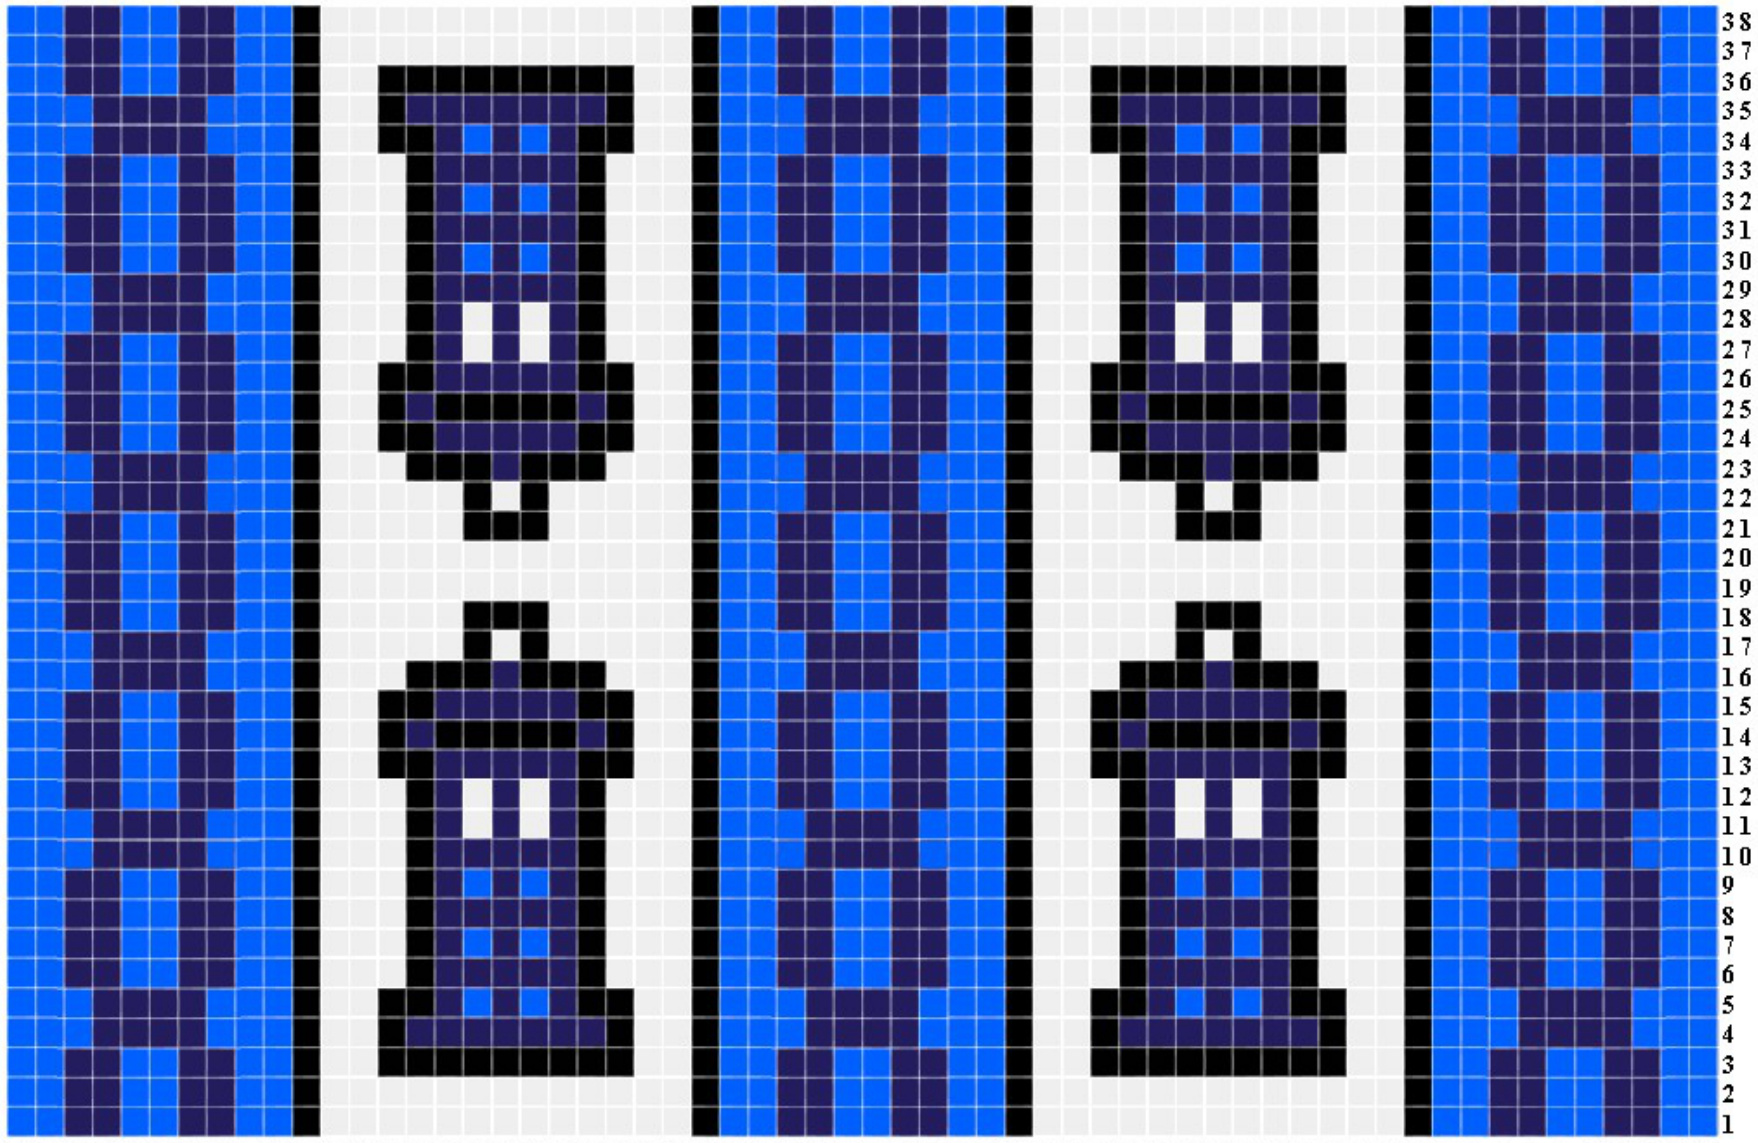
Front Panel:
Cast on 60 sts in blue. Use the chart below to knit rows 1-38 and the Cable Pattern above for the right, middle and leftcables. Cast off all stitches.
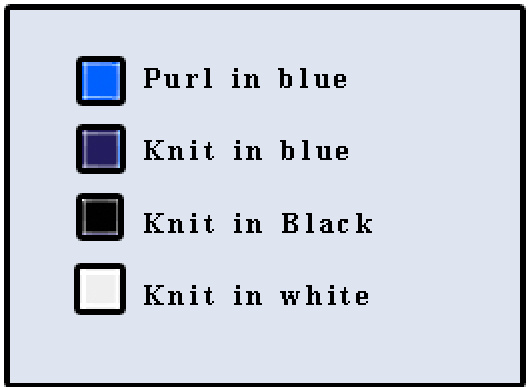
)n even rows, knits and purls will be reversed since working on Ws
Back Panel 1: Cast on 23 sts in blue. Row 1: k13, p10 Row 2: k10, p13 Row 3-4: repeat Rows 1-2 Row 5: k23 Row 6: p23 Row 7-8: repeat Rows 5-6 Rows 1-8 will be repeated 6 more times, followed by one repetition of Rows 1-3. Cast off all sts. Back Panel 2 (Button holes): Cast on 23 sts in blue. Row 1: k13, p10 Row 2: k10, p13 Row 3-4: repeat Rows 1-2 Row 5: k23 Row 6: p7, cast off one st, p16 Row 7: k17, cast on one st, k5 Row 8: p23 Rows 1-8 will be repeated 6 more times, followed by one repetition of Rows 1-3. Cast off all sts. Top and Bottom Panels (x2): Cast on 20 sts in blue. Row 1: k20 Row 2: p20 Row 3-4: repeat Rows 1-2 Row 5: p20 Row 6: k20 Rows 7-8: repeat Rows 5-6 Rows 1-8 will be repeated 6 more times, followed by one repetition of Rows 1-3. Cast off all sts.
Side Panel (x2):
Cast on 20 sts in blue. Row 1: k20 Row 2: p20 Row 3-4: repeat Rows 1-2 Row 5: p20 Row 6: k20 Rows 7-8: repeat Rows 5-6 Rows 1-8 will be repeated 7 more times, followed by one repetition of Rows 1-3. Cast off all sts.
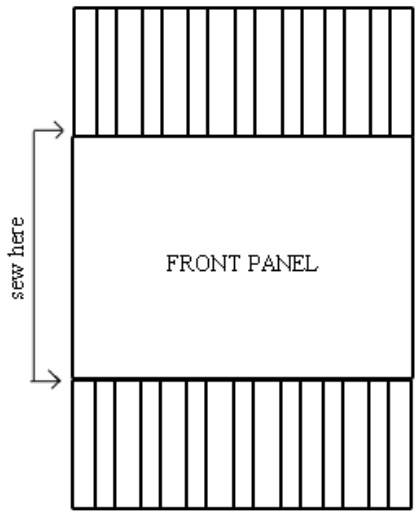
Assembly:
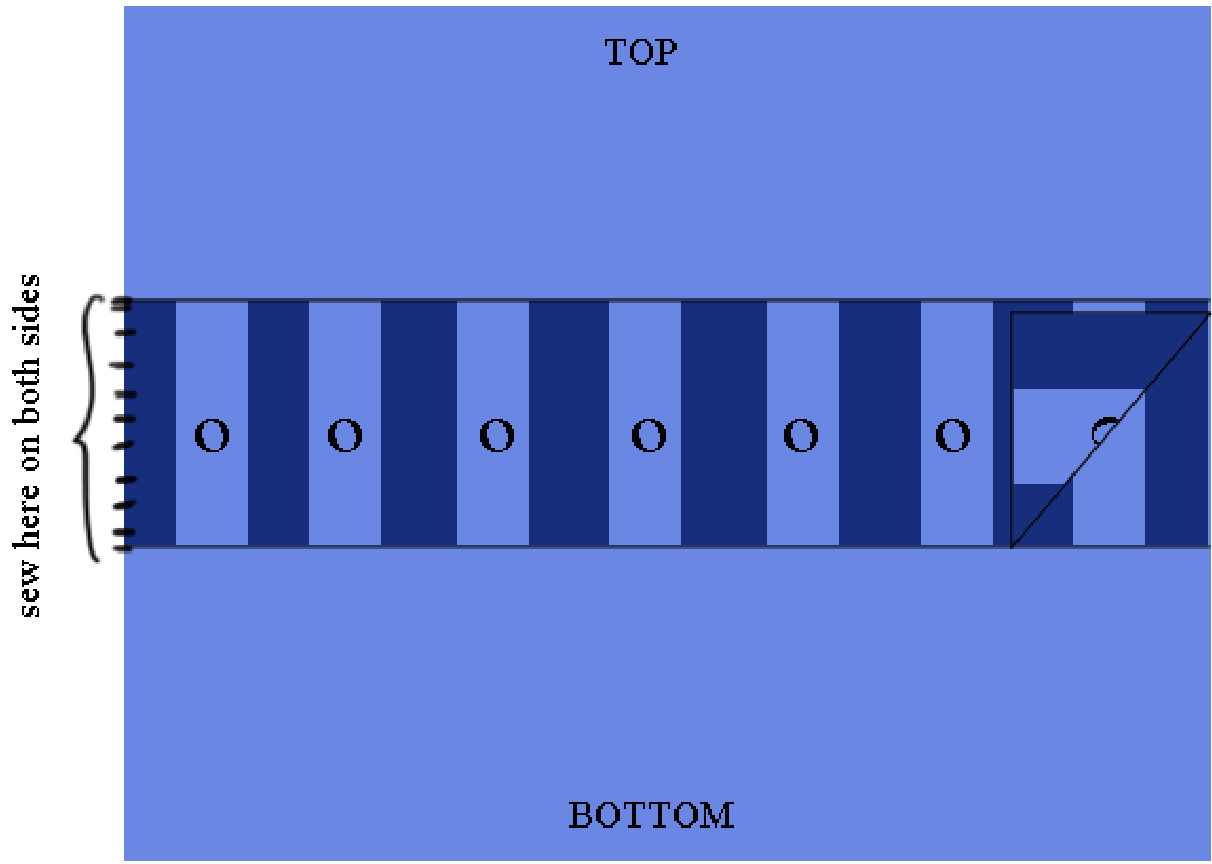
Sew the top and bottom panels along the ribbed edge to the top and bottom of the front panel:
Next sew the other ribbed edge of the top panel to Back Panel 2 (with button holes). Similarly, sew the other ribbed edge of the bottom panel to Back Panel 1:
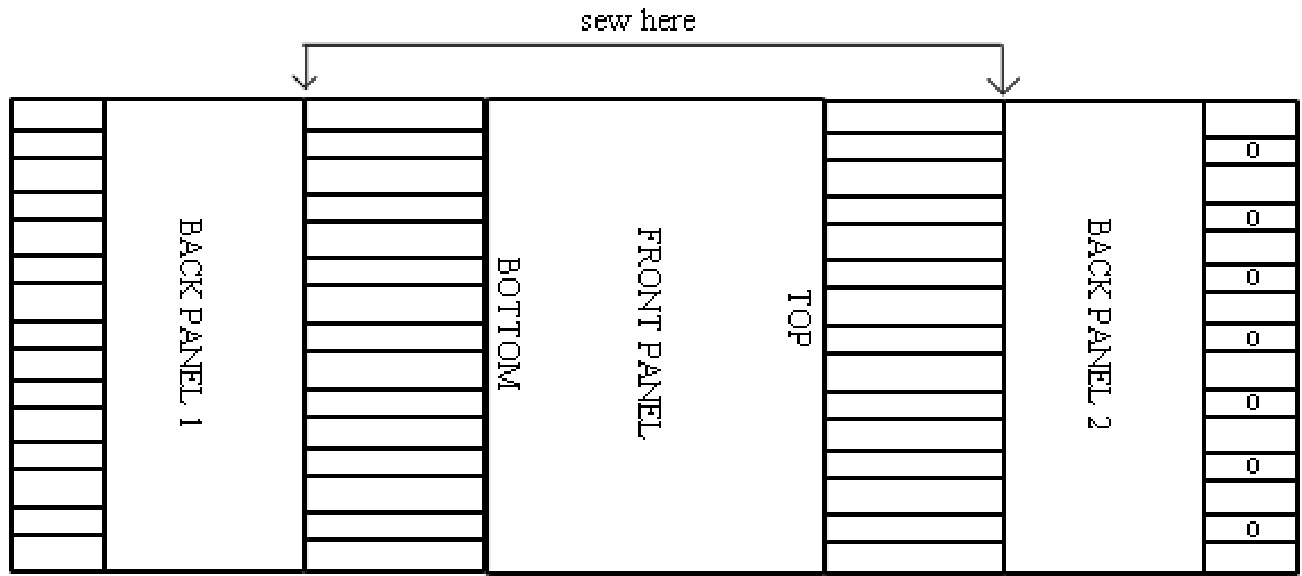
Now attach Back Panel 2 to Back Panel 1 by overlapping the ribbed parts with Back Panel 2 on top (with the button holes on the top layer). Sew along the side of the ribbed area to hold the two panels together:
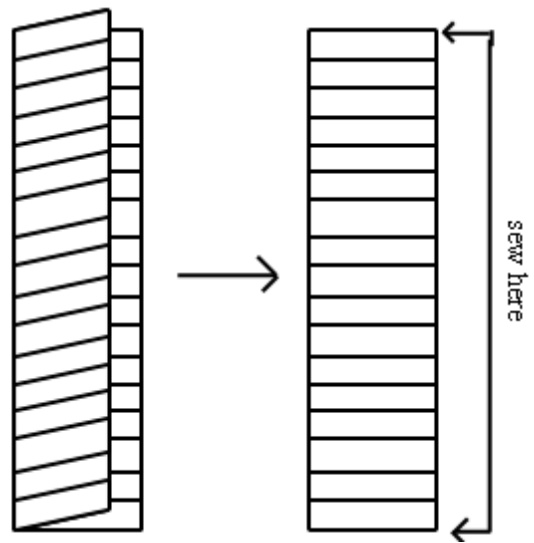
Fold both side panels in half to make longer strips, then sew the top and bottom together:
Now sew the side panels onto the pillow. Lastly, sew on buttons and you are done!


