Wicked Good Mitts
By SaraJWolf
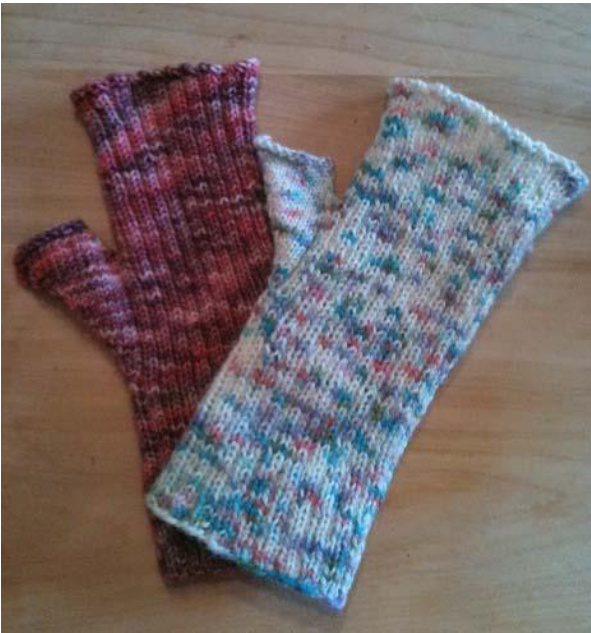
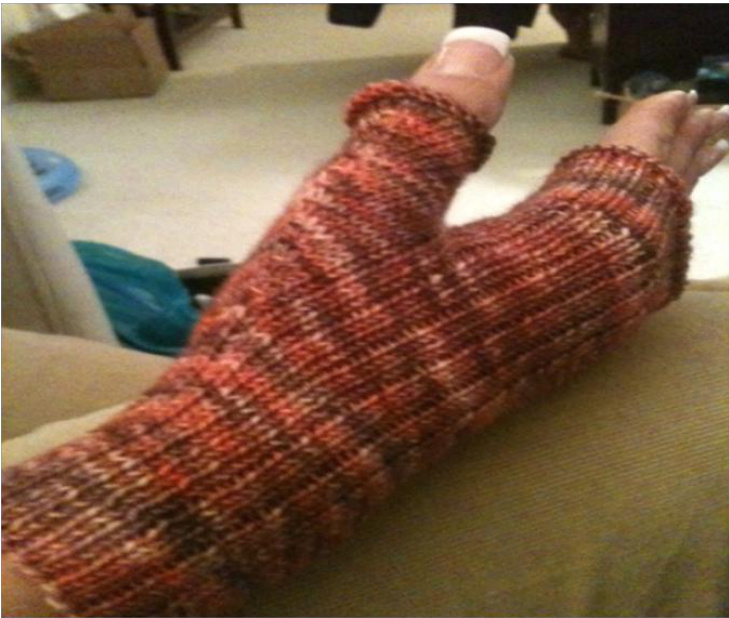
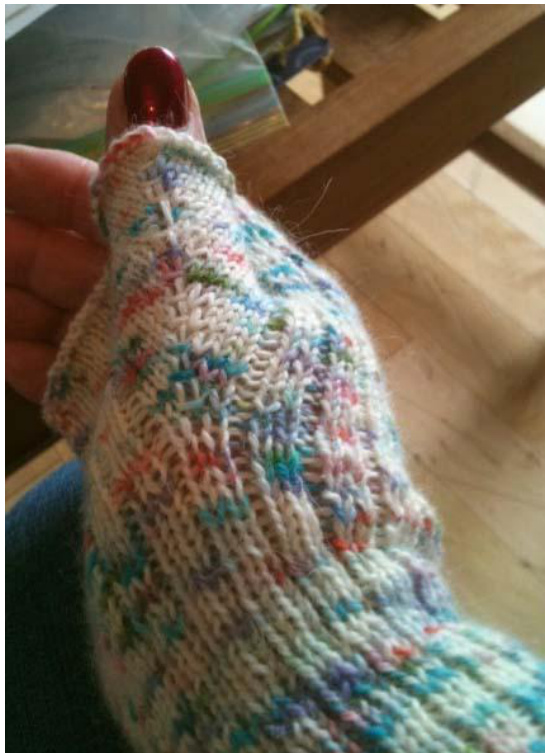
Left: Mulberry Jam (Size Small/Medium) Right: Confetti (Size Medium/Large A simple mitt with an interesting thumb gusset - possibly the most comfortable thumb ever. Because it has a diagonal slant, the thumb stitches wrap around and feel more like part of the hand rather than a later addition. The double increase down the thumb results in a decorative ladder and bar that doesn't really look like a typical increase, adding an interesting detail. Sewn bind-offs are stretchy and provide a pretty, slightly rippled edge.
Materials:
S/M Ella Rae Lace Merino (1 skein) Size US 0 double-point needles M/ L Any fingering weight yarn (1 skein) Size US 1.5 or 2 double-point needles Stitch markers Darning needle Size: S/M or M/L. The mitt is very stretchy and will fit a larger hand. However, it looks better if the ribs are not widely stretched. It can be easily sized up by using a sock yarn (fingering weight) and US size 1.5 needles. Gauge: S/M 12 sts/inch of rib pattern (un-stretched) M/L 9 sts/inch of rib pattern (un-stretched) Instructions: (the instructions are the same for both sizes) Using the long-tail method, loosely cast on 60 stitches. Distribute on 4 needles (15 stitches/needle), and join in the round, being careful not to twist the stitches. Work 2 % inches in 2x1 rib (K2,p1). [Note, work a longer cuffif desired].
Gusset Increases.
The gusset increases will be worked between needles 2 and 3 as follows: Row 1. Work in pattern as established to the last stitch (purl) on needle #2. Place marker. Purl last stitch. Knit the first stitch from needle 3 and move it to needle 2. M1R using the bar between needle 2 and 3, and place the stitch on needle 2 (17 sts on needle 2). M1L using the same bar between needles 2 and 3 and place the stitch on needle 3. Work 1 knit and 1 purl stitch from needle3 and place marker. Work in pattern to the end of the round.
[Note: all gusset increases will occur between needle 2 and needle 3.]
Row 2. Work in pattern to the stitch marker. Slip marker. Purl 1, knit to the end of needle 2. Knit to the purl stitch before the marker on needle 3. Purl 1, sl marker, work in pattern to the end of therow. Continue working rows 1 and 2 until there are 9 knit stitches after the marker on needle two, and 9 knit stitches before the marker on needle 3. Work row 1 one more time (10 knit stitches on each side of the gusset increase). Next Row: Work in pattern across needle 1 and needle 2 as far as the stitch marker. Remove the stitch marker and purl 1 stitch. Place the remaining 10 stitches from needle two and the first 10 stitches from needle 3 on waste yarn. Using the Backward Loop method, cast two stitches on to needle 3. Purl the stitch before the marker. Remove the marker and continue in pattern to the end of the round. Hand: Continue working in pattern for 2 % inches, or desired length on the hand. Bind off using a loosely worked sewn bind-off to create the slight ruffle at the edge. Good instructions and illustrations can be found here: ttp://www.knittingdaily.com/blogs/howto/archive/2008/05/15/sewn-bind-off.aspxThumb: You will be picking up 4 stitches in the open space of the gusset; 2 at the beginning of the first round, and 2 at the end as follows: Transfer half of the stitches on the waste yarn to one needle (A), and the remaining stitches to a second needle (B). Join the working yarn. Pick up and knit 2 stitches from the left side of the opening and knit 5 stitches from needle A (7 stitches on needle 1 and 5 stitches on needle A). Using a new needle, knit the remaining 5 stitches off of needle A (this will now be needle 2). Use another needle to knit 5 stitches from needle B (this will now be needle 3). Using another needle knit the remaining 5 stitches from needle B, then pick up and knit 1 stitch from the right side of the gusset gap (6 stitches on needle 4). Using the remaining free needle, pick up 1 final stitch from the gap and slide it onto needle 1. Row 1. Knit the picked-up stitched and the first stitch of needle 1 together tbl. Knit to the end of needle 2. M1R using the bar between needle 1 and needle 2, placing the increase stitch on needle 2. M1L using the same bar and place the increase stitch on needle 3. Knit to the last two stitches of needle 4. Knit the last two stitches together (Needle 1: 7 sts, Needle 2: 6 sts, Needle 3: 6 sts, Needle 4: 5 sts). Row 2. Knit the first two stitches together. Knit to the end of the round. Row 3. Knit to the end of needle 2 andM1R as before. M1L and knit to 2 stitches before the end of needle 4. Knit the last two stitches together. [Note: the number of stitches on needles 2 and 3will continue toincrease while the number of stitchesonneedles 1 and 4 will decrease.] Repeat rows 2 and 3 three more times. Repeat Row 2 one more time. Finish the thumb with a sewn bind off. Finishing: Weave in ends, hand wash, and block lightly (without stretching)
M/L worked in fingering/sock handspun S/M worked in Ella Rae Lace Merino


