Chelsea Wrap MADuNaier MAD Cap Fancies
Chelsea Wrap
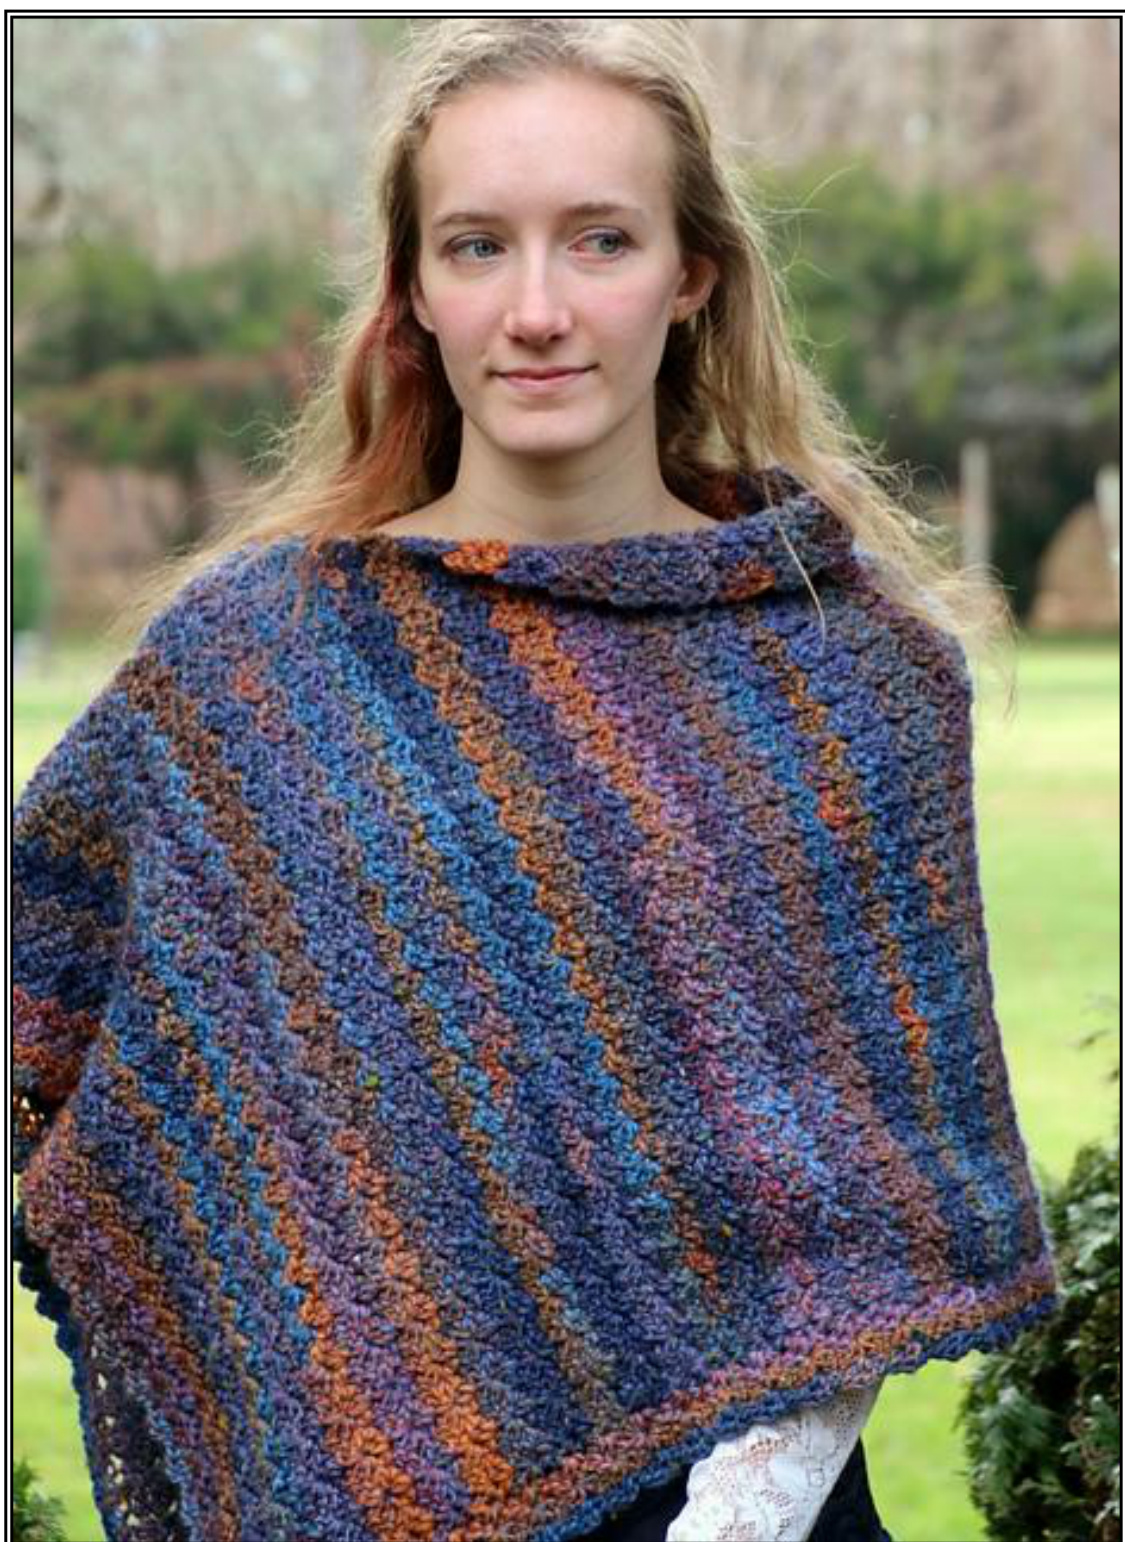
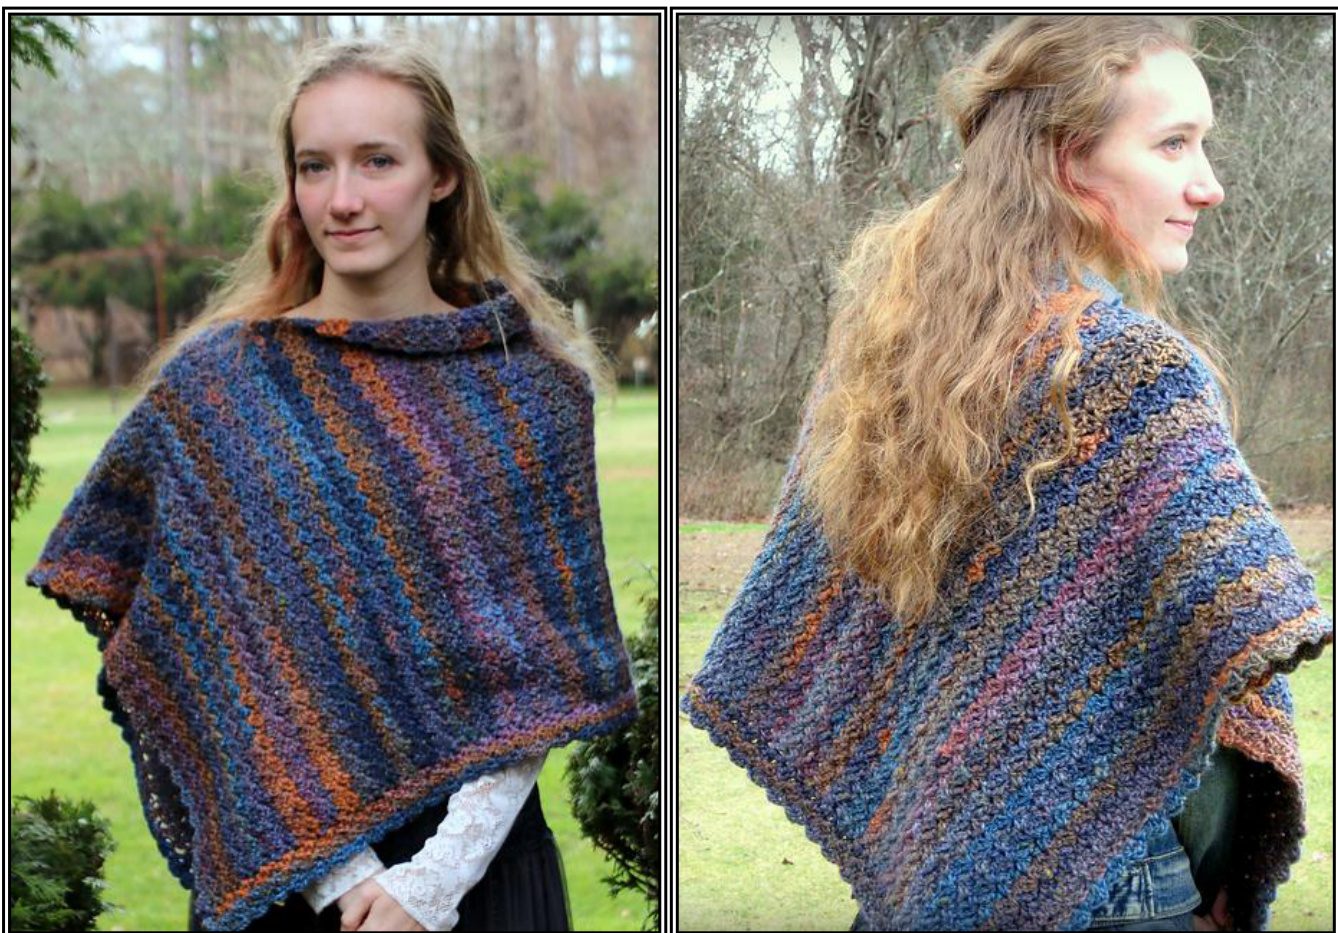
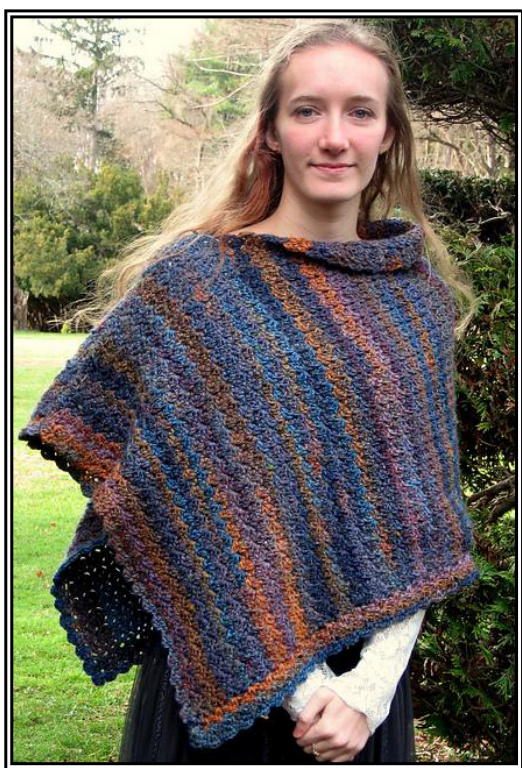
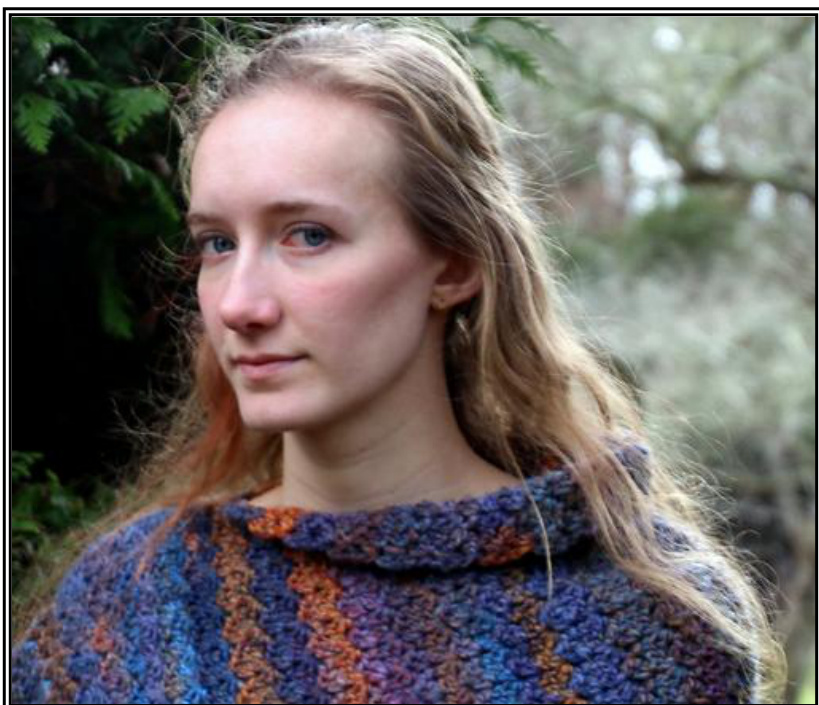
MADuNaier MAD Cap Fancies Materials: Crochet hook in size I (5.50mm), or whatever size gives your yarn a nice drape. Yarnsewing needle. Yarn: 700-950 yards of lofty chunky weight yarn. Model shown was made using 9 balls of Berroco Lodge. Finished Size: Model shown is 21.5" by 50", can be made deeper or longer. Gauge: Using I hook, mine was 11 Shells = 10", but gauge is not really important.
Abbreviations:
ch = chain. st = stitch. sl = slip. sl st = slip stitch. sc = single crochet stitch. dc = double crochet stitch. tch = turning chain made at start of prev row. rep = repeat.
Chelsea Wrap Recipe
Yarn Selection
You could theoretically use any yarn, but to keep the wrap from being too heavy I recommend a lofty, chunky weight yarn. My model took a little under 800 yards of Berroco Lodge (in a discontinued color which I had hoarded in my stash from half-price sales). For an even less pricey alternative, use your 50% off coupons at Joann's and purchase 3 150 gram skeins of Lion Brand Scarfie - at 104 yards per 50 grams, it is even lighter than my Lodge (which is 86 yards per 50 grams). There are many other lovely alternatives if you can splurge (see yarnsub.com/berroco/lodge), but look for a chunky yarn which is light in weight - something which has at least 85 yards per 50 grams. My daughter is 5' 9" and weighs 120 pounds - I made her wrap in what I would consider a Medium size and used 775 yards - a Large would take about 900-950 yards. A Small Adult size would use about 700 yards. You could also make it in Children's sizes. Keep in mind: if you use a thinner yarn than #5 chunky weight, you wil require more yardage.
Construction Plan
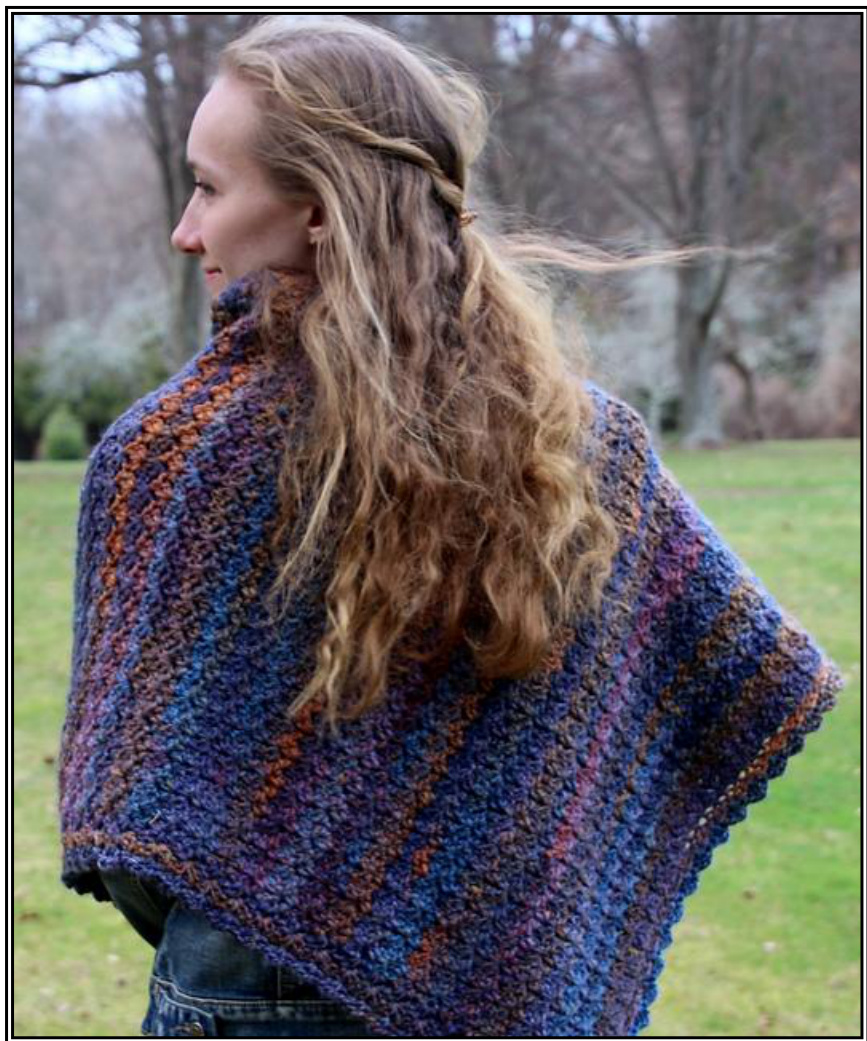
The wrap is a simple rectangle which is then folded in half and seamed along the side, leaving an opening for your head. 1. First, make a starting chain, then work Section A for a long rectangle (mine was about 20" wide and 50" long, but you can try it on as you go). 2. For the second part, pick up stitches along the long edge and work Section B for several inches (mine added 1.5" for Section B). 3. Then fold it in half 4. And sew the shoulder seam.
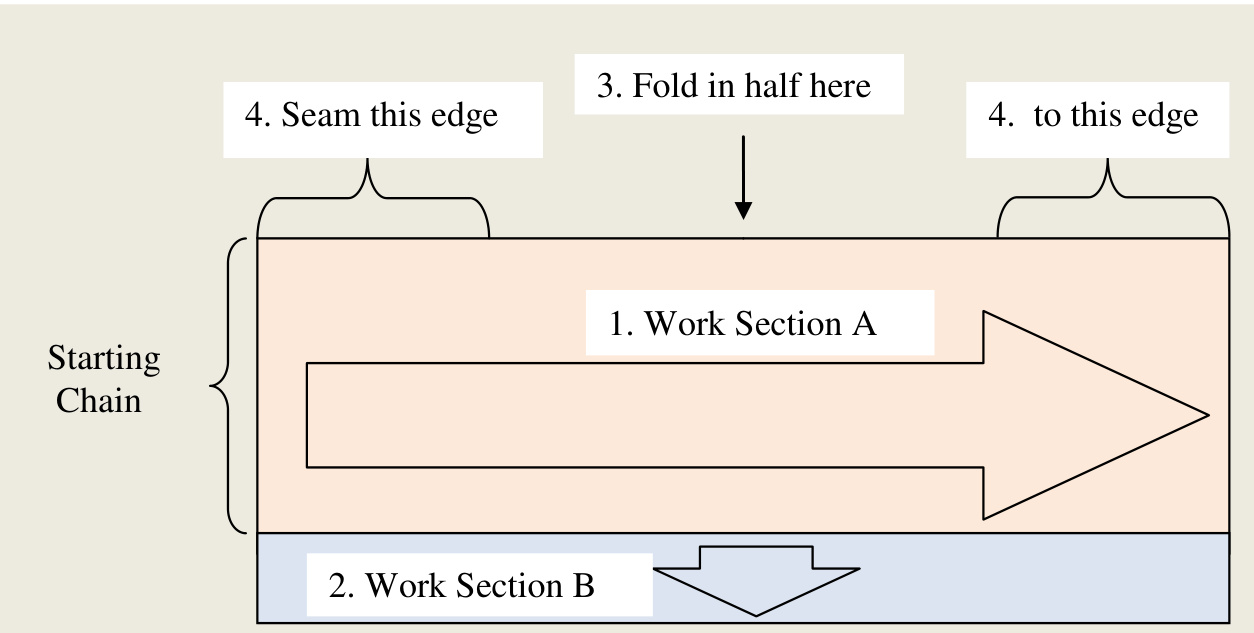
It's that easy! Now for the details..
Step 1 - Section A
Using a 5.5 mm hook (or larger, if desired), make a starting chain of desired length (mine was about 21" long, but make yours shorter if you wish to have a deeper Section B, or longer if you do not want much of a Section B). CRAZY-SHELL = (2dc, ch2, sc) worked in same place Row 1: Dc in 5th ch from hook, ch2, sc in same place (Starting Shell made), \*skip 2 or 3 ch (depending on your starting chain tension - what is important is that the starting chain is neither tight nor saggy), work a CRAZy-SHELL in next ch; rep from \* to end of chain, unweave any remaining chains. Count your Shells! Row 2: Ch3, turn. (Dc, ch2, sc) in ch-sp of 1st Shell, work [CRAZY-SHELL in ch-sp of next Shell] across row. Count your Shells and make sure you have the same amount as you had in Row 1! Repeat Row 2 until it is about 50-60" long, measuring from Row 1. (It should be about double the distance from one elbow to the opposite side of your neck.
Try it on!
Fold it in half and baste or clip the side edge closed, leaving the center open for your head (see diagram in "Construction Section"), then slip it on. Flip the neck edge opposite from the seam side over like a little collar to take up the excess fabric Now decide two things: 1. Do you need more of Section A? (Adding to Section A will make it longer on the seam side.) If so, work a few more inches and try it on again. 2. How deep you want Section B to be? (Section B will add depth at the other side - not the seam side). My daughter did not want it too long (she wants her arms free at the elbows) so she was good with the 50" of Section A, but wanted an inch or 2 for Section B to even the depth of the two sides.
Step 2 - Section B
Remove your seam clips or basting stitches, pivot work, and begin crocheting across the long edge: Row 1: (Ch3, dc, ch2, sc) in same place where you worked last Shell of Section A's last row, work [CRAZY-SHELL in each Shell] across the long edge. Row 2: Ch3, turn. (Dc, ch2, sc) in ch-sp of 1st Shell, work [CRAZY-SHELL in next Shell] across row. Repeat Row 2, working across long side of rectangle, until desired depth.
Step 3 - Fold in Half
As you did before in Step 4, fold it in half and baste or clip the side edge closed, leaving the center open for your head, then slip it on. If you need more of Section B, work additional repeats of Row 2 of Section B. Optional: It bothered me that the starting chain edge of Section A did not have a scalloped edge like the rest of the edges, so I worked a row of Shells into the unused loops of the starting chain.
Step 4 - Seaming
Decide which side is going to be the right side, then remove clips or basting stitches, fold it wrong side out, and whip stitch the seam closed, leaving an opening for your head. Try it on before cutting the yarn, and make sure you are happy with the neckline size. Then cut the yarn and weave in the ends with wrong side facing. If yours is bulkier or stiffer than you would like, wet or steam block it.
Options
Some ideas to think about: - Use a different color in Section B than what you use in Section A. - Experiment with a gradient yarn. - Try some striping in one or both of the sections! - Instead of seaming, use buttons, or work a short seam just at the shoulder, leaving the arm as an open flap. - Make Section B deeper than mine - perhaps 1/3 the width of Section A's starting chain. - Colorblock: Work Section A in 3 parts: color 1 for 10", color 2 for 30", color 1 for 10", then use color 1 again in Section B for 10".
Copyright MADuNaier 2015. Make them to wear, give, or sell,but please don't sell or distribute my patte!


