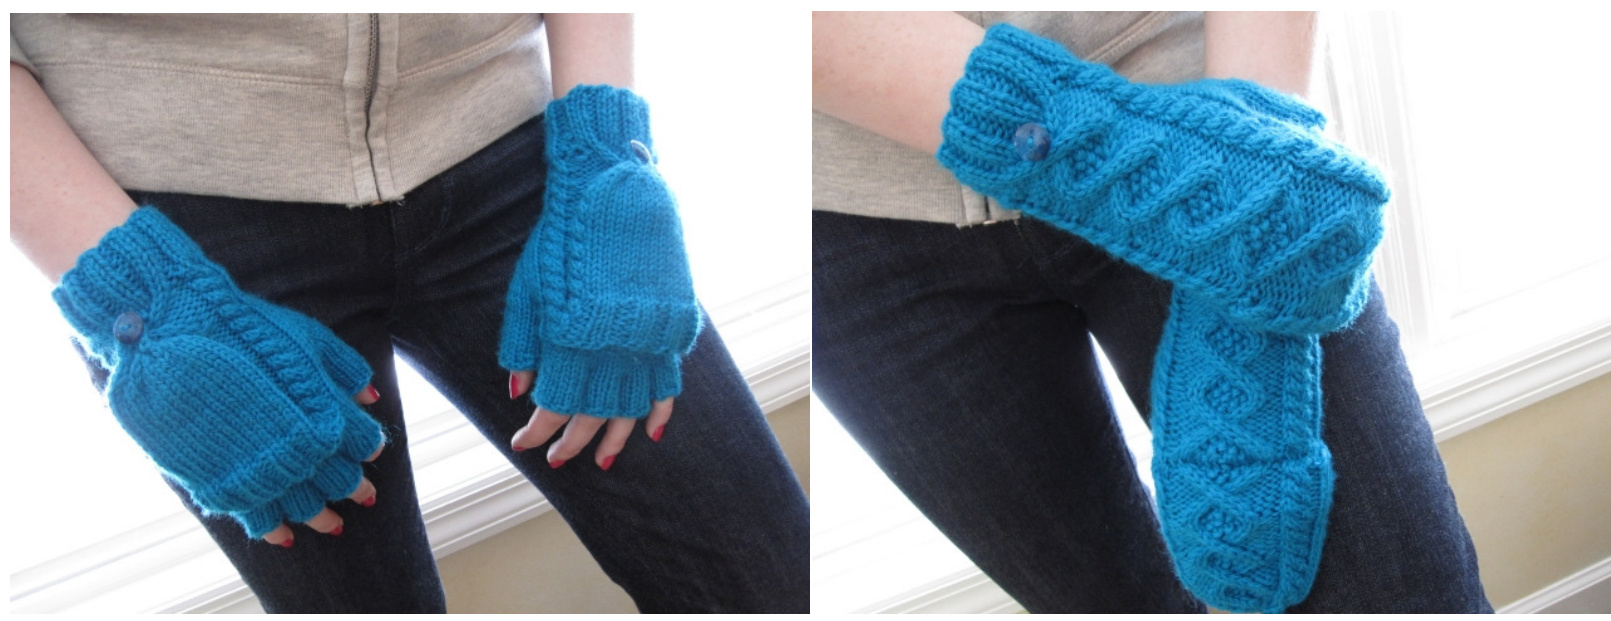
London Eye Glittens
by Chelsea Flint
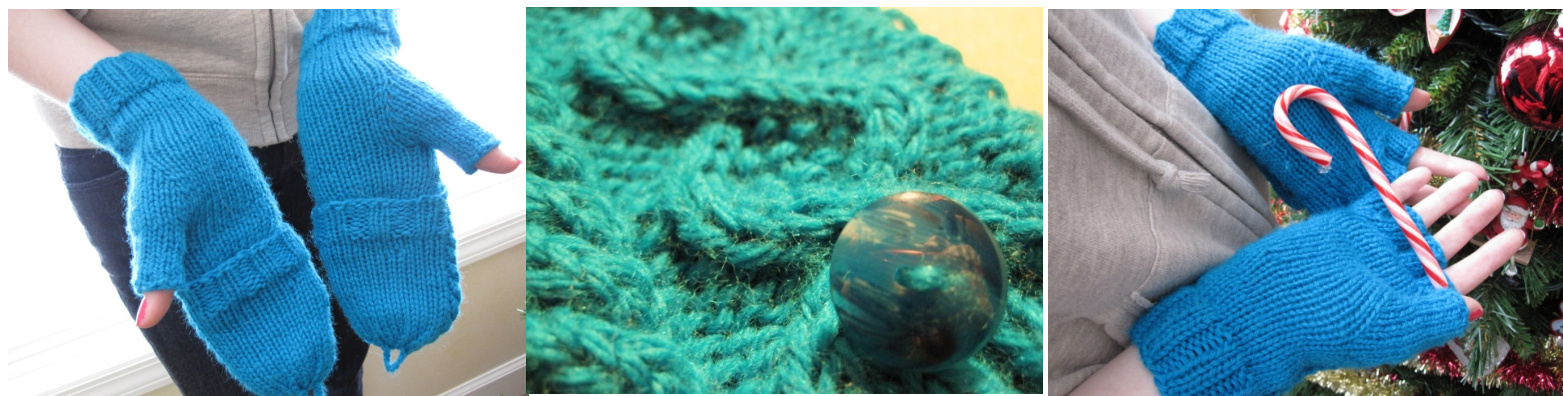
The "wrist warmer" part is worked first,then stitches are picked up acrossthe back of the hand forthe mitten flap.1 have pretty average size hands, but if you want to make the glittens bigger, just cast on more stitches forthe palm ofthe hand. Just make sure the total number of stitches is a multiple of 4 or you'llhave to change the k2p2 ribbing at the bottom. This pattern was designed for two double pointed needles/the magic loop. You may need to split the stitches up differently if you're using double-pointed needles in order to work the cables. Finally, I am eternall grateful to Christina Slattery of www.christinaknits.com for her wrist warmer pattern, which is where I got the cable pattern and the thumb gusset technique, and for starting off my wristwarmer obsession!
Yarn: Ella Rae Classic wool Gauge: 20 sts/4in Needles: 2 $24^{\prime\prime}$ US size 7 $(4.5\;\mathsf{m m})$ ) circular needles (or one $40^{\prime\prime}$ for the magic loop) Other Notions: tapestry needle 2 shank buttons size F crochet hook stitch markers cable needle small amount of waste yarn for thumb gusset and fingers Cast on 40 stitches (split evenly among two needles). Work in k2p2 rib for 10 rounds. Begin the cable pattern. Start at row 1, on column 6 -- work the chart until then end on the front needle,then work in stockinette stitch across the back needle until 5 stitches remain, then work columns 1-5. Knit in cable pattern for two chart repeats. On row 9 of the last repeat, place markers for thumb gusset as so: Right hand: Knit until 2 stitches past the cable chart, pm, knit 2, pm, knit to end. Left hand: Knit until 4 stitches before the cable chart begins again on back needle, pm, k2, pm, 2. Thumb gusset: next round: knit to first marker, slip marker, M1 by knitting in the stitch below, knit to second marker, M1, slip marker. Continue in cable pattern in front and increasing between markers every other round untilthere are 14 stitches between the markers. This will take more than one full chart repeat. Closing the thumb gusset: Knit until the stitch before the marker, M1, remove marker. Slip first stitch onto right needle and place 12 stitches on waste yarn. Place slipped stitch back on left needle, k2tog, knit to end. Knit until end of current chart repeat, then cease cable work and knit across to mark for flap. Knit 1 round. Next round: k2tog over each cable (that is, over the two C4F cables and each arm of the diamond cable -- 4x total. This hides the decreases somewhat). Knit three more rounds, then place allstitches on waste yarn for fingers. Fingers: Pinky: pick up stitches from edge of glove, on opposite side from thumb. Cast on 2 stitches inthe middle Knit 5 rounds. Bind off (Idid the bindoffrow in kpl patten fora neat edge that would sit ontop ofthe knitting instead of around the side, but that's all personal preference, whichever you like better.) Pick up remaining 28 stitches, plus 2 stitches from pinky edge. Knit 1 round (this compensates forthe crook of the pinky being lower than the rest of the fingers and makes the glove fit better). Ring finger: place allbut 10 stitches on waste yarn. Cast on 2 stitches in the middle. Knit 7 rounds. Bind off. Middle finger: pick up 5 stitches from either side, 2 stitches from ring finger edge, and cast on 2 stitches in the middle. Knit 8 rounds. Bind off. Pointer finger: pick up 10 stitches from waste yarn and 2 stitches from middle finger edge. Knit 6 rounds. Bind off. Thumb: pick up 12 stitches from waste yarn and 2 stitches from hand edge. Knit 11 rounds. Bind off. At this point, there will be lose ends hanging off the glove allover from working each finger individually. I wove in all these ends before going on to the flap, otherwise it's a real pain. Mitten flap: Pick up 25 stitches from cable to cable on first knit row. Cast on 15 stitches on palm side (25 sts on front needle, 15 sts on back needle). Work in cable pattern on front needle (Note:after the third row, switch the first C4F cable to the back needle (as the glove was knitted) to even out the number of stitches on the needle and make it easier.), and k2p2 on palm side for 8 rows. (Another note: there's an odd number of stitches across the palm. If you start with a knit stitch you'll end with one purl, but the purl stitch before the C4F cable compensates for that.) Switch to stockinette stitch on palm side and continue in pattern for 3 cable repeats. Decreases: The decreases for the tip of the mitten flap are worked so that the cables are not affected. On the front side of the needle, the purl stitches on either side of the diamond cable are decreased. This slants the C4F cables around the closing diamond. On the back needle, decreases are worked across the palm stockinette stitches. Row 1: knit in pattern. Row 2: on front needle:ssp, knit diamond cable, p2tog. On back needle: k1, k2tog, kto 3 stitches before cable, k2tog,k1. Continue ssp's and p2tog's on front needle for the next 3 rows. Back needle decreases are as follows: Row 3: k1, k2tog x2, k3, k2tog x2, k1. Row 4: k1, k2tog x3, k2. Row 5: k2tog x3. There should be 11 stitches remaining on the front needle, and 8 stitches remaining on the back needle. Cut yarn, leaving a long enough tailto crochet button loop, and draw through remaining stitches. Crocheted Button Loop: Using tail from knitting, chain8, and attach to flap with slipstitch. Sewbutton in corresponding spot on back of hand. (Note: Depending on your button size, you may need to chain more or less.) Cable Chart: (The line between stitches 5 and 6 indicates where to divide the pattern over the two needles.)

2sts tocn,hold to frontp1,k2fromn C4F-Sl2sts tocn,hold to front,k2,k2fromn


