Heather Knitz presents... "Preppy and Sassy Knitting Patterns" # Heather's
Hint and Tip Guide
For finishing your Preppy Purse Kpit/Felted/B2g Bag Purses and Handbags... apd much, much more!
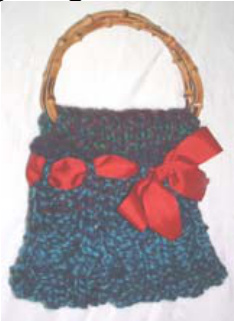
Heather's FINISHING TECHNIQUES USING GROSGRAIN RIBBON
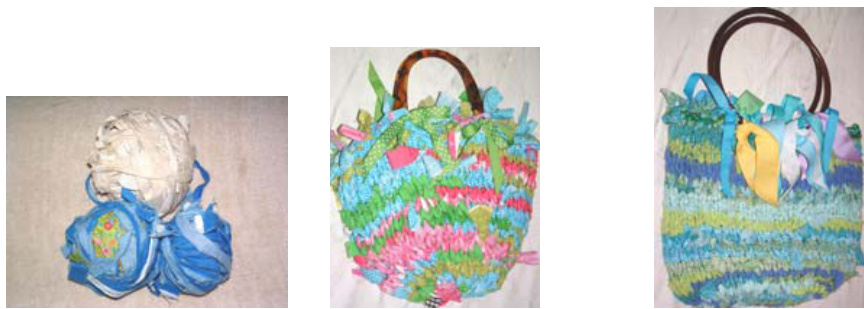
1. Add texture by mixing solid colored ribbon with polka dots, stripes and other prints in coordinating colors 2. Add depth by using mixed widths of ribbons (l use mostly 1.5", 1.0" and .5" widths) 3. You can finish your purse bag by tying bows:

4. You can finish your purse bag by using double knots and letting the ribbons hangdown:
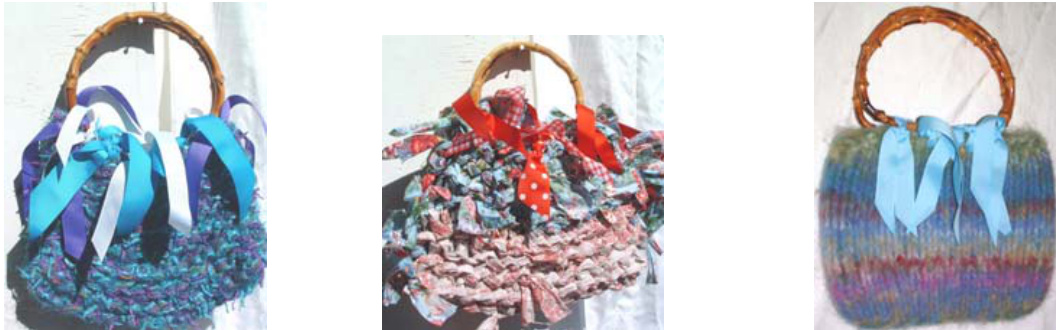
5. For knit purses you can weave grosgrain ribbon in and out of the purse:
6. Heather's favorite Online Ribbon boutique... $\circledcirc$ On ebay check out Fancy Nancy's Ribbon Boutique: $\circledcirc$ Fancy Nancy's Ribbon Boutique specializes in unique, fun and funky woven and grosgrain ribbon mixes. This ribbon is great for hairbows, belts, clothing and scrapbooking. $\circledcirc$ Her ebay store is always fully stocked...be sure to tell her that Heather sent you! $\circledcirc$ Fancy Nancy's ebay id is: fancynancy621
\*BONUS\* SELECTING THE RIGHT PURSE HANDLE
Large 9/10" circular purse handles These LARGE smooth wooden handles are great, they don't snag on clothing $\circledcirc$ They can easily be carried in the hand OR they can be carried over the shoulder $\circledcirc$ These large purse handles work great for large/extra large knit and rag bag purses AND felted totes
6/7" U-shaped purse handles
These handles are some of my favorites to use! $\circledcirc$ They come in a large variety of sizes as well as finished (wooded, bamboo, faux tortoise shell and a variety of Lucite plastic COLORS!!! $\circledcirc$ They can easily be carried in the hand $\circledcirc$ Perfect for the rag bags and the felted 6/7" D-shaped purse handles

These handles are some of my favorites to use! $\circledcirc$ They come in a large variety of widths & finishes (wooded, bamboo, faux tortoise shell) $\circledcirc$ They can easily be carried in the hand $\circledcirc$ Perfect for the rag bags and your hand knit purses! \*\*My new favorite purse handles are now available through Crystal Palace Yarns\*\* You can view their entire line of purse handles OR download a pdf file that has all of the ones that are available... These handles are allsold in pairs, in a clear poly bag with header . Use them for knited, felted, crocheted or sewn bags. Style number, size and color name are shown under each photo. Choose from animal prints, holiday handles or brightly colored Lucite plastic handles!
visit the Web site at www.straw.com
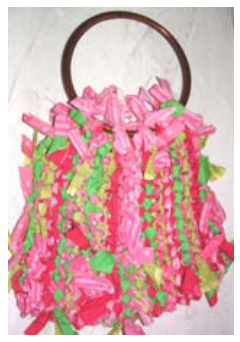
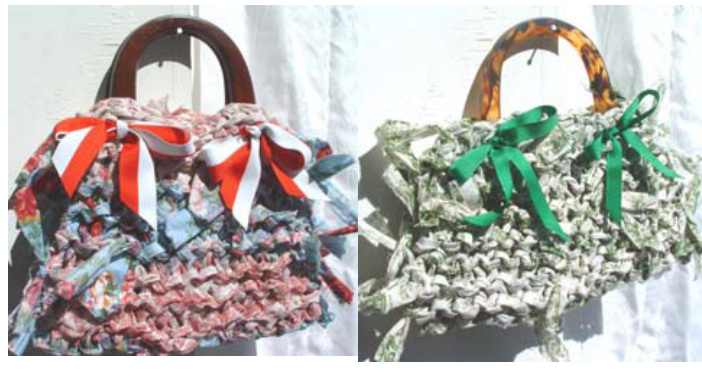
HEATHER'S TIPS ON SELECTING FABRICS FOR RAG BAGS 1.Choosingcolors:
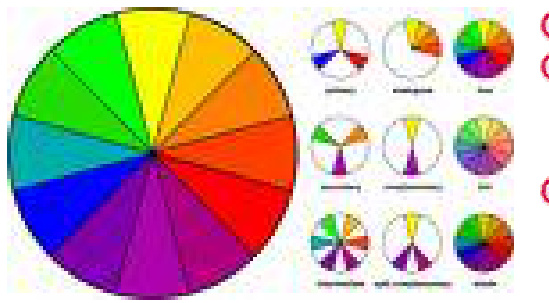
Color is very important in choosing fabrics Complementary Colors: Colors that are opposite on the color wheel are great...I love to mix reds and greens and blues and oranges together! Analogous colors: My favorites are the blue/green/yellow coior family! I also love the oranges into reds and yellows!
2. Choosing fabrics:
Mix prints and texture (in addition to color) $\circledcirc$ I love to use polka dots, stripes and solids together $\textcircled{\textcircled{\scriptsize{1}}}$ Use a variety of different types of fabrics
3. Using Lilly Pulitzer Siqnature Fabric and Vera Bradley Fabrics: These tabrics are WIDELY available on the internet BUT ARE VERY EXPENSIVE $\circledcirc$ One tip I have is to enter the fabrics into your "favorite searches" in eBay, when new things become available, you will get notified... $\circledcirc$ Every now and then I have watched fabric, swooped in right before it expired and I got a good deal on it! $\circledcirc$ BELIEVE IT OR NOT..THERE ARE SO MANY KNOCK-OFFS, I HAVE FOUND GREAT SIMILAR PRINTS AT WAL-MART SUPERCENTERS!! You can actually find fabrics for $\mathbb{s}1.00$ and $\pmb{\mathbb{52.00}}$ a yard!!!! A place I have purchased Lilly Pulitzer Signature Fabric on eBay is: 0 Her ebay id is uniquekraftygifts ; she consistently has had FAIR pricing on Lilly Pulitzer signature fabrics! Check her out and tell her that Heather sent you!
1. Helpful materials for using fabric to knit with...
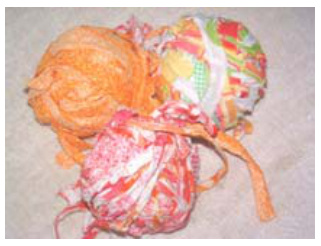
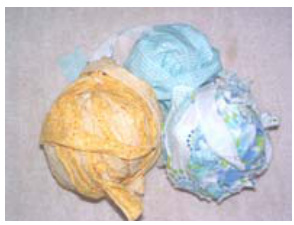
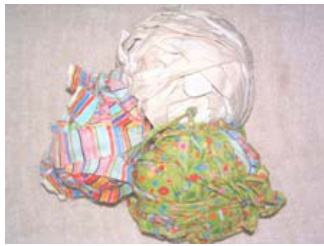
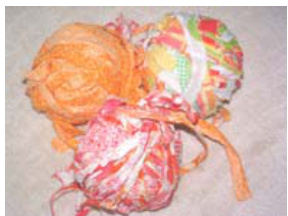
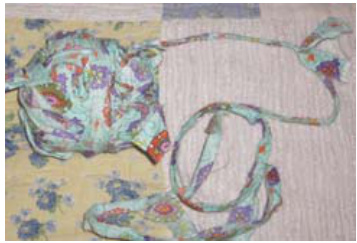
$\circledcirc$ Fiskars rotary cutter and mat (IF USING THE CUTTING METHOD) $\circledcirc$ Sharp, sharp scissors 2. The tear method (my personal favorite): a. Buy fabric needed b. \*\*IMPORTANT: BEFOREYOU TEAR\*\*\*What size knitting needles are you using to knit with? You must determine this BEFORE tearing fabric. Here is a Heather Tip: CUT THE FABRIC STRIPS THE APPROXIMATE SIZE OF THE KNITTING NEEDLE (FOR EXAMPLE. IF YOU ARE USING SIZE 35 KNITTING NEEDLES, MAKE THE FABRIC STRIPS ABOUT 1.25 INCHES. If you are using size 19 knitting needles, make the fabric strips about 1 inch wide. c.Lay about a yard of fabric out flat at a time. Fold in half. Place the fold end by you. d. Make 1" DEEP cuts into the fold of the fabric the DESIRED WIDTH. Make the cuts all the way across the fabric. e. Now at each of the cuts along the fold, TEAR THE FABRIC. \*\*\*IMPORTANT: YOU DEFINITELYWANT TOHAVESHREDDINGANDYOUMAYFROMTIMETOTIME HAVE PIECES THAT DON'T TEAR PERFECTLY...THAT IS THE WHOLE POINT! DON'T EVER THROUGH ANY FABRIC STRIP AWAY!!!\*\*\* f. Once you complete all of the tearing you will have a mound of fabric strips. Now it is time to tie the strips together! If you are only using one type of fabric, just double knot the fabric strips together. After you tie them all together, wind the yarn as if you were winding yarn! Now you have created a ball of fabric to knit with! g. IF YOU ARE USING SEVERAL TYPES OF FABRIC, there are a number of ways to proceed here... i. If you want to create stripes, tie 3-6 pieces of the same fabric together and then move on to the next type of fabric and onward.. i. If you want to create a completely unconventional rag bag, jumble and piece at a time, knot together until you run out! ii. if you want to create patterning, lay the piles out of fabric (separated by color or print, etc..) on the floor and then pull one strip from each pile, tie together. Continue until you run out of fabric.
3. The cutting method:
a. FOLLOW THE TEARING METHOD DIRECTIONS. INSTEAD OF TEARING USING YOUR ARM STRENGTH JUST CUT ACROSS (A ROTARY CUTTER IS VERY HELPFUL WHEN USING THIS METHOD)
\*BONUS\*
Heather's Tips on HOW TO MAKE A SIMPLE BROADCLOTH PURSE LINER 1.Why Broadcloth? It's inexpensive and sturdy enough. If you finish with grommets (instead of hand sewing the liner directly into the purse) you can remove the liner from the purse and wash it!!! Ialso like to stick to the plain colored broadcloth because my purses tend to be bright and vibrant!
2. Hand Sewing vs. using a Sewing Machine:
You can totally hand sew this liner using a whip stitch. It would; however, be much easier and FASTER if you had a sewing machine to sew up the two sides of the liner! You will hand sew the finished liner directly into the purse, just below where the purse is attached to the handles.
3. Steps to making a BASIC liner..
Finish the purse/handbag. $\circledcirc$ Lay the finished purse out flat. $\circledcirc$ You will cut a piece of broadcloth the width of your purse, adding one inch to sew a seam. Use a ruler to measure. If it is about 18" wide, cut a piece of broadcloth 19" wide. $\circledcirc$ Now measure how deep the purse is...if it is $\pmb{9}^{,}$ deep on one side, you will want to cut the broadcloth piece 19" (18 inches plus 1 inches to sew the seam). When you have cut out the piece of broadcloth out, you will fold it in half. You will be sewing up the left side and the right side with a simple stitch. I use a zig zag stitch on the sewing machine. (Try to keep to a $\%$ inch seam) $\circledcirc$ For thread, I use the nylon Coats & Clark clear thread! $\circledcirc$ I also fold over the top (1/2 inch seam on each side). I use a zig zag. stitch on the sewing machine as well. \*\*IMPORTANT: When you fold over for the seam, be sure to FOLD TO THE OUTSIDE. After you sew the seams, you will be simply setting the liner inside the purse (so you want all of the seams on the outside of the liner). The pretty side of the liner should be on the INSIDE because that is the part that will be visible when you open the purse! Set the liner inside the purse. Do a simple whip stitch all the way around the purse along the top of the liner. I usually go around two times just to add extra durability to the liner.
4. One last option...
After you have finished sewing the liner you can add grommets to the. top of the liner. If you are finishing the purse using grosgrain ribbon, it makes it very easy to attach the purse handles to the purse! $\circledcirc$ For a purse that is about $\mathbf{18}^{,}$ wide at the base and about $\mathbf{10^{\circ}}$ deep,I could see adding about 7 grommets across each side along the top!
\*BONUS\* Heather's HOT Tips on Felting Knit Wool
$\circledcirc$ I usually felt by placing each purse in its own pillowcase. $\circledcirc$ If lam using I-cord or other small pieces to felt, will put a few pieces in a single pillowcase $\circledcirc$ Set washing machine on heavy load, add a pair of jeans $\circledcirc$ Washing machine cycle: HOT WATER, medium size load (unless you are felting a lot of stuff at one time) $\circledcirc$ I have literally felted TONS AND TONS of things and I have never seen the benefit of wasting the water in the "rinse"' cycle...there really is no pointtry to avoid that at all costs! Let it agitate, agitate, agitate and then spin, spin, spin! $\circledcirc$ I add some fabric softener...Honestly, I did it one time in place of detergent BY ACCIDENT. When the purse cycled through, the felted wool was SO SOFT I couldn't believe it. I have just adopted that policy (with really no scientific research conducted) and do it each and every time! $\circledcirc$ Despite popular opinion...DoN'T walk away from your purse/object when you put it in the washing machine! You spent all of that time knitting....don't let it be wasted! $\circledcirc$ It is really important to tug, pull and shape the wet felted wool! You can really get some amazing shapes by taking the time to stretch it out! $\circledcirc$ Felt until you are comfortable and are happy with the resul...Some people say there shouldn't be visible stitches...Well, it really is all personal preference! $\circledcirc$ There are many colors of wool yarn that I use IN A ToN OF THINGS...every now and then they felt differently on me! Don't panic! Sometimes the wool that you are most familiar with, will surprise you! $\circledcirc$ Sometimes an object will felt in one cycle, sometimes it will take 5 runs! Just ride it out
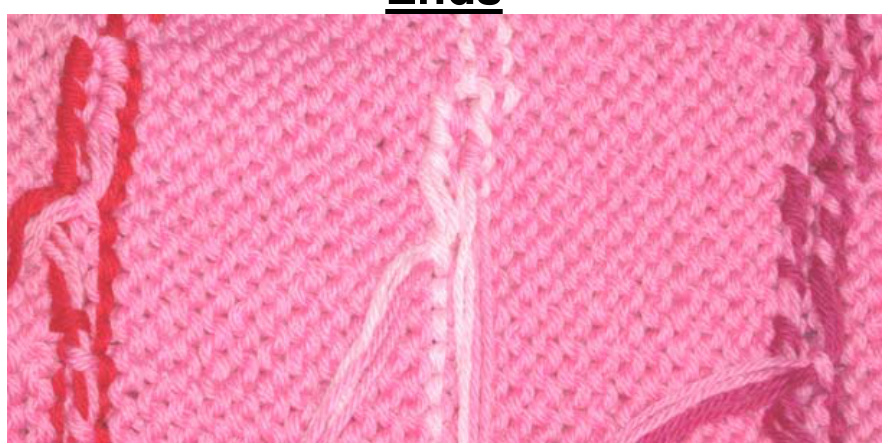
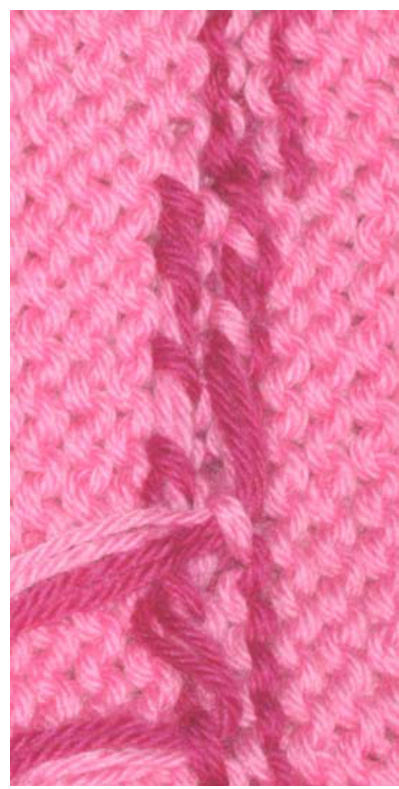
When you switch colors, cut the yarn end so that there is a tail about 5-6" long. Hold the tail back. As you begin to knit with the new color, cross the tail over in back so that the tail of the old color is being pulled across. You will do this for like 8-10 stitches. What is the point of this? After you are done knitting, all of your ends are already sewn in, all you have to do is trim! It saves SO MUCH TIME. Here are two pictures (above and below) of what it Now, pull the yarn end tight. Weave in all yarn ends.
\*BONUS\*
\*\*\* How to Secure the Purse Handles to the Purse\*\*\*
\*\*\* U-shaped purse handles\*\*\* $\circledcirc$ If you are using U-shaped purse handles, measure the top of your purse. $\circledast$ Mark the center of the purse with a safety pin. Then measure out how to center the purse handles you are using out from the center. $\circledcirc$ Mark those measurements out with safety pins. $\circledcirc$ Either use a sharp knife or a sharp pair of scissors. You will want to make a one centimeter cut into the felt where you have centered your purse handles. So, for the u-shaped purse handles you will be making a total of 4 cuts (two on each side). $\circledcirc$ Cut FOUR, 14" strips of grosgrain ribbon. (My favorite width to use is the 1" and the 1.5" wide ribbon) $\circledcirc$ Now you just put the grosgrain ribbon through the hole in each of the four holes. $\circledcirc$ Double knot the ribbon and then tie a bow. If you don't want a bow you can just let the ends hang down. Trim the ends of the ribbon at an angle. $\circledcirc$ If you want the ribbon ends NOT TO fray, use fray check or I have heard of using clear fingernail polish! That will preserve the ribbon! The great thing about using ribbon is that it can EASILY be removed and changed out! Check out the other tip sheets for more ideas on how to finish your purse! \*\*\*D-shaped purse handles \*\*\* If you are using D-shaped purse handles, measure the top of your purse. 0Mark the center of the purse with a safety pin. Then measure out how to center the purse handles you are using out from the center. 0 Mark those measurements out with safety pins. $\circ$ Either use a sharp knife or a sharp pair of scissors--\*\*\*BE CAREFUL\*\*\*\*. You will want to make a one centimeter cut into the felt where you have centered your purse handles. For 5" wide, D-shaped handles I would recommend making one cut for each inch (so 5 cuts on either side would make a total of 10 cuts) 0 Cut enough grosgrain ribbon for the number of holes you made. (My favorite width to use is the 1" and the 1.5" wide ribbon) 0 Now you just put the grosgrain ribbon through the hole in each of the holes. 0 Double knot the ribbon and then tie a bow. If you don't want a bow you can just let the ends hang down. Trim the ends of the ribbon at an angle. $\circledcirc$ If you want the ribbon ends NOT TO fray, use fray check or I have heard of using clear fingernail polish! That will preserve the ribbon! $\circledcirc$ The great thing about using ribbon is that it can EASILY be removed and changed out!
Check out the other tip sheets for more ideas on how to finish
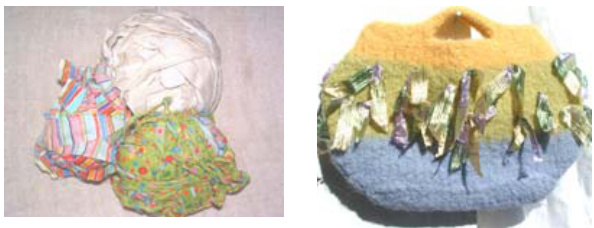
\*BONUS\*
If you are using circular purse handles, measure the top of your purse. 0 Mark the center of the purse with a safety pin. Then measure out how to center the purse handles you are using out from the center. O Mark those measurements out with safety pins. oEither use a sharp knife or a sharp pair of scissors--\*\*\*BE CAREFUL\*\*\*. You will want to make a LONG cut into the felt where you have centered your purse handles. 0 For 5" wide, circular bamboo handles I would recommend making one about 3 inches wide! (ABOUT 1.5-2 INCHES TO THE LEFT AND TO THE RIGHT OF THE CENTER) 0MAKE THIS CUT ABOUT 12 INCH DOWN FROM THE TOP OF THE PURSE o Cut enough grosgrain ribbon for the number of holes you made. (My favorite width to use is the 1" and the 1.5" wide ribbon) I USED 7 DIFFERENT PIECES OF RIBBON ON EACH SIDE OF THE PURSE! 0 Now you just put the grosgrain ribbon through the LONG CUT. 0 Double knot the ribbon and then tie a bow. If you don't want a bow you can just let the ends hang down. Trim the ends of the ribbon at an angle. $\circledcirc$ If you want the ribbon ends NOT TO fray, use fray check or I have heard of using clear fingernail polish! That will preserve the ribbon! $\circledast$ The great thing about using ribbon is that it can EASILY be removed and changed out! Check out the other tip sheets for more ideas on how to finish your purse!
\*Bonus\*
MAKING THE OPTIONAL OCTOPUS ARM FLOWER!
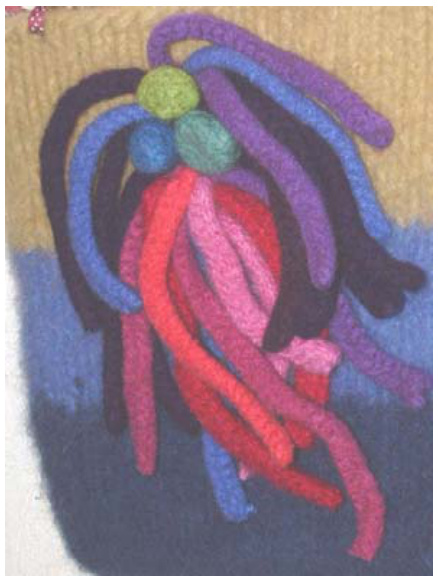
$\circledcirc$ These octopus arm flowers are actually i-cord strips knitted separately! $\circledcirc$ I used about 8 different shades of Cascade 220 wool yarn to make this particular flower $\circledcirc$ I make about 10-15 different I-cord strips to make a flower this size $\circledcirc$ I used a 3 stitch I-cord, I used size 15 double pointed needles, I used a double strand of Cascade 220 yarn ? I made each piece of I-cord a different length..anywhere from 6 inches to 15 inches (before felting) $\circledcirc$ I then felted them all and then I sewed them together using clear nylon thread Then, I sewed them onto the purse! To make the small balls in the middle, make small squares knit in wool (about 5 stitches by 5 stitches), felt them and use the nylon thread to pull up the ends and you have a little felted ball!
Copyright 2007: HK Heather Knitz
This patten(s) is designed for you personal knitting enjoyment. This pattern or any of the techniques used may NOT be made for sale without written permission from Heather Lynch Lowe/Heather Knitz. All designs are 100% original to me and not intended for copy or reproduction. If you are interested, I would be delighted to speak with you about any retail or consignment options that may be available. I'd be happy to accommodate you.


