Glass lCozy Ummertime
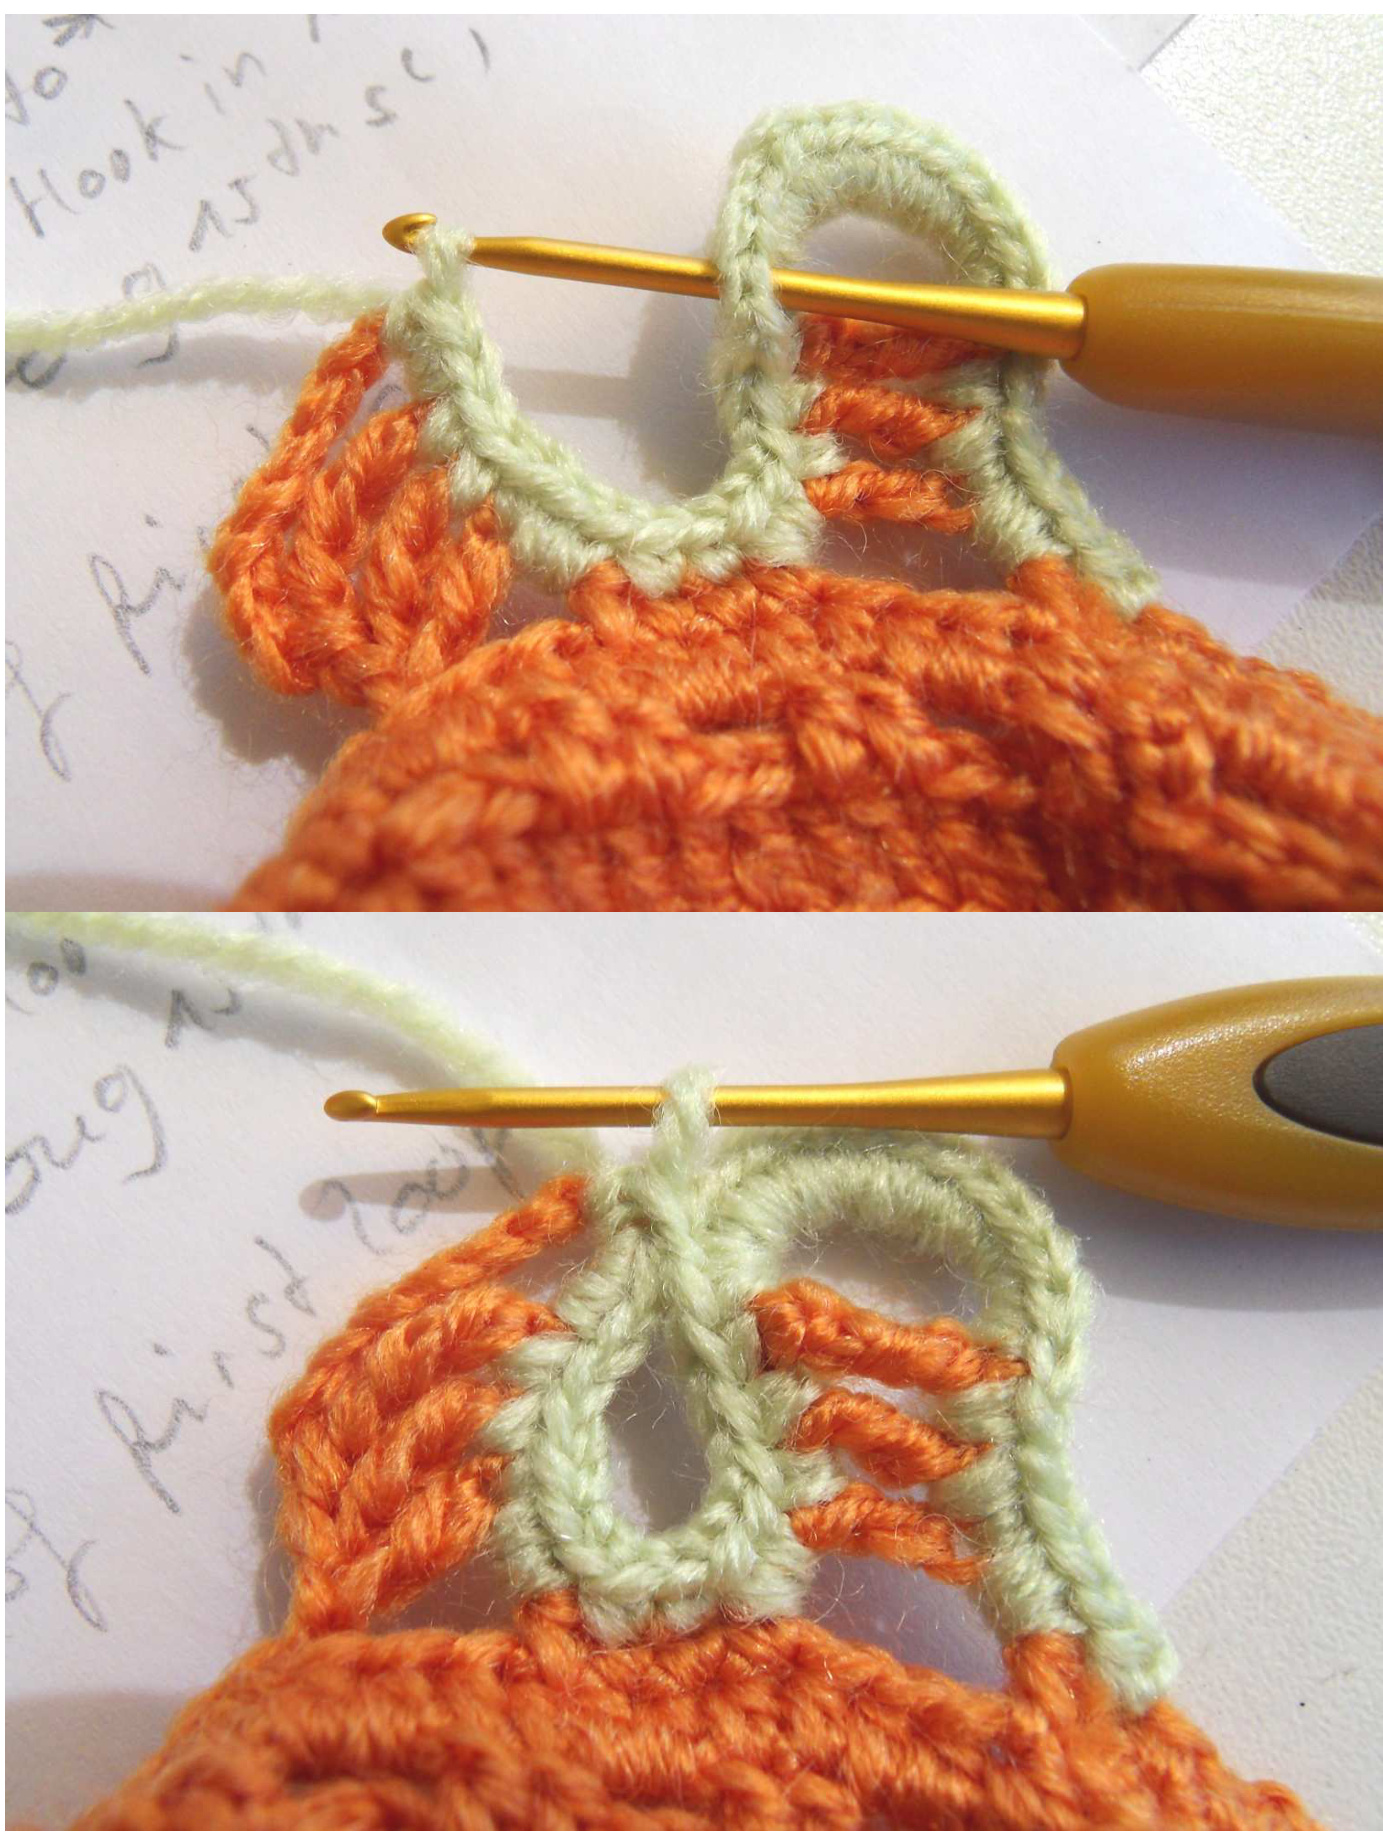
by Daniela Herbertz The Glass Cozies on the picture are crochet with: Some leftover green and orange acrylic yarn (one cozy weighs 10g). 2mm crochet hook The bottom circle is cm 7 0 The hight of the Glass Cozy is 4,5cm Abbrevations (US Terms): Slip Stitch (sl st), Chain (ch), Single crochet (sc), Half double crochet (hdc), Double crochet (dc), Treble crochet (tr), Double Treble crochet (dtr), skip (sk), st (stitch), FO (fasten off) Pattern: You start in the middle of the bottom circle using the main color. 1. Rd: ch 7, sl st in 1st ch to form a ring. Ch 3 (counts as first dc), work 13 dc in ring, sl st in $3^{\mathrm{{rd}}}$ ch of ch 3 to close the round $(=14\ d\mathsf{c})$ 2. Rd: ch3, dc in same space as slip stitch made, $^{\star}2$ dc in next ${\mathsf{d}}{\mathsf{c}}^{\star}$ ,repeat from \* to \* around, close round with slip stitch in $3^{\mathsf{r d}}$ ch of ch3 $(=28$ dc) 3. Rd: ch3, 2dc in next st, $^\star_{\sf d c}$ in next st, 2 dc in next ${\mathsf{s t}}^{\star}$ , repeat from \* to \* around, close round with slip stitch in $3^{\mathsf{r d}}$ ch of ch3 $(=42$ dc) 4. Rd: ch3, dc in next st, 2dc in next st, $^\star_{\sf d c}$ in next st, dc in next st, 2 dc in next ${\mathsf{s t}}^{\star}$ ,repeat from \* to \* around, close round with slip stitch in $3^{\mathsf{r d}}$ ch of ch3 $(=56$ dc) 5. Rd: ch3, dc in next st, dc in next st, 2dc in next st, $^\star_{\sf d c}$ in next st, dc in next st, dc in next st, 2 dc in next st\*, repeat from \* to \* around, close round with slip stitch in $3^{\mathrm{rd}}$ ch of ch3 $(=70\ d\mathsf{c})$ This is the bottom circle. Try if it is big enough for your glass. If you have to adjust the size no problem. You can add rows or crochet less so the circle has the right size for your glass. Just make shure that you can divide the number of stitches on the last round through 7!!! That's important for the following rounds. No matter how big or small you made your circle you can continue with the pattern. The only thing that changes is the numer of "Loops" you will have. Remember you need 7 stitches as base for one “Loop". 6. Rd: Work in back loops only (only this round): ch3, dc in every st around $(=70$ dc) 7. Rd: ch3, dc in next st, \*ch2, sk 2 st, dc in next $^{2}\,{\mathsf{s t}}^{\star}$ , repeat from \* to \* around, close round with slip stitch in $3^{\mathsf{r d}}$ ch of ch3 8. Rd: ch2, \*hdc in next ${\mathsf{s t}}^{\star}$ , repeat from \* to \* around, close round with slip stitch in $2^{\mathsf{n d}}$ ch of ch2 $(=70$ hdc) 9. Rd: Now we start forming the “Loops" (see picture). Sc in same as joining sl st made. Sc in next st, $^{\star}{\tt c h13}$ , dtr in $10^{\mathrm{th}}$ chain from hook, tr in next st, dc in next st, ch1, sk the last ch, sk the next 3 hdc, sc in next $4\;{\mathsf{s t}}^{\star}$ , repeat from \* to \* around, only that you work 2 sc after making the last loop (not 4sc) close round with slip stitch in first sc made. FO main color $(=10$ Loops made)
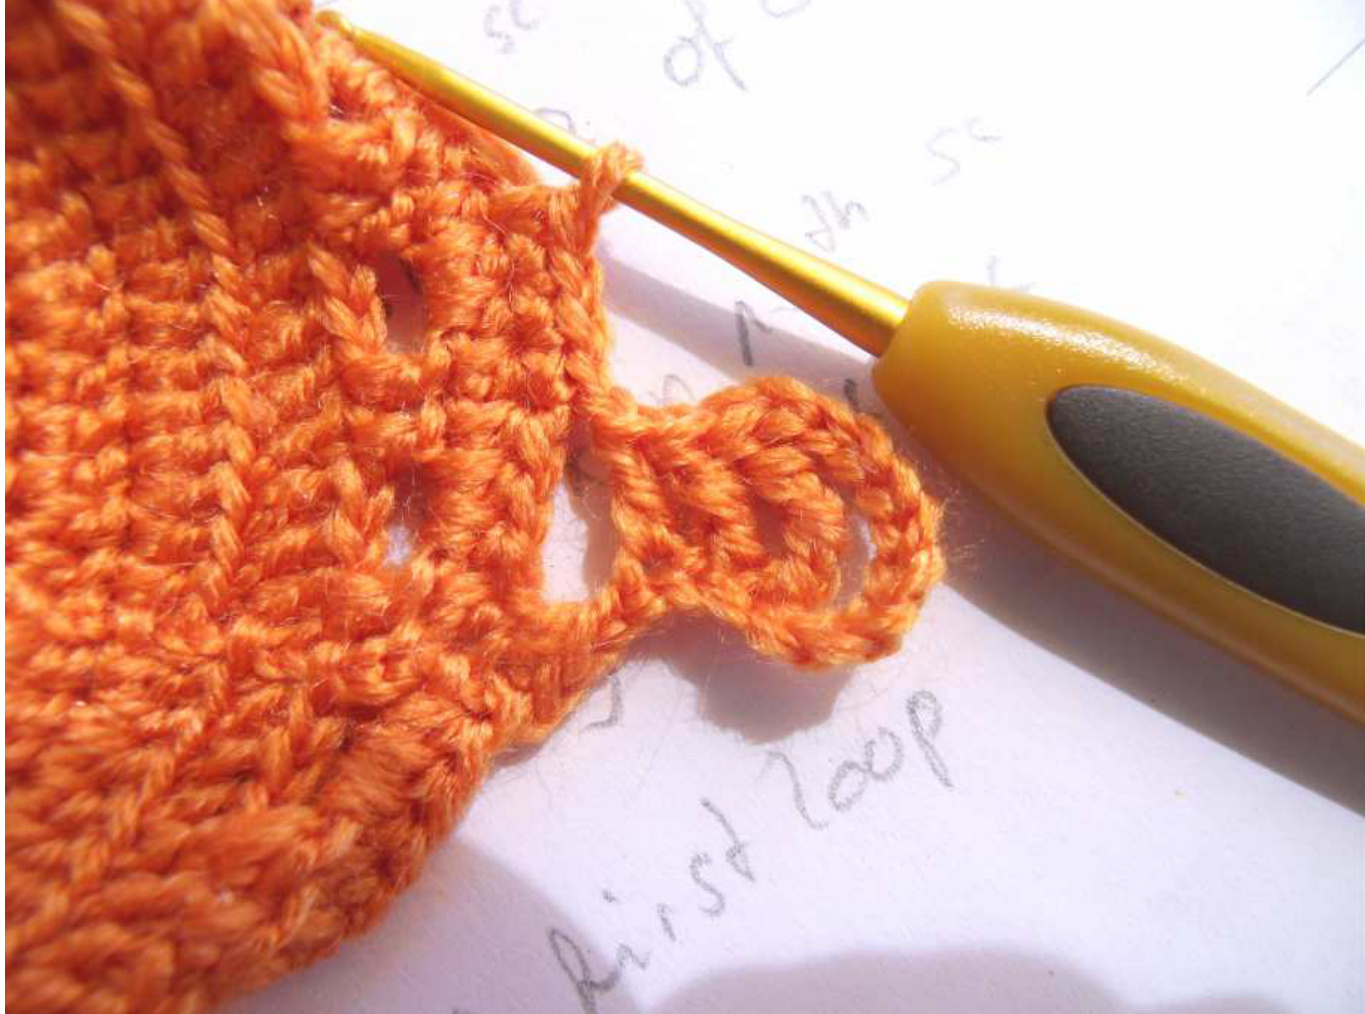
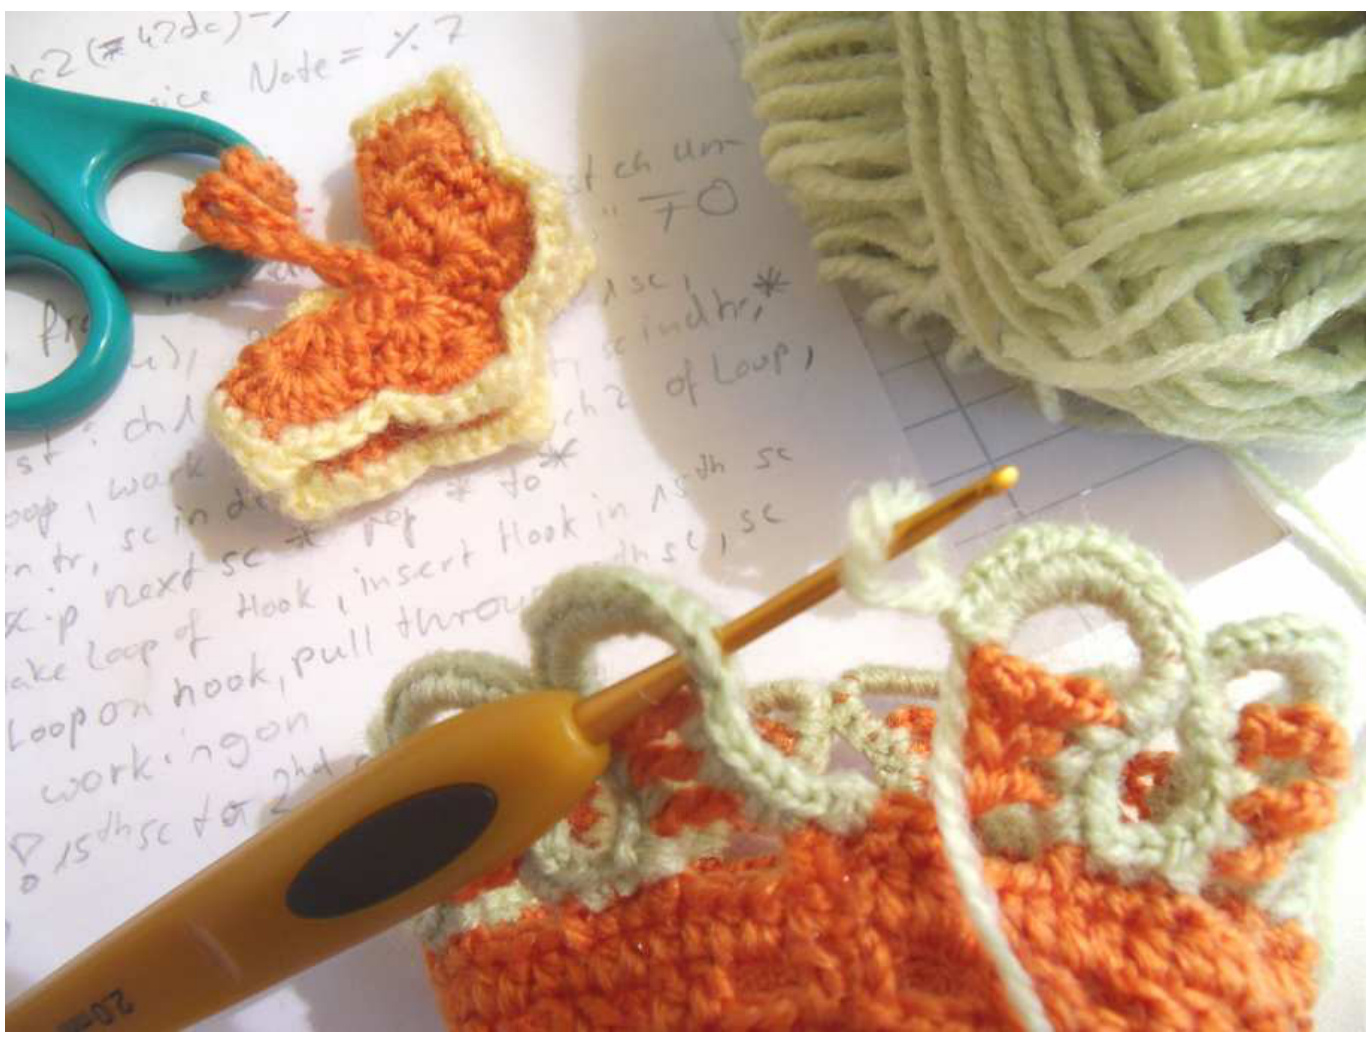
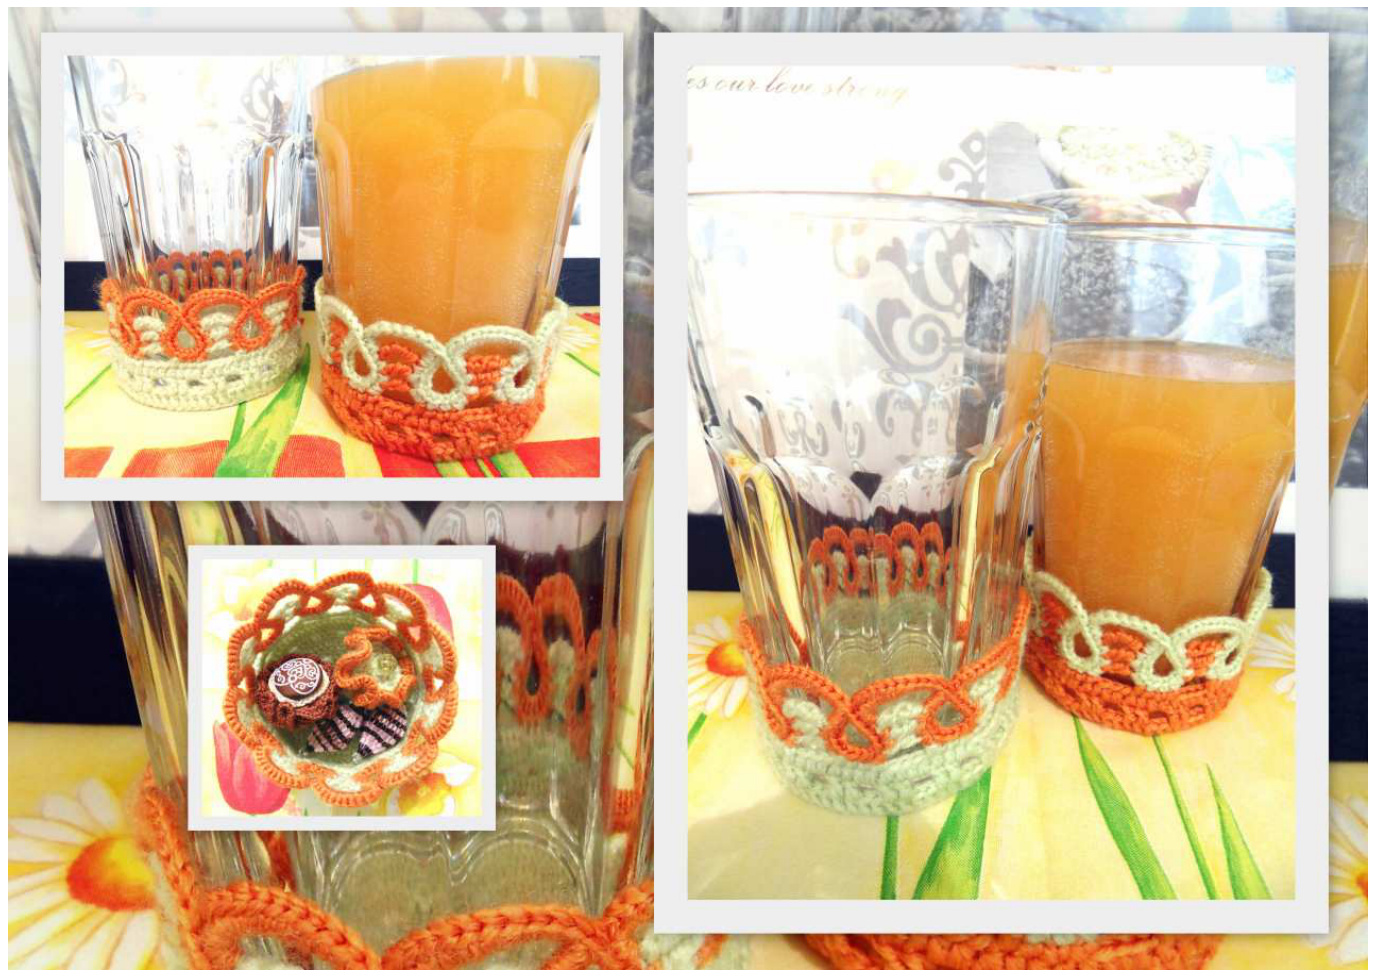
Rd 10: attach second color with a slip stitch to any of the $3^{\mathsf{r d}}$ sC of 4 sc made in Rd 9, sc in same st, skip next sc, work 2 sc in first 2 ch of “Loop", sc in dc, sc ind tr, sc in dtr, 16 sc in top of Loop, sc in dtr, sc in tr, sc in dc, 2 sc in last 2 ch of “Loop", skip 1 SC, $^\star_{\tt S C}$ in next 2 sc, skip 1 sc, work 2 sc in first 2 ch of next “Loop", sc in dc, sc ind tr, sc in dtr, 2 sc in top of "Loop". Now take the loop off the Hook, with hook stitch through the $15^{\mathrm{th}}$ sC on top “Loop" of last "Loop" you made (see next two pictures), put loop back on Hook and pull through the. $15^{\mathrm{th}}$ sc, now continue working: 14 sc in top of “Loop", sc in dtr, sc in tr, sc in dc, 2 sc in last 2 ch of "Loop", skip 1 $\mathsf{s c}^{\star}$ , repeat from \* to $^\star6$ more times. Now you will work the last “Loop". The only difference here is that you have to attach it to two other Loops: sc in next 2 sc, skip 1 sc, work 2 sc in first 2 ch of next “Loop", sc in dc, sc ind tr, sc in dtr, 2 sc in top of "Loop". Now take the loop off the Hook, with hook stitch through the $15^{\mathrm{th}}$ sC on top “Loop" of last "Loop" you made (see next two pictures), put loop back on Hook and pull through the $15^{\mathrm{th}}$ sc, now continue working: 13 sc in top of “Loop" Now again take the loop off the Hook, with hook stitch through the $2^{\mathsf{n d}}$ sC on top "Loop" of first "Loop" you made (see 3rd picture), put loop back on Hook and pull through the $2^{\mathsf{n d}}$ sC, now continue working: sc 1 in top of "Loop", sc in dtr, sc in tr, sc in dc, 2 sc in last 2 ch of "Loop", skip 1 sc, sC 1, close round with slip stitch to first sc you made in this round. FO. Finished :0))) Now you made your first Glass Cozy "Summertime". Well done :o) You can slo use it as votiv candle holder, for a very small flower pott, or as little bowl for jewelry, rings, bonbons or whatever comes to your mind :o) This is a free pattern I made to share with everyone who wants to have it. Feel free to share it with friends and family. But please do not sell for Profit. You can sell finished Glass Cozies if you want to but I think they are much better as a Gift ;o). That's what they are made for :o) !!! (c) 05.06.2010