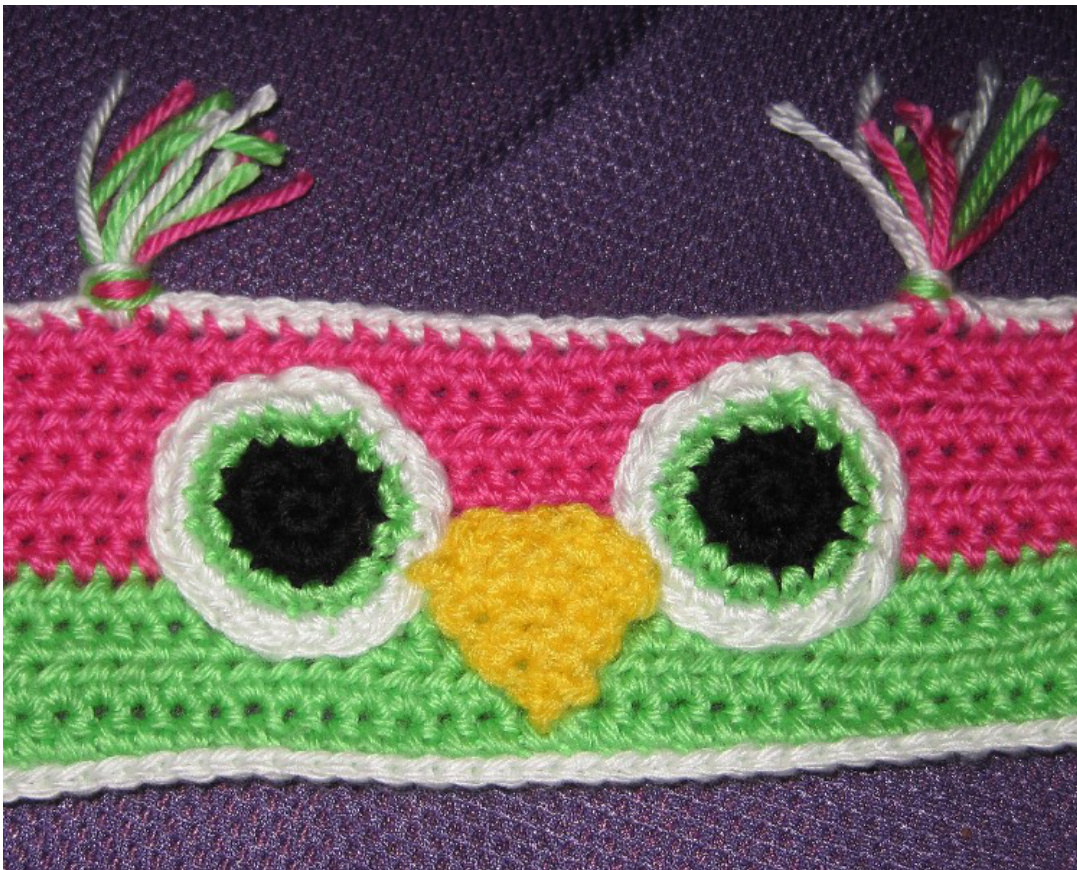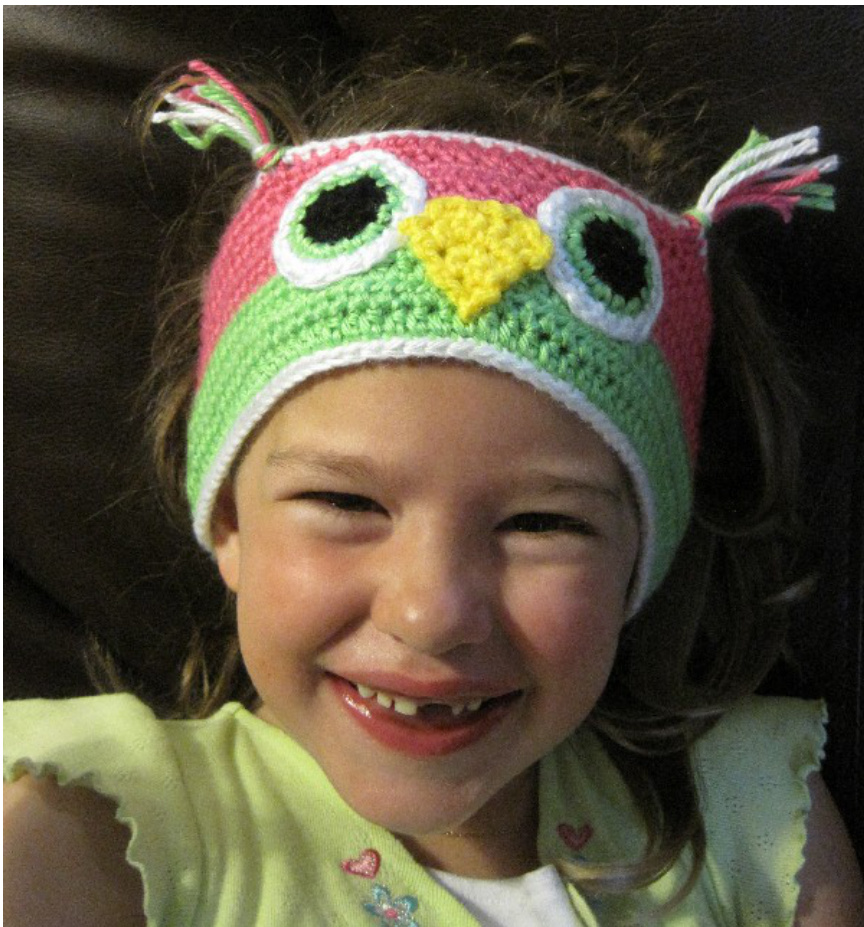
Hooty Headband
@ 2012 by Heather Holland This is a free pattern. You may make as many printouts as you like, give them to others if you'd like, but please retain the copyright information. Feel free to sell the things you make from the pattern, but you MAY NOT sell the pattern, because that just wouldn't be fair, would it. Worsted Weight yarn: Color A(lower color + eye iris): Bright green Color B (upper color): Watermelon Color C (edging, outer eye): White Color D (center eye): Black Color E (beak): Lemonade 1 or 2 medium sized buttons G hook Gauge: Doesn't much matter, mine was 17sc/4" but Simply Soft is slightly smaller than "normal"worsted. With A, make a chain long enough to go around the head where the headband should be. For my 5 year old, this was about 20 inches. Row 1: Sc in second chain from hook and next 9 stitches. Hdc across until 11 stitches from other end. Sc in each the last 11 stitches. Ch1, turn. Row 2: Sc in the next 10 stitches. Hdc across until 11 stitches from other end. Sc in last 11 stitches. Ch1, turn. Rows 3&4: Repeat row 2. Change to color B Repeat row 2, 6 more times, in color B. Fasten off. With color C, start in bottom right corner of the headband. Slip into corner, ch 1, sc 2 in corner stitch. Moving up the right end of the headband, sc 6. Making buttonhole: Ch 3, turn entire piece around and sl stitch into the previous border stitch 3 before the start of the chain. Ch1, sl stitch in the next stitch, then turn again to work forward. sc 4 into ch 3 space you just made, to form buttonhole. Make sure that your button fits through this. Adjust as necessary. Sc in edge next to where you turned, and in next stitch. 2 sc in the corner. Continue to sc all the way around the outside of the headband, with 2sc in each corner, until you are back at the start of the edging. Fasten off. Making the buttonhole:
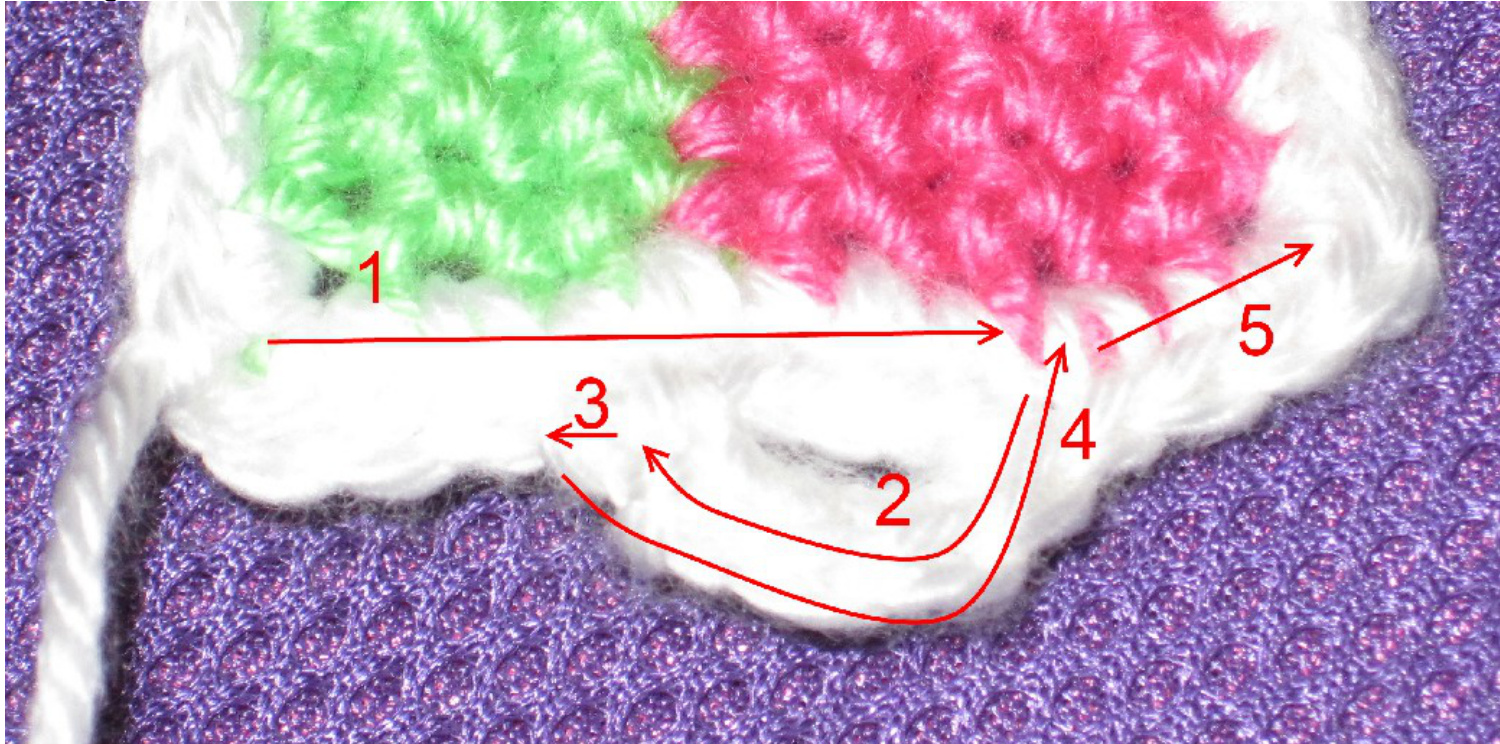
1. Sc 6 from corner. 2. Ch 3, and turn entire piece around, slip stitch in border stitch 3 sc before the start of the chain. 3. Sl stitch to following stitch (so your sc's aren't detached working back) 4. Turn entire piece, sc 4 into ch 3 space you just made 5. Sc in next edge stitch to continue the border around from there. Eyes (make 2) Row 1: In magic loop with color D, make 6 sc. Join with sl to first sc, ch 1 Row 2: 2 sc in each sc around. Join with sl to first sc. Change to color B. Row 3: Ch 1, \*2 sc in first sc, 1 sc in next sc. Repeat from \* around. Join with sl to first sc. Change to color C. Row 4: Ch 1, \*2 sc in first sc, 1 sc in each of next 2 sc. Repeat from \* around. Join with sl to first sc. Fasten off, leaving a long tail to sew the eye down.
Beak
With color E, ch 2, leaving a long starting tail to sew the beak down (this is the point of the beak, leaving the tail will make it nice and pointy) Row 1: 2 sc in second chain from hook, ch 1, turn Row 2: Sc in first sc, 2sc in second sc Row 3: Sc in first sc, 2 sc in second sc, sc in third sc, ch1, turn Row 4: Sc in first sc, 2 sc in second sc, 2sc in third sc, sc in fourth sc, ch1, turn Row 5: Sc in first sc, 2 sc in second sc, sc in third sc, 2 sc in fourth sc, sc in fifth sc. Fasten Off. Fold headband in half to find the center, and mark with a safety pin or other temporary item. Sew on eyes 1/2" on either side of the center mark, and 2 rows down from the top. Sew onbeak in center. Cut four 4" lengths of colors A, B, and C. Divide evenly into 2 bundles. Use these and a large hook to make a fringe at the upper edge of the headband aligned with the outer edge of the eyes. Trim as necessary. Attach button(s) in the proper position to fit when buttoned.