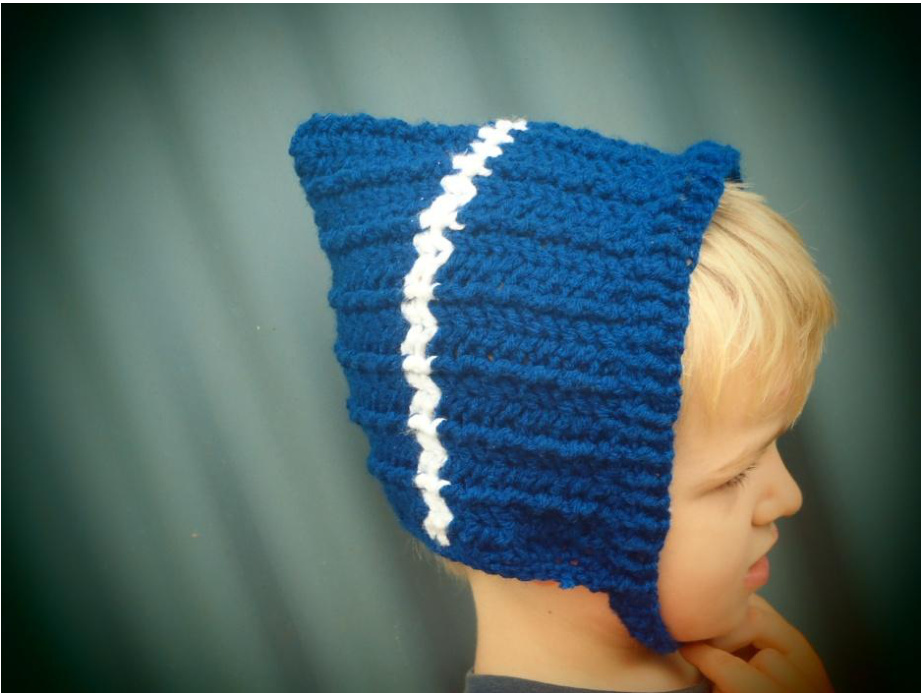
Bramble Bonnet/Pixie Hat
Skill level: Intermediate :s: Newborn, 3 months, 6 months, 12 months, 2 yrs, 3-5 yrs, 6-10 yr Please refer to the head circumference chart to choose the correct sizing. The fit is a nice loose comfortable fit. Sizes newborn to 12 months have an optional strap under the jaw.

| Size | Head circumference |
| Newborn | 13.5"/34cm |
| 3month | 16"/41 cm |
| 6 month | 17"/43cm |
| 12 month | 18"/46cm |
| 2 years | 19"/48cm |
| 3-5 years | 20"/51cm |
| 6-10years | 21"/53cm |
This hat in these pictures is actually a size too small for this child. This is a 3-5 yrs and he should be wearing a 6-10 for his head circumference. But he was the only one who would wear the hat and be photographed
Maya Levitt Bramble Bonnet/Pixie Hat. First published 18 January, 2013.
Supplies needed
VHook: 4 mm VYarn: 8 ply wool V1 tapestry or yarn needle optional 1 button
Mad Hattons Yarn and Sew: Bramble Bonnet/Pixie Hat
Allstitches areUs crochetterms
Stitches and abbreviations used:
Stitch Gauge
Foundation single crochet Chain (Ch) Single crochet (SC) Double crochet (DC) Half Double Crochet (HDC) Front post double crochet (FPDC) Back post double crochet (BPDC) Slip stitch (SI St) Skip Stitch (Sk St) .Stitch (st) Next (nx) Same stitch (sm st) Pattern FPDC/BPDC Ribbing:11 st &5 rows per2" Leaf Stitch: 15st & 8 rows per 2"
BEGINNING
STRAP LESS OPTION: Foundation Single crochet 60 (66, 72, 78, 84, 90, 96) STRAP 0PTl0N: Foundation single crochet 96 (111, 119, 129, 138, 147, 156) Row 1: Ch 2, BPDC, FPDC across in each st. HDC in last St. Turn Row 2: Ch 2, if the previous Row finished BPDC, FPDC around the first st, then BPDC next st. If the row finished with FPDC, start with BPDC then FPDC in the next st. Continue the pattern of BPDC/FPDC across. If using the strap option finish the row at st 60 (66, 72, 78, 84, 90, 96). Turn. Row 3: Ch 3. Sk 1 st, DC in nx st, Ch3, Sk 1 st, DC in nx st, sk 1 st, DC nx St, \*Sk 1 st, DC in nx st, Ch3, Sk 1 st, DCin nx st, sk 1 st, DC nx St .\* Repeat from \* to \* across. Turn Row 4: Ch 2, going through the ch3 loop of the previous row, DC into the 2nd sk st on the previous row, ch 3, DC into the sm st (again over the top of the previous ch 3), BPDC nx DC. \* Going through the ch3 loop of the previous row, DC into the 2nd sk st on the previous row, ch 3, DC into the sm st (again over the top of the previous ch 3), BPDC nx DC.\* Repeat \* to \* across.Turn Row 5: Ch 2, going over the top of the previous ch 3, DC into the 2nd ch st of the ch 3 on the previous row, ch 3, DC into the sm st (again under the top of the previous ch 3), FPDC around the BPDC. \*Going over the top of the previous ch 3, DC into the 2nd ch st of the ch 3 on the previous row, ch 3, DC into the sm st (again under the top of the previous ch 3), FPDC around the BPDC.\* Repeat \* to \* across. Turn. Maya Levitt Bramble Bonnet/Pixie Hat. First published 18 January, 2013.
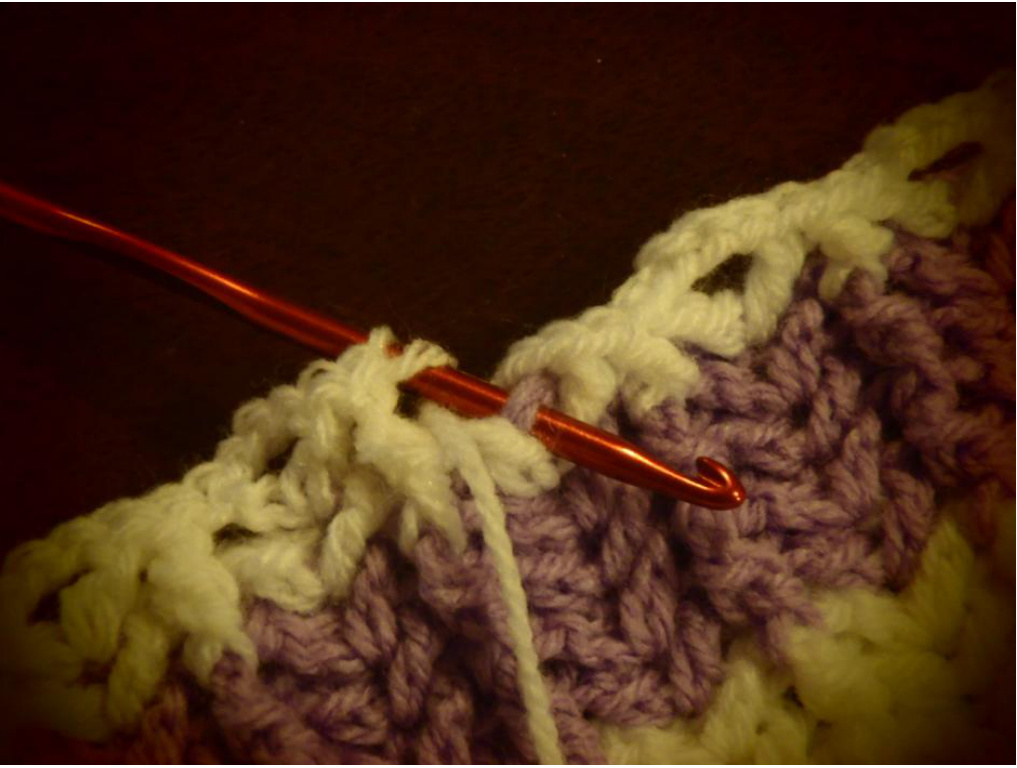
nis image demonstrates how and where to set the DC, Ch3, DC stitches for row 5) Row 6: Ch 2, going through the ch3 loop of the previous row, DC into the 2nd ch st of the ch 3 on the previous row, ch 3, DC into the sm st (again over the top of the previous ch 3), BPDC around the FPDC. \*Going through the ch3 loop of the previous row, DC into the 2nd ch st of the ch 3 on the previous row, ch 3, DC into the sm st (again over the top of the previous ch 3), BPDC around the FPDC.\* Repeat \* to \* across. Turn.
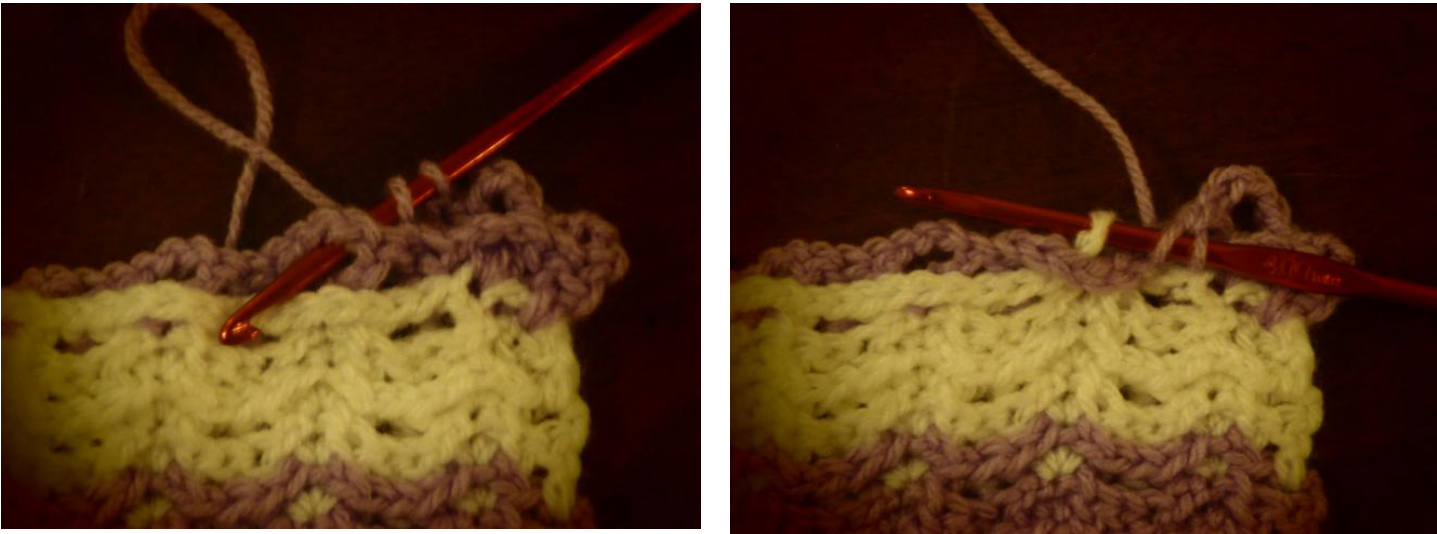
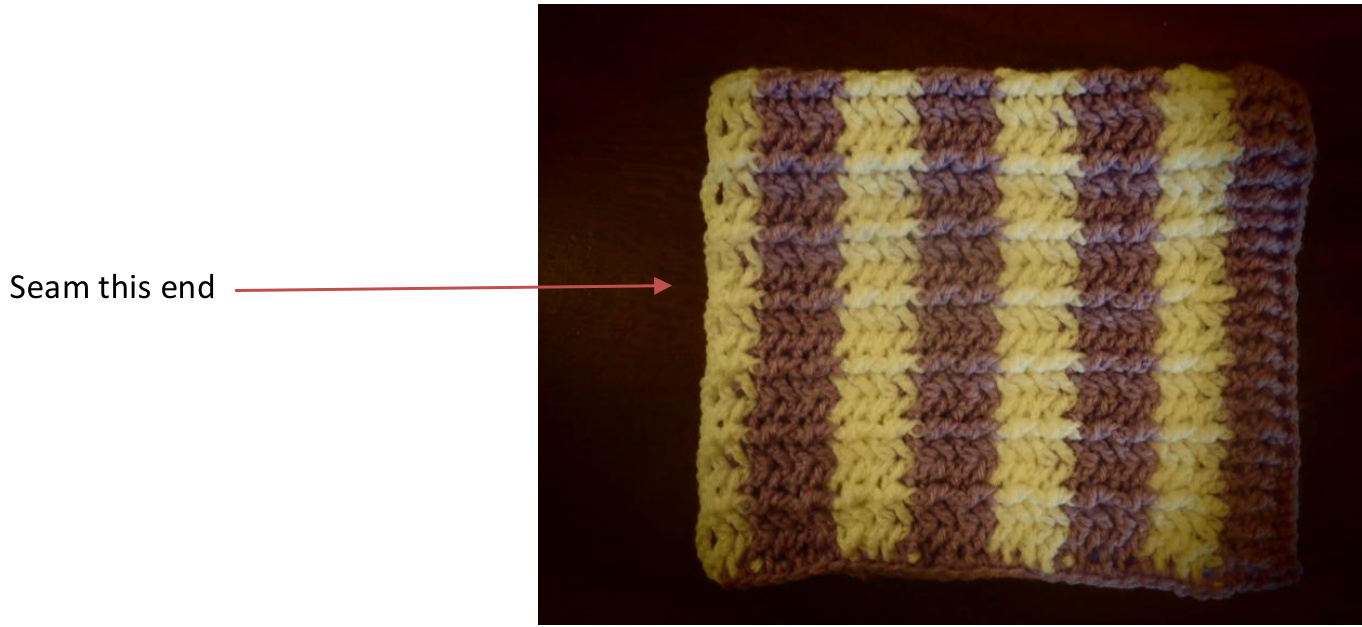
(These images show how and where to pull up the stitches in Row 4 and 6) REPEAT R0w 5-6: until the piece measure 5.5" (6, 6.5, 7, 7.25, 7.5, 8, 8.5) FINisHiNG: Sc evenly down the each side of the piece to the ribbing. Weave in the ends. Block as needed. Fold the top of the piece in half and seam the last row together, matching the stitch pattern.
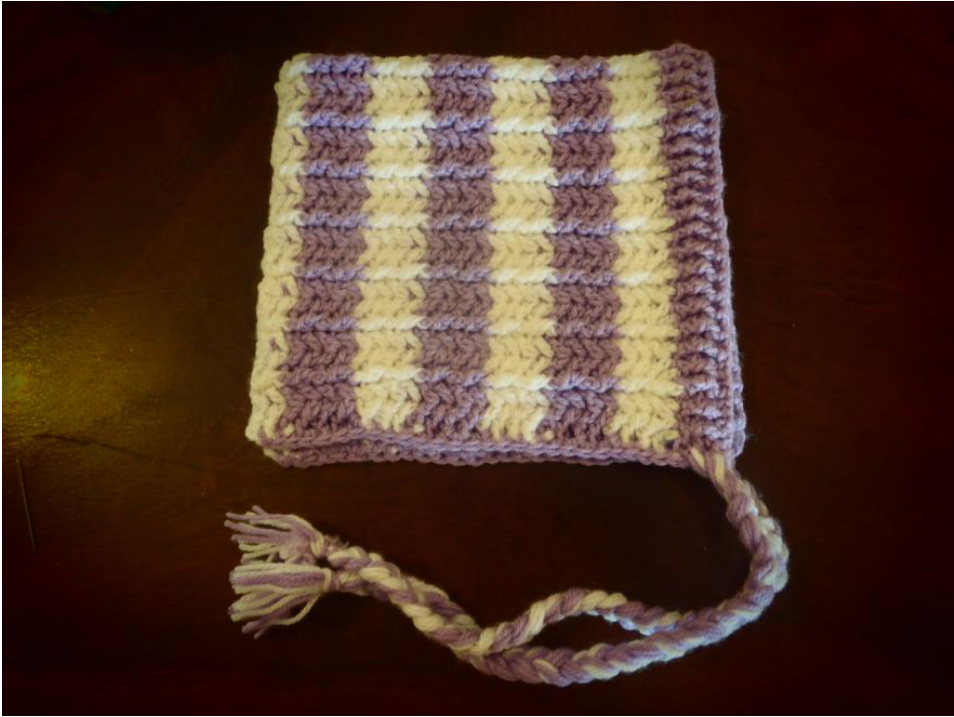
STRAP OPTION: Sew a button on the ribbing on the opposite side of the strap. The BPDC/FPDC stitch allows for a small gap to be used as a button hole for a 14mm button. The great thing about this is that you can have a loose or tight strap depending on how you like it. STRAPLEss OPTIoN: Thread 3 groups of 4 strands x 12" (14, 16, 18, 20, 22, 24) of the 8 ply wool through the ribbing on each side so the length is folded in half. Plait to the end then knot and trim the excess wool off.
If you have any issues with the pattern, please feel free to contact me at madhattonyarnsew@hotmail.com Maya Levitt Bramble Bonnet/Pixie Hat. First published 18 January, 2013.


