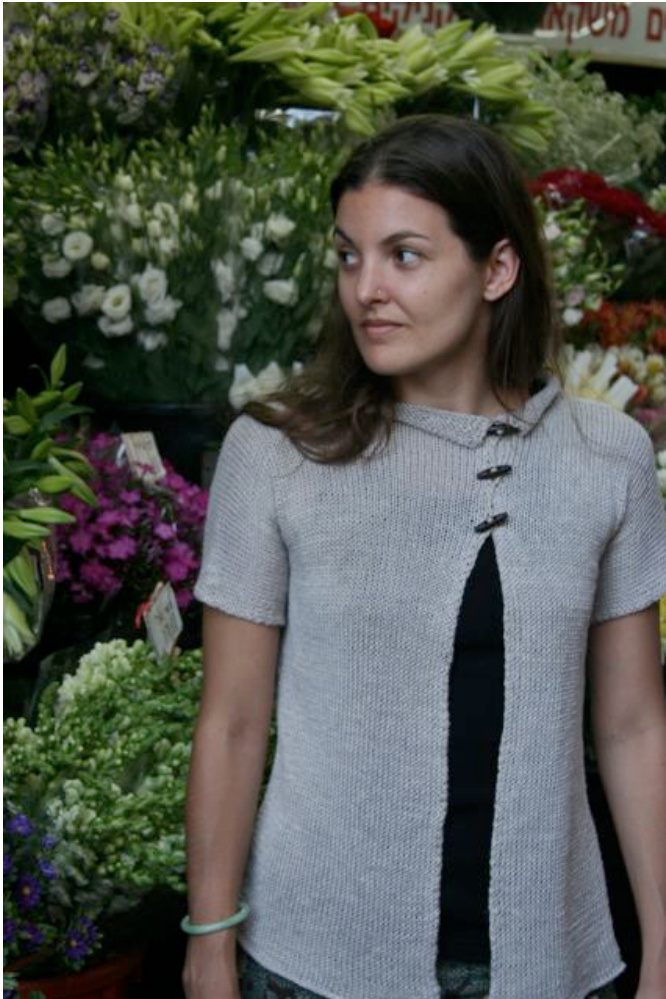
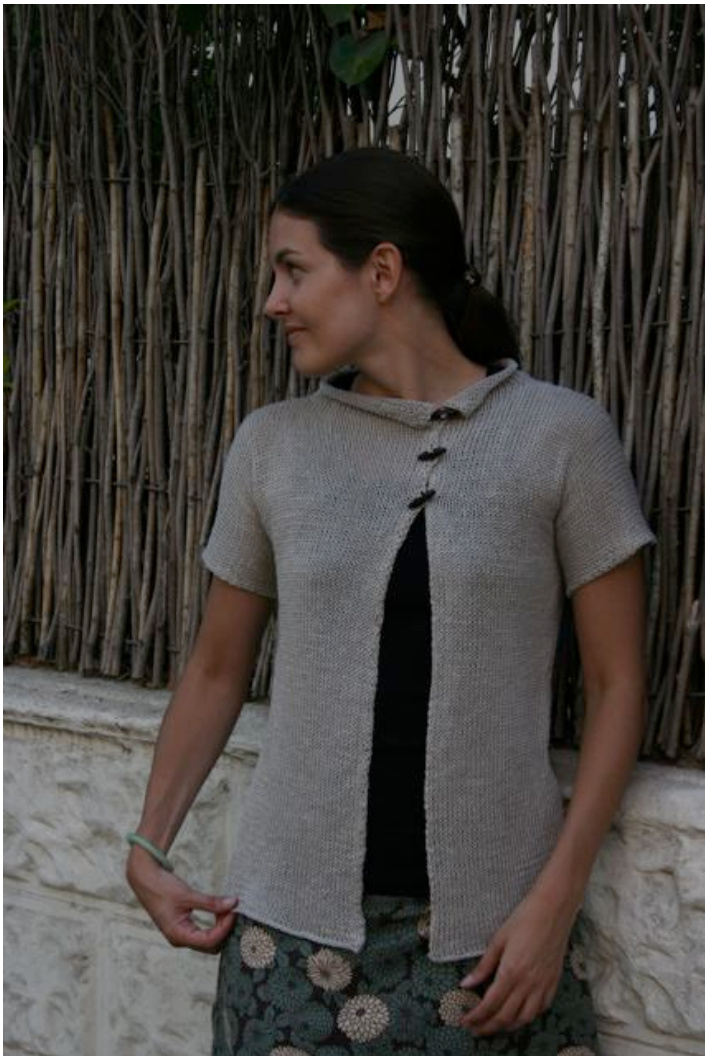
Summer Swing Jacket

By Jessica Grzedzinski http://yarnmonster.blogspot.com I've always been inspired by all things Japanese—I find this aesthetic so simple and soothing and beautiful. I wanted, specifically, a short-sleeved linen summer top, a little something to throw over my tank top on a cool evening, something a little Japanese, a little sweet, and very minimal. So I wrote the simplest pattern I could come up with--no side shaping, all one piece, kimono sleeves, no edgings. Here's what I did: SIZE Written for a 32" bust MATERIALS Henry's Attic Normandy Linen [linen; 8oo yds per cone]; color: natural gray; 1 cone #1 set US $\#6/4\mathrm{mm}$ circular needles (I used 32" Addis) waste yarn extra set of circs for figure 8 cast-on (I used US# 1, 32" Addis)
GAUGE
5.25sts/6.5 rows $={\bf{1^{\prime\prime}}}$ in stockinette stitch-AFTER MACHINE WASHING! This is important-this yarn both shrinks and softens considerably
PATTERN NOTES
I wrote this pattern, in a little notebook, for myself, so it's sized for me. It looked, the whole time I was knitting it, like it was never going to fit, but after washing, it did. If you decide to knit this, and need to make modifications/adjustments, I strongly suggest washing your swatch BEFORE doing the requisite math.
PATTERN
CO 84 sts for back Knit in stockinette stitch till 16" At the ends of the next 2 rows, CO 18 sts. (120 sts total)-these are your sleeves. K even till 21.5" Next RS row: K across 78 sts. Put these 78 sts on holder or waste yarn K across remaining 42 sts Next row: Purl back across 42 sts, then provisionally CO 15 sts (I used figure 8 cast-on, with a US #1 needle, knitting it off the #1 and on to the #6 on the next row). 57 sts total-this is your left front Work even till 5.5" from provisionally cast-on edge. At beg. of next WS row, BO 18 sleeve sts. K even till 21.5" from prov. cast-on. BO all sts. Go back to the right shoulder, where you have 78 sts on holder. Attach yarn at outsideedge. Knit across 42 sts, then provisionally CO 26 sts. 68 total-this is your right front K even till 5.5" from prov. CO edge At beg. of next RS row, BO 18 sleeve sts K even till 21.5" from prov. CO edge BO all sts. Sew the side/underarm seams. You should stillhave 15 live sts from your prov. CO at the top of the left front, 36 from the back, and 26 from the right front. Put these back on your $\#6$ needle. Knit even for 1.5", picking up 3 sts over each shoulder gap between front and back. ROall ata
FINISHING
Machine wash and block. My sweater was a little biased from knitting off the cone, but this went away with blocking. The linen changes a lot when you wash it, so don't worry if it's super stiff beforehand. I added the buttons last, placing them by trying it on. Their exact placement on mine is $2^{\circ}$ $4.5^{\circ}$ and $7^{\circ}$ from the top edge. For closures, I crocheted a little chain edge on the inside edge of the jacket, chaining 3 separately and then re-attaching and continuing on for the buttonholes. I started about $2^{\circ}$ below the $\mathbf{1^{st}}$ hole (didn't bother doing it all the way from the bottom, you can't really see it) and went to the top. And you're done!
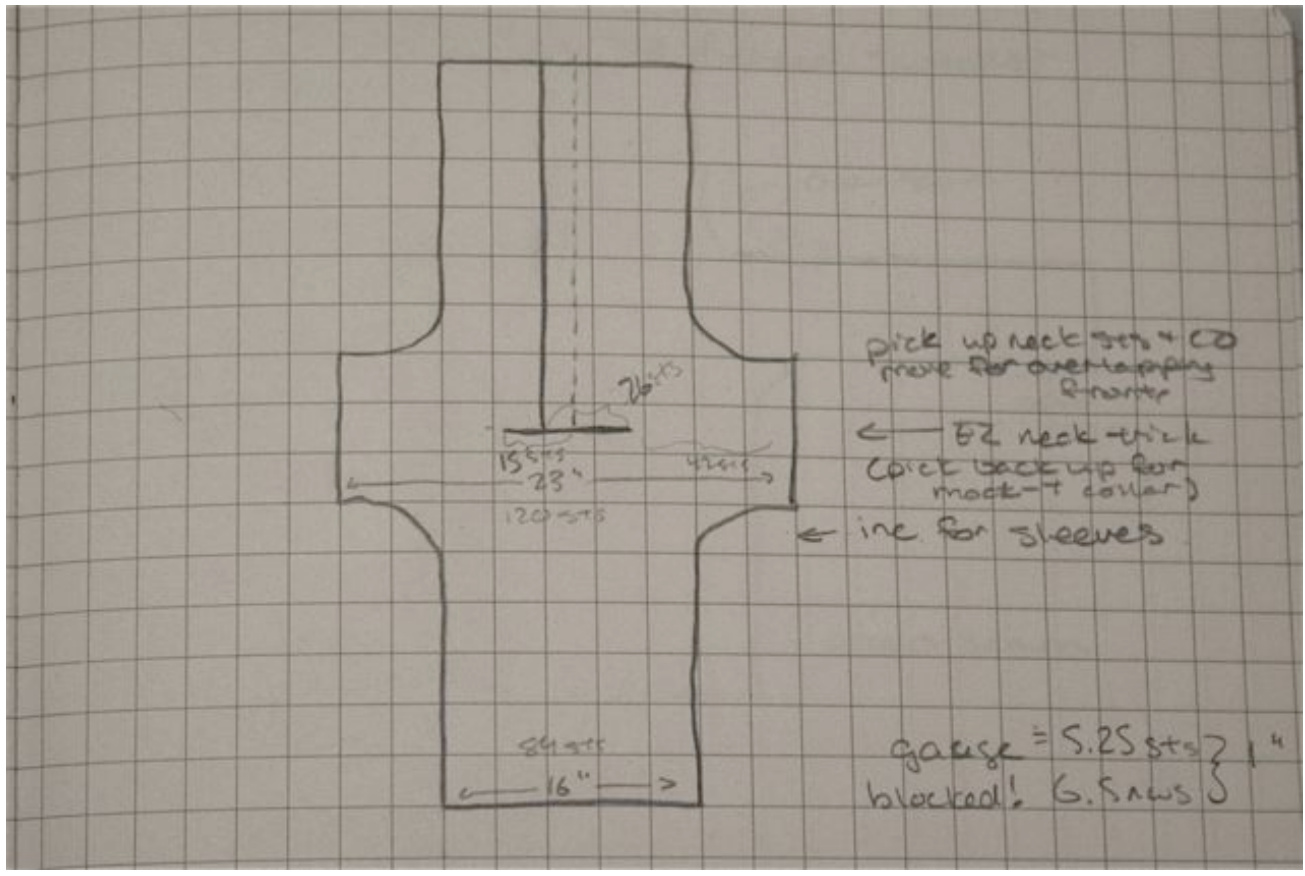
PS—-Disregard note in drawing for the EZ neck trick-I did not do this.


