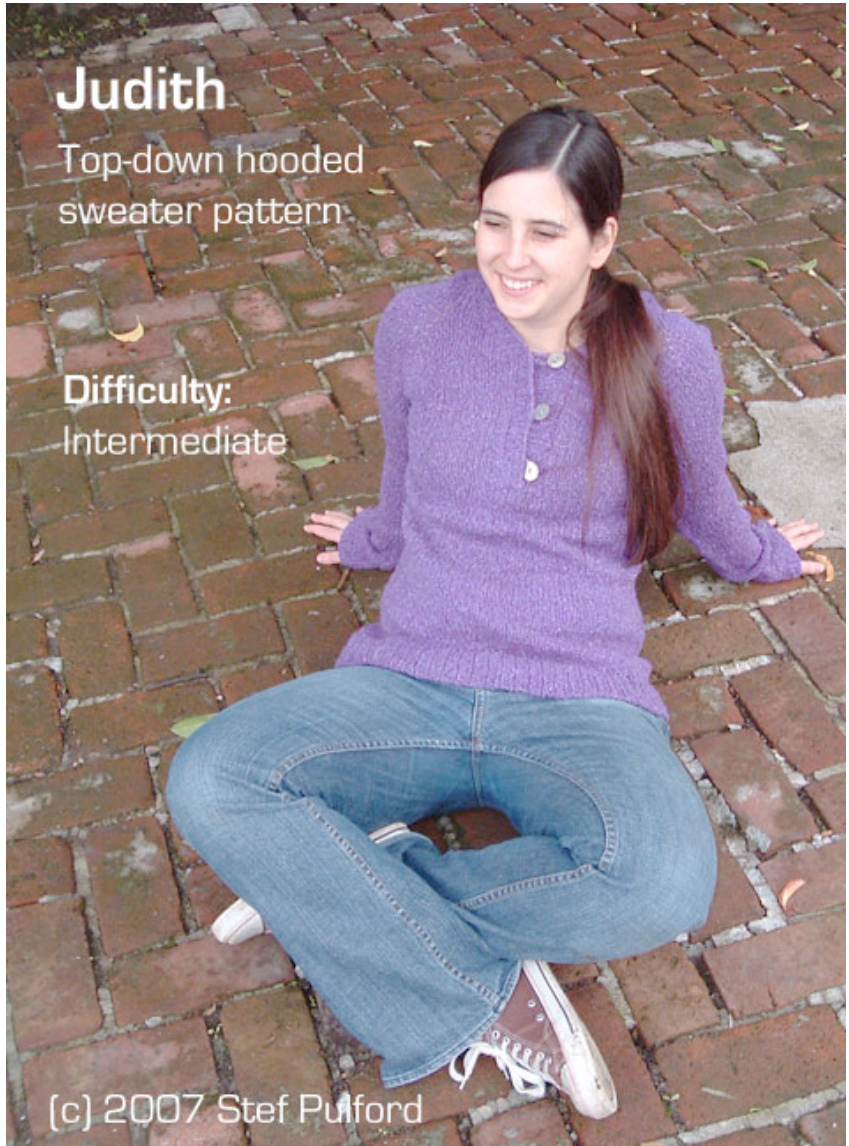
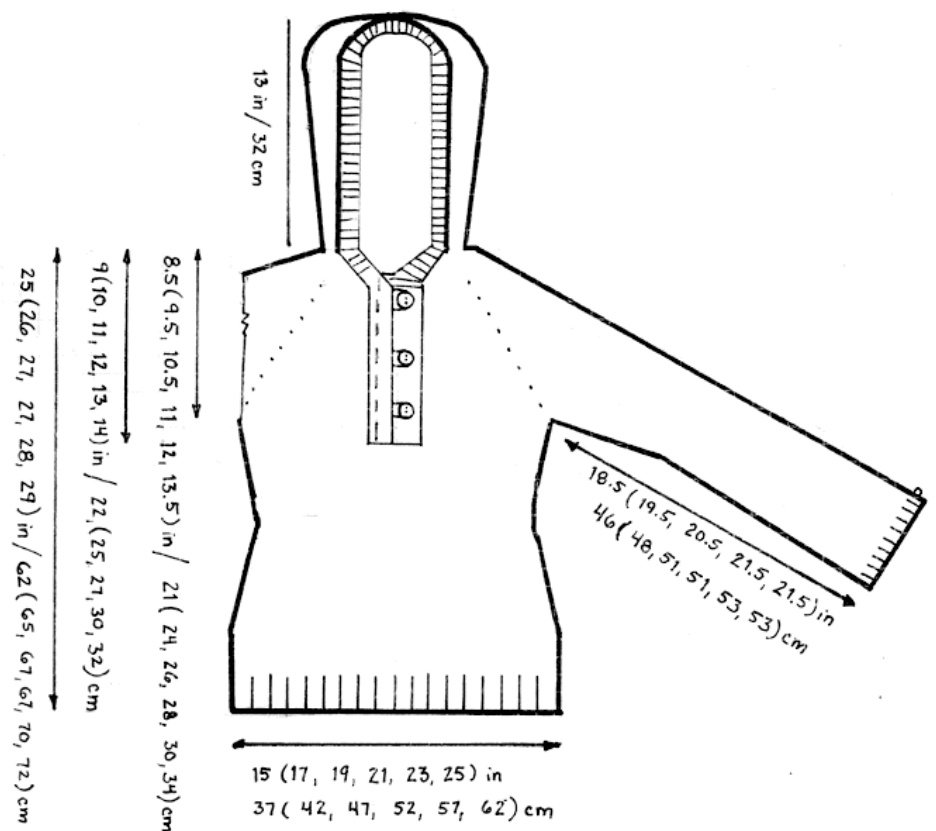
Sizes Finished bust 32 (36.5, 40, 44.5, 48, 52.5)" [81 (93, 102, 113, 122, 133 cm] Length 25 (26, 27, 27, 28, 29)" [62 (65, 67, 67, 70, 72) cm]
Materials
7(8, 9, 10, 11, 13) skeins Rowan Summer Tweed $(70\%$ silk, $30\%$ cotton; 118 yd $\left[108\;\mathsf{m}\right]$ per $50\;\mathfrak{g}$ 32-40" [80-100 cm] size US 9 $[5.5\;\mathrm{mm}]$ circular needle $16"$ [40 cm] size US 9 $[5.5\;\mathrm{mm}]$ circular needle size US 9 $[5.5\;\mathrm{mm}]$ double-pointed needles $20"$ [50 cmJ US 7 $[4.5\;\mathrm{mm}]$ circular needle Yarn needle stitch markers safety pin or split ring marker 2 small buttons 3 large buttons or toggles sewing needle and thread scrap yarn 14 sts and 16 rows $=$ 4" [10 cm] in stockinette worked in the round, with size 9 $[5.5\,\textrm{m m}]$ needle. Note that though Summer Tweed often does not knit to a gauge this large, it tends to expand. Try wet-blocking your swatch to ensure that you'll meet the gauge after blocking. Yarn substitution Though this sweater was written to match the expanding tendencies of Rowan Summer Tweed, most worsted wool and cotton can be substituted. Lamb's Pride Brown Sheep Worsted and Cascade Pastaza make excellent winter substitutions. If you have trouble meeting the gauge, try wet-blocking your swatch to get the recommended 14 sts/4".
Pattern
The sweater is worked from the top of the hood down. Hood The hood instructions are the same for all sizes. With longer size 9 $[5.5\;\mathrm{mm}]$ circular needle, CO 62 sts.
Row 1 (WS): P31, place marker, p31. Rows 2-3: Work even in stockinette. Row 4 (RS): K to 2 sts before marker, kfb, k1, sl marker, k1, kfb, k to end:64 sts. Cont in stockinette, increase as set on every following 4th row 3 times more:70 sts. Work even until hood measures 13" [32 cm], ending with a RS row and removing marker on last row. Collar and yoke Set-up row (WS): P3 (4, 5, 6, 5, 6) place first marker. Continue: P18 (16, 14, 12, 12, 10), place marker, p28 (30, 32, 34, 36, 38), place third marker, p18 (16, 14, 12, 12, 10), place marker, p3 (4, 5, 6, 5, 6) to end of row. Place a safety pin or split ring stitch marker at the end of this row. You'll use this marker as a measuring point later. Take a minute to visualize the sweater body. The stitches between the first and second markers will become the left shoulder/sleeve. The stitches between the second and third marker will become the sweater's back. The stitches between the third and fourth marker will become the sweater's right shoulder/sleeve. The end stitches after the fourth marker will eventually be connected to the stitches before the first marker to form the sweater's front. Row 1 (RS): K1, kfb, $^\star\mathbf{k}$ to 1 st before marker, kfb, sl marker, kfb; repeat from \* for each marker. K to last 3 sts, kfb, k to end. This row adds ten new stitches to the total: 80 sts. Row 2 (WS): P. Repeat these two rows 7 (7, 7, 7, 9, 9)times more: 50 (150, 150, 150, 170, 170) sts. Next (increase) row (RS): $^\star\sf K$ to 1 st before marker, kfb, sl marker, kfb; rep from \* for each marker, k to end: 158 (158, 158, 158, 178, 178) sts. Next row (WS): P. Repeat these two rows 5 (8, 10, 13, 13, 16) times more: 198 (222, 238, 262, 282,306) sts. Split sleeves from body Next row (RS): K to first marker. Place all sts between first and second markers on a piece of scrap yarn, removing second marker. K to third marker. Place sts between third and fourth markers on scrap yarn, removing fourth marker. K to end of row. The sts on scrap yarn wil eventually become the sleeves. You should have 106 (122, 134, 150, 162, 178) sts on the needle, with two markers remaining (one at each underarm). Work even in stockinette until work measures 9 (10, 11, 12, 13, 14)" [22 (25, 27, 30, 32, 35) cm] from the marker denoting the set-up row, ending with a WS row. Next row: K to end. CO 6 sts: 112 (128, 140, 156, 168, 184) sts. Join for working in the round.
Waist shaping
K 4 rounds even. Next (decrease) rnd: $^\star\sf K$ to 4 sts before marker, k2tog, k2, sl marker, k2, k2tog; rep from \* once, k to end: 108 (124, 136, 152, 164, 180) sts. Cont in stockinette, decrease as set on every foll 6th rnd 3 times more: 96 (112, 124, 140, 152, 168) sts. Work even until body measures 17 (18, 19, 19, 20, 22)" [42 (45, 47, 47, 50, 55) cm] from set-up row marker, or until your natural waist length is reached. Next (increase) rnd: $^\star\sf K$ to 2 sts before marker, kfb, k1, sl marker, k1, kfb; rep from \* once, k to. end: 100 (116. 128, 144, 156, 172) sts. Increase as set on every foll 6th rnd 3 times more: 112 (128, 140, 156, 168, 184) sts.
Hem
Work even until body measures 23 (24, 25, 25, 26, 27)" [57 (60, 62, 62, 65, 67)cm] from set-up row marker. Work 10 rounds of k1, p1 rib. Bind off loosely.
Left sleeve
Move the 46 (50. 52, 58, 60, 64) sts of one sleeve from scrap yarn to shorter size 9 $[5.5\;\mathsf{m m}]$ circular needle. Place a marker at the underarm and join for working the round. K 14 rounds. Next (decrease) rnd: K to 2 sts before marker, k2tog, sl marker, k2tog: 44 (48, 50, 56, 58, 62) sts. Cont in stockinette, decrease as set on every following 12th rnd 4 times more: 36 (40, 42, 48, 50, 54) sts. Change to double-pointed needles when there are not enough stitches to go around circular needle. Work even until sleeve measures until sleeve measures 18 (19, 20, 20, 21, 21)" [45 (47, 50, 50, 52, 52) cm] from underarm.\*
Left Cuff:
Next rnd: K18 (20, 21, 24, 25, 27) sts. C0 5 sts. Turn work for knitting flat. Switch to size 7 [4.5 mm] circular needle. Next row: Work in k1, p1 rib to marker, remove marker, continue in rib to end. Turn. Continue in rib for 4 more rows. Bind off in rib.
Right sleeve
Work as for left sleeve to \*\*.
Right Cuff
Next rnd: K18 (20, 21, 24, 25, 27) sts. Turn work for knitting flat. Switch to size 7 [4.5 mm] circular needle. Next row: Work in k1, p1 rib to marker, remove marker, continue in rib to end of row. CO 5 sts. Turn. Continue in rib for 4 more rows. Bind off in rib.
Placket and hood border Right side: With size 7 $[4.5\;\mathrm{mm}]$ circular needle, join yarn at top right corner of hood. Working downward along the neck edge, pick up and knit one stitch for every two rows. End just as you reach the 6 cast-on stitches at the bottom of the neck. Work in k1, p1 rib for 7 rows. Bind off in rib. Left side: With size 7 $[4.5\;\mathrm{mm}]$ circular needle, join yarn at top left corner of hood. Working downward along the neck edge, pick up and knit one stitch for every two rows. End just as you reach the 6 cast-on stitches at the bottom of the neck. Work in k1, p1 rib for 7 rows. Bind offall but the bottom 8 (9, 10, 11, 12, 13) [20 (22, 25, 27, 30, 32) cm] inrib. Continue in rib on remaining sts for 6 more rows. Bind offall sts in rib.
Finishing
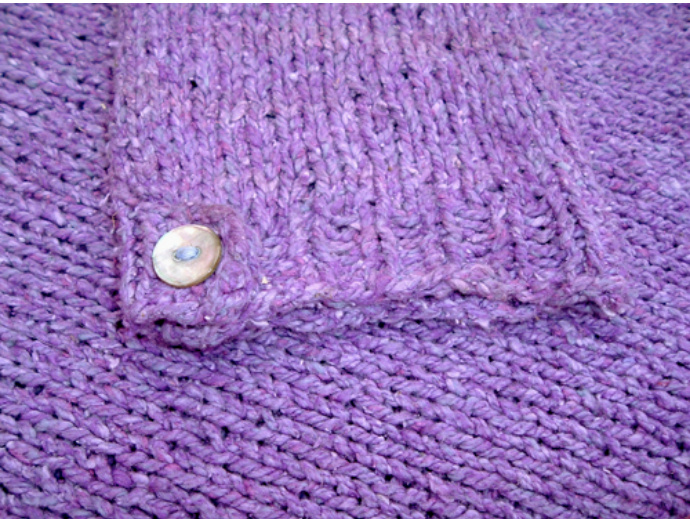
Cuffs: Lap the tab end over the cuff. (The tab will be pointing toward the back of the sweater.) With needle and thread, sew a small button over the tab, securing the tab to the cuff in the process. Placket: With yarn threaded on yarn needle, stitch the end of the left side border (the wider side) to the 6 cast-on sts at bottom of neck. Lap right side over left (without stretching!) and stitch bottom edge in place. Button loops: Make 3 alike: CO 10 sts. Bind off. Space loops evenly over right placket and stitch in place sewing thread. (I recommend thread in lieu of yarn because Rowan Summer Tweed is highly textured and not very strong.) Buttons: Sew in place with needle and thread, positioning to correspond with button loops. Sew top edges of hood together, working from front edges to back of head. Weave in ends. Block.
Originally published in Magknits June 2007, this pattern is now available on KnitTheHellUp.com and as a free Ravelry.com download. Creative Commons license rules apply. Email me at stef@knitthehellup.com.Enjoy!


