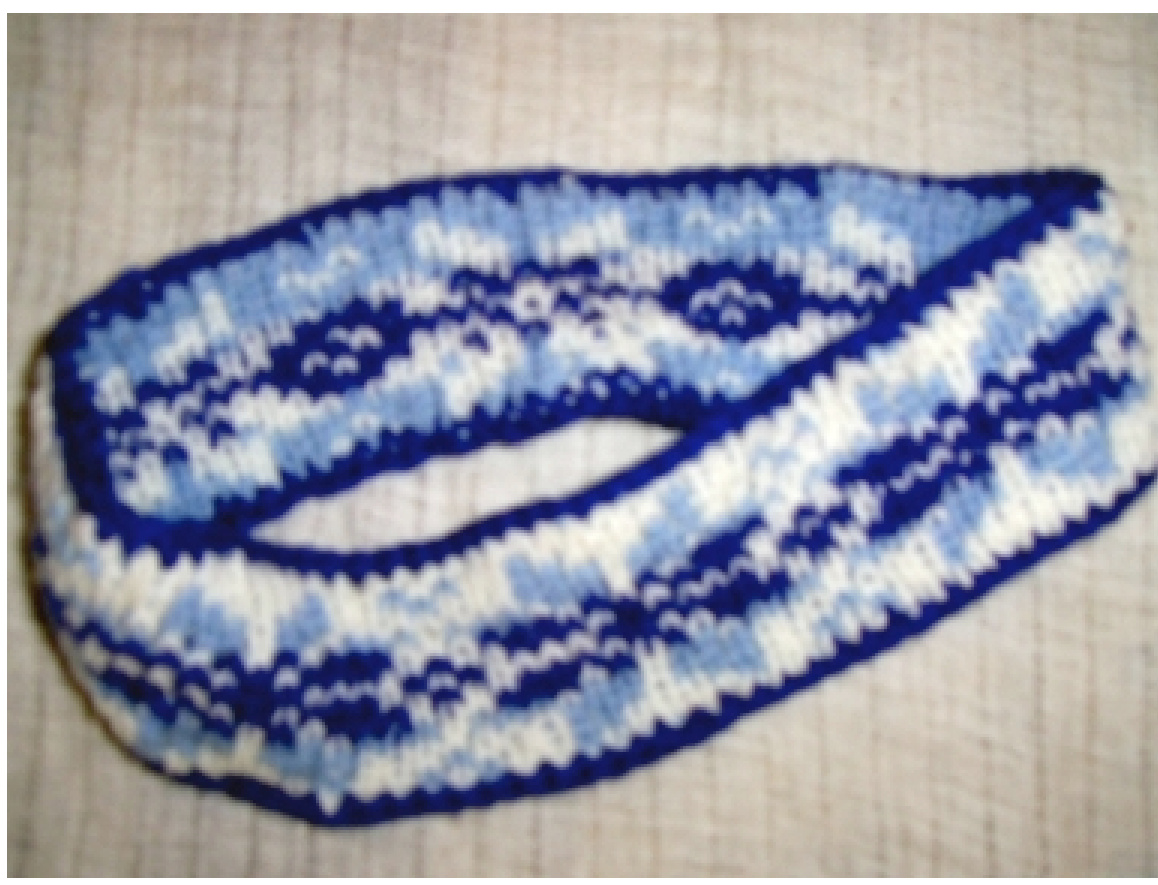
Polaris Headband
Andrea KruB-Anders, January 2007 Latest Revision: September 15, 2008 Revision history: 2008-09-15 First release of pattern
Legal Notes, Terms of Usage
This pattern is intended for private use only. You may copy and distribute it freely under that constraint. I consider this pattern to be my intellectual property. Selling or trading it or other commercial usage is prohibited. Every other usage or publication, entirely or partially, in print or electronically, needs my explicit written consent. My name as designer must not be removed. Yarn: Schachenmayr nomotta Regia 6-ply solid. 375 meters per 50g. Colors # 2080 (super white), 1945 (light blue) and 540 (royal blue) less than 50 g each. Needles: $3.5\;\mathrm{mm}$ (US 4), 3 mm (US 2 1/2) for casting on. Gauge: 34 sts $\times\,30\ \mathsf{r o w s}=4$ inches $\times\,4$ inches in double-face pattern Finished size: Circumference 50 cm (20 inches) (unstretched), height 5.5 cm (a little over 2 inches) Required skills: Double-face knitting (will be explained below), round cast-on, sewing together, single crochet for the border. Notions: Tapestry needle, crochet hook 3 mm
Pattern notes
The headband is worked in double-face or double-knitting technique. You work the front side and the back side of a double-layered fabric simultaneously by alternately doing one stitch of the front and one stitch of the back layer. The front layer stitches are knitted while the back layer stitches are purled so that the finished piece looks like stockinette from either side. The double-knitting fabric is a bit stretchy making the headband cling nicely around the head.
Diagram
The Polaris snow star pattern is 15 rows high and 28 stitches wide, 14 front layer stitches and 14 back layer stitches intertwined. If you want the headband to be wider, repeat the first and last row several times. Here is the double-knitting diagram:
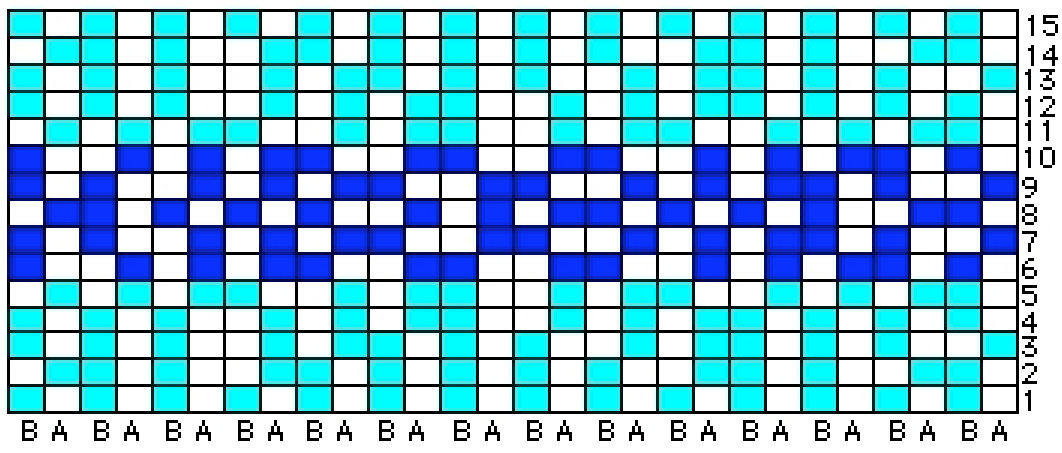
How to read the double-knitting diagram
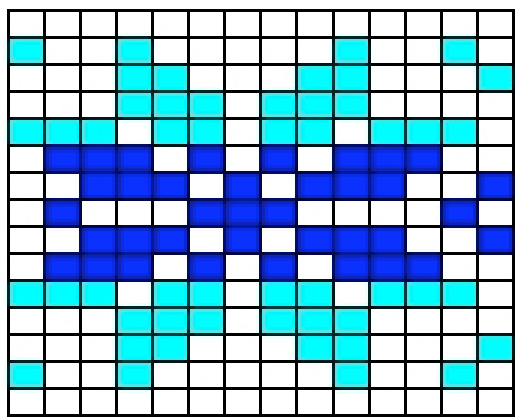
The diagram shows the stitches for both the front and the back layer. The columns labelled A are the front layer stitches, those labelled B the back layer stitches. In an odd-numbered (RS) row you read the diagram from right to left and knit the front layer stitches (A) and purl the back layer stitches (B). In an even-numbered (WS) row you read the diagram from left to right and knit the back layer stitches (B) and purl the front stitches (A). When the piece is finished the front layer will look like this:
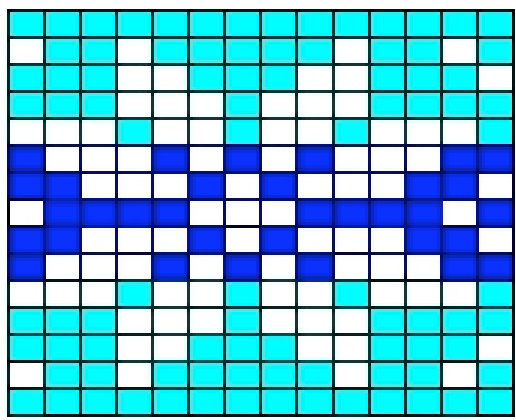
and the back layer like this:
Instructions
Knot together the ends of the white and the light blue yarns. Lay the knot over one of the thinner needles and cast on 170 sts with a round cast-on. The stitches formed on the needle will alternately be white and light blue. Switch to thicker needles and work the double-face pattern flat according to the diagram. The 170 sts will make six full repeats of the pattern plus 2 extra sts, one front layer and one back layer stitch. In rows 6 to 10 replace the light blue yarn with the dark blue one. When you reach the end of the pattern, cast off in pattern or sew off. Cut all threads. Thread the white yarn through a tapestry needle.and sew together the side edges to form a ring. With the crochet hook and the dark blue yarn work a row of single crochet along the bottom and the top edge. Weave in all ends. Enjoy knitting! Andrea KruB-Anders (Drea)


