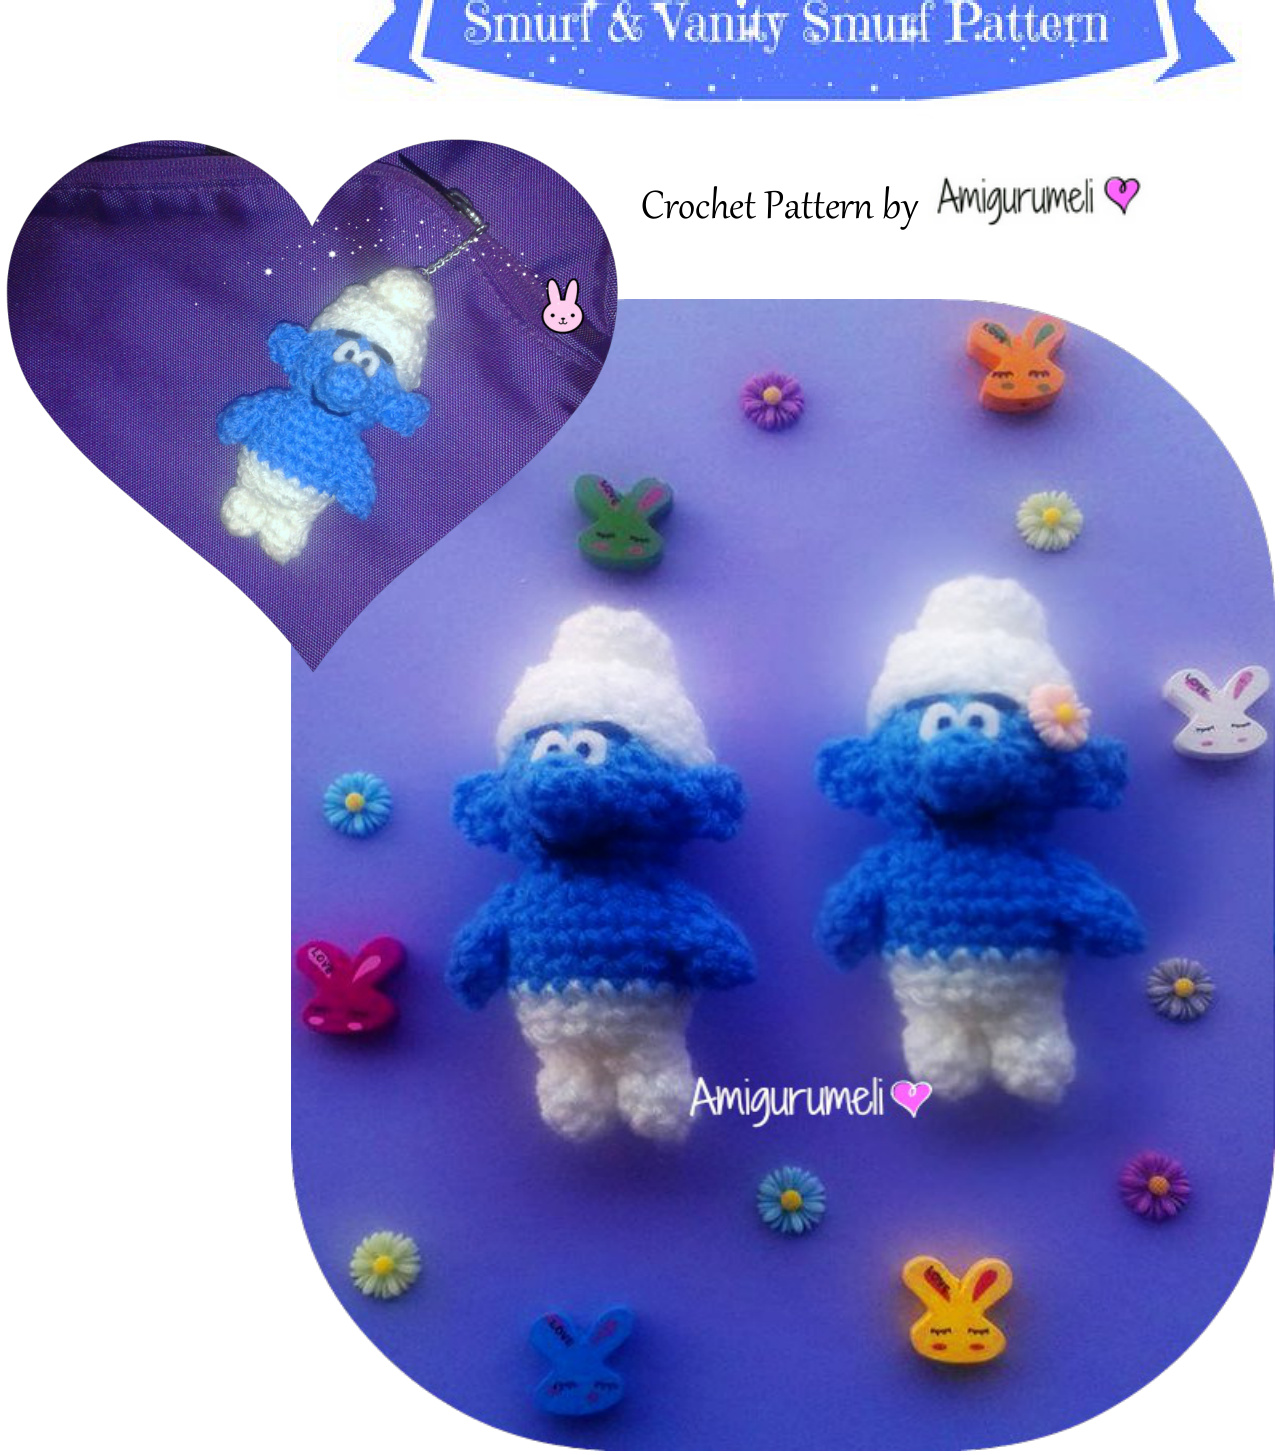
Congratulations on your purchase of Smurf & Vanity Smurf Pattern. Thank you for buying my pattern! I'm really glad you decided to try to create these little pretty Smurfs handmade. I spent a lot of time to realize the pattern as perfect as possible. Your creation could be used as normal puppet, accessory bag, key-chain, ornament or everything your mind suggests you. If you follow correctly all the instructions you will be able to create your own Smurf. I do not assume any responsibility for unsatisfactory results but I'm ready to help you for every kind of questions. I would like to see your finished creation, so please add your project on Ravelry! Amigurumeli Original Design and Photos. @ Copyright 2015. All right reserved.
SIZE
Your Smurf is about 4' (10,5 cm) height and 2'' (4 cm) wide (if using similar yarn).
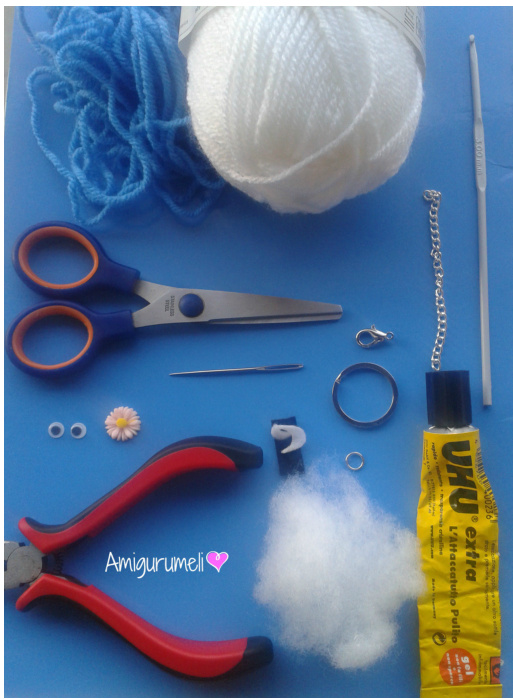
MATERIALS
3 mm hook 100% acrylic yarn white and azure (BRAVO YARN) fiberfill a pair of scissors tapestry needle UHU glue small piece of black felt
Optional:
small piece of white felt for eyes or a pair of doll eyes plastic/wooden flower (for Vanity Smurf, but you can realize it using pink felt)
For key-chain:
key ring or fastening pincers chain
ABOUT THE PATTERN
This pattern is made in continuous rounds. Do not join or turn unless otherwise instructed. The pink number is the total of stitches that you should have at the end of each round. Do not change color until told. Use a stitch marker at the end of every round to keep track of your work. Remember to leave a long tail to sew the parts together.
STITCH ABBREVIATIONS AND INSTRUCTIONS
MR = magic ring sc= single crochet inc= 2 single crochet in the same stitch sl st= slip stitch sc2tog= 2 single crochet together (single crochet decrease) How to make a single crochet decrease? Insert the hook into the front loop of the two next stitches yarn over draw through the loops make a single crochet Amigurumeli Original Design and Photos. @ Copyright 2o15. All right reseved.
HEAD (USING AZURE YARN)
Round 1: 6 sc in a MG (6) Round 2: inc (repeat 6 times) (12) Round 3: sc in each stitch around (12) Round 4: inc, sc (repeat 6 times) (18) Round 5-6-7: sc in each stitch around (18) Round 8: 2sctog, sc (repeat 4 times) (12) Round 9: sc in each stitch around (12) Start stuffing. Round 10: 2sctog (repeat 3 times) (6) Finish stuffing, sl st and leave a long tail for sewing.
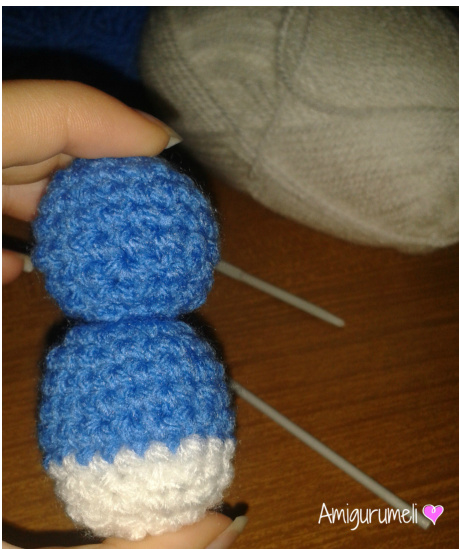
BODY (USING AZURE AND WHITE YARN)
Start with azure yarn. Round 1: 6 sc in a MG (6) Round 2: inc (repeat 6 times) (12) Round 3: inc, sc (repeat 6 times) (18) Round 4-5-6-7: sc in each stitch around (18) Change with white yarn. Round 8: 2sctog, sc (repeat 4 times) (12) Round 9-10: sc in each stitch around (12) Start stuffing. Round 11: 2sctog (repeat 3 times) (6) Finish stuffing, sl st and leave a long tail for sewing.
HAT (USING WHITE YARN)
Round 1: 6 sc in a MG (6) Round 2: inc (repeat 6 times) (12) Round 3-4-5-6-7-8: sc in each stitch around(12) Round 9: inc, sc (repeat 6 times) (18) Round 10-11-12: sc in each stitch around (18) Round 12: inc, 16 sc, inc (20) Round 13: inc, 18 sc, inc (20) Round 14: inc, 20 sc, inc (22) Round 15: sc in each stitch around (24) Stuff with fiberfill. EARS (USING AZURE YARN) × 2 Amigurumeli Original Design and Photos. @ Copyright 2015. All right reserved. Round 1: 6 sc in a MG (6) sl and leave a long tail for sewing.
ARMS (USING AZURE YARN) × 2
Round 1: 6 sc in a MG (6) Round 2: sc in each stitch around (6) Round 3: 2sctog (repeat 3 times) (3) Round 4: sc in each stitch around (3) sl st, do not stuff, leave a long tail for sewing.
LEGS (USING WHITE YARN) x 2
Round 1: 6 sc in a MG (6) Round 2-3: sc in each stitch around (6) Round 4: 2sctog, sc (repeat 2 times) (4) Round 5: sc in each stitch around (4) sl st, stuff, leave a long tail for sewing.
NOSE (USING AZURE YARN)
FIRSTPART Round 1: 6 sc in a MG (6) sl st, sew it in the middle of the face of the Smurf. SECOND PART Round 1: 3 sc in a MG (3) Round 2-3-4: sc in each stitch around (3) sl st and sew it over the first part of the nose.
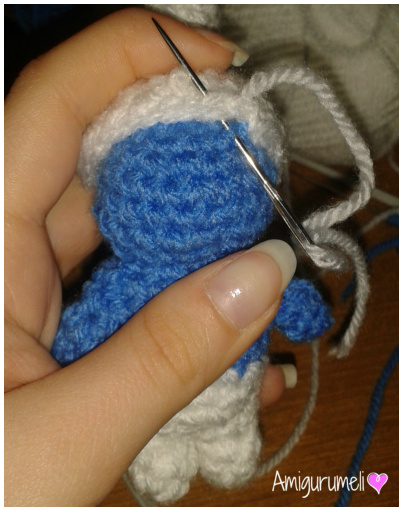
FINISHING
Sew head to body (starting from the antepenult round of the head and the third round of the body): Sew ears to head (between round 5 and 6 of head);: Sew the two parts of the nose; Sew arms (do not stuff!) and legs as shown in the pictures; Optional: you can create and sew a tiny tail using the pattern of the second part of the nose; Sew hat to head (REMEMBER to flat the hat and sew it in this position too). Cut and stick on eyebrows, mouth and eyes (or apply a pair of doll eyes) Optional: apply a plastic/wooden flower on the hat for Vanity Smurf. Amigurumeli Original Design and Photos. @ Copyright 2015. All right reserved. How sew head to body? _Here is a guide for sewing correctly head to body:
Start sewing from the antepenult round of the head and the third round of the bod.
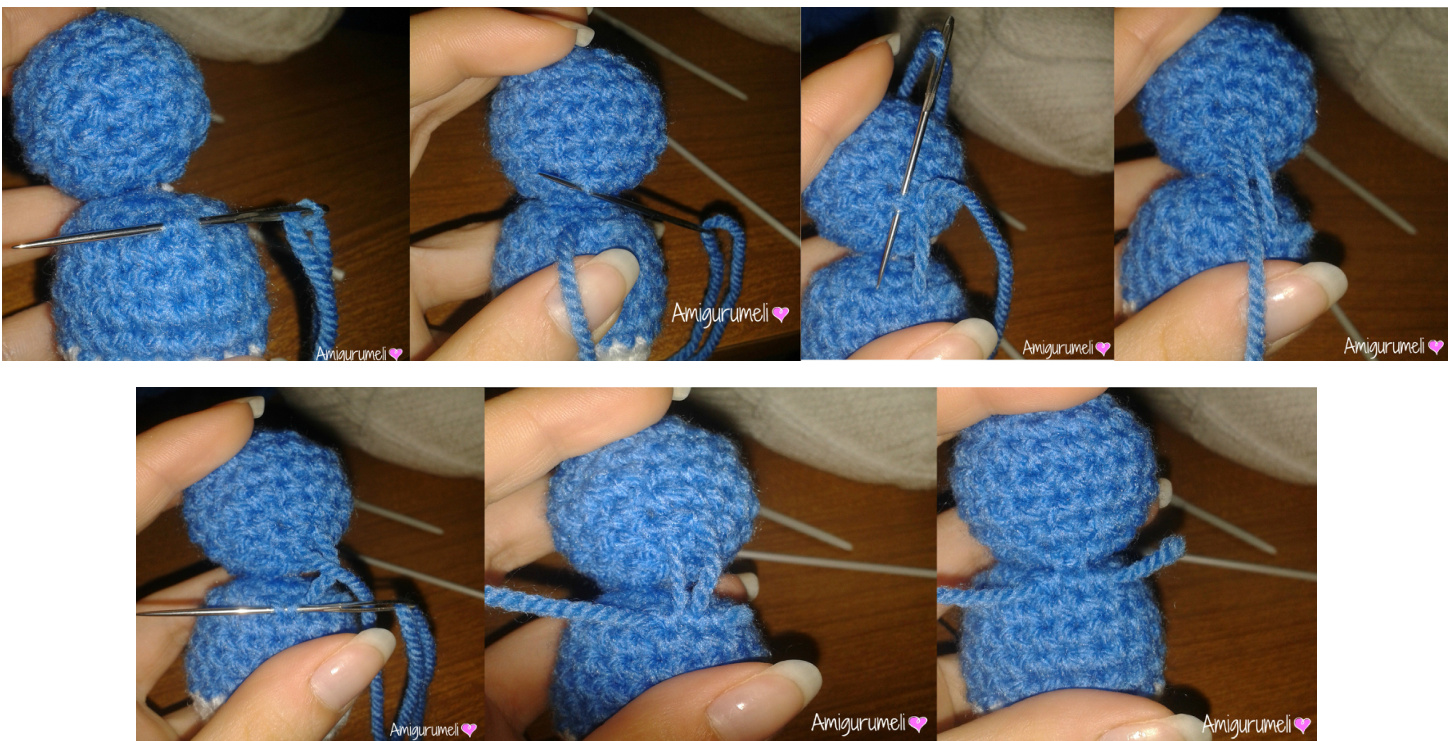
Now your Smurf should look like this:

Amigurumeli Original Design and Photos. @ Copyright 2015. All right reserved.
COPYRIGHT TERMS:
This pattern has been created by Amigurumeli @ Copyright 2015.
You are NoT allowed to copy, modify, translate, sell or distribuite the pattern or any part of it (included images and photos). The finish item is for personal use. I understand how much time and patience is necessary to create Amigurumis, so: You CAN sell your finished Smurf or Vanity Smurf, PROVIDED you credit me as the designer (just write"by Amigurumeli" and add a link to my Ravelry page in your item description → http://www.ravelry.com/people/Amigurumeli) and PROVIDED you DO NOT sell a large numbers of finished products (more than 50 items). You are NoT allowed to use any of my pictures to sell your items. I'm sure you will understand my will and that you will respect it. Thank you! :) uest, suggestion, doubt, question or to report mistakes please fell free to contact me Amigurumeli Original Design and Photos. @ Copyright 2o15. Allright reserved.


