
Notice: This is a FREE content pattern. Current retail value: \$0.00. Copyright Tanya Naser 2013. All Rights Reserved. Baby Critter Photo Props
All techniques and finished sizes are listed in US terminology.
Materials Needed:
Size E (3.50mm) crochet hook Size G (4.25mm) crochet hook Size H (5.00mm) crochet hook Any medium worsted weight yarn: For all props I used Red Heart Super Saver Yarn. The following colors are suggestions only. Feel free to substitute. OTurtle was completed in MC: Spring Green and AC: Coffee Fleck OLadybug was completed in MC: Cherry Red and AC: Black Buzzy Bee was completed in MC1: Bright Yellow and MC2: Black Tapestry needle 2 small buttons (optional) For Buzzy Bee Prop only: Eyelash yarn, embroidery needle, and transparent thread
Stitches and Terms Used:
AC: accent color ch: chain dc: double crochet fpdc: front post double crochet: complete the stitch around the post of the next indicated stitch by inserting the hook from front to back to front around the post MC: main color Rnd: round sl st: slip stitch st/sts: stitch/stitches v-st: v-stitch: [dc, ch 1, dc] in same space Note: In the interest of saving your printer ink I did not include photos on the assembly for either the ladybug or the bee. Each pentagon motif cape is assembled the exact same way as the turtle.

BABY CRITTER PHOTO PROPS
An original Pattern by Tanya Naser Copyright @ Tanya Naser 2013. AllRights Reserved. Federal copyrightlaw prohibitsunauthorized reproduction by any means and imposes fines up to \$25,000 for violation. This pattern is registered and protected by copyright. All material (including all pattern/s and photographs) may not be altered, reproduced, shared, or published in print or electronic form without consent. Thismaterialis intended for private use only. Permission to sell and photograph completed items is granted with purchase of pattern.
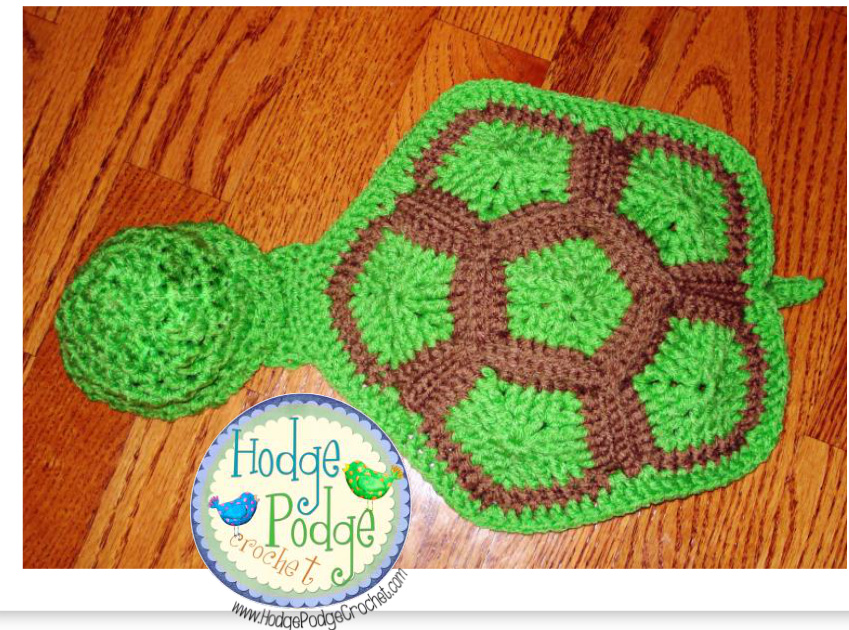
Turtle Photo Prop
Turtle Pentagon Motif: (Make 6) Using a size G (4.25mm) crochet hook and your chosen MC yarn: Ch 3, sl st to 1st ch to form a ring. Rnd 1: Ch 3 (counts as dc), v-st 4 times in ring, dc in ring, ch 1, sl st to top of ch 3. (10 dc) Rnd 2: Ch 3 (counts as dc), fpdc around ch 3 from rnd 1, fpdc around next dc, \*v-st in next ch 1 sp, fpdc around next dc, fpdc around next dc, rep from \* around to 1st ch 1 space, dc in 1st ch 1 sp, ch 1, sl st to top of ch 3. (10 fpdc, 10 dc) Rnd 3: Ch 3 (counts as dc), fpdc around ch 3 from rnd 2, fpdc around next dc, fpdc around next dc, fpdc around next dc, \*v-st in
next ch 1 sp, fpdc around next dc, fpdc around next dc, fpdc around next dc, fpdc around next dc, rep from \* around to 1st ch 1 space, dc in 1st ch 1 sp, ch 1, sl st to top of ch 3. Finish off. (20 fpdc, 10 dc) Using AC, join in any ch 1 space with a sl st, ch 3, fpdc around ch 3 from round 3, fpdc around next 5 dc, \*v-st in next ch 1 sp, fpdc around next 6 dc, rep from \* around to 1stch 1 space, dc in 1st ch 1 sp, ch 1, sl st to top of ch 3. Finish off and weave in all tails. (30 fpdc, 10 dc) Weave in all tails before moving on to next motif.
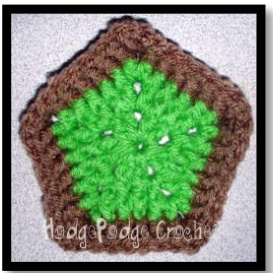
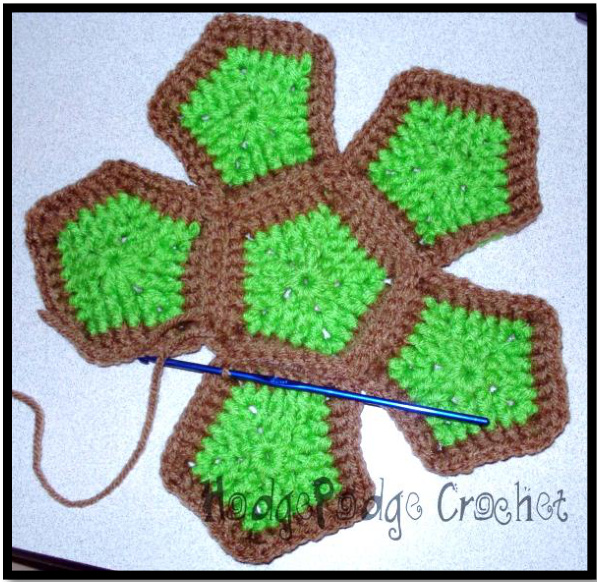
Right Side of motif Turtle Pentagon Assembly:

Wrong Side of motif Baby Critter Photo Props Start with your center motif. Arrange the other 5 motifs around the center. All flanking motifs will be joined by one side to the center first, (we will join the rest later). Take your center motif and any one flanking motif and place them wrong sides together.
Where to find HodgePodge Crochet:
Email: HodgePodgeCrochet@gmail.com ?Facebook: https://www.facebook.com/HodgePodgeCrochet Craftsy: http://www.craftsy.com/user/400300/pattern-store ?Ravelry: http://www.ravelry.com/stores/hodgepodge-crochet-designs Etsy: http://www.etsy.com/shop/thehodge Pinterest: http://pinterest.com/TanyaNaser/ Twitter:https://twitter.com/TheHodgeCrochet HodgePodge Crochet Blog: http://hodgepodgecrochet.wordpress.com/ Note: Keep in mind that your two motifs will be placed wrong sides together, so the back loops will be the two loops closest to each other. See photo below:
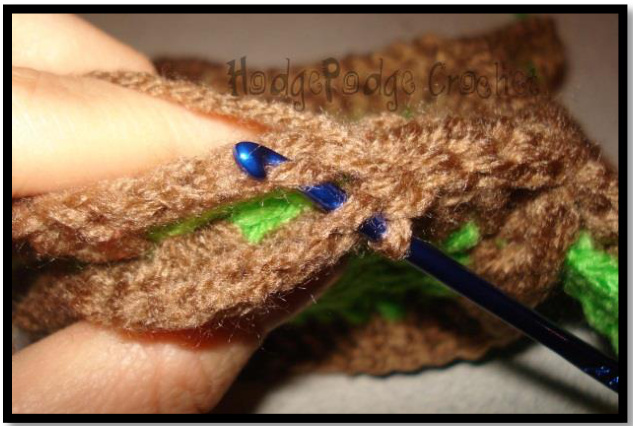
Using an E (3.50mm) hook and your chosen AC: Join in ch 1 space of both motifs. Working back loops only, \*sl st across to next ch 1 sp. Sl st in ch 1 space and arrange your next flanking motif-- wrong sides together, with the center motif. Sl st in ch 1 space of new motif and center motif. Continue from \* until all flanking motifs are joined by one side to center motif.
Now we will sew up the rest of the seams between each flanking motif. Remember: when you join your motifs you want to make sure you are holding them wrong sides together. There are two ways to join. The hard way: Since your yarn is already attached to your hook, sl st that first seam between the flanking pentagons closed-taking care to hold the motifs wrong sides together, finish off. \*Insert your hook into both ch 1 spaces at the base (close to the center pentagon) of the next two flanking pentagons. Attach your AC with a sl st, sl st in the back loops only, sl st to the end of the pentagon and finish off. Repeat from \* around until all seams have been slip stitched closed. Weave in all loose ends. The easy way: The other way you could do it would involve a tapestry needle. Since your yarn is already attached to your hook, sl st that first seam between the flanking pentagon's closed, finish off. Thread your tapestry needle with a long length of your chosen AC and whip stitch the rest of your seams shut. Take care to whip-stitch in the back loops only and make sure that all of your motifs are being held wrong sides together.
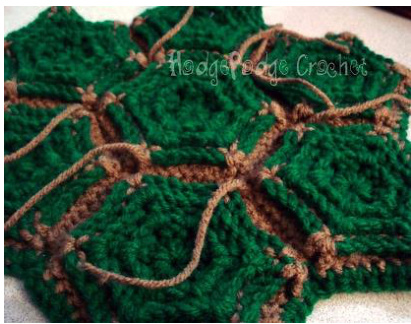
In order to move your needle to the next join, thread it under your project, hiding the extra yarn in the undersides of your stitches.
http://hodgepodgecrochet.wordpress.com/
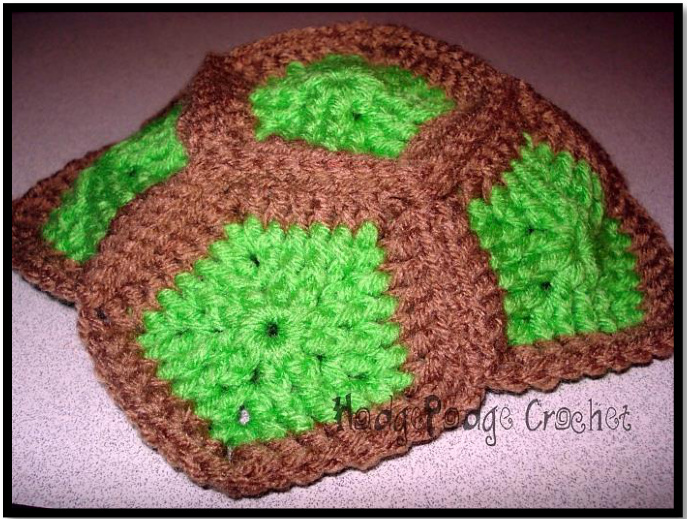
Border and Tail:
Using an H (5.00mm) hook and your chosen AC: With RIGHT SIDE of blanket facing you, join with a sl st in the ch 1 space located in the point of the pentagon on the right of your work. (See black arrow in pic below for proper placement.)
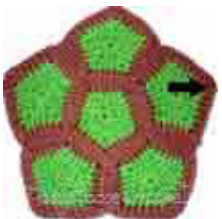
Ch 2, dc in the same space as join, \*1 dc in each st across to the next ch 1 space, 2 dc in the ch 1 space, 2 dc in the next ch 1 sp, 1 dc in each st across to the next ch 1 space, 2 dc in the next ch 1 sp, continue from \* around until you reach the center of the two bottom pentagons. 2 dc in the ch 1 sp, ch 8, (you can make this a little longer if you'd like. What you are going for here is sort of a one sided leaf shape.) sl st in the second ch from hook, sc in next ch, hdc in next ch, dc in next 2 chs, hdc in next ch, sc in next ch. Tail Made 2 dc in the next ch 1 space, 1 dc in each st across to the next ch 1 space, 2 dc in the next ch 1 sp, 1 dc in each st across to the next ch 1 space, 2 dc in the ch 1 space, 2 dc in the next ch 1 sp, 1 dc in each st across to the next ch 1 space, join in the top of the ch 2. Finish off and Weave in any remaining tails. Neck: (optional) The neck portion is not necessary as it's more functional than decorative. Sewing a small button onto the top of it will enable you to attach the hat when you want to store the prop. To complete the neck portion, find the motif at the top of your project (This will be the motif directly opposite the tail.). Using a size H (5.o0mm) hook and your chosen MC: Row 1: With right side facing, sl st into the 3rd dc to the right of the very top of your motif, ch 3, 1 dc in each of the next 8 sts, ch 3, turn. Rows 2 and 3: 1 dc in each of the next 7 sts, ch 3, turn. Finish off after completing row 3. Weave in ends. Attach one or two buttons to the top of the neck. [ Baby Critter Photo Props http://hodgepodgecrochet.wordpress.com/ Turtle Photo Prop Hat Finished Sizes: Preemie/12"(Baby/14") Using a size G (4.5mm) hook and yarn in your MC: Ch 4, sl st into 1st ch to join rnd. Rnd 1: Ch 1, 8 sc into center of rnd, sl st to 1st sc to end rnd — 8 sc. Rnd 2: Ch 1 (counts as 1st sc), sc in same st, \*2 sc in next st; rep from \* around, sl st to beginning ch to end — 16 sc. Rnd 3: Ch 1 (counts as 1st sc), sc in same st, sc in next st, \*2 sc in next st, sc in next st; rep from \* around, sl st to beginning ch to end — 24 sc. Rnd 4: Ch 1 (counts as 1st sc), sc in same st, sc in next 2 sts, \*2 sc in next st, sc in next 2 sts; rep from \* around, sl st to beginning ch to end —- 32 sc. Rnd 5: Ch 1 (counts as 1st sc), sc in same st, sc in next 3 sts, \*2 sc in next st, sc in next 3 sts; rep from \* around, sl st to beginning ch to end — 40 sc. Rnd 6: Ch 1 (counts as 1st sc), sc in same st, sc in next 4 sts, \*2 sc in next st, sc in next 4 sts; rep from \* around, sl st to beginning ch to end — 48 sc. For size 12"/Preemie skip to Rnd 8. For size 14"/Baby proceed to next rnd. Rnd 7: Ch 1 (counts as 1st sc), sc in same st, sc in next 5 sts, \*2 sc in next st, sc in next 5 sts; rep from \* around, sl st to beginning ch to end — 56 sc. Rnd 8: Ch 1 (counts as 1st sc), sc in each st around, sl st to beginning ch to end — 48 (56) SC. Repeat Rnd 8 until hat measures 4.5 (5.5)" or until desired length. Fasten off and weave in ends.
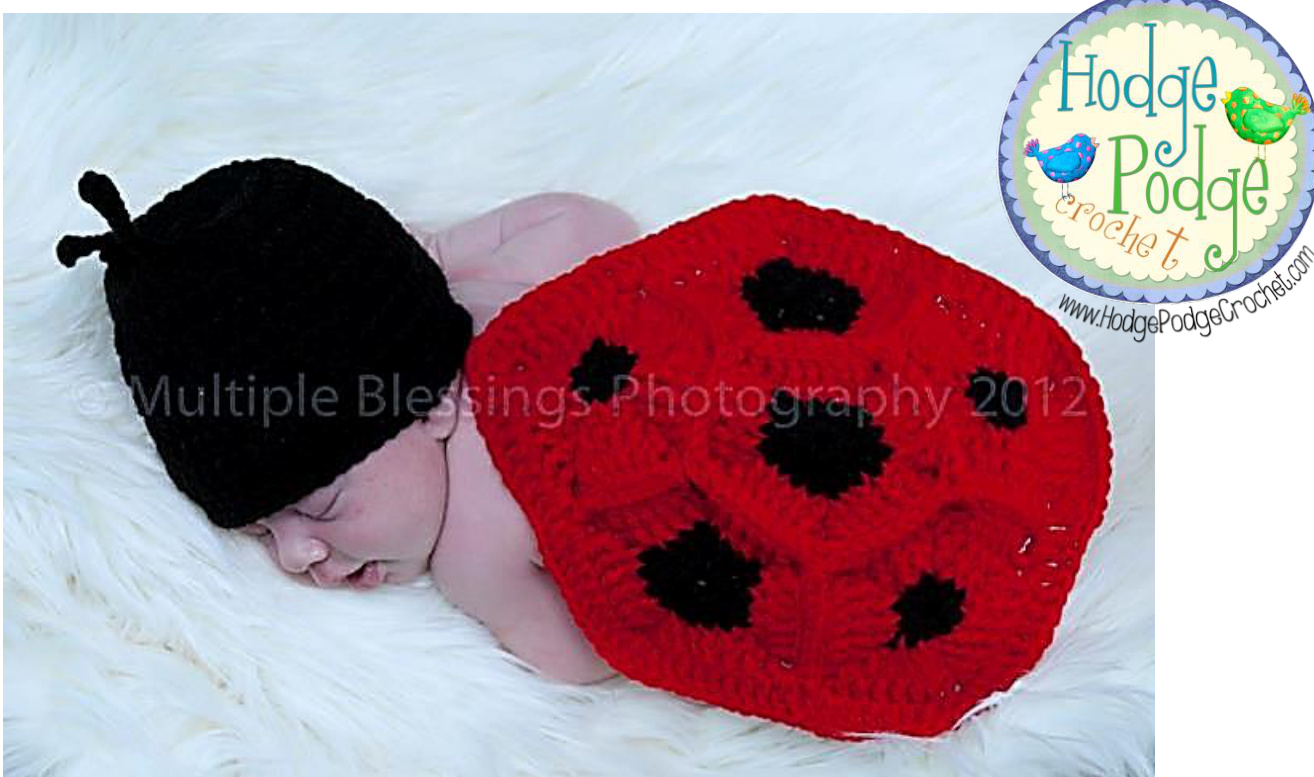
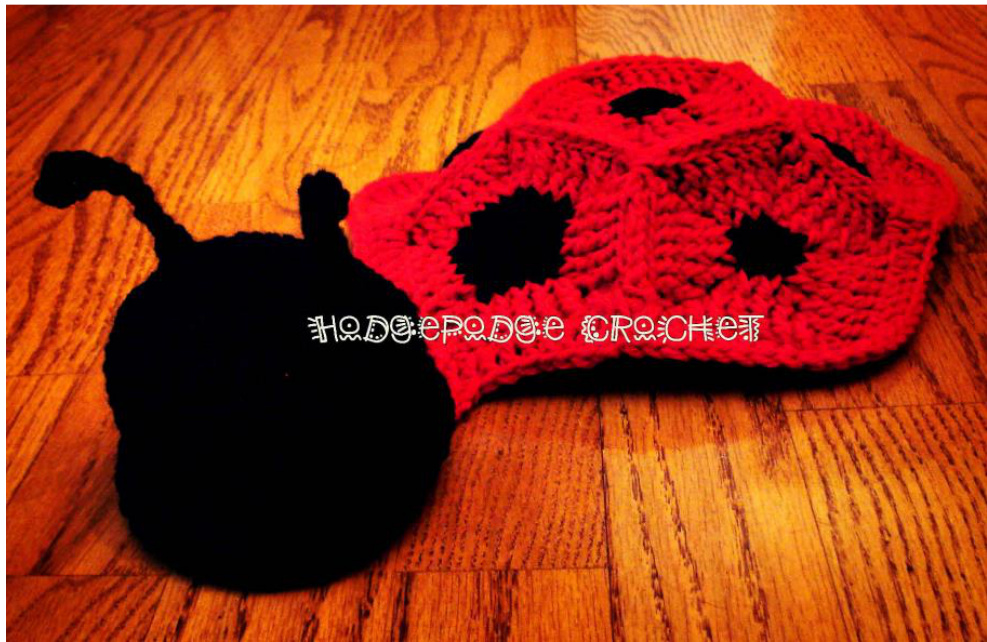
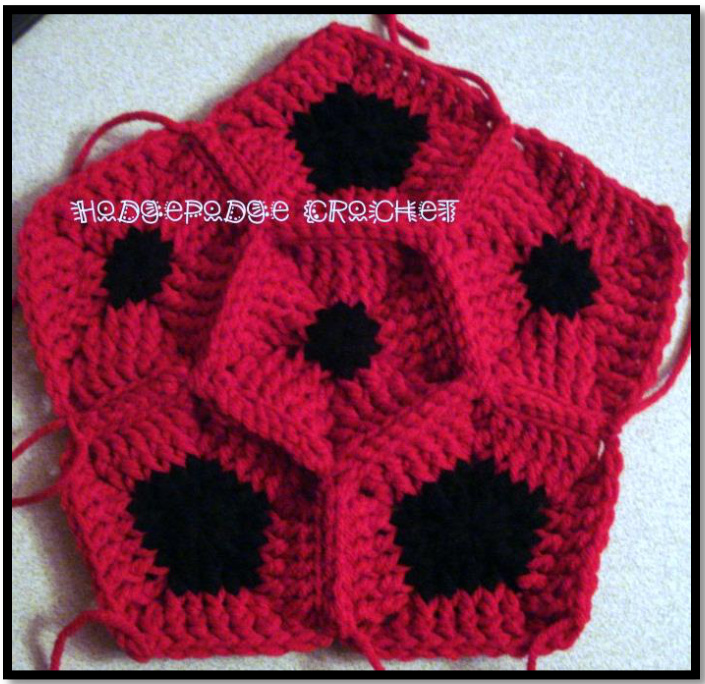
Ladyjbug hoto Prop
Ladybug Pentagon Motif: (Make 6: 3 SMALL spotted pentagons and 3 LARGE spotted pentagons.) Using a size G (4.25mm) crochet hook and your chosen AC: Ch 3, sl st to 1st ch to form a ring. Rnd 1: Ch 3 (counts as dc), v-st 4 times in ring, dc in ring, ch 1, sl st to top of ch 3. (10 dc) For SMALL spotted pentagon only, change to MC. For LARGE spotted pentagon, continue this round with AC.
Rnd 2: Ch 3 (counts as dc), fpdc around ch 3 from round 1, fpdc around next dc, \*v-st in next ch 1 sp, fpdc around next dc, fpdc around next dc, rep from \* around to 1st ch 1 space, dc in 1st ch 1 sp, ch 1, sl st to top of ch 3. (10 fpdc, 10 dc) For SMALL spotted pentagon, continue to next round as normal. For LARGE spotted pentagon, changetoMc. Rnd 3: Ch 3 (counts as dc), fpdc around ch 3 from round 2, fpdc around next dc, fpdc around next dc, fpdc around next dc, \*v-st in next ch 1 sp, fpdc around next dc, fpdc around next dc, fpdc around next dc, fpdc around next dc, rep from \* around to 1st ch 1 space, dc in 1st ch 1 sp, ch 1, sl st to top of ch 3. Finish off. (20 fpdc, 10 dc) Rnd 4: Ch 3 (counts as dc), fpdc around ch 3 from round 3, fpdc around next 5 dc, \*v-st in next ch 1 sp, fpdc around next 6 dc, rep from \* around to 1st ch 1 space, dc in 1st ch 1 sp, ch 1, sl st to top of ch 3. Finish off. (30 fpdc, 10 dc) Weave in all tails before moving on to next motif. | Baby Critter Photo Props
Ladybug Assembly:
Start with your center motif. Arrange the other 5 motifs around the center. Be sure to pay attention to how your spots are lined up! Now is the time to think about how you want your finished ladybug to look! All flanking motifs will be joined by one side to the center first, (we will join the rest later). er motif and any one flanking motif and place them wrong sides togethe Note: Keep in mind that your two motifs will be places wrong sides together, so the back loops will be the two loops closest to each other. Using an E (3.50mm) hook and your chosen MC: Join in ch 1 space of both motifs. Working back loops only, \*sl st across to next ch 1 sp. Sl st in ch 1 space and arrange your next flanking motif--wrong sides together, with the center motif. Sl st in ch 1 space of new motif and center motif. Continue from \* until all flanking motifs are joined by one side to center motif. Now we will sew up the rest of the seams between each flanking motif. Remember: when you join your motifs you want to make sure you are holding them wrong sides together. There are two ways to join. The hard way: Since your yarn is already attached to your hook, sl st that first seam between the flanking pentagons closed-taking care to hold the motifs wrong sides together, finish off. \*Insert your hook into both ch 1 spaces at the base (close to the center pentagon) of the next two flanking pentagons. Attach your MC with a sl st, sl st in the back loops only, sl st to the end of the pentagon and finish off. Repeat from \* around until all seams have been slip stitched closed. Weave in all loose ends. The easy way: The other way you could do it would involve a tapestry needle. Since your yarn is already attached to your hook, sl st that first seam between the flanking pentagon's closed, finish off. Thread your tapestry needle with a long length of your chosen MC and whip stitch the rest of your seams shut. Take care to whip-stitch in the back loops only and make sure that all of your motifs are being held wrong sides together. In order to move your needle to the next join thread it under your project, hiding the extra yarn in the undersides of your stitches.
Border:
Using an H (5.00mm) hook and your chosen MC: Join with a sl st in any ch 1 space located in any point of a pentagon. (In other words, NOT in a valley part where you have two ch 1 spaces side by side.) Ch 2, dc in the same space as join, \*1 dc in each st across to the next ch 1 space, 2 dc in the ch 1 sp, 2 dc in the next ch 1 sp, 1 dc in each st across to the next ch 1 space, 2 dc in the next ch 1 sp, continue from \* around, join in the top of the ch 2. Finish off and weave in any remaining tails. Neck: (optional) The neck portion is not necessary as it's more functional than decorative. Sewing a small button onto the top of it will enable you to attach the hat when you want to store the prop. To complete the neck portion, find the motif at the top of your project. Using a size H (5.00mm) hook and your chosen MC: Row 1: With right side facing, sl st into the 3rd dc to the right of the very top of your motif, ch 3, 1 dc in each of the next 8 sts, ch 3, turn. http://hodgepodgecrochet.wordpress.com/ Rows 2 and 3: 1 dc in each of the next 7 sts, ch 3, turn. Finish off after completing row 3. Weave in ends. Attach one or two buttons to the top of the neck. Ladybug Photo Prop Hat Finished Sizes: Preemie/12"(Baby/14") Using a size G (4.5mm) hook and 4 ply yarn in your AC: Ch 4, sl st into 1st ch to join rnd. Rnd 1: Ch 1, 8 sc into center of rnd, sl st to 1st sc to end rnd — 8 sc. Rnd 2: Ch 1 (counts as 1st sc), sc in same st, \*2 sc in next st; rep from \* around, sl st to beginning ch to end — 16 sc. Rnd 3: Ch 1 (counts as 1st sc), sc in same st, sc in next st, \*2 sc in next st, sc in next st; rep from \* around, sl st to beginning ch to end — 24 sc. Rnd 4: Ch 1 (counts as 1st sc), sc in same st, sc in next 2 sts, \*2 sc in next st, sc in next 2 sts; rep from \* around, sl st to beginning ch to end - 32 sc. Rnd 5: Ch 1 (counts as 1st sc), sc in same st, sc in next 3 sts, \*2 sc in next st, sc in next 3 sts; rep from \* around, sl st to beginning ch to end - 40 sc. Rnd 6: Ch 1 (counts as 1st sc), sc in same st, sc in next 4 sts, \*2 sc in next st, sc in next 4 sts; rep from \* around, sl st to beginning ch to end — 48 sc. For size 12" /Preemie skip to Rnd 8. For size 14"/Baby proceed to next rnd. Rnd 7: Ch 1 (counts as 1st sc), sc in same st, sc in next 5 sts, \*2 sc in next st, sc in next 5 sts; rep from \* around, sl st to beginning ch to end — 56 sc. Rnd 8: Ch 1 (counts as 1st sc), sc in each st around, sl st to beginning ch to end — 48 (56) SC. Repeat Rnd 8 until hat measures 4.5 (5.5)" or until desired length. Fasten off and weave in ends.
Antenna (make 2)
Use two stitch markers to mark where to place each antenna. Attach AC with a sl st, ch 10, sc in 3rd ch from hook, sl st down the length of the antenna, sl st around post of the st on hat where attached. Fasten off and weave in tails.
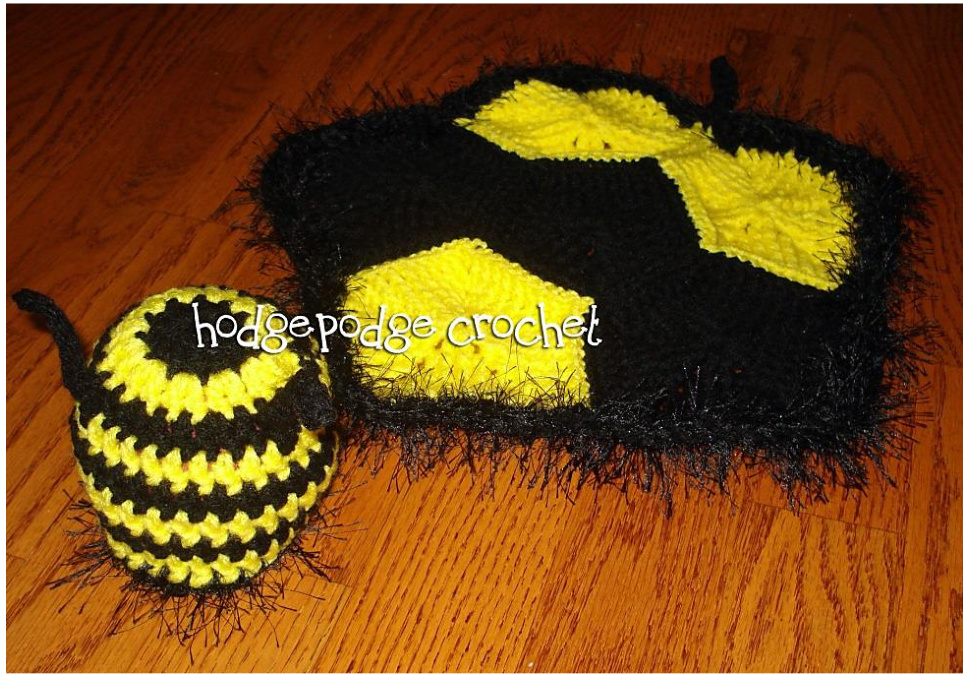
Buzy BeePhotoProp
Buzzy Bee Pentagon Motif: (Make 6: 3 yellow pentagons and 3 black pentagons.) ng a size G (4.25mm) crochet hook and your chosen MC (black or yellow) Ch 3, sl st to 1st ch to form a ring. Rnd 1: Ch 3 (counts as dc), v-st 4 times in ring, dc in ring, ch 1, sl st to top of ch 3. (10 dc) Rnd 2: Ch 3 (counts as dc), fpdc around ch 3 from round 1, fpdc around next dc, \*v-st in next ch 1 sp, fpdc around next dc, fpdc around next dc, rep from \* around to 1st ch 1 space, dc in 1st ch 1 sp, ch 1, sl st to top of ch 3. (10 fpdc, 10 dc)
Rnd 3: Ch 3 (counts as dc), fpdc around ch 3 from round 2, fpdc around next dc, fpdc around next dc, fpdc around next dc, \*v-st in next ch 1 sp, fpdc around next dc, fpdc around next dc, fpdc around next dc, fpdc around next dc, rep from \* around to 1st ch 1 space, dc in 1st ch 1 sp, ch 1, sl st to top of ch 3. Finish off. (20 fpdc, 10 dc) Rnd 4: Ch 3 (counts as dc), fpdc around ch 3 from round 3, fpdc around next 5 dc, \*v-st in next ch 1 sp, fpdc around next 6 dc, rep from \* around to 1st ch 1 space, dc in 1st ch 1 sp, ch 1, sl st to top of ch 3. Finish off. (30 fpdc, 10 dc) Weave in all tails before moving on to next motif
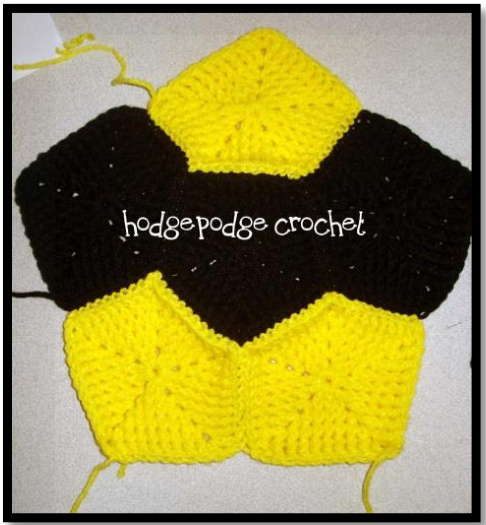
Buzzy Bee Assembly:
Start with your center motif. Arrange the other 5 motifs around the center. In order to get the bee effect, be sure to stripe the yellow and black pentagons. Note: You can have either a yellow, black, yellow pattern OR a black, yellow, black pattern. Right now is the time to decide!
Allflanking motifs will be joined by one side to the center first, (we will join the rest later). Take your center motif and any one flanking motif and place them wrong sides together. Note: Keep in mind that your two motifs will be places wrong sides together, so the back loops will be the two loops closest to each other. Using an embroidery needle and transparent nylon sewing thread: Sew together all flanking motifs to the center motif first making sure you are only sewing through the back loops of each motif. When all motifs are join in the center, continue sewing the rest of the seams in between each flanking motif.
Border and Stinger:
Using an H (5.00mm) hook, one strand of MC2 and one strand of black eyelash yarn: With the RIGHT SIDE of blanket facing you, join with a sl st in the ch 1 space located in the point of the black pentagon on the right of your work. (See turtle photo for reference.) Ch 2, dc in the same space as join, \*dc all the way across to the next ch 1 space, 2 dc in the ch 1 space, 2 dc in the next ch 1 sp, dc all the way across to the next ch 1 space, 2 dc in the next ch 1 sp, continue from \* around until you reach the center of the two bottom pentagons. 2 dc in the ch 1 sp, sl st the two ch 1 spaces together, DROP THE EYELASH YARN and only crochet using the black 4 ply. Ch 8, (you can make this a little longer if you'd like. What you are going for here is sort of a one sided leaf shape.) sl st in the second ch from hook, sc in next st, hdc in next st, dc in next 2 sts, hdc in next st, sc in next st Stinger Made Pick up your eyelash yarn once again, 2 dc in the next ch 1 space, 1 dc in each st across to the next ch 1 space, 2 dc in the next ch 1 sp, repeat from \* around, join in the top of the ch 2. Finish off and weave in any remaining tails. Neck: (optional) The neck portion is not necessary as it's more functional than decorative. Sewing a small button onto the top of it will enable you to attach the hat when you want to store the prop. To complete the neck portion, find the motif at the top of your project (This will be the motif directly opposite the tail.). Using a size H (5.o0mm) hook and your chosen MC: Row 1: With right side facing, sl st into the 3rd dc to the right of the very top of your motif, ch 3, 1 dc in each of the next 8 sts, ch 3, turn. Rows 2 and 3: 1 dc in each of the next 7 sts, ch 3, turn. Finish off after completing row 3. Weave in ends. Attach one or two buttons to the top of the neck. Buzzy Bee Photo Prop Hat Finished Sizes: Preemie/12"(Baby/14") Using a size G (4.5mm) hook and 4 ply yarn in MC1 and MC2: With MC2: Ch 4, sl st into 1st ch to join rnd. .: With black: Ch 1, 8 sc into center of rnd, sl st to 1st sc to end rnd — 8 sc Rnd 2: Change to yellow. Ch 1 (counts as 1st sc), sc in same st, \*2 sc in next st; rep from \* around, sl st to beginning ch to end - 16 sc. Rnd 3: Change to black. Ch 1 (counts as 1st sc), sc in same st, sc in next st, \*2 sc in next st, sc in next st; rep from \* around, sl st to beginning ch to end - 24 sc. Rnd 4: Change to yellow. Ch 1 (counts as 1st sc), sc in same st, sc in next 2 sts, \*2 sc in next st, sc in next 2 sts; rep from \* around, sl st to beginning ch to end — 32 sc. Rnd 5: Change to black. Ch 1 (counts as 1st sc), sc in same st, sc in next 3 sts, \*2 sc in next st, sc in next 3 sts; rep from \* around, sl st to beginning ch to end -- 40 sc. Rnd 6: Change to yellow. Ch 1 (counts as 1st sc), sc in same st, sc in next 4 sts, \*2 sc in next st, sc in next 4 sts; rep from \* around, sl st to beginning ch to end - 48 sc. For size 12"/Preemie skip to Rnd 8. For size 14"/Baby proceed to next rnd. Rnd 7: Change to black. Ch 1 (counts as 1st sc), sc in same st, sc in next 5 sts, \*2 sc in next st, sc in next 5 sts; rep from \* around, sl st to beginning ch to end -- 56 sc. Rnd 8: \*If you are joining from Rnd 6, change to black.\* Change to yellow. Ch 1 (counts as 1st sc), sc in each st around, sl st to beginning ch to end - 48 (56) sc. Repeat Rnd 8, alternating black and yellow stripes until hat measures 4.5 (5.5)" or until desired length. Optional: When your hat reaches the desired length, join eyelash yarn with a sl st in any stitch. Hdc in eachst around. Fasten off and weave in ends.
Antenna (make 2)
Use two stitch markers to mark where to place each antenna. Attach black yarn with a sl st, ch 10, sc in 3rd ch from hook, sl st down the length of the antenna, sl st around post of the st on hat where attached. Fasten off and weave in tails.