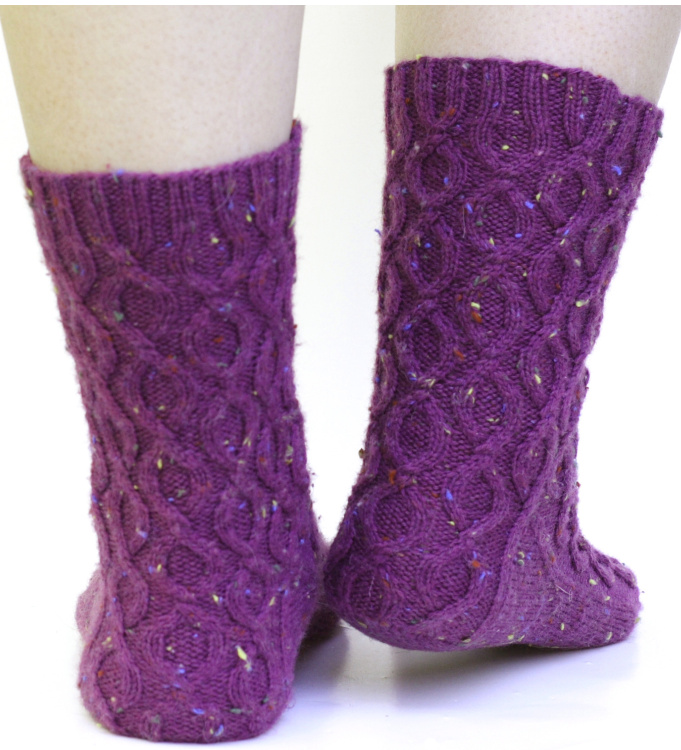
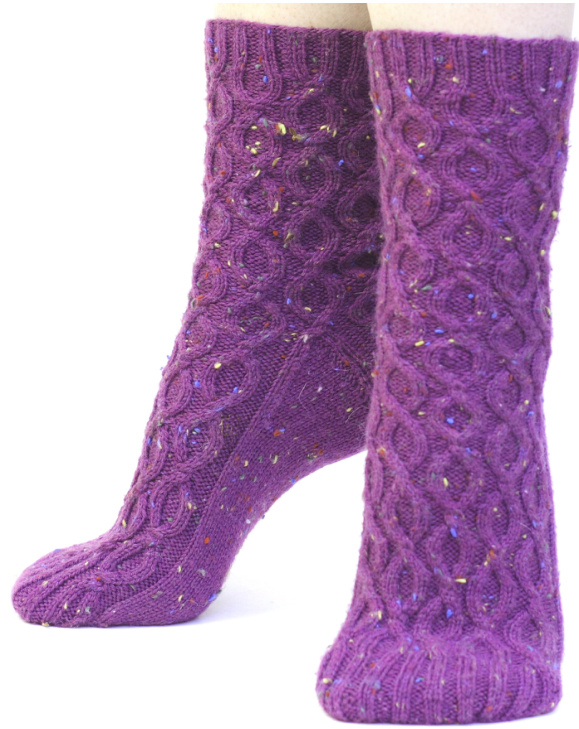
amask (gbl able Oocks
Design by Amy Klimt These socks remind me of old damask wallpaper patterns, with their ornate curves in half-drop orientation. Deeply textured cables stand out in even dark yarns. The pattern flows harmoniously over cuff, heel, gusset, and toes. Size: To fit foot $8"$ around, women's Med (approx US shoe size 7-8) Note- shoe sizes reflect length much more than width and individual preferences for snugness vary. Finished Measurements: Leg 6" or desired length, heel to toe $8.5"$ or desired length, cross-cuff $3.5^{\circ}$ slightly stretched, cross-foot $3.75^{\circ}$ slightly stretched. Yarn: Knit Picks Essential Tweed, $(65\%$ Superwash Merino Wool, $25\%$ Nylon, $10\%$ Donegal; 231 yards [211 meters] $/50\mathrm{g}$ Plum, 2 balls.
(LYS substitutes: Regia 4-ply Tweed or solids.) Needles: US $2/2.75\mathrm{mm}$ one $35^{\circ}$ or longer circular needle for magic loop, or 2 shorter circulars if you prefer working on 2 circular needles. Notions: Tapestry needle, cable needle. Gauge: 34 sts and 50 rows to $4^{\circ}$ in stockinette stitch Suggestions for custom sizing- experiment with needle sizes and/or sock yarns of different bulk. If you need to tighten the sole portion (which doesn't draw in like the cables), one option is to continue gusset decreases until fewer than original # of sts remain. Another option is to work the sole stitches (stockinette portion) with a smaller needle (like US 1.5) if you're using the 2 circular needles method.
Abbreviations
CO:Cast on. Sts:Stitches C4L: Slip 2 sts to cable needle, hold in front of work. K2, then k2 from cable needle. C4R: Slip 2 sts to cable needle, hold in back of work. K2, then k2 from cable needle. T3R: Slip 1 st to cable needle, hold in back of work. K2, then p1 from cable needle. T3L: Slip 2 sts to cable needle, hold in front of work. P1, then k2 from cable needle. M1: Make one st by picking up the bar between two stitches and knitting tbl. K2tog: Knit 2 together. P2tog: Purl 2 together. Ssk: Slip 2 sts knitwise individually, then knit these 2 sts together through back loop. K3tog: Knit 3 together. SK2P: Slip 1 st knitwise. K2tog, then pass the slipped st over. PM: Place marker. SM: Slip marker. PU: Pick up. Tbl: Through back loop.
Main Cable Pattern:
Round 1: (T3R, p2 T3L, p1, t31, T3R, p1) around. Round 2: (K2, p4, k2, p2, k4, p2) around. Round 3: (K2, p4, k2, p2, C4L, p2) around. Round 4: (K2, p4, k2, p2, k4, p2) around. Round 5: (K2, p4, k2, p2, C4L, p2) around. Round 6: (K2, p4, k2, p2, k4, p2) around. Round 7: (T3L, p2, T3R, p1, T3R, T3L, p1) around. Round 8: (P1, k2, p2, k2, p2, k2, p2, k2, p1) around. Round 9: (P1, T3L, T3R, pl, T3R, p2, T3L) around. Round 10: (P2, k4, p2, k2, p4, k2) around. Round 11: (P2, C4L, p2, k2, p4, k2) around. Round 12: (P2, k4, p2, k2, p4, k2) around. Round 13: (P2, C4L, p2, k2, p4, k2) around. Round 14: (P2, k4, p2, k2, p4, k2) around. Round 15: (P1, T3R, T3L, p1, T3L, p2, T3R) around. Round 16: (P1, k2, p2, k2, p2, k2, p2, k2, pl) around.
Cuff
CO 80 sts using long tail or your preferred method. Arrange first 40 sts on Needle A, and remaining 40 sts on Needle B. This terminology will be used to refer to the two ends of a magic loop needle as well. Join to work in the round, being careful not to twist. Work ribbing for 1" as follows: P1, (k2, p2) to last 3 sts, k2, p1.
Begin working 16 st, 16 row main cable chart. All chart rows are read from right to left when working in the round. Complete 16 rows of chart 4 times. Work through row 4 once more.
Heel
Setup: Work row 5 of chart across all 40 sts on Needle A. These will become instep sts. Needle B: P2, arrange next 4 stitches as C4L without working them. K the 1st 2 stitches of cable. Slip the 4 sts (2 purl, 2 knit) just worked onto Needle A to sit with with the other 40 instep sts. M1 in crotch of cable, k the 2nd 2 sts of cable. Continue working in row 5 pattern to last 6 sts of needle B. Arrange next 4 sts as C4L without working them. K the 1st 2 sts of cable. M1 in crotch of cable. Slip the last 4 sts on needle (unworked) onto needle A to sit with other 44 instep sts. Heel Flap: Needle B now holds 34 sts for heel flap. Heel flap is worked back and forth in rows. Even chart rows are typically read from left to right. In this case, it's symmetrical so it doesn't matter. Do note that k on the RS becomes p on the WS, and vice versa. Turn to begin heel flap on WS row: P3, k2, work 24 sts in row 6 of main chart as established, k2, p3. Next RS row: K3, p2, work 24 sts in row 7 of main chart, p2, k3. See heel chart for clarification if needed. Work heel flap as established until it measures about 2 1/4", ending on row 15 of chart (RS). Turn Heel: Modified square heel over 34 sts, beginning on WS row
S1, p18, p2tog, pl, turn. S1, k5, ssk, k1, turn. S1, p6, p2tog, pl, turn. Continue in this manner, working 1 more st each row before decreasing, until you reach the following- S1, k11, ssk, k1, turn. Then work the next 2 rows as follows. Note there is no “k1" or “p1”" worked after decreasing. S1, p12, p2tog, turn. Repeat these last 2 rows until all sts have been worked, ending on a RS row. 14 heel sts remain.
PU and knit 18 sts on left side of heel flap plus 1 extra at ankle. Work instep sts on Needle A as follows: K 2, PM, p2, work row 6 of main
chart as established to last 4 sts, p2, PM, k2. PU 1 extra st at ankle, then 18 sts on right side of heel flap. K 7 to middle of heel sts- new start of round. Rearrange stitches so remaining half of heel stitches, one side of gusset, and 18 instep stitches beyond first marker are on one needle. This needle is now called needle A. Remaining 26 instep sts to $2^{\mathrm{nd}}$ marker, other side of gusset, and other half of heel stitches all go on the other needle. This needle is now called needle B.
Gusset Decreases:
Setup round- K 7 heel sts. K picked up sts tbl to 3 sts before marker. K2tog, k1, SM. P2, work row 7 of chart across instep as established to 2 sts before marker, p2. SM, k1, ssk. K remaining PU sts tbl, then knit 7 heel sts to end of round.
Round 1-
K to marker, SM, p2, work even round of chart to last 2 sts before marker (will be row 8 the first time this round is worked), p2, SM, k to end of round. Round 2- K to 3 sts before marker, k2tog, k1, SM. P2, work odd chart round to last 2 sts before marker (will be row 9 the first time this round is worked), p2, SM, k1, ssk, k to end of round. Repeat rounds 1 and 2 until 80 sts remain. Try on the sock if possible to determine if a few more gusset decreases are necesary. Keep stitch markers in place for toe shaping. Work even in established pattern until work measures about $1.5"$ shorter than desired length from heel (about 7.25"). End on round 16 or 8. Toe: Round 1- Kto 3 sts before marker, k2tog, k1, SM. K1, ssk, work k2 p2 ribbing across, lining up with established pattern to last 3 sts before marker. K2tog, k1, SM, k1, ssk. K to end of round. Round 2- K to marker, SM, k2, work in established ribbing to 2 sts before marker, k2, SM, k to end of round. Repeat rounds 1 and 2 until 60 sts remain, then repeat round 1 until 4 sts remain. Round 3- K to 3 sts before marker, k2tog, k1, SM. K1, SK2P, work $\mathrm{k}2\,\mathsf{p}2$ ribbing as established to last 4 sts before marker. K3tog, k1, SM. K1, ssk, k to end of round. Repeat Round 3 until 20 sts rmain. On the last repeat, you will ned to rearrange stitches to execute the SK2P. Slip last 2 sts of needle A onto needle B before working this decrease. K the first 5 sts of the next round (to marker). Working yarn is now between sole and instep sections. Rearrange stitches so stitches between markers are all on the same needle. (10 sts each on Needles A and B.) Use kitchener stitch to graft 10 sts on Needle A to 10 sts on Needle B. Weave in ends. Block if desired. They make a prettier gift blocked, but don't stretch beyond recipient's foot size! Make second sock, substituting C4R for llinstances of C4L for a mirror image sock if desired.

$\copyright$ 2009, Amy Klimt. All rights reserved.


