KLiNGaN BALDRiC/SCARF
bY ymbolicalatiny
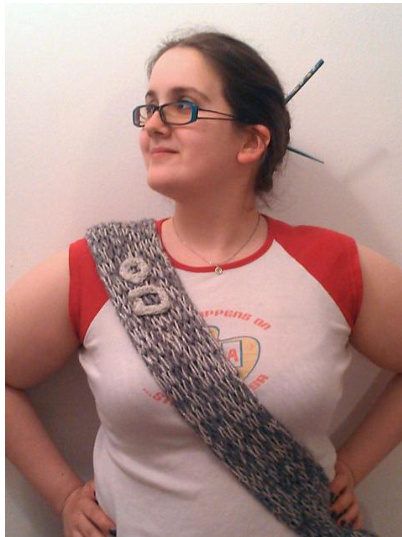
'ith Honor project for more on the story behind this pattern, and extra pictures! As written, this pattern will make a scarf about 4" wide (with the ribbing unstretched), and as long as you like. For a wider baldric, increase the number of CO stitches. The ribbing keeps it from curling up at the edges, and makes it effectively reversible; the extremely loose gauge creates the chain-link effect, and the combination of yarns makes it look metallic without being too shiny. This pattern used far, far less than one skein of either yarn-- I made 2 identical scarves and still had a considerable amount leftover.
YOU WILL NEED:
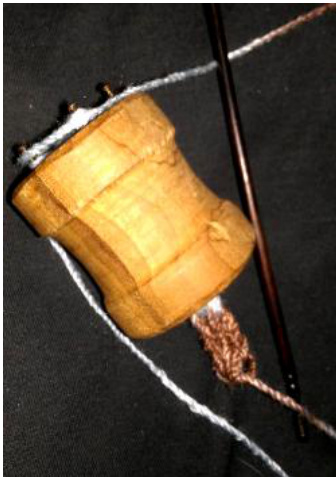
★< 1 skein Caron Simply Soft Solids in Grey Heather (or substitute any worsted / aran weight yarn in a grey colorway) ★ < 1 skein Patons North America Brilliant (or substitute any sparkly yarn in a silvery color you like. Mine was apparently called “Green Glitter," but it's not a very green color as the photos show. Ideally this should be non-splitty and thinner than the grey yarn chosen.) ★ US 17 (12.75 mm) knitting needles--this pattern is worked flat ★ small knitting loom (the circular kind, approximately 5 pegs) OR small DPNs to make i-cord ★ sewing needle ★ gray thread
SCARF / BALDRIC BASE
Cast on 22 stitches (or as many as needed, provided it's an even number!) using both yarns simultaneously. Knit 1, Purl 1 to end of row, making sure to insert needle through both yarns, and knit and purl with both yarns. Continue until scarf is desired length, then cast off. The scarf should be 2-3 inches longer than you need it to be to wrap as a sash, to allow space to fasten. The insignias are made using the shiny yarn only, to make them stand out and keep them smaller and lighter than the rest of the scarf/baldric.
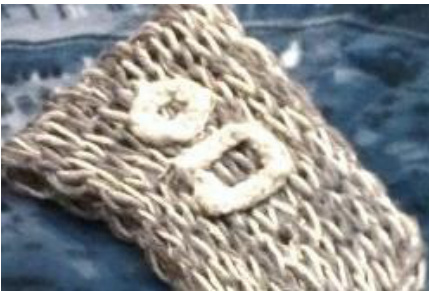
They are constructed out of 5-stitch I-cord; the circular insignia pictured is about 4", while the rectangle is approximately 6". Mine were made on a tube-shaped knitting loom, but you could just as easily work them on small DPNs. Gauge and exact shape are up to you! Join pieces of I-cord at the end and stitch down onto the scarf using sewing needle and thread. For rectangle, pinch ends and stitch into an angle before attaching to scarf.
Try the baldric on before attaching the insignias so you can pin them in place-- the ends of the scarf should meet on your back, just behind your hip, and the insignias should fall on your chest, just below the shoulder.
WEARING
As a scarf, it's pretty self-explanatory. I like to wrap it so the insignias fall to one side of my neck, which leaves the ends about even. As a baldric, hang it so the insignias fall on your chest, just below your shoulder. Worf wears his from right shoulder to left hip, and I do the same. If you wanted to be really fancy, you could add a button and loop at the loose ends to properly close the sash—-personally, I never bothered, and I tend to let the back hang and the front tuck into a belt loop.

And that's about it.
Please feel free to message me if you have further questions, and if you choose to make one, I'd love to see it linked back to the pattern!
Check out my blog, symbolicalating.blogspot.com , for more fibery shenanigans and a link back to my Ravelry page and all that good stuff. Qapla!


