Pure Joye lllusions
Pattern for
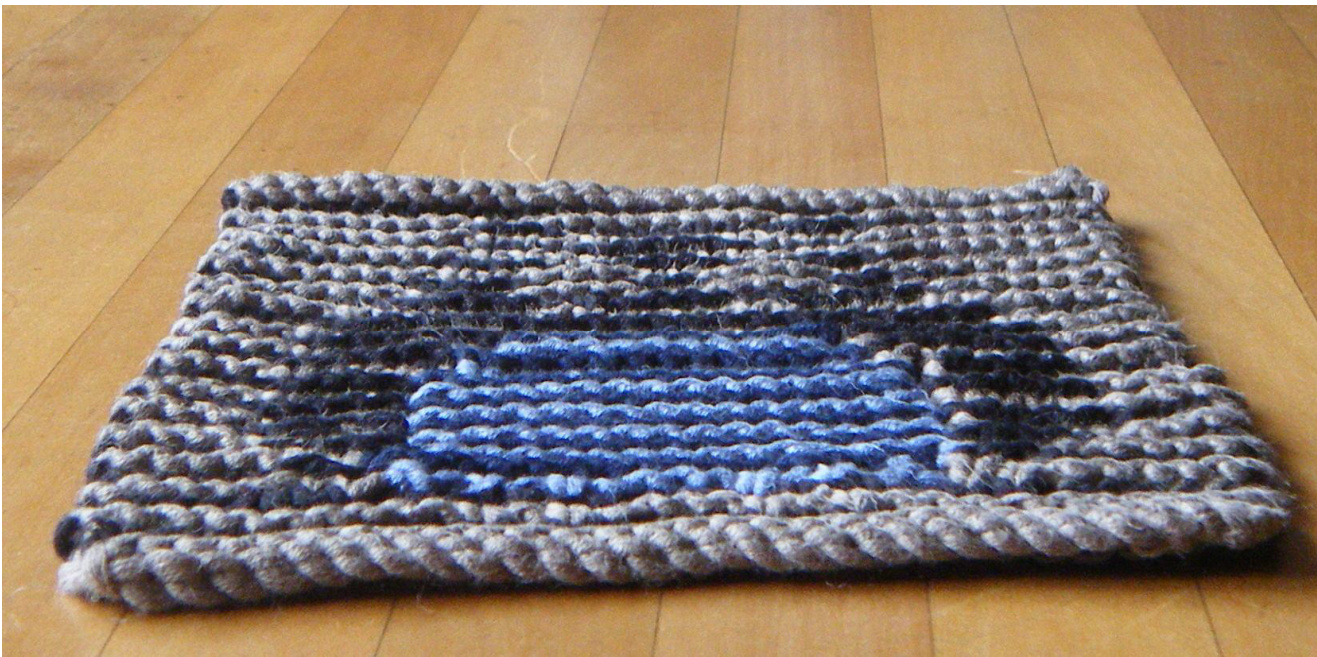
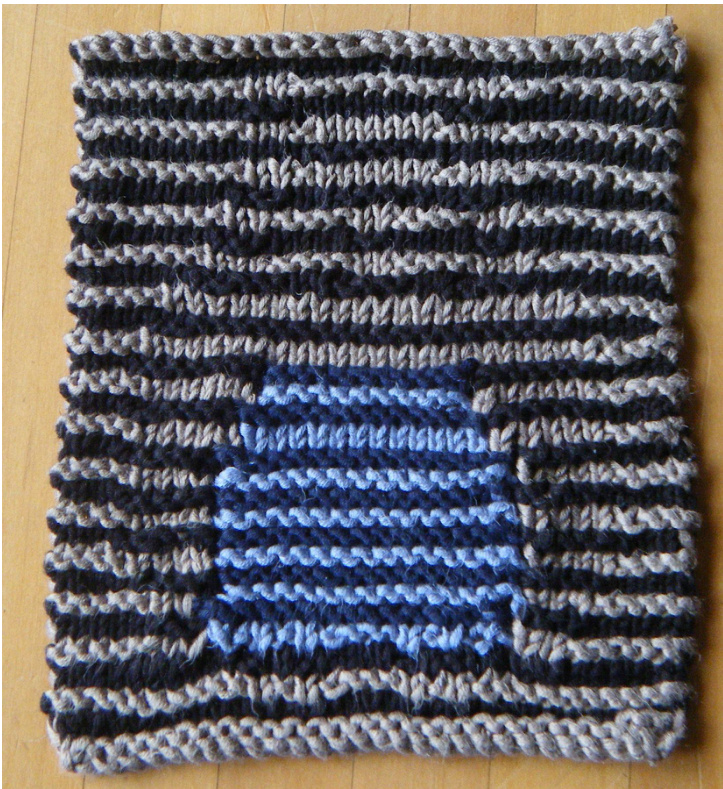
Owl lllusion Dishcloth
This pattern is in both written and chart form An illusion knitted dishcloth designed by Catherine-Joye Truman
Illusion Knitting
llusion Knitting is also known as Shadow Knitting. The effects are very easy to create once you understand how they work. The effect of illusion knitting is created by combinations of garter stitch and stocking stitch. A garter stitch ridge sticks up more than a stocking stitch section. When you want to see a garter stitch stripe, the adjacent stripe has to stand back and is therefore stocking stitch. So to make a dark ridge stand out, the adjacent light coloured stripes must stand back in stockingstitch. Every right side row is knit. The wrong side rows determine whether the stripe stands up (garter stitch) or hides (stocking stitch). If you knit on the wrong side, you get a garter ridge, which stands up. If you purl, you get a stocking stitch ridge which hides.
When you look down you see a pattern of stripes. Each stripe seems to be one ridge (two rows) of garter stitch.
Yarn
Approximately 30m DK weight (8 ply) yarn suitable for dishcloths - in each of two colours. 1 have used pure cotton, cotton/bamboo mix, cotton/silk mix. Wool or acrylics are not suitable. In this Owl lllusion, you can choose to knit the tummy of the owl a different colour, requiring another light and dark colour.
Needles
I used 3 mm as to hold the shape, as it needs to be firm. It can be knitted with finer yarn and finer needles, but result will be bigger
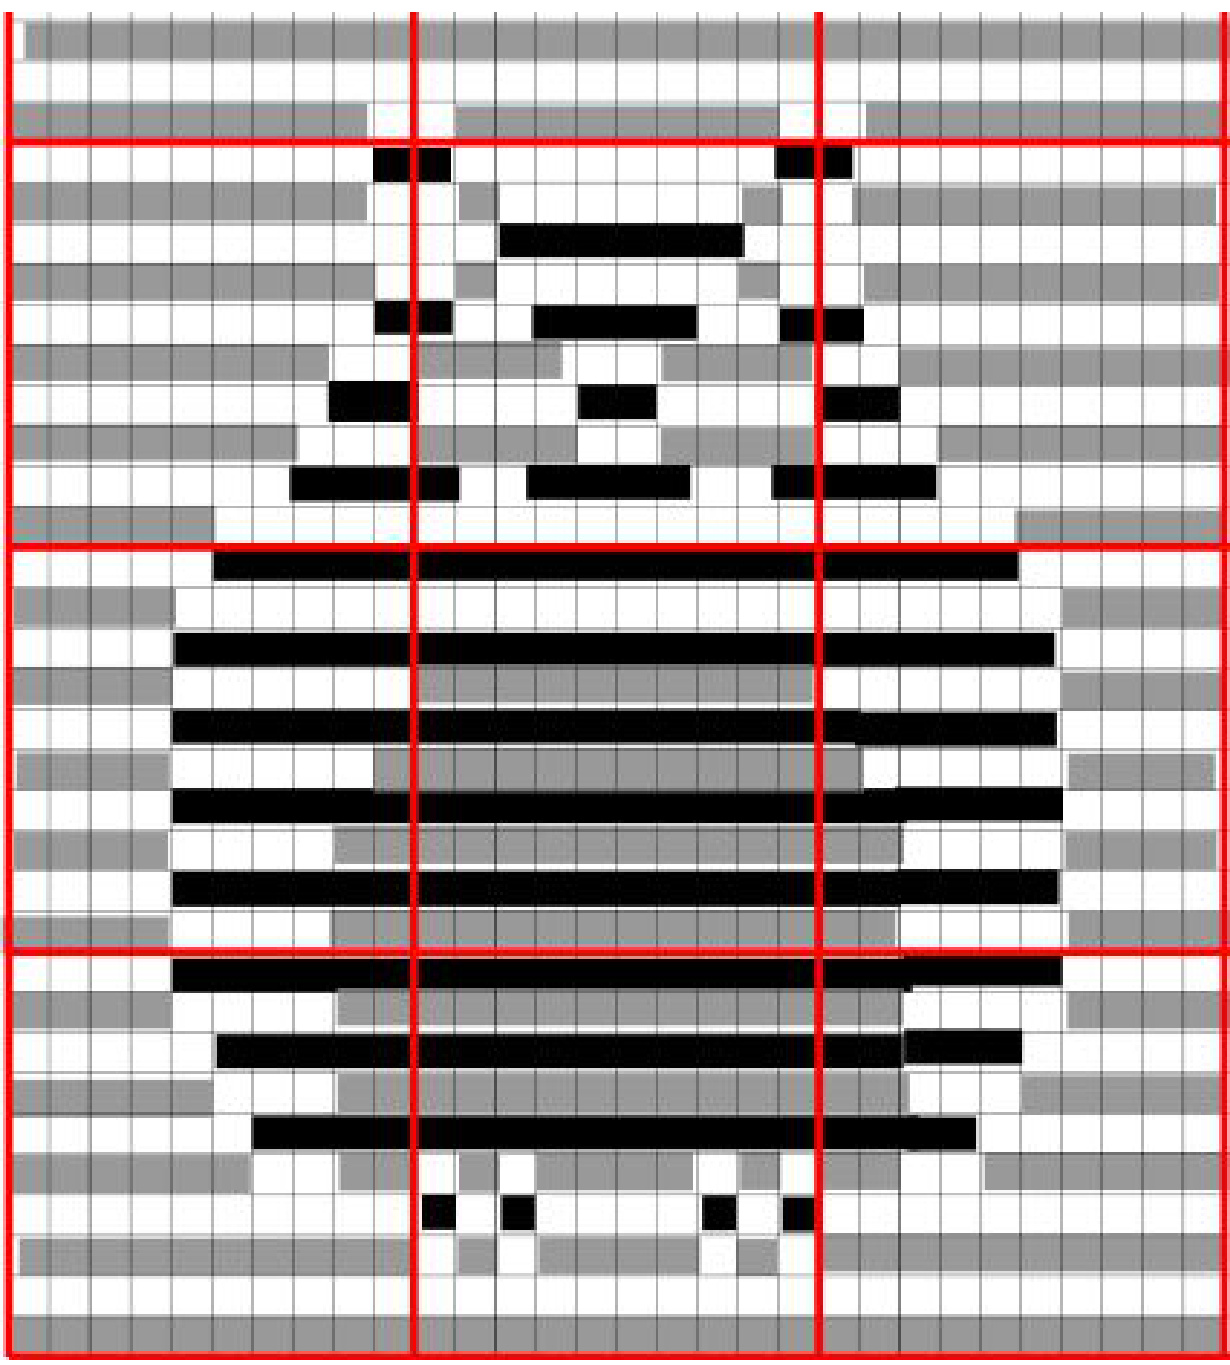
Chart
The picture is knitted from the bottom up with 30 stitches over 33 ridges (66 rows). The chart indicates whether the wrong side row is knitted or purled. There are alternate ridges of dark and light. When following a dark row, the stitches to be knitted are indicated with a black square on the chart, the stitches to be purled are indicated by a white square. The same applies to the lighter row on the wrong side, a grey square indicates a knitted stitch and a white square a purled stitch. There are two rows to each colour and the right side row of each colour which is knitted on the right side is always knit (this row is not marked on the chart). I found it helpful to place markers corresponding to the red lines on the chart and used a tally counter to keep track of the ridge that I was on. The sequence of working is: Row 1 - Using dark yarn, cast on (this is counted as the first row), thereafter, knit this row. Row 2 - Using dark yarn, follow the chart, knitting the black squares on the chart and purling the white ones. Row 3 - Using light yarn, knit the entire row Row 4 - Using light yarn, follow the chart, knitting the black squares on the chart and purling the white ones. These 4 rows will create two ridges or stripes.
Method
Follow the chart below as per the above instructions, or use the written instructions on the next page. Having both the written instructions and the chart will help the understanding of the chart and I hope will inspire you to venture into creating a larger Illusion Knit, usually worked from a chart.
Written Instructions
The odd numbered ridges are knitted in the dark yarn and the white in the light yarn, carrying the yarn up the side from the previous ridge without breaking it off.
| Right Side rows | Wrong Side rows - as per chart | |
| Ridge 1 | Cast on 30 st | knit to end |
| Ridge 2 | knit to end | purl to end |
| Ridge 3 | knit to end | k10, p1, k1, p1, k4, p1, k1, p1, k10 |
| Ridge 4 | knit to end | p10,k1, p1, k1, p4, k1, p1, k1, p10 |
| Ridge 5 | knit to end | K6, p2, k2, p1, k1, p1, k4, p1, k1, p1, k2, p2, k6 |
| Ridge 6 | knit to end | p6, k18, k6 |
| Ridge 7 | knit to end | k5, p3, k14, p3, k5 |
| Ridge 8 | knit to end | p5, k20, p5 |
| Ridge9 | knit to end | k4, p4, k14, p4, k4 |
| Ridge 10 | knit to end | p4, k22, p4 |
| Ridge 11 | knit to end | k4, p4, k14, p4, k4 |
| Ridge 12 | knit to end | p4, k22, p4 |
| Ridge 13 | knit to end | k4, p4, k14, p4, k4 |
| Ridge 14 | knit to end | p4, k22, p4 |
| Ridge 15 | knit to end | k4, p5, k12, p5, k4 |
| Ridge 16 | knit to end | p4, k22, p4 |
| Ridge 17 | knit to end | k4, p6, k10, p6, k4 |
| Ridge 18 | knit to end | p4, k22, p4 |
| Ridge 19 | knit to end | k4, p22, k4 |
| Ridge 20 | knit to end | p5, k20, p5 |
| Ridge 21 | knit to end | k5, p20, k5 |
| Ridge 22 | knit to end | p7, k4, p2, k4, p2, k4, p7 |
| Ridge 23 | knit to end | k7, p3, k4, p2, k4, p3, k7 |
| Ridge 24 | knit to end | p8, k2, p5, k2, p4, k2, p8 |
| Ridge 25 | knit to end | k8, p2, k4, p2, k4, p2, k8 |
| Ridge 26 | knit to end | p9, k2, p2, k4, p2, k2, p9 |
| Ridge 27 | knit to end | k9, p2, k1, p6, k1, p2, k9 |
| Ridge 28 | knit to end | p12, k6, p12 |
| Ridge 29 | knit to end | k9, p2, k1, p6, k1, p2, k9 |
| Ridge 30 | knit to end | p9, k2, p8, k2, p9 |
| Ridge 31 | knit to end | k9, p2, k8, p2, k9 |
| Ridge 32 | knit to end | Purl to end |
| Ridge 33 | knit to end | Cast off knitwise |
Contrast Option for Tummy
Knitting a contrast colour into the tummy requires two balls of each of the light and dark main colours and a dark tummy and a light tummy colour (indicated in blue below). The ridges 5-18 are then knitted as per the following, using the contrast light and dark colours according to whether you are on a dark or light ridge. When changing colours, loop the yarn around the next colour, not carrying it to the end of the row. Knit all other ridges as indicated in the main chart.
| Ridge 5 | k8, k14, k8 | K6, p2, k2, p1, k1, p1, k4, p1, k1, p1, k2, p2, k6 |
| Ridge 6 | k8, k14, k8 | p6, k2, k14, k2, k6 |
| Ridge 7 | k8, k14, k8 | k5, p3, k14, p3, k5 |
| Ridge 8 | k8, k14, k8 | p5, k3, k14, k3, p5 |
| Ridge9 | k8, k14, k8 | k4, p4, k14, p4, k4 |
| Ridge 10 | k8, k14, k8 | p4, k4, k14,k4, p4 |
| Ridge 11 | k8, k14, k8 | k4, p4, k14, p4, k4 |
| Ridge 12 | k8, k14, k8 | p4, k22, p4 |
| Ridge 13 | k8, k14, k8 | k4, p4, k14, p4, k4 |
| Ridge 14 | k8, , k14, k8 | p4, k4, k14, k4, p4 |
| Ridge 15 | k9, k12, k9 | k4, p5, k12, p5, k4 |
| Ridge 16 | k9, k12, , k9 | p4, k5, k12, k5, p4 |
| Ridge 17 | k10, k10, k10 | k4, p6, k10, p6, k4 |
| Ridge 18 | k10, k10, ,k10 | p4, k6, k10, k6, p4 |
Please respect the moral rights of independent designers. The copyright of this pattern remains with the author. This pattern is provided for personal home use only; you may not sell wall-hangings made from this pattern without the author's permission, copying this pattern, sharing copies of this pattern or distributing it without the author's permission is prohibited under the copyright. Please email purejoye@gmail.com for any enquiries. @ Catherine-Joye Truman First Published 2013 4 Maude St, Oamaru, 9400, New Zealand All rights reserved


