SEPTEMBERMORNING by Jana Huck
Eduard Moerike Translation: Walter M. Aue
SEPTEMBERMORNING
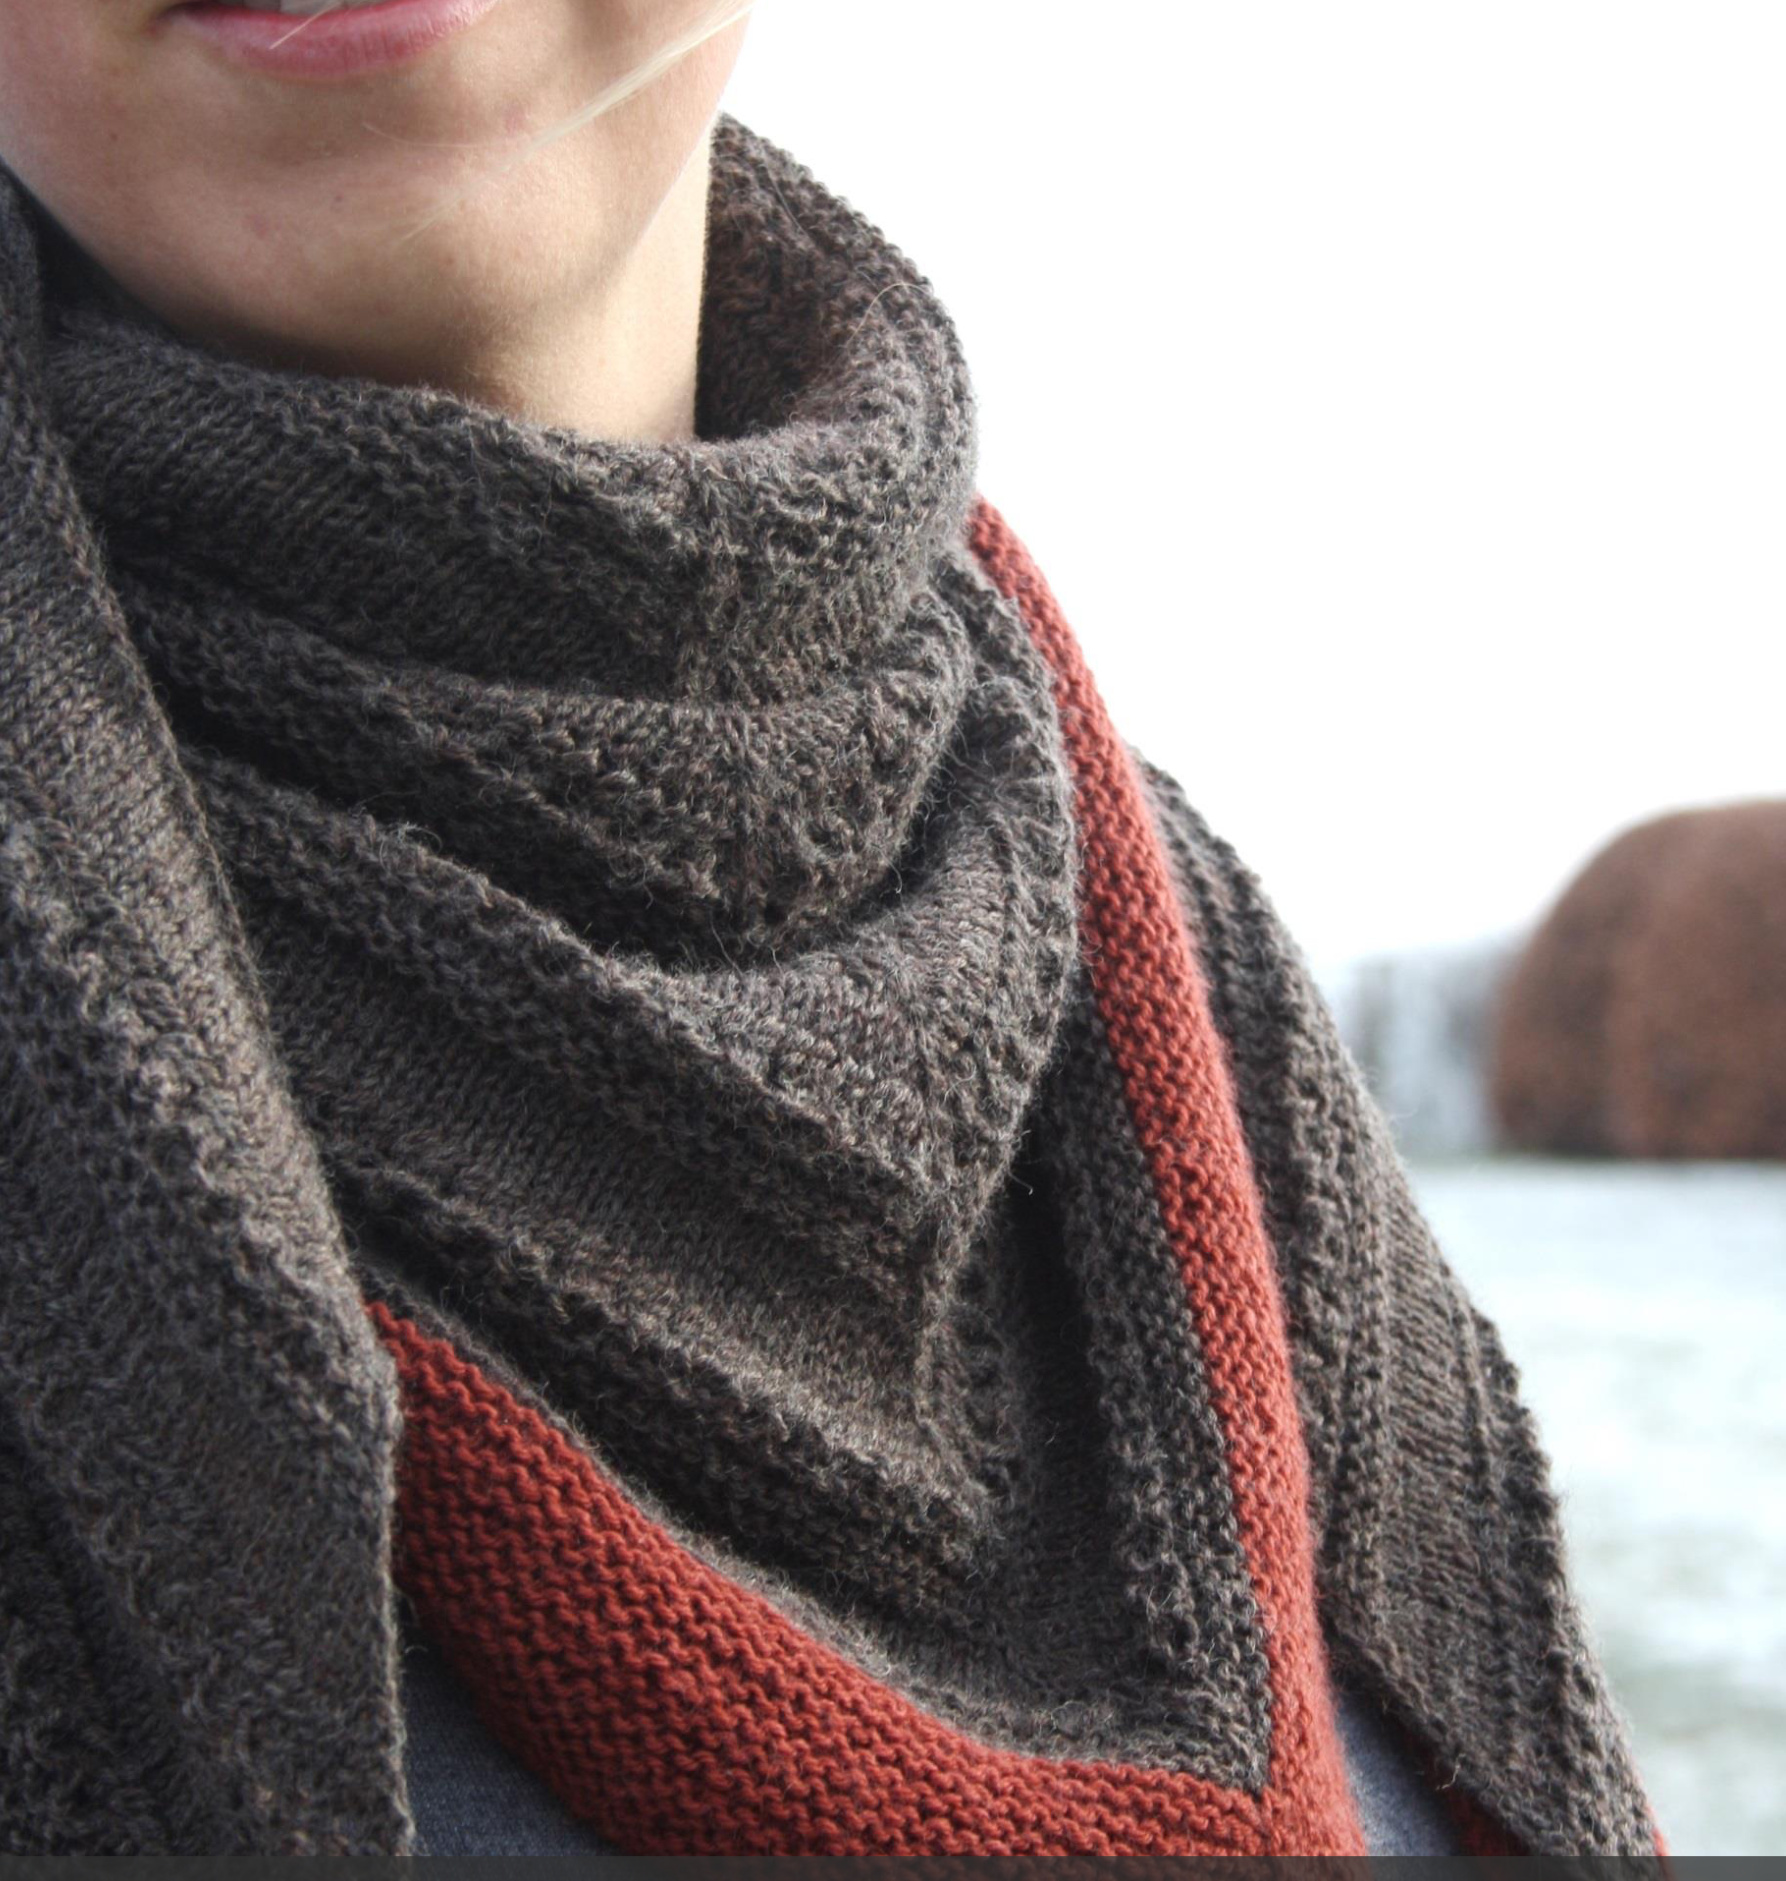
The world's adream in fog's embrace, Still slumber woods and meadows: But soon, through the dissolving lace, You'll see the blue of endless space, The milder grace of autumn's face Transcending golden shadows. September Morning is a triangular shawl knit from the centre out to the contrast coloured edging; it features compelling stripes in a textured stitch pattern. The title was inspired by the poem of the same name by the German poet Eduard Moerike because the colours of the shawl are reminiscent of the autumn hues depicted in thepoem.
TECHNICAL DETAILS
MATERIALS
Yarn
Fingering weight yarn, shown in Twister Sox 4; 75% pure wool, 25% polyamide, 420 m (460 yd)/100 g
Yardages
630 m (689 yd)/150 g of MC (= brown) and 181 m (198 yd)/43 g of CC (= orange) Needle 3.5 mm (Us#4) 150 cm (60 in) circular needle Notions 1 st marker (to mark centre st)
GAUGE
24 sts and 35 rows = 10 cm (4 in) - 3.5 mm (Us#4) needles - stocking st (= knit on RS, purl on WS) SIZE Width: 140 cm (55 in) Height: 65 cm (25.5 in)
ABBREVIATIONS
BO =bind off CC = contrast colour CO = cast on k= knit k2tog = knit two together M1L = make one left M1R = make one right MC = main colour p =purl p2tog = purl two together rep = repeat RS = right side sl1 = slip one st(s) = stitch(es) WS = wrong side YO = yarn over
PATTERN NOTES
Slipped sts: Slip sts purlwise with yarn in front. Selvedge: The selvedge sts are slipped every other row and thus form a chain selvedge. They are included in the written directions. Increases:4stswillbeincreasedoneachRSrowin the stocking st and garter st parts; one st will be increased at the beginning, and one st at the end of row,as well as one st to each side of the centre st. The stripe increases at a different rate. The number of increases worked will be noted in brackets at the end of eachRS row and at the end of ws rows if there are any. See Appendix for the increase techniques(M1R/M1L). Illustrated directions for all techniques used are provided in the Appendix. This triangular shawl is worked from the centre of the longest edge outwards to the CC edging.
STRIPED MAIN PART
Set up for first stripe
With main colour, CO 5 sts using the long tail CO method (see Appendix, p. 4). Row 1 (WS): Sl1, p3, k1. Row 2 (RS): SI1, M1L (see Appendix, p. 5), k1, M1R (see Appendix, p. 4), k1 (mark this st as centre st), M1L, k1, M1R, k1. 9 sts on the needle. Row 3: Sl1, purl to last st, k1. Row 4: Sl1, M1L, knit to centre st, M1R, k1 (= centre st), M1L, knit to last st, M1R, k1. 13 sts on the needle. Row 5: Sl1, purl to last st, k1. Work rows 4 and 5 two more times. 21 sts on the needle.
1st Stripe
Row 10 (RS): SI1, M1L, \*cable CO 1 st (see Appendix, p. 4) leaving it on the right needle, k1; rep from \* to centre st, M1R, k1 (= centre st), M1L, \*cable CO1 leaving it on the right needle, k1; rep from \* to last st, M1R, k1. 43 sts on the needle (4 sts increased and all sts between centre st and selvedge sts have been doubled). Row 11 (Ws): Sl1, p1, \*purl together knit st and CO st from previous row (for "p2tog" see Appendix, p. 5); rep from \* to one st before centre st, p3. \*Purl together knit st and cO st from previous row; rep from \* to last 2 sts, p1, k1. 25 sts on the needle (the cast-on sts from previous row have been decreased). Row 12: Sl1, knit to last st, k1. (0 sts increased.) Row 13: Sl1, YO, \*k2tog (see Appendix, p. 5), YO; rep to one st before centre st, p3, YO. \*K2tog, YO; rep to last st, k1. 27 sts on the needle (2 sts increased). Row 14: Sl1, purl to centre st, k1 (= centre st), purl to last st, k1. (0 sts increased.) Row 15: Sl1, YO, \*k2tog, YO; rep from \* to centre st, p1 (= centre st), YO. \*K2tog, YO; rep from \* to last st, k1. 29 sts on the needle (2 sts increased). Row 16: Sl1, purl to centre st, k1 (= centre st), purl to last st, k1. (0 sts increased.) Row 17: Sl1, purl to last st, k1.
Garter stitch, 4 rows
Row 18 (RS): Sl1, M1L, knit to centre st, M1R, k1 (= centre st), M1L, knit to last st, M1R, k1. 33 sts on the needle. Row 19 (Ws): Sl1, knit to centre st, p1 (= centre st), knit to end. Work rows 18 and 19 one more time. 37 sts on the needle.
Stocking stitch, 8 rows
Row 22 (RS): Sl1, M1L, knit to centre st, M1R, k1 (= centre st), M1L, knit to last st, M1R, k1. 41 sts on the needle. Row 23 (Ws): Sl1, purl to last st, k1. Work rows 22 and 23 three more times. 29 rows worked. 53 sts on the needle.
Pattern repeats
Repeat rows 10-29 to desired length of shawl (the picture shows 9 repeats, which is a total of 10 stripes).
EDGING
Join CC, work 24 rows in garter stitch and increase 4 sts on each RS row as before (= work rows 18 and 19 of main part 12 times). BO all sts knitwise (see Appendix, p. 5) and cut yarn.
FINISHING
Weaveinends. Block shawl by wetting thoroughly and then spreading in desired shape on a flat surface and wait for it to dry completely.
CAST-ON
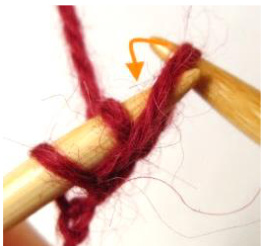
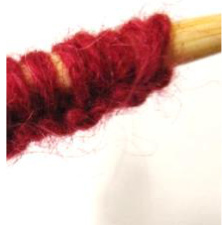
Long tail cast-on
Make a slip knot, leaving a tail of roughly three times the length of the desired cast-on edge. \*Place long thread around your thumb from back to front and working thread around your index finger from front to back.

Repeat from \* until you have the required number of sts on the needle. Bring needle over and under long tail and then over and under working thread and one last time through the loop that is formed by the long tail. Pull tight. 2 sts on the needle.
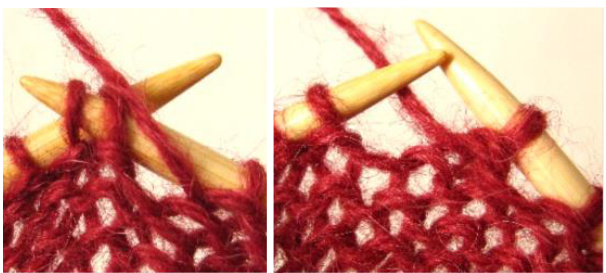
Cable cast-on (= cable CO 1 st)
2 sts on the needle.1 \*Insert needle between both st... ...and pull loop through. Slip new st onto the left needle. Rep from \* until you have the desired number of sts on the needle.1 1This information is included to make the directions for the cast-on complete. You will not need to work these steps in the pattern.
INCREASES
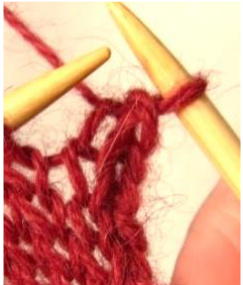
Make one right (= M1R)
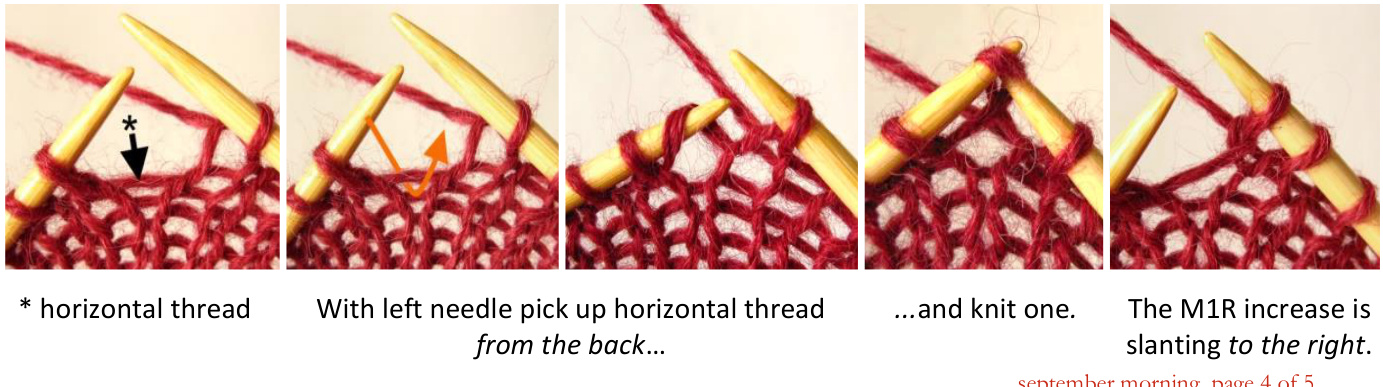
Make one left (= M1L)
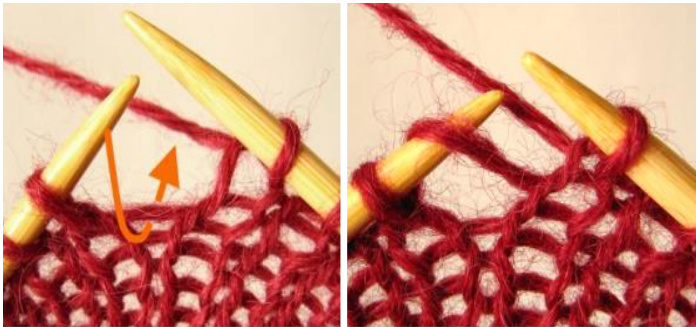
With left needle pick up horizontal thread from the front... ...and knit through the back loop. The M1L increase is slanting to the left.
DECREASES
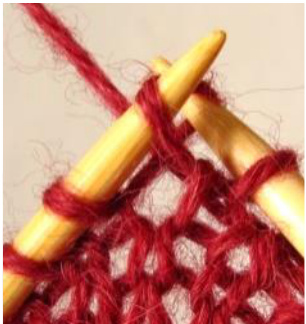
Knit two together (= k2tog)
...and knit together with first st. The decrease is slanting to the right.
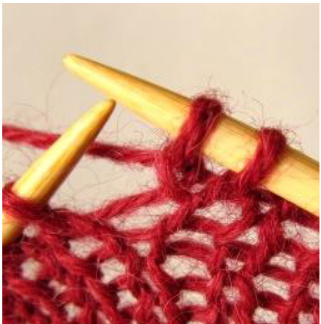
Purl two together (= p2tog)
Insert right needle into the first two sts on the left needle as if to purl with yarn in front.. ...and purl them together. The decrease is slanting to the right, as seen from right side.
BIND-OFF
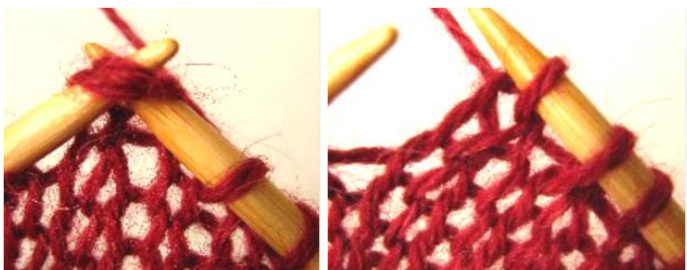
Basic knit bind-off

...and pass first st over.
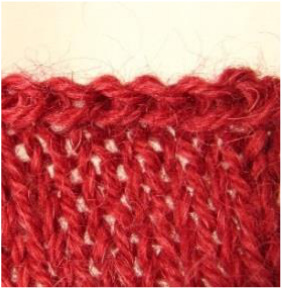
Repeat from \*. The basic knit bind-off edge seen from right side. One st is bound off.


