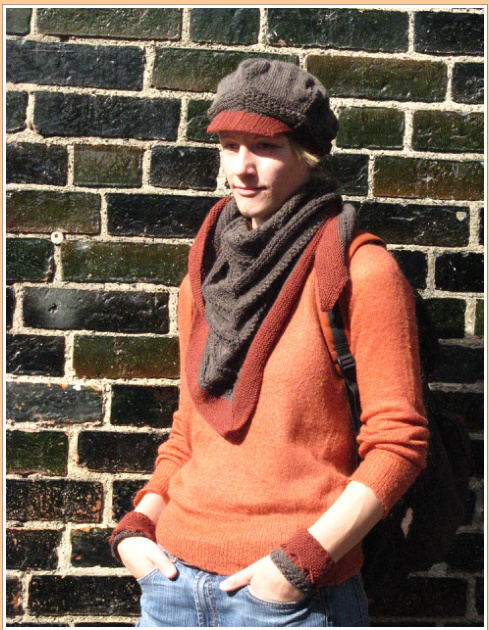
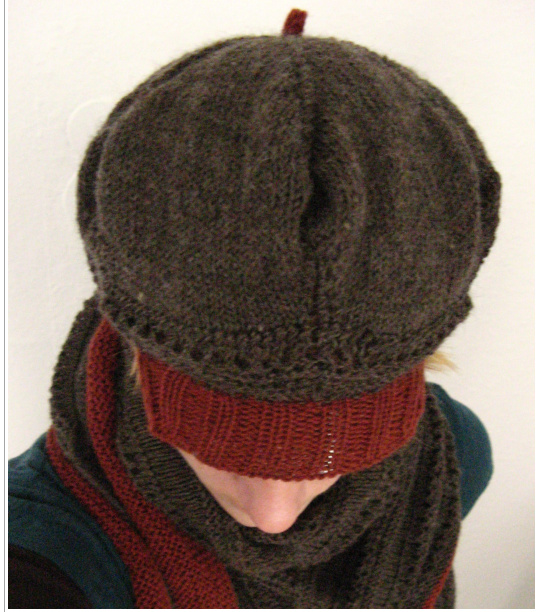
September Morning
by Jana Huck I knit this collection in September, hence the name. The skill level is intermediate but suitable for beginners with experience following written directions. It was fun finding out how to work the pattern into the shawl, peaked cap and wristlets and I am really happy with the result!
Yarn: Any fingering weight yarn that knits to gauge and is not itchy. I used Twister Sox 4 ( $75\%$ virgin wool, $25\%$ polyamide, $100\,\mathfrak{g}/420\,\mathfrak{m}/460$ yds): 200 g ( $840\;\mathrm{m}/920$ yds) brown $=$ MC, $80\,\mathfrak{g}$ (340 $\mathsf{m}/370$ yds) orange $=\mathsf{C C}$ (the amount of yarn needed is noted separately for the shawl, cap and wristlets) Needles: double pointed needles US # $\hbar4/3,5\;\mathrm{mm}$ ; US : $\sharp4/3,5\ \mathrm{mm}\,24\$ inch/40 cm circular for the peaked cap and US #4/3,5 mm 47 inch/140 cm circular for the shawl (if you don't have a long enough needle you can use two shorter ones instead), crochet hook US E-4/9 $(\mathsf{U K})/3,5\mathsf{\,m m}$ for the peaked cap Notions: 6 equal coloured stitch markers and one in a contrasting colour (it is possible to use scrap yarn instead), a removable marker, a piece of felt (approximately $6\,\mathsf{c m}/2,5$ inches x 16 $\mathsf{c m}/6\mathrm{,}5$ inches) or some plastic or cardbord of that size (any stiff fabric) Gauge: 26 sts and 30 rows $=4$ square inchesi $^{\prime}{}^{10}\,\mathsf{c m}^{2}$ NecessarySkills: Shawl: Knit and purl, make a YO and p2tog, k2tog. (easy-intermediate: Peaked Cap: See shawl, plus knitting in the rnd, sl1-k1-psso, 3-needle-BO. ..00) Wristlets: See peaked cap, plus provisional CO and garter stitch kitchener.
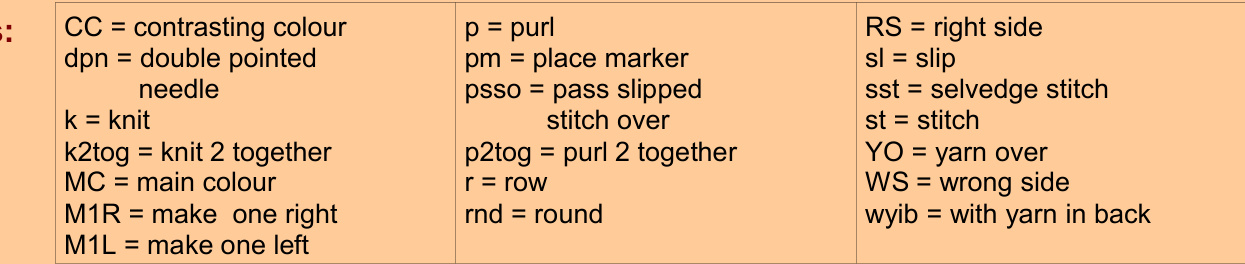
Abbreviations:
Repeats: Repeat instructions between the \* across the whole row/rnd. Contact me at: justblocked@yahoo.de
Shawl
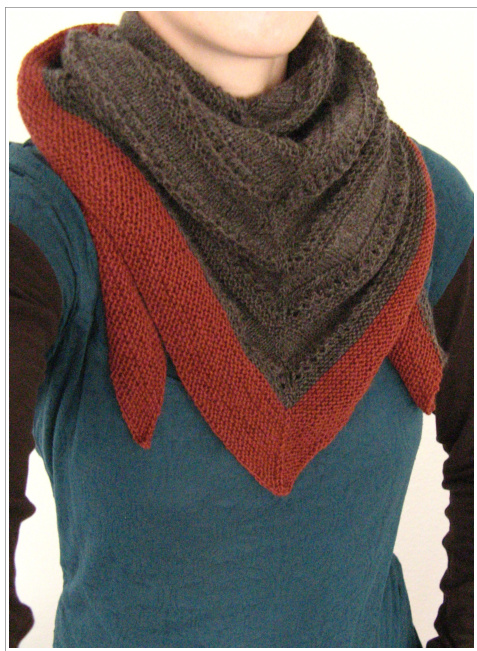
Materials: Yarn: Twister Sox 4, 150 g ( $630\;\mathrm{m}/689$ yds) of brown yarn (MC) and $50\,\mathfrak{g}$ $210\;\mathrm{m}/230$ yds) of orange yarn (CC) will make a shawl of $140\mathtt{c m}/55$ inches width and 65 cm/26 inches length. Needles: US : $\lvert\ddagger4/3,\rvert5\ \mathrm{mm}\ 60$ inches/140 cm circular needle (or two shorter ones if you don't have a long enough needle) Notions: one stitch marker
Pattern:
This triangular shawl is knit from the middle of the widest side up to the top. The increases are worked after and before the selvedge stitches as well as on each side of the center stitch. Selvedge stitches: Work the selvedge stitches with your preferred method. They are not included in the written pattern. Increases: First two increases in the row: Using the left-hand needle, pick up horizontal strand between last stitch and next stitch, from the front. Knit through the back I $\mathsf{o o p}=\mathsf{M}1\mathsf{L}$ Third and fourth increase in the row: Using the left-hand needle, pick up the strand from the back and knit into front of $100\uprho=\mathsf{M}1\mathsf{R}$ CO 5 sts with brown yarn (MC), R 1 (WS): Purl. R 2 (RS): M1L, knit 1, M1L, knit 1 (mark this st as center st), M1R, knit 1, M1R. R 3: Purl. In all following right side rows (even numbers) there will be four increases worked as described above. R 4: Knit. R 5: Purl. R 6: Knit. R 7: Purl. R 8: Knit. R 9: Purl. The following patterns are taken from the book Schachenmayr, Das neue Strick- und Hakelbuch (patterns 86 and 125, translated by Jana Huck). In rows 8-15 there are sometimes no increases on the right side rows. This is noted in brackets at the end of the instructions of each row. R 10: \*Insert needle between the first and second stitch on the left-hand needle, pull loop through and slip it onto the right-hand needle, knit the first stitch on the left-hand needle\* (the increases are worked the usual way). R 11: \*The knitted stitch and YO are purled together\*, increased stitches and middle stitch are purled. R 12: Knit (no increases). R 13: YO, \*k2tog, YO\*, p1 (1 st before center st), p1 (center st), p1, \*YO, k2tog\*, end row with a YO. R 14: Purl to center st, k1 (center st), purl to end (no increases). R 15: YO, \*k2tog, YO\*, p1 (center st), YO, \*k2tog, YO\*. R 16: Purl to center, k1 (center st), purl to end (no increases). R 17: Purl. From now on the increases are worked again on the right-side rows as described above. Work 4 rows of Garter stitch and 8 rows of stockinette stitch (rows 18-29): R 18: Knit . R 19: Knit until center st, p1 (center st), knit to end. R 20: Knit. R 21: Knit until center st, p1 (center st), knit to end. R 22: Knit. R 23:Purl. R 24: Knit. R 25: Purl. R 26: Knit. R 27: Purl. R 28: Knit. R 29: Purl. Repeat rows 10-29 until desired length (the pictures show 9 repeats which is a total of 10 stripes) The edging is knit in 24 rows of garter stitch with orange (contrasting) yarn (knit right side and wrong side rows). Continue to work the increases on the right side rows. Bind off (I used the double-crochet bind off), pass the yarn through the first 5 stitches, pull tight, cut yarn and weave in ends.
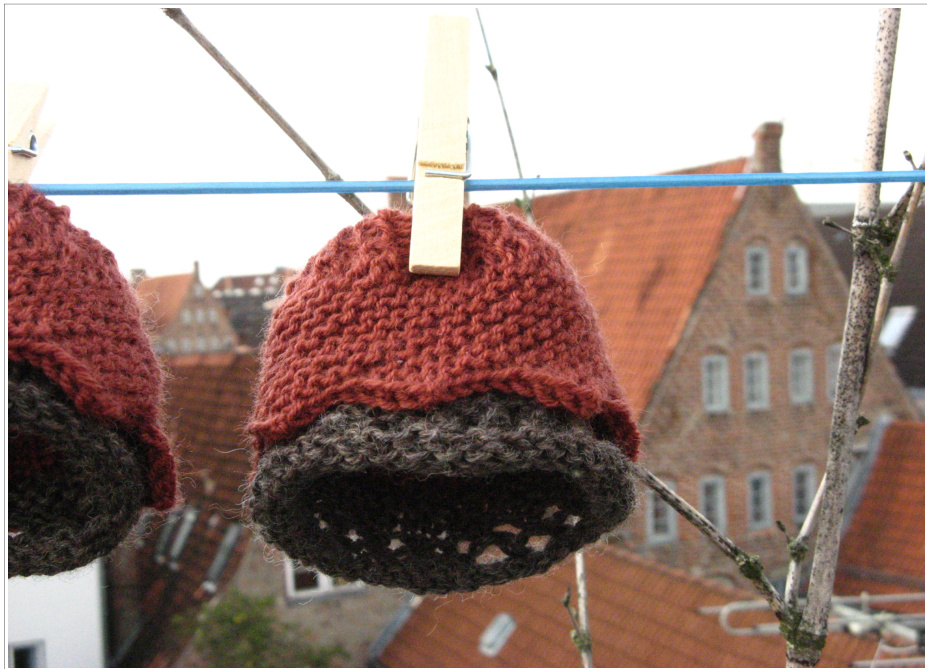
Peaked Cap
Materials: Yarn: Approximately $50\,\mathfrak{g}/210\,\mathfrak{m}/230$ yds of brown yarn $(=\mathsf{M C})$ and $10\ g/21\ m/23$ yds of orange yarn $(=\mathsf{C C})$ Needles: double pointed needles US#4/3,5 mm; circular needle US#4/3,5 mm (24 inches/60 cm); crochet hook US E-4/9 (UK) $/3{,}5\;\mathrm{mm}$ Notions: 5 markers for the increases and decreases, 1 different coloured maker for the beginning of the round, a removable marker, a piece of felt (approximately $6\,\mathsf{c m}/2,5$ inches $\times\,16\,\mathsf{c m}/6,\!5$ inches), plastic or cardbord of that size. Sizes: A: head circumference of 49-52 cm/19-20,5 inches/US hat size 6 1/8 - 6 1/2; B:head circumference of $53{-}56\mathtt{c m}/21{-}22$ inches/US hat size 6 5/8 - 7; C: head circumference of 57-60 cm/22,5-23,5 inches/US hat size 7 1/8 - 7 1/2.
Pattern:
CO 5 sts using brown yarn $(=\mathsf{M C})$ and dpns, knit into front and back of each stitch (total of 10 sts). Knit one round and mark the beginning of the next round with the special marker in a contrasting colour. Rnd 1 (Increase rnd): (M1L, pm, insert needle between the first and second stitch on the left-hand needle, pull loop through and slip it onto the right-hand needle, knit the first stitch on the lefthand needle, M1R, k1) 5 times. Rnd 2: Knit, the stitch and YO between the increases are knit together. Rnd 3 (Incrase rnd): (Knit until marker, M1L, slip marker, insert needle between the first and second stitch on the left-hand needle, pull loop through and slip it onto the right-hand needle, knit the first stitch on the left-hand needle, M1R) 5 times, knit until end of rnd. Rnd 4: Knit, the stitch and YO between the increases are knit together Size A: Repeat rnds 3 and 4 18 times. 210 sts on the needle. Size B: Repeat rnds 3 and 4 19 times. 220 sts on the needle. Size C: Repeat rnds 3 and 4 20 times. 230 sts on the needle. Decrease rnd: \*Knit until two sts in front of the marker, Sl1, k1, psso, slip marker, insert needle between the first and second stitch on the left-hand needle, pull loop through and slip it onto the right-hand needle, knit the first stitch on the left-hand needle, k2tog\* knit to end. Followina rnd: Knit. the stitch and YO between the decreases are knit toaether. Repeat these two rnds 5 times. A:160 (B:170, C:180) sts on the needle. Work one stripe of the pattern: Rnd 1: \*Insert needle between the first and second stitch on the left-hand needle, pull loop through and slip it onto the right-hand needle, knit the first stitch on the left-hand needle\*. Rnd 2: \*The knitted stitch and YO are knit together\*. Rnd 3: Knit. Rnd 4: (\*P2tog, YO\* until marker, slip marker) 5 times, \*p2tog, YO\* to end. Rnd 5: Purl. Rnd 6: (\*P2tog, YO\* until marker, slip marker) 5 times, \*p2tog, YO\* to end. Rnd 7: Purl. Rnd 8: Knit. Now 4 rnds in Garter and 4 additional rnds in stockinette stitch are knit (rnds 9-16): Rnd 9: Knit, work 10 decreases as described for the decrease rnd above. Rnd 10: Purl, the stitch and YO between the decreases are purled together. Rnd 11: Knit, work 10 decreases as described for the decrease rnd above. Rnd 12: Purl, the stitch and YO between the decreases are purled together. Rnd 13: Knit, work 10 decreases as described for the decrease rnd above. Rnd 14: Knit, the stitch and YO between the decreases are knit together. Rnd 15: Knit, work 10 decreases as described for the decrease rnd above. Rnd 16: Knit, the stitch and YO between the decreases are knit together. Remove the st markers for the decreases as you go.
A: 120; B: 130; C:140 sts on the needle.
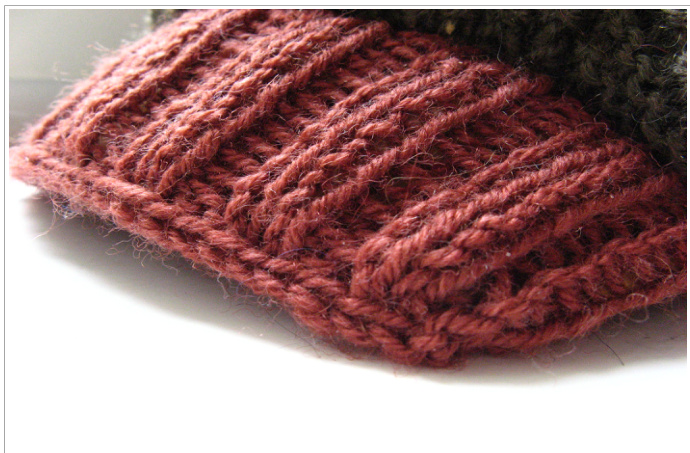
Ribbing (orange yarn, CC):
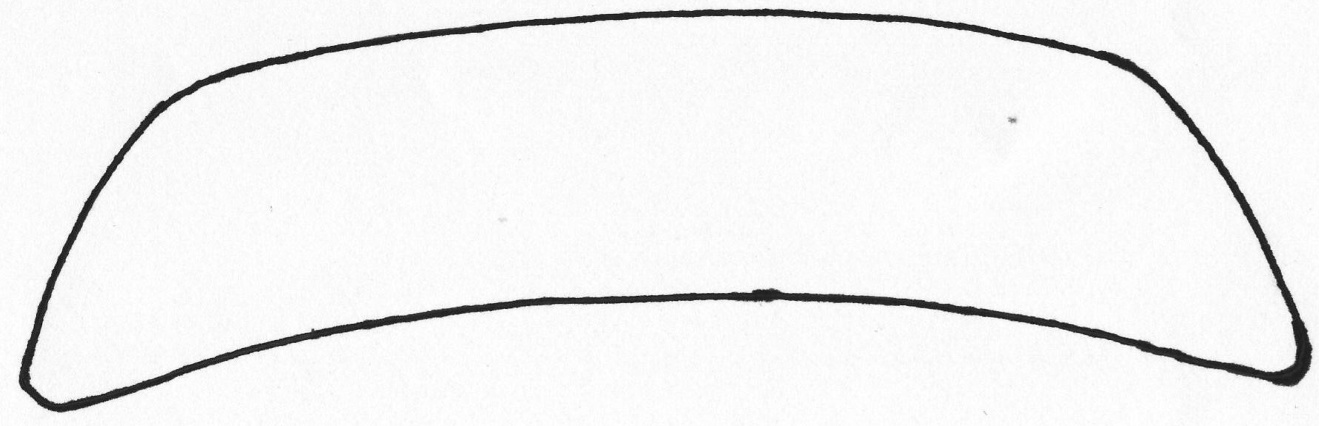
Rnd 1: Mark the decrease in the middle of rnd 65 (the one that will be on the front of the finished peak cap) with the removable marker, (size B only: Begin rnd with increasing 1st then) knit until 16 sts after the marked st, change to dpns with the 15th st in front of the marked st as you go (this 15th st will be the first st of the peak) and don't cut yarn but start working the peak of the cap: Rnd 1 (second half): CO 32 sts with a dpn. PM to mark the end of rnd/beginning of the next rnd. Rnd 2: Knit the 15th st in front of the marked st, continue with $\star_{\mathsf{p}2}$ $\mathsf{k}2^{\star}$ (rib pattern I), end rnd with p2, k1, arrange all sts of the round on 4 dpns (16 sts per needle). Rnd 3-12: K1. (P2, k2) around, rnd ends with p2, k1. Rnd 13: Sl1, k1, pss0, continue with rib pattern I, knit the 31st and 32nd st together, sl next st, k1, psso, continue with rib pattern I, knit the 63th and 64th st together. Rnd 14: Sl1, k1, pss0, continue with rib pattern I, knit the 29th and 30th st together, sl next st, k1, psso, continue with rib pattern I, knit the 59th and 60th st together. Work a three-needle-BO to close the front of the peak. Cut yarn. Insert inlay cut out of a piece of felt or plastic sheet using the graphic below.
Continue with the ribbing:
Rnd 1 (continued): CO 32 sts with the crochet hook, for each st insert the needle into one of the peak sts and one st of the hat edging. This way the peak is fixed to the cap and the inlay sewed in. (Size B only: Increase 1 then) k until end of rnd (size B: total of 132 sts for rnd 1, A: 120, C: 140) Rnd 2-6: K1. Work p2, k2 around (Rib pattern I), end k1
BO sts. Cut yarn.
Pick up the first five sts of the cap using orange yarn $(=\mathsf{C C})$ . Knit five rounds (5 sts per rnd). Cut yarn. Pass yarn through all sts, pull tight. Weave in all ends.
Inlay (scale 1:1):
Wristlets

Materials: Yarn: Approximately $5\,\mathfrak{g}/10\,\mathfrak{m}/1\,1$ yds of brown yarn $(=\mathsf{M C})$ and $15\,\mathfrak{g}/31\,\mathfrak{m}/34$ yds of orange yarn $(=\tt C C)$ ·,Needles: double pointed needles $\mathsf{U S\#4}/3,5\;\mathsf{m m}$ Notions: stitch marker to mark the beginning of the rnd, scrap yarn. Size: Written for a wrist circumference of 12,5 (14; 15,5; 17; 18,5; 20; 21,5 cm)/ 5 (5,6; 6,2; 6,8; 7,4; 8; 8,6 inches) The pictures show the smallest size, worn with 2 inches of negative ease. With each size an edge is added.
Pattern:
CO 32 (36, 40, 44, 48, 52, 56) sts using brown yarn. This will fit a wrist of 12,5 (14; 15,5; 17; 18,5; 20; 21,5) cm/ 5 (5,6; 6,2; 6,8; 7,4; 8; 8,6) inches. Knit one round. Place marker for the beginning of the rnd. Work one stripe of the pattern: Rnd 1: \*Insert needle between the first and second stitch on the left-hand needle, pull loop through and slip it onto the right-hand needle, knit the first stitch on the left-hand needle\*. 64 (72, 80, 88, 96, 104, 112) sts. Rnd 2: \*The knitted stitch and Y0 are knit together\*. 32 (36, 40, 44, 48, 52, 56) sts. Rnd 3: Knit. Rnd 4: \*P2tog, YO\*. Rnd 5: Purl. Rnd 6: \*P2tog, YO\*. Rnd 7: Purl. Rnd 8: Knit. Now add 4 rnds of Garter and 2 rnds of stockinette stitch ( $\because$ rnds 9-14): Rnd 9: Knit. Rnd 10: Purl. Rnd 11: Knit. Rnd 12: Purl. Rnd 13: Knit. Rnd 14: Knit. Cut yarn. Continue with orange yarn, knit one round and then work 7 cm/ 3 inches (7,5/3;8/3;8,5/3,5;9/3,5; 10/4) of $\star_{\mathsf{p}1}$ $\mathsf{k}\mathsf{1}^{\star}$ around $\prime_{=}$ rib pattern Il). The marker for the beginning of the rnd can be removed. Don't cut yarn.
Now work the serrated edging as follows:
Row 1: CO 12 sts using the provisional CO -method and scrap yarn. Turn. Row 2: Knit the 12 freshly CO sts and knit one of the rib pattern sts. (13 sts) Turn. Row 3: Pick up the horizontal strand between the last knitted st of the ribbing in the previous row and the next st of the rib pattern using the the left-hand needle and knit it together with the first st on the left-hand needle, knit 12 sts. Turn. Row 4: Knit 13 sts and knit one of the rib pattern sts. (14 sts) Turn. Row 5: Pick up the horizontal strand between the last knitted st of the ribbing in the previous row and the next st of the rib pattern, slip it onto the left-hand needle and knit it together with the first st on the left-hand needle, knit 13 sts. Turn. Row 6: Knit 14 sts and knit one of the rib pattern sts. (15 sts) Turn. Row 7: Pick up the horizontal strand between the last knitted st of the ribbing in the previous row and the next st of the rib pattern, slip it onto the left-hand needle and knit it together with the first st on the left-hand needle, knit 14 sts. Turn. Row 8: Knit 15 sts and knit one of the rib pattern sts. (16 sts) Turn. Row 9: Pick up the horizontal strand between the last knitted st of the ribbing in the previous row and the next st of the rib pattern, slip it onto the left-hand needle and knit it together with the first st on the left-hand needle, knit 15 sts. Turn. Row 10: BO 4 sts, knit 12 and knit one st of the rib pattern sts. (13 sts) Turn. Repeat rows 3-10 seven (8,9,10,11,12,13) times. Row 10 of the last repeat is worked as follows: B0 4 sts, slip the only st that's now on the right-hand needle onto the left-hand needle, pick up the provisionally CO sts on a dpn and bind them off together with the sts of the last row 9 (the stitches on the left-hand needle) using the garter stitch kitchener. This will make the most invisible seam. Alternatively the 3-needle BO can be used. Cut yarn and weave in ends.