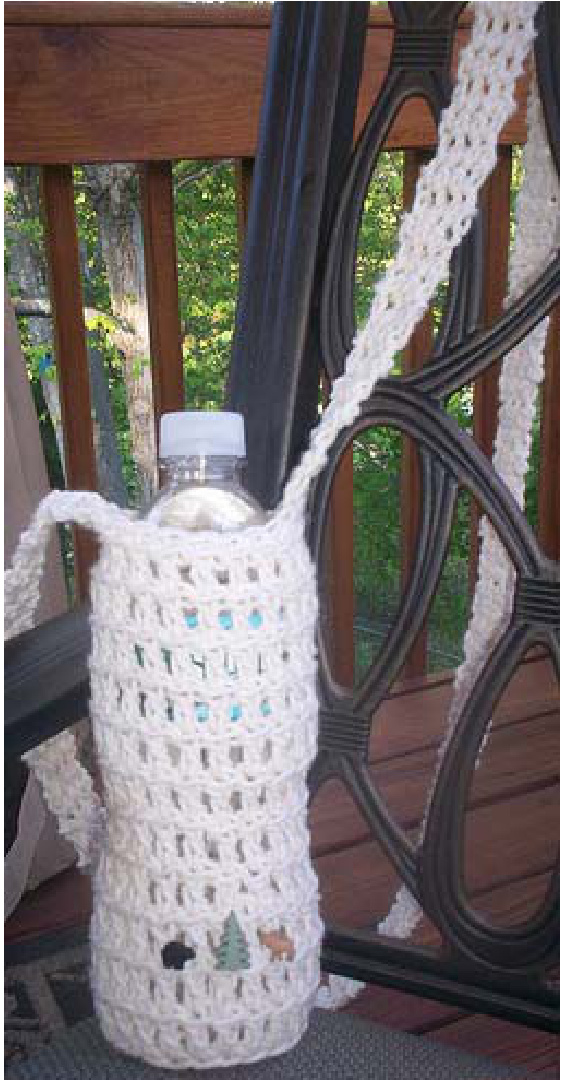
Easy Crochet Water Bottle Holder
Supply List for Images shown: Sugar 'n Cream Cotton Yarn, color Ecru. Size J crochet hook Cute wilderness buttons Yarn Needle Needle and light thread for buttons.
Suggestions:
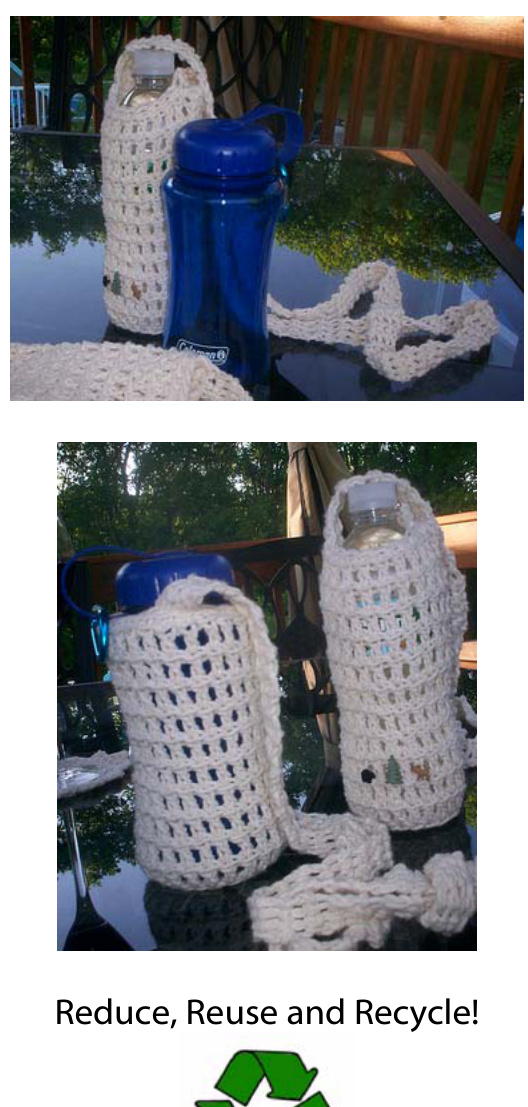
Any cotton you have will do. I worked 4 or 5 off a 1 Ib cone and still had well more than a half a cone left. The small skeins of Sugar 'n Cream or Peaches 'n Cream should be plenty to make one carrier. Beads and other notions could be attached across the top or bottom. "Flare" (credit to Office Space the Movie) could be pinned all over. I pinned a Smokey the Bear Pin to the one above as a gift to my favorite state park ranger Betsy.
Stitches used:
Chain (ch), Double crochet (dc), Slip stitch (ss),Increase dc and decrease dc. Note: I make stuff up as I go, and my directions sometimes reflect that. There is a lot of wiggle room in a pattern like this. Have fun and switch it up a bit. If you have any questions at all email me at happyhooking@gmail.com. Starting loop and first round: Chain (ch) 4 leaving the first loop loose and open. Leave a longer tail yarn.

Double crochet (dc) 11 in the first loop of your ch 4 that you left open above.
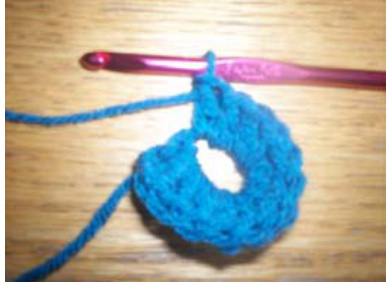
Pull the yarn tail tight closing the hole.
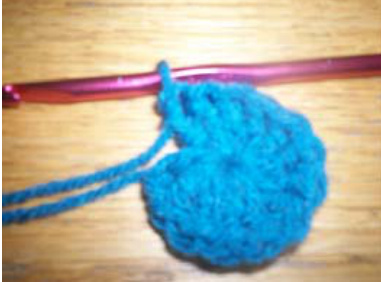
Join to the top of the ch 4. (12 dc, with 1st ch 3 counting as a dc.) (PS. It's a ch 4 rather than a ch 3 because you are using the first ch as the center of your ring. Ilike to work the tail in to the 11th dc after I close the hole. You can also work it into your ch 3 of the next round, it makes it thicker and less obvious that it's not a "real" stitch) Second Round: ch 3 (counts as your first dc, here and throughout the rest of the pattern). Dc in same stitch. Dc in each stitch around, slip stitch to join. (24 dc) Rounds 3-4: Ch3, dc in next stitch and in each stitch around, slip stitch to join (24 dc). If l am working this up for a off the shelf water bottle like a Poland Springs Bottle I add another round here for height, so work round 5 same as rounds 3 and 4. (24 dc) Round 5: If lam working fora Nalgene type bottle I will decrease one stitch, somewhere around stitch 12 into the round. Slip stitch to join. (23 dc) Round 6: Decrease one stitch for either bottle. Poland Springs type bottle (23 dc); Nalgene type bottle (22 dc). If working for the Poland Springs type bottle add another round here, decreasing one stitch to bring it down to a total of 22 dc. Round 7-8: Ch 3. Work a dc in each stitch. Join with a slip stitch. (22 dc) Round 9-10: Ch 3. Work a dc in each stitch, increase one stitch. Join with a slip stitch. (row 9: 23 dc, row 10 24dc). Check the height against your actual bottle, it may be long enough. If not add one more round around of dc. Total of 24dc. Round 11: Single crochet in each stitch (24sc). Round 12: (optional if you want the neck tighter around your bottle), slip stitch around top. If you do not want a handle tie off here, use a yarn needle to sew in your end tail. If you want a handle do not tie off, continue below. Handle: Ch1, sc in next three stitches. Ch 1 (does not count as a stitch, it's just not beefy enough) turn. $^{*}\mathsf{S c}$ in each of the next three sc of previous row, ch 1 turn\* Repeat between from\* over and over again until it is the length you want. It will stretch and it's okay if you make it to long. You can tie a knot in the handle to shorten it. When it is as long as you'd like join it to the opposite side, just line it up or you can count the stitches on the top of the carrier to center it. I slip stitched to join the other side of the handle to the carrier then used the extra yarn and sewed a few stitches over that to make sure it was secure enough to handle the beatings the children will put it through. Summary: Basically crochet a circle for two rounds, then stop increasing for the next few rounds, decrease for a couple of rounds to shape around bottle, work a couple of rounds then increase back to original size. Cotton will stretch and form to bottle and is easy to clean. The stuff I have to add: Please do not copy this pattern or sell the pattern itself. You can make and sellas many finished objects that you like, as long as you are not making more than 1000 a year.

Share you finished objects on Ravelry! HappyHooking Thanks! JoAnne Leonard $\copyright$ 2008 Happyhooking@gmail.com http://happyhooking.googlepages.com


