Short Row Mittens
by Tanja Osswald
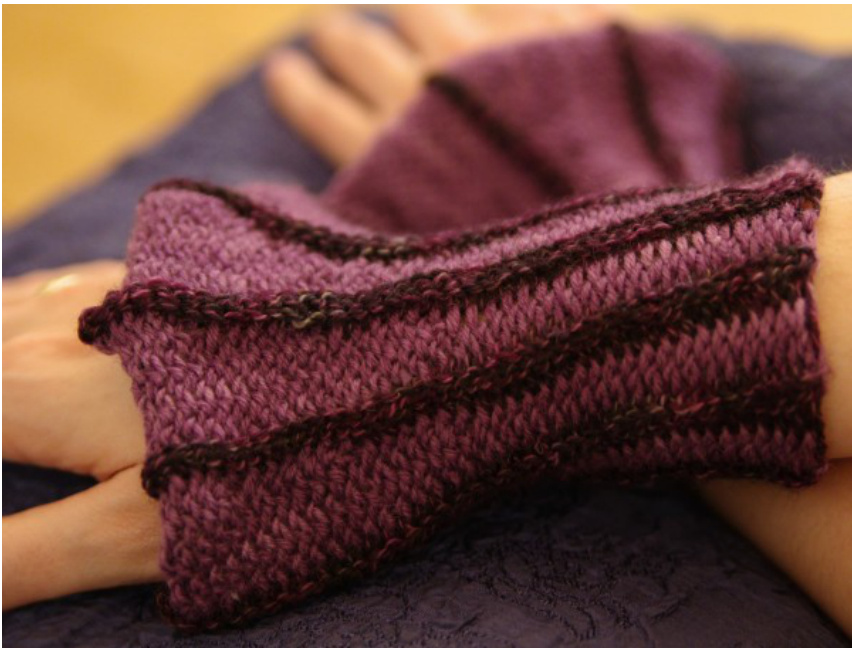
These fingerless mittens are snug on the arm and fan out over the hand. They are worked sideways, with short rows. A big thank you to Ant Nat Nat for test crocheting!
Size
The mittens are about 18 cm (7 inches) long
Material
· sock weight yarn in two colors, about 30 g of the main color (MC) and a rest of a contrasting color (CC) · 3.5 mm crochet hook
Gauge
Gauge is about 26 sts and 28 rows per 10 x 10 cm (4 x 4 in) unstretched in the smooth pattern (F in odd rows, iB in even rows).
Stitch Abbreviations:
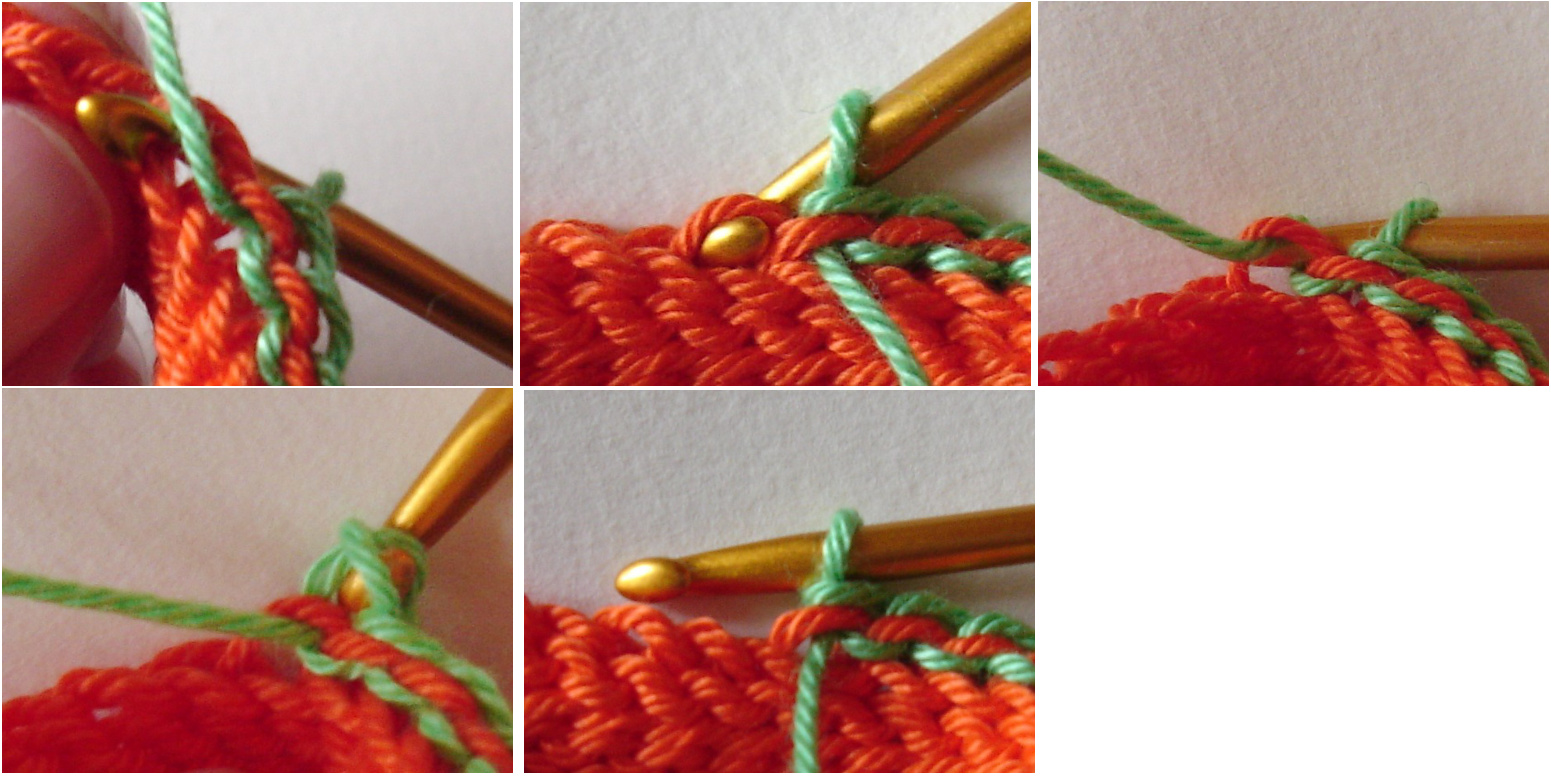
I use David Burchall's terminology in naming the stitches. In the picture, all four basic stitches areshown.
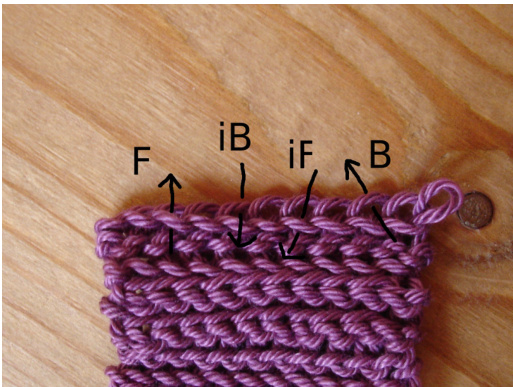
·ch: chain · sl st: slip stitch (through both loops) ● F (front loop only slip stitch - yellow in the picture): Insert the hook from the front into the front lop, yarn over, draw hook through all loops (see p. 4). ● B (back loop only slip stitch - blue in the picture): Insert the hook from the front into the back loop, yarn over, draw hook through all loops (see p. 5). · iB (inverse back loop only slip stitch - green in the picture): Yarn in front of the work, insert the hook from the back into the back loop, yarn over, draw hook through all loops (see p. 6). In this pattern, F, B, iB, and regular slip stitches are used. Until you get used to recognizing the end of a row, put a marker into the first stitch of every row. Stitch Patterns Two main stitch patterns are used in the mittens. The lace part of the mitten is worked on a basis of the fat pattern which consists of one row of F and one row of iB. The rest of the mitten is worked in a rib pattern, which is B in all rows.
Stitch Tutorials
In case you are new to slip stitch crochet: Before you start on the pattern, take some yarn that is easy to rip, choose a pointy smooth hook that is about 2 mm larger than the one you'd normally use and practice the basic stitch. Try to have as little tension as possible (that works for most people). In particular, if you hold the yarn by wrapping it several times around your index finger, try to change to a way without the extra wraps, so the yarn can fow through your fingers.
F
ook from the front into the front loop, yarn over, draw hook through all loope
B
Insert the hook from the front into the back loop, yarn over, draw hook through all loops.
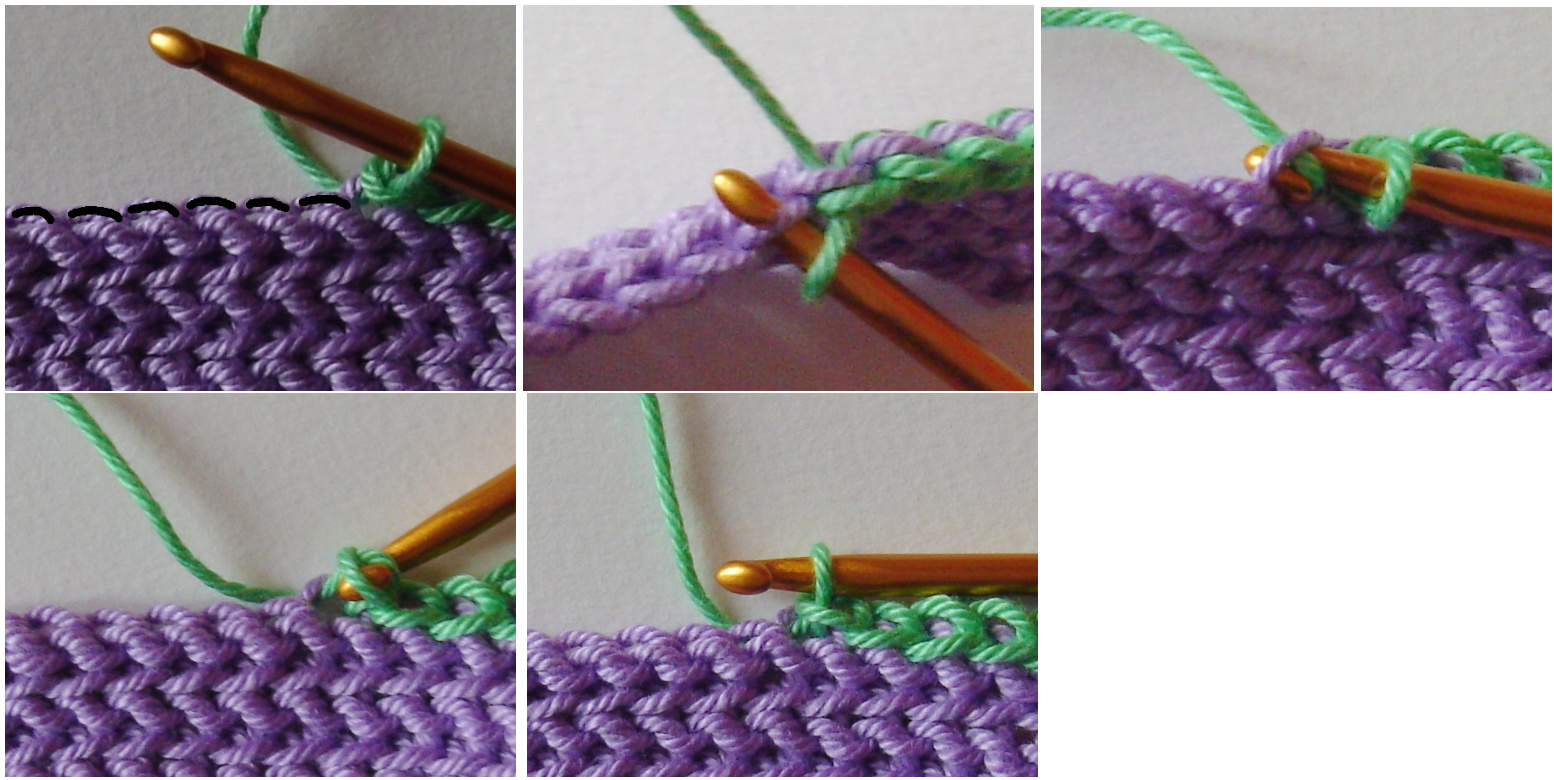
iB
With yarn in front of the work, insert the hook from the back into the back loop, yarn over, draw hook through all loops.
Techniques
Short Rows
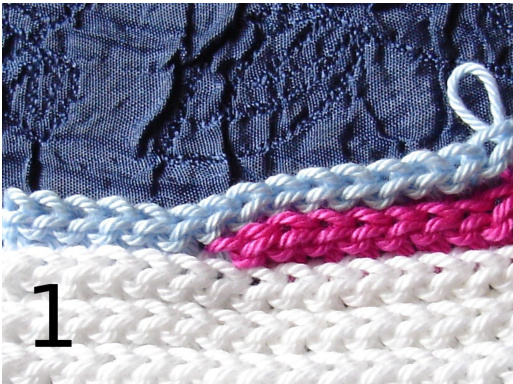
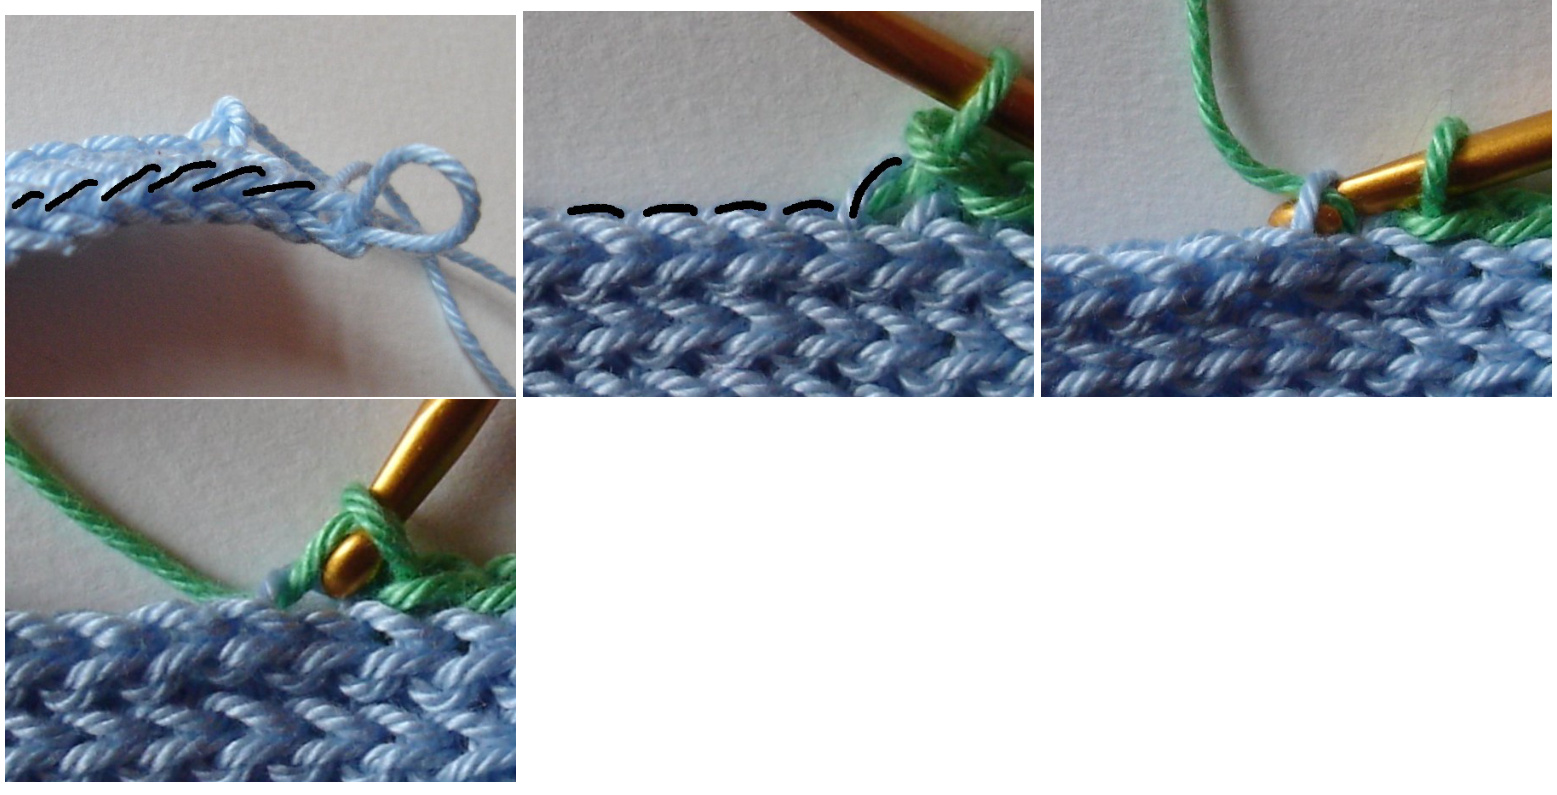
Short rows sometimes have the reputation of being complicated. This is undeserved. Remember when you once picked up your work in progress the wrong way and continued back along the row instead of finishing it? That's what you do on purpose with short rows. They can be used for optics only or for shaping, in particular for garments. In the photos, I worked in B only. The short row is worked in pink.
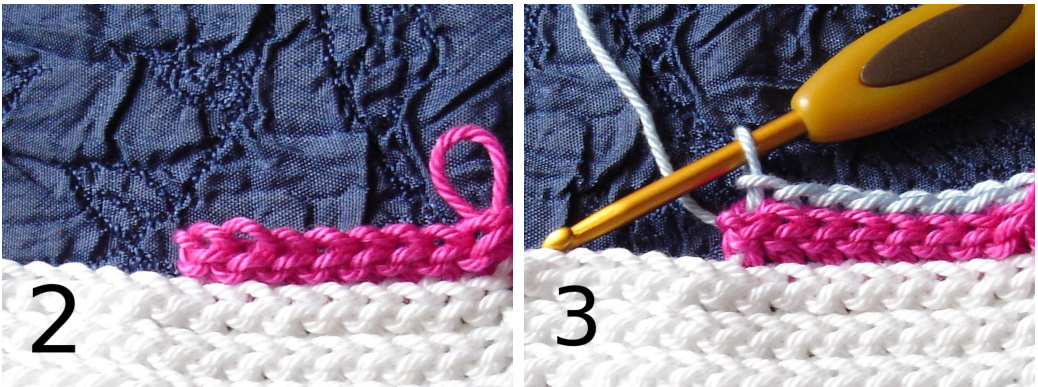
For a short row, stop before the end of the row, make a chain, turn and work back (pink in the picture). Some stitches of the row below (white in the picture) are left unworked (2). When the pattern tells you to, work to the end of the short row (3) and then continue along the unworked Stitches.
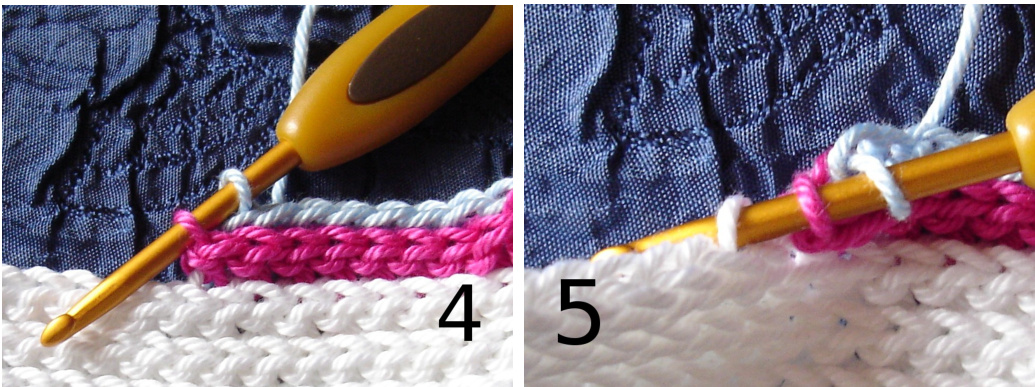
To avoid holes, for the frst stitch after the short row, insert the hook frst into the turning chain of the short row (4) and then into the stitch (5). Yarn over and pull through all three loops.
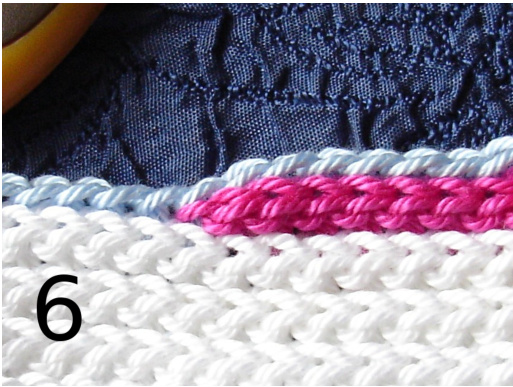
Continue along the unworked stitches (6).
Pattern
The mittens are worked with short rows. One rib in contrast color is followed by a fat part in the main color which fans out on top because of the short rows. Turning chains are made for every row but not mentioned below. The mitten is closed by a crocheted seam. If you prefer to make an invisible seam, work the first row into the back loop instead of the back bumps. In CC, ch 40 plus 1 turning chain. Row 1: slip stitch 40 into the back bumps of Row 8: F 12 each of the chains Row 9: iB 15 Row 2: change to MC, B 40 Row 10: F 15 Row 3: iB 6 Row 11: iB 18 Row 4: F 6 Row 12: F 18 Row 5: iB 9 Row 13: iB 40 Row 6: F 9 Row 14: change to CC, F 40 Row 7: iB 12 Row 15: B 40 Rows 16 to 29: Repeat Rows 2 to 15 Row 30: change to MC, B 40 Rows 42 to 53: Repeat Rows 30 to 41. Row 54: change to MC, B 40 Row 58: F 18 Row 55: iB 9 Row 59: iB 40 Row 56: F 9 Row 60: change to CC, F 40 Row 57: iB 18 Row 61: B 40 Repeat Row 54 to 61, then Rows 30 to 41 and then Rows 30 to 38. Row 39 is worked as a connection row: Fold the mitten to a tube, with the wrong side facing and crochet the beginning chain to the last row with slip stitches. Use the front loop of the last row and the back loop of the beginning chain. Work the second mitten inverse, i.e. start with the longer short rows and end with the shorter ones.


