Star Pinball/Ornament
By Amanda Carrigan
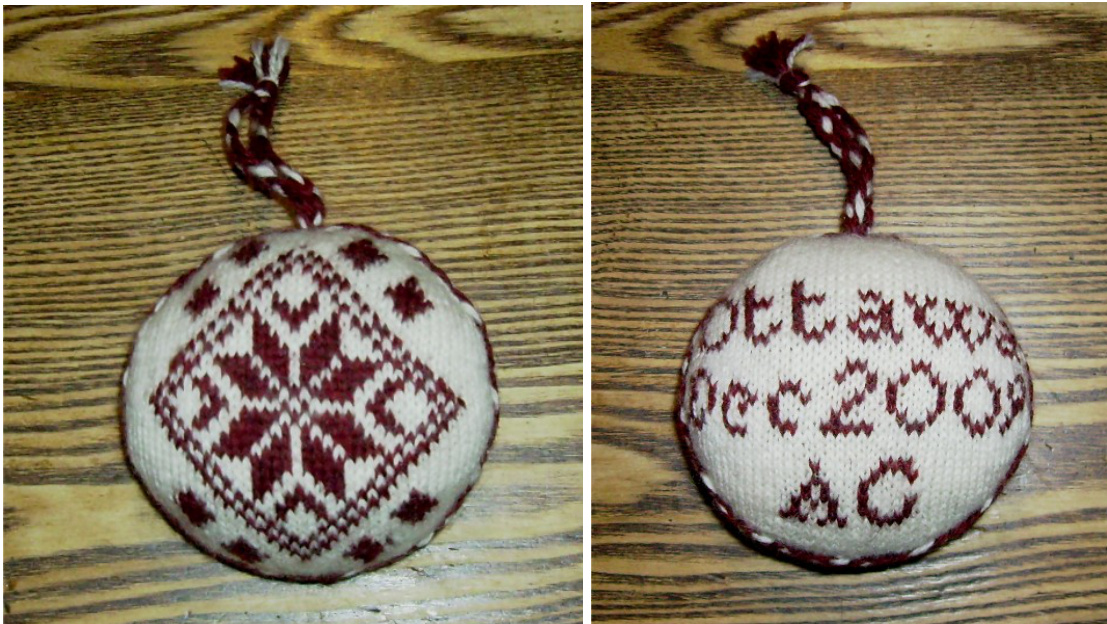
Inspired by pictures of lovely pinballs in an issue of Piecework, I made this one for an ornament swap. I had my initials and date/place on the back; alphabet and numbers are provided and a blank graph so you can customize your own - or put a design on the back as well as the front.
Needles: 2mm
Yarn: Fingering weight in 2 contrasting colors, MC (main color) for background and CC (contrast color) for pattern. I used KnitPicks Palette. Gauge: Approx 9-10 stitches/inch but not crucial -- if gauge is different you will simply have a different sized ornament. Notions: Ribbon or extra yarn to braid for seam covering and hanging loop. Stuffing. Straight pins. Needle and thread in similar color to ribbon or braid trim. Terms and Abbreviations: K: Knit P: Purl K2tog: Knit 2 together SSK: Slip next 2 stitches and knit them together. P2tog: Purl 2 together SSP: Slip next 2 stitches, purl them together. M1: Make 1. Pick up and twist strand between next 2 stitches, knit or purl this loop as a new stitch. MC: Main color CC: Contrast color
Instructions:
Front:
Cast on 21 stitches in MC Row 1: Purl. (Row 1 of front graph) Row 2: K1, M1, K19, M1, K1 Row 3: P1, M1, P21, M1 P1. Continue to increase 2 stitches each row through row 14 (47 stitches total). At the same time, begin patterning in CC as indicated by graph on row 8. Because you are working back and forth, the CC does not have to be carried to the end of each row, but it should be carried far enough to secure in a convenient position for the next row. Rows 15-34: Work even, continuing in pattern as indicated. Rows 35-47: Decrease 1 at each end of each row, continuing in pattern. Thus on purl rows, P2tog, P to 2 before end, SSP. On knit rows, SSK, K to 2 from end, K2 tog. w 47, 21 stitches should remain. Bind off remaining stitches
Back:
Same cast on number and shaping as for front, only replace front pattern with personalization if desired.
Assembly:
Weave in ends. Pin pieces with right sides together, and sew together around outside, beginning at top. Leave one side open. Turn piece right side out and stuff firmly. Seam remaining side as flat as possible. Take a length of ribbon or yarn braid (I used a 4 strand braid of the Palette) long enough to cover the seam plus several inches for the hanging loop. Center the ribbon at the bottom, and pin in place all around seam, with free ends at the top center. Beginning at top center, stitch ribbon in place to cover seam all around. Back at the top, securely stitch the base of the ends for the hanging loop together. Knot ends together and trim for desired loop length.
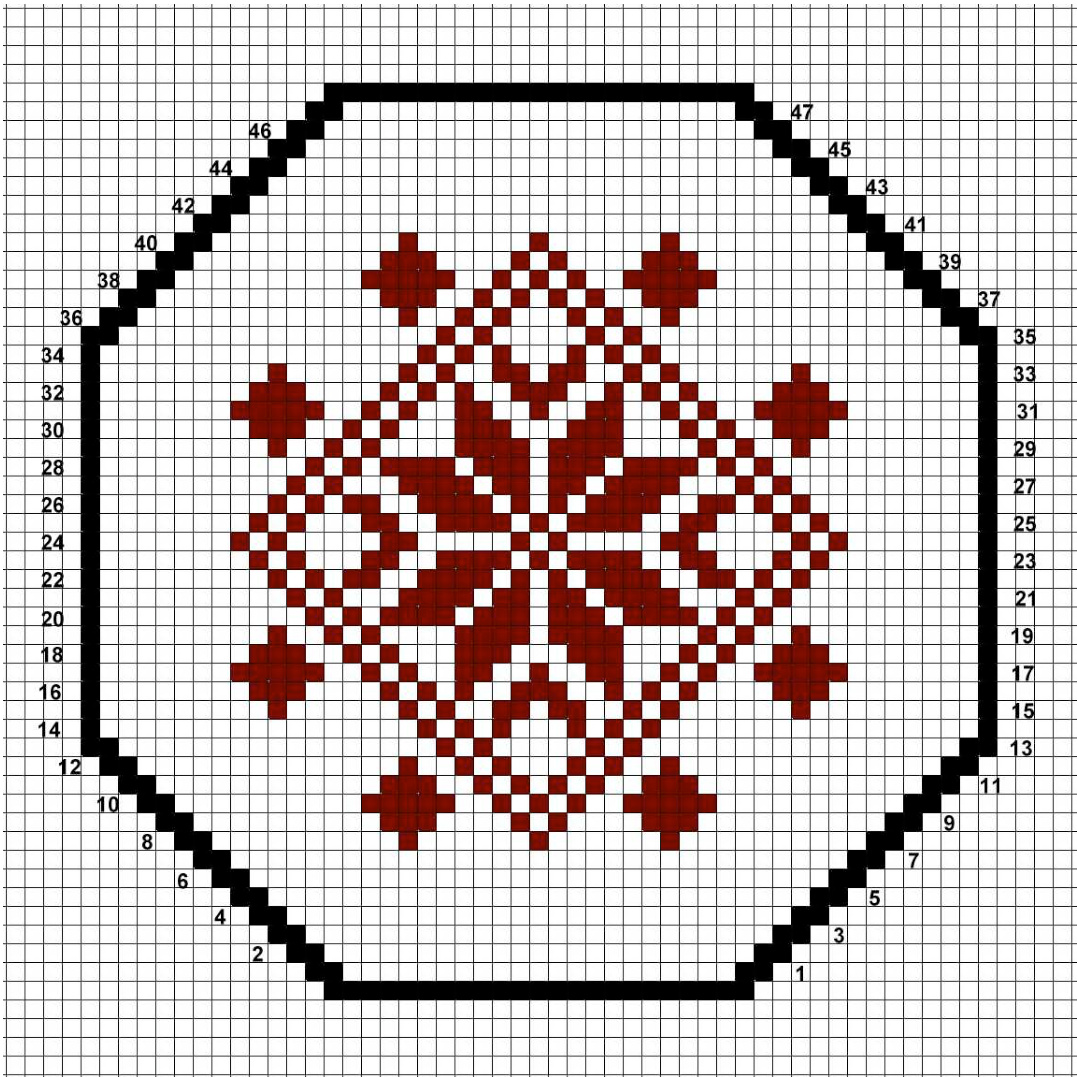
Pinball Front Graph:
Please note black squares are merely to outline graphs. White and red squares are MC and CC, respectively.
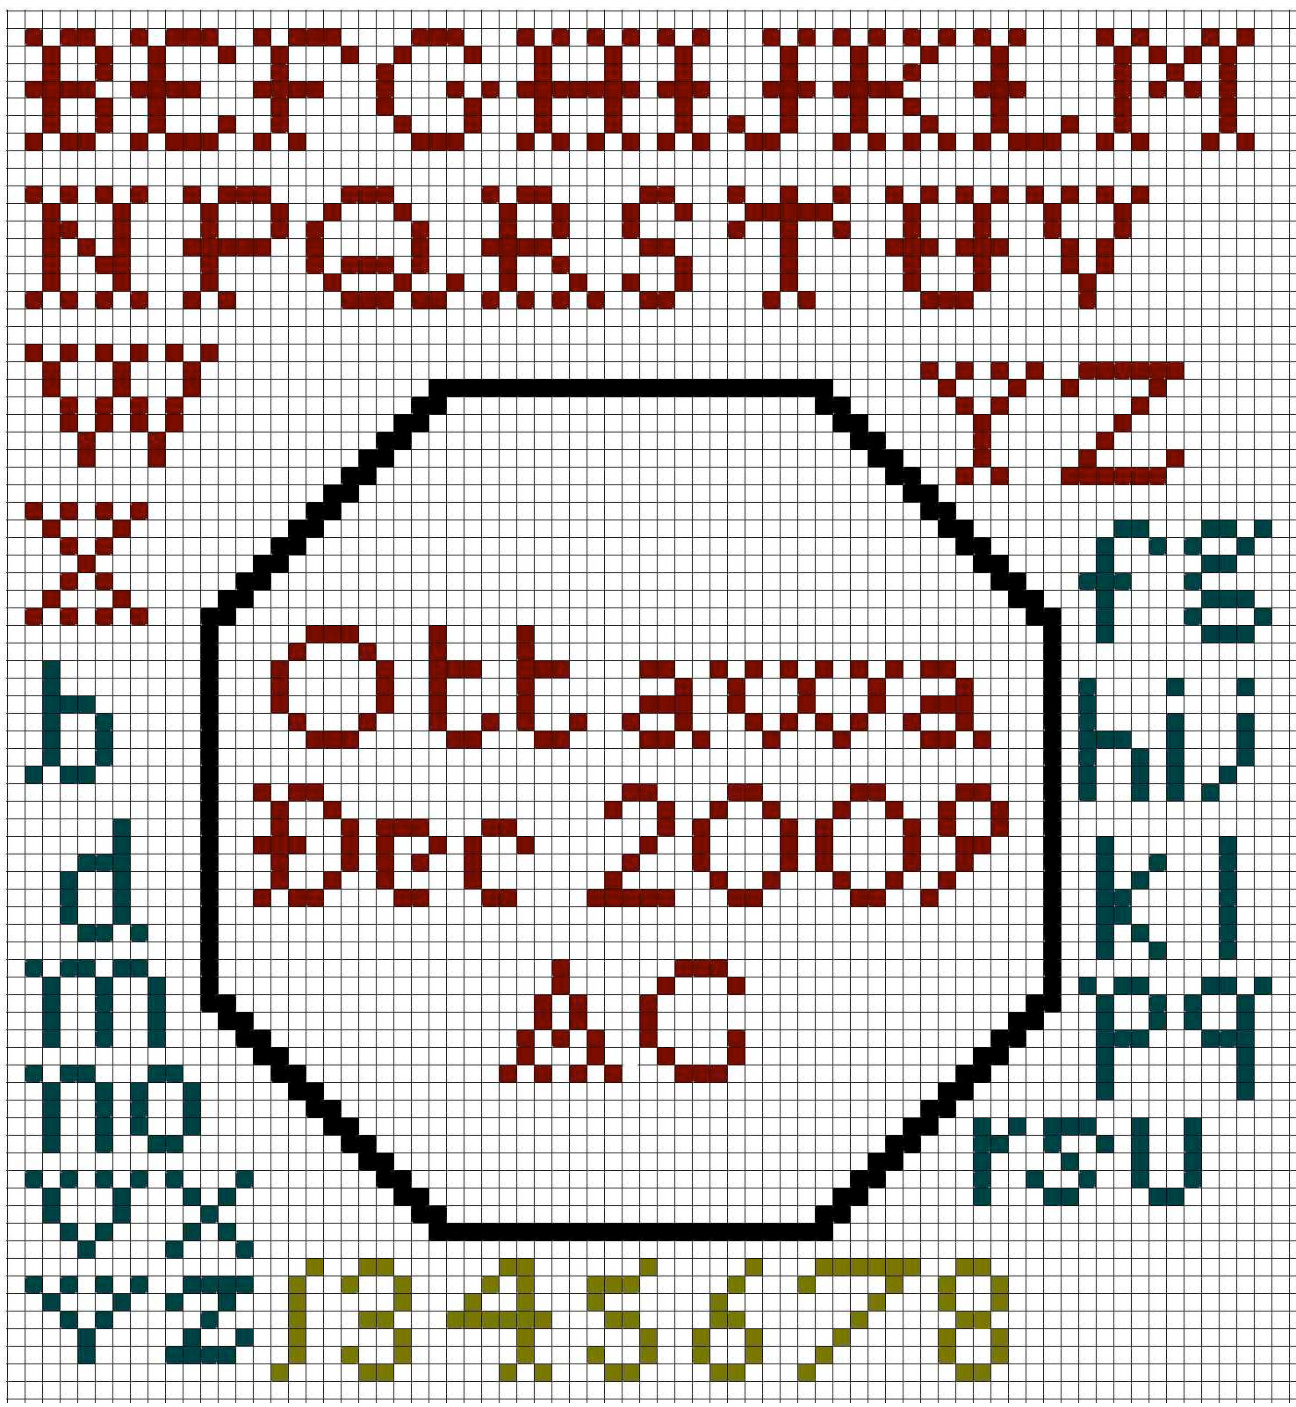
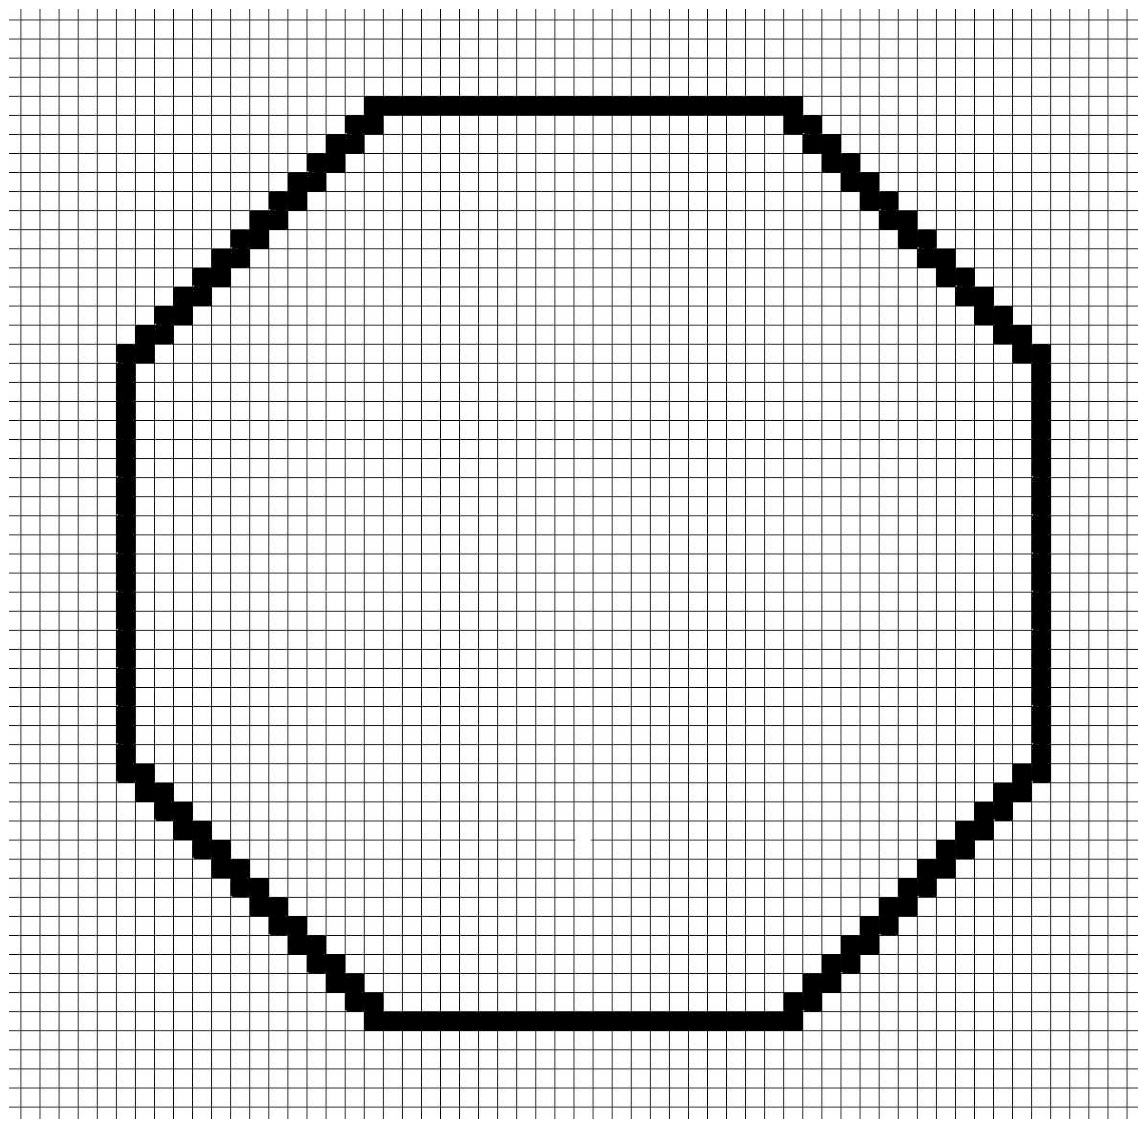
Pinball Back Graph and Blank:
Letters and numbers not used originally are shown outside the octagon.
Please note this pattern has not been independently tested, so there may be errors. Questions or comments? Message me on Ravelry (nightandday) or by e-mail (amlcarrigan@yahoo.com.)


