Mobile mittens (Tip-down)
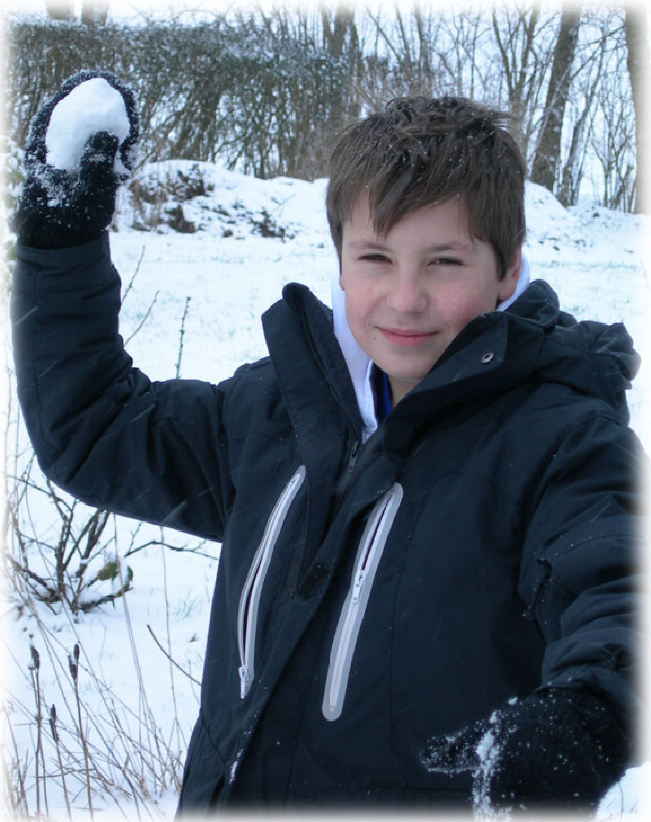
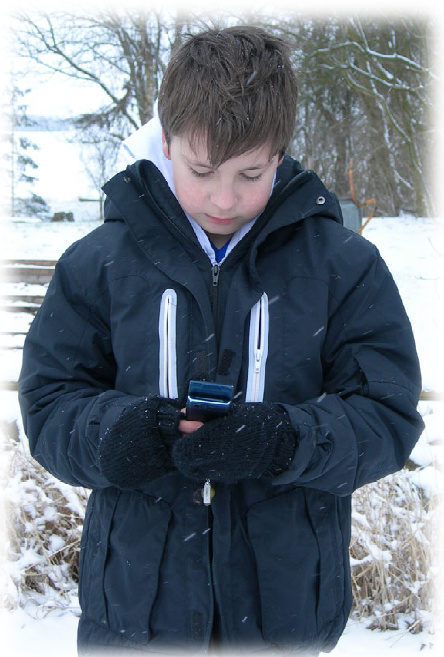
For Tweens and Teens These mittens are a direct result of a request from my tween-aged son. He was cold on his hands, but refused to wear ordinary mittens or gloves because they were "too much trouble" to remove when he needed to check or write his text-messages (which is basically all the freaking time!). Flap top mittens weren't enough because he also needed to be able to remove the mitten from his thumb in order to type. Also he wanted them to be black and cool (not defined). 1 measured his hand and started working from the tip down. This pattern will give you directions for 2 sizes, but also directions to make them using the measurements of the intended receiver.
Size: Tween/Teen The difference between the two sizes is the length of the hand and the width of the thumb. Tweens are not fully matured and have shorter (but often as wide) hands. The teen size is the same as a small woman size. But the pattern is easy to adjust! Gauge: Not important. Really. You are knitting these from the tip down and using your measurement tape to decide when you are done. But my gauge was 20 st. per ${10}\,\mathsf{c m}$ Yarn: Light worsted weight will be perfect. I used Gronhoj Garn Peru Wool ( $100\,\%$ wool). $100\,\%$ wool isbest for mittens, they willget wet, and it's nice that they don't get cold right away! I used about $^{120\;\mathsf{m}}$ (131 yards). Needles: I've made these using the Magic Loop Method knitting on a circular needle, but you could easily adjust the pattern to using 3 DPN's or two circs. Mine were made on a $5\:\mathsf{m m}$ needle, but you should use the size that is appropriate for your yarn and tension.
Abbreviations:
${\sf S t}=$ Stitches $\mathsf{K}=$ knit, $P=\mathsf{p u r l}$ Kfb $=$ Increase by knitting in front of back of stitch. $\rightarrow=$ until $\mathsf{K}2\mathsf{t g t}=\mathsf{K}\mathsf{n i t}\,2$ st together, to decrease 1 st. Pattern: Cast on 8 st using Emily Ocker's Cast On. Distribute the st to make ready for Magicloop Knitting, 4 st on each side. Round 1: Kfb in all stitches, so you now have 8 st on each side, 16 st total. Round 2: Knit all stitches. Round 3: $^{\ast}\mathsf{K}1$ , kfb, $\mapsto$ second last stitch, kfb, $k1^{*}$ two times. Round 4: Knit all stitches Repeat round 3 and 4 until half of the mitten (one side) measures app. 9,5 cm (40 st total) . Pull the cast on thread to close the hole at top. Knit each round until mitten measures 8,5 cm / 10 cm from the top (or until you reach the base of the fingers).
Right mitten only:
Next Round: knit halfthe stitches (20 st) using scrap yarn.Slip the stitches backto the left needle and knit them again using working yarn, knit the other half of the stitches (20 st). Knit each round until mitten measures ${11\,\mathsf{c m}}$ / 13 cm from the top (or until you reach the place where the thumb starts). Next Round: K3, knit 5st/6st using scrap yarn. Slip the 5/6 stitches back to the left needle and knit them again using working yarn, knit to end of round.
Left mitten only:
Next round: knit 20 st, then knit the next 20 st using scrap yarn. Slip the stitches back to the left needle and knit them again using working yarn. Knit each round until mitten measures 11 cm / 13 cm from the top (or until you reach the place where the thumb starts). Next Round: Knit first 20 st,then knit 12/11 st. Knit st/6st using scrap yarn. Slip the 5/6 stitches backto the left needle and knit them again using working yarn, knit to end of round (3 st).
Continue both mittens:
Knit each round until mitten measure 15 cm / ${19}\,{\mathsf{c m}}$ (or until you reach the point where the hand goes to the wrist). Next round: Decrease 4 st like this: $^{\ast}\mathsf{K}1$ , K2tgt, k→third last stitch, K2tgt, K1\* twice. (36 st) Next Round: Decrease 4 st like this: $^{\ast}\mathsf{K}1$ K2tgt, k→third last stitch, K2tgt, K1\* twice. (32 st)
Cuff: Do ak2,p2 rib for as long as you likethe cuffto be orfor 5 cm/6cm. Cast ofin patten.
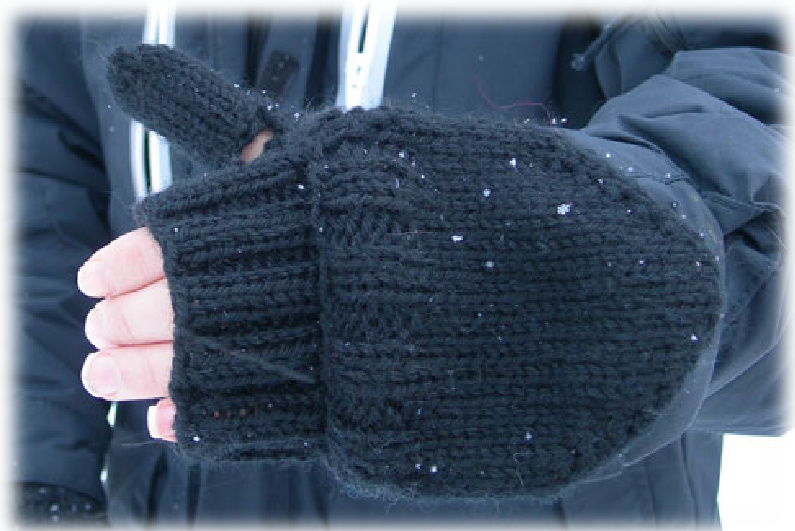
Flap top:
Carefully remove scrap yarn across palm and place the resulting live stitches on needles, the stitches closest to the tip of the fingers are going to be a part of the flap; the stitches closest to the palm are going to be part of the fingerless mitt part. Flap stitches: These are worked flat. Reattach working yarn. Knit one row, purl 1 row, then do ribbing k2,p2 for2 cm and cast off in pattern. Palm side stitches: Reattach working yarn (leaving about 20 cm yarn tail). Knit the 19 st (the live stitches you just put on needles), then cast on 19 st, and join to work in the round. Knit two rounds, then do ribbing k2,p2 until the mitt part is 4 cm long and cast off in pattern. Hand tack (sew, being careful not to sew through the mitten) the cast on stitches to the inside of the mitten with the yarn tail from when you reattached the working yarn. Thumbs: Carefully remove scrap yarn at the thumbs and place the resulting live stitches on needles or holders. There should be 5/6st on the finger tip side and 4/5 st at the cuff side. Start with the bottom (cuff side) stitches. First round: reattach yarn and knit 4/5 st, pickup and knit 2/3 st at the side ofthe hole, knit 5/6 st, pick up and knit 2/3 st. Knit for 2/4 rounds. Hole in thumb: Knit until you reach the palm side ofthethumb, bind off5/6st, knit $\rightarrow$ end of round. Next round: Knit until you reach the bound off st, cast on 5/6st, knit $\rightarrow$ end of round. Knit until thumb measures $5\,\mathsf{c m}/\,6\,\mathsf{c m}$ . Then do decrease rounds $^{*}\mathsf{k}1$ $\mathsf{K}2\mathsf{t g}^{*}$ repeat until end of round until there is about 6 st left. Break yarn. Sew the flap part (the one that was worked flat) sides to the mitten sides. Weave in ends and see if you can get to block the mittens before the receiver gets to them (I couldn't, so mine aren't blocked yet). Then send me a message on Ravelry (I'm MariaDenmark) or on my blog: Wool and Weeds and let me know that you have made these. You may use this pattern for knitting for any purpose you like - including selling items made from it. Have fun (and hey, If you sew, check out my shop: ShopONiON.com with Danish design Sewing Patterns)!