Anklet Socks By: Lorinda Browning
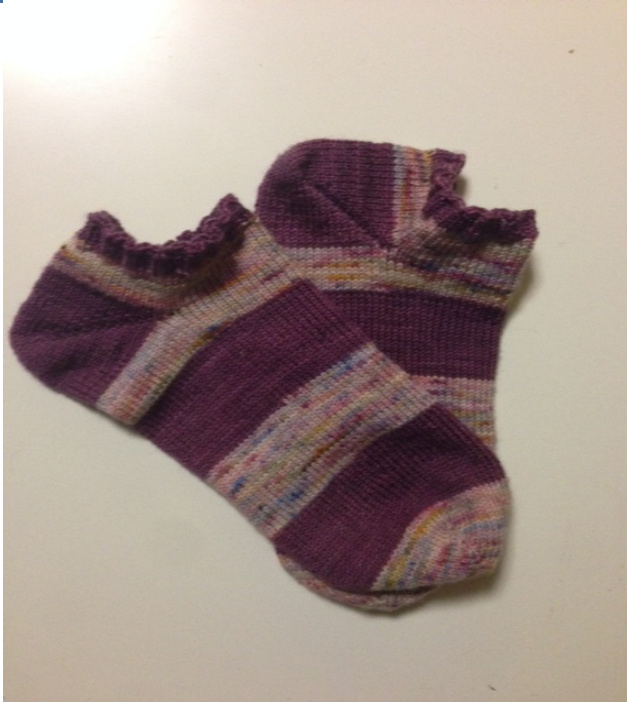
Anklet socks are the rage! I have knit this toe up sock pattern for anklet socks several times with stripes or without. They really knit up fast and become a great tool for learning the basics of sock knitting. I encourage new knitters to use this pattern as a template to learn 3 essential sock-knitting techniques; provisional cast on, after thought heel and Kitchener stitch. These socks knit up so fast you can make several pairs and try new techniques including Judy's Magic Cast-On, Fish Lip Kiss Heel, and Jenny's Super Stretchy Bind Off. You will be happy you learned these techniques as well.
Materials:
Yarn - Any sock weight yarn Yardage - approximately 250 - 300 yards Needles - US #1.0(2.25) or needle needed to obtain gauge Gauge: 18 sts and 26 rows per 2 inches Finished Measurements: medium women
Pattern:
Provisional cast on 31 sts. For the technique on how to provisional cast on please refer to techniques section: Provisional Cast On at the end of the pattern. Toe increase: Row 1: For all sizes k16 on 1st needle, k8 on 2nd needle, and k6, m1, k1 on the 3'd needle. (32 sts) First needle will be referred to as Side 1, 2"d and 3'd needles together will be referred to as Side 2. Row 2: (side 1), k1, m1, k14, m1, k1, (side 2) k1, m1, k14, m1, k1 (36 stitches total, 18 sts per side). Row 3: knit all sts on all needles.
Pattern Continued:
Row 4: (side 1), k1, m1, knit to last stitch, m1, k1, (side 2) k1, m1, knit to last stitch, m1, k1. Row 5: knit all sts on all needles. Repeat rows 4 and 5 until there are 34 stitches per side or 68 sts total. Knit in the round until project measures 7 % inches from tip of toe. Heel: Place waste yarn for an after thought heel. Choose yarn that is the same weight as yarn being used to knit project. At the beginning of side 1 drop the working yarn and pick up waste yarn. Knit the next 34 stitches of Side 1. Drop the waste yarn and go back to right or beginning of the needle just worked. Pick up the working yarn and knit all 34 stitches of Side 1 again. Knit 11 rows.
Cuff:
K1p1 ribbing for 6 rows. Twisting the sts will make a more firm ribbing. BO loosely. After Thought Heel: Pick out the waste yarn and carefully place live stitches on dpns. You have two sides to pick up. Place Side 1 on one dpn (34 sts) and Side 2 on two dpns (17 sts each needle). Row 1: knit all stiches on all needles. Row 2: (Side 1) k1, ssk, knit to last 3 sts, k2tog, k1, (Side 2) k1, ssk, knit to last 3 sts, k2tog, k1. Repeat row 1 and 2 until 16 total sts remain (8 sts each side). Place Side 2 onto 1 dpn. Break yarn leaving 18 inches for Kitchener stitch and thread yarn onto a yarn needle. Refer to Kitchener Stitch in Techniques section to finish. Hope you enjoy this pattern by Lorinda Browning Designs. You can find more patterns by Lorinda Browning on ravelry.com. Follow me for new pattern role outs on the following social media. Instagram: knittingblackbelt Twitter: @BrowningLorinda Designed by Lorinda Browning, aka knittingblackbelt on www.Ravelry.com
Techniques:
Provisional Cast On:
With a crochet hook a little bigger than the knitting needles you are using, crochet an 18- stitch chain using waste yarn that is slightly smaller in caliber and a little slippery. Put the crochet hook aside. This chain is your provisional cast on and will be removed. Using the project yarn and knitting needles, pick up and knit 16 stitches into the bottom of the crochet Chain. Work 3 rows in stockinet stitch. Unpick the end of you crochet chain and gently tug at the last stitch on the chain. The chain will pull out exposing live stitches. Put the live stitches onto 2 dpns. You will now have 16 sts on 1st needle, 8 sts on a 2nd needle, and 7 sts on a 3'd needie. Follow pattern repeat pattern above starting with row 1.
Kitchener stitch for Stockinet:
A. Starting the Kitchener Stitch - Thread yarn needle through first stitch on front needle as if to purl, leave stitch on needle. Thread yarn needle through first stitch on back needle as if to knit, leave stitch on needle. B. Thread yarn needle through first stitch on front needle as if to knit and slip this stitch off the needle. Thread yarn needle through the next stitch as if to purl and leave stich on needle. C. Thread yarn needle through first stitch on back needle as if to purl and slip this stitch off the needle. Thread yarn needle through the next stitch on back needle as if to knit and leave this stitch on the needle. D. Repeat B and C until all stiches are threaded. E. Weave in ends Tips: Always make sure yarn goes under needles when working between front and back needles. Be sure that the tension of the Kitchener stitches are the same as the knitted stitches. Pull tension of the Kitchener stiches as you go. I usually thread about 5 stitches then adjust and pull tension then thread 5 more and so on until all stitches are threaded.
Knitting Shorthand definitions:
BO = bind off CO = cast on dpns = double pointed needle k = knit stitch k2tog = knit 2 stiches into one stitch m = make a stitch. Pick up the ladder between stitches with the right hand needle and place stitch on the left hand needle. Knit into the back of the stitch. p = purl stitch ssk = Slip two stitches. Insert left needle into the front loops of the slipped stitches and knit them together from this position (through the back loops). sts = stitches


