Simplicity
A Yarn-Madness pattern, by Madeleine Nilsson
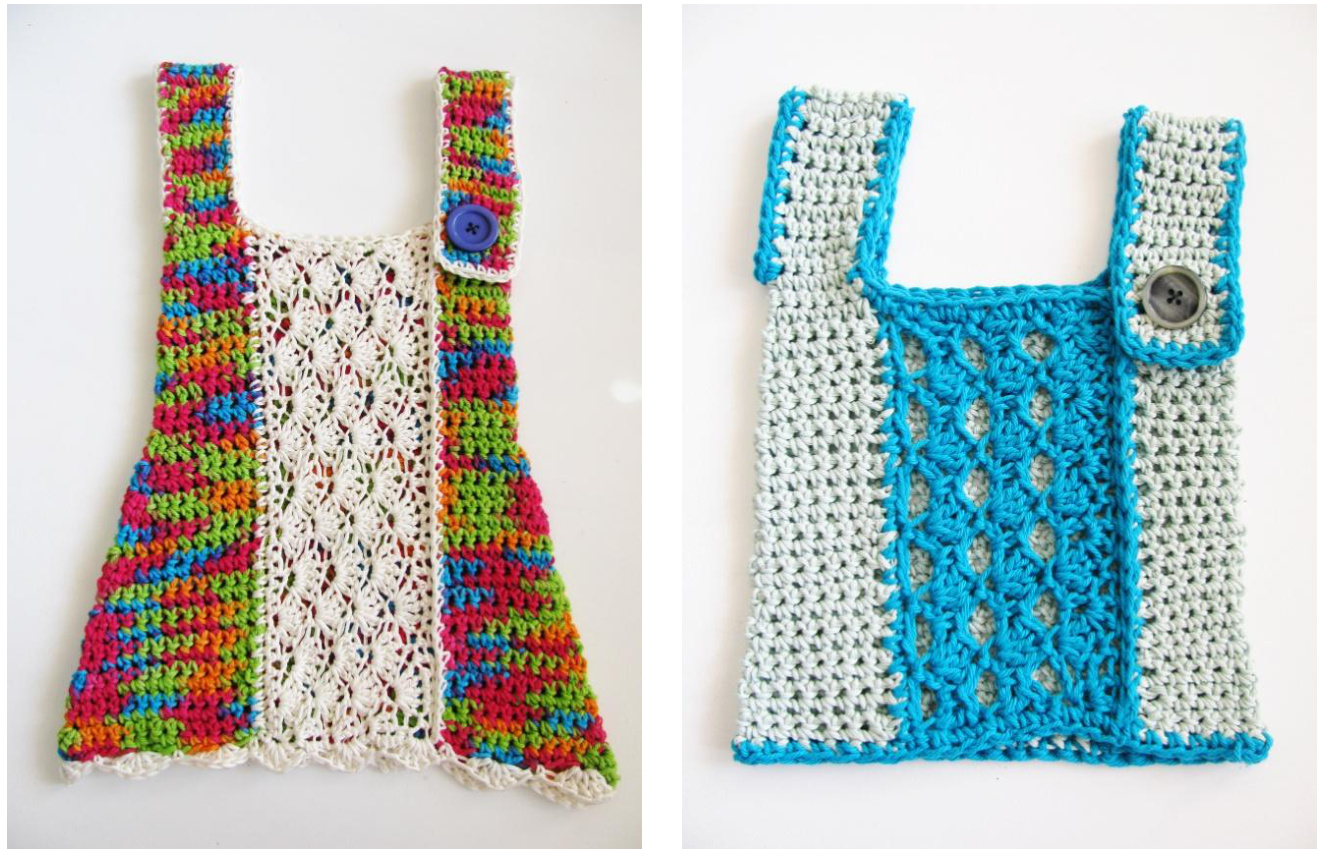
Sizes: Newborn/3m/6m/12m (2y/4y/6y/8y) Gauge: 3 sc per inch.
Materials:
DK or light worsted weight yarn (Prototypes are worked in Drops Muskat and Järbo Soft Cotton.) Sizes: Newborn (chest: 16 inches/40 cm) 3 months (chest: 17 inches/43 cm) 6 months (chest: 18 inches/45 cm) 12 months (chest: 20 inches/50 cm) 2 years (chest: 23 inches/58 cm) 4 years (chest: 25 inches/63 cm) 6 years (chest: 26 inches/67 cm) 8 years (chest: 28 inches/71 cm) Dress; MC: Appr 120/140/180/240 (280/340/380/420) meters CC:Appr 50/60/80/120(150/180/200/240) meters Vest; MC: Appr 80/100/120/160 (200/240/280/320) meters CC: Appr 30/45/60/80 (120/160/180/200) meters 5 mm crochet hook, or size to get gauge 2 open stitch markers Note: Pattern uses US crochet terms.
Shoulder strap #1:
With MC, ch 7/7/7/7 (8/8/9/9). Sc in 2nd ch from hook, and sc across. [6/6/6/6 (7/7/8/8) sc] Ch1, sc in same st, sc in each sc across. Repeat the last row until work measure 12.5/12.5/15/15 (17.5/17.5/20/21.5) cm 0r 5/5/6/6 (7/7/8/8.5) inches.
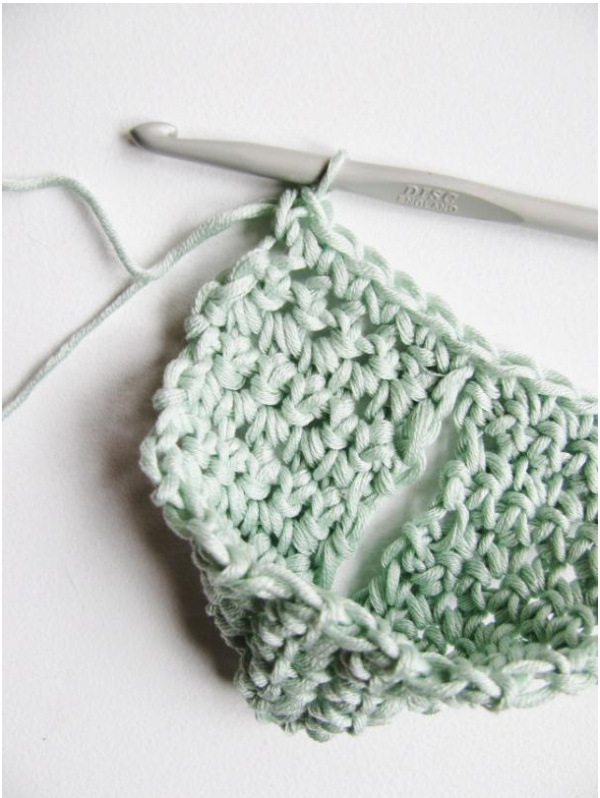
Body, part 1:
Without turning, ch 3/3/4/4 (5/5/6/6), then fold shoulder strap. Starting from the closest corner, sc 6/6/6/6 (7/7/8/8) over the starting chain. (See photo 1 - note that it's missing the extra sts at the armhole, though.) Without turning, chain 22/24/29/33 (38/42/43/45), turn. Sc in 2nd ch from hook, and sc across. [36/38/44/48 (56/60/64/66) sc] Photo 1 Continue with either dress or vest instructions.
Dress instructions
Body, part 2:
Ch1, sc in same st, sc in each sc across. Repeat the last row until work measure 10/11/13/14 (16/20/22/25) cm or 3.9/4.3/5/5.5 (6.3/7.9/8.7/9.8) inches from the armhole.
Skirt increases:
Place the two markers, 6/6/6/6 (7/7/8/8) st in from each side of work. ● Ch1, sc in same st, sc to m, sc3 in st with m, moving marker up to the 2nd of the 3 sc. Sc to the next m, sc3 in st with m, moving marker up to the 2nd of the 3 sc. Sc in each sc to end. ?Ch1, sc in same st, sc in each sc across. Repeat the last two rows 2 times more. Ch1, sc in same st, sc to m, sc3 in st with m, moving marker up to the 2"d of the 3 sc. Sc to the next m, sc3 in st with m, moving marker up to the 2"d of the 3 sc. Sc in each sc to end. ·Ch1, sc in same st, sc in each sc across. Ch1, sc in same st, sc in each sc across. Ch1, sc in same st, sc in each sc across. Repeat the last 4 rows until work measure 36/42/48/54 (58/60/64/68) cm or 14.2/16.5/18.9/21.3 (22.8/23.6/25.2/26.8) inches from the top of the shoulder, or until desired length. Break yarnfor Mc.
Shoulder strap #2:
At the top and on the RS, join MC 15/15/16/16 (19/19/22/22) sts in from the edge. Ch1, sc in same st, sc in the next 6/6/6/6 (7/7/8/8) sts. Turn work. [6/6/6/6 (7/7/8/8) sc] Work like the first shoulder strap, until reaching the same length. Attach to the front flap (vertical to the front edge, remember the added sts for the armhole), or work button hole as following; Button hole - Ch1, sc in same st, sc 2/2/2/2 (2/2/3/3), ch2/2/2/2 (3/3/2/2), sk2/2/2/2 (3/3/2/2), 2/2/2/2 (2/2/3/3). Work 2 more rows of sc. Break yarn.
Front flap:
(RS) Join CC at the bottom corner of the RS front, and from the RS evenly crochet a number of sc that can be divided with 6 + 1 (for example 30 + 1, 36 + 1 etc). (WS) ch1, sc in same st, sc in each sc across. Start working front pattern: Row 1 (RS): Ch1, sc in same st, \*sk2, 5dc in the next st, sk2, sc in the next st\*, repeat \*-\* to end. Row 2 (Ws): Ch 3, 2dc in same st, \*sk2, sc in next st (middle dc), sk2, 5 dc in next st (sc)\*, repeat \*- \* to end, making 3 dc instead of 5 in the last st. Repeat these 2 rows until almost reaching the second front flap, ending with a RS row. (See photo 2)
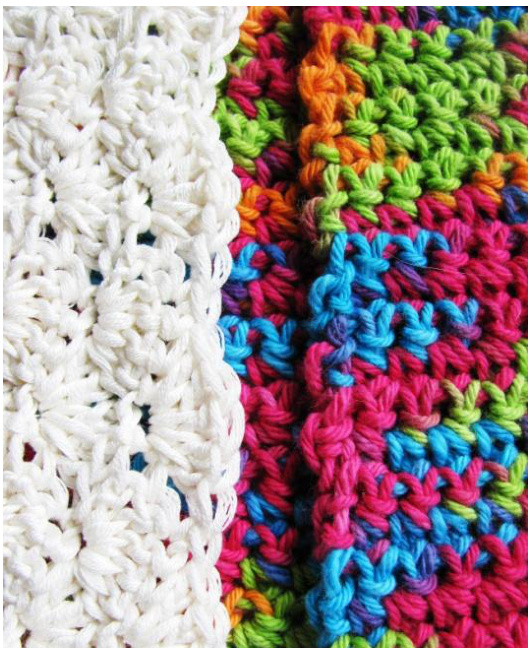
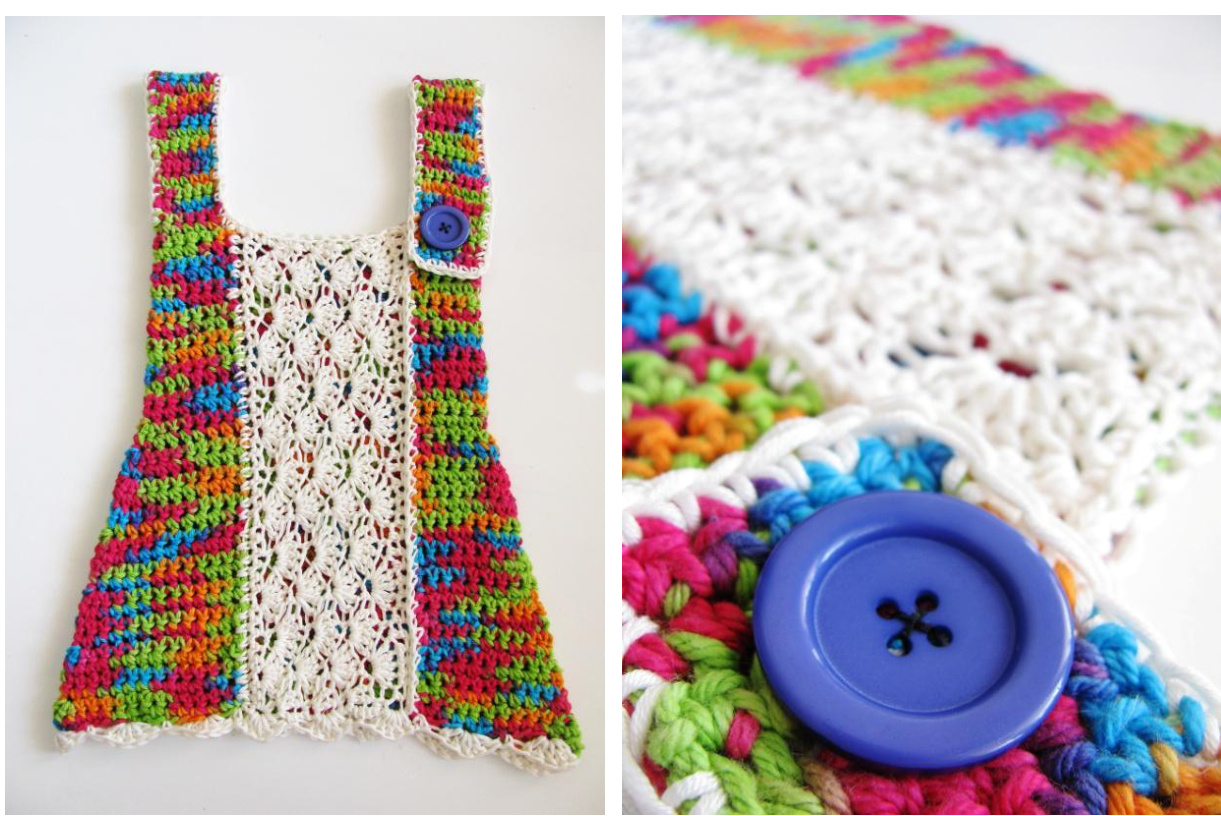
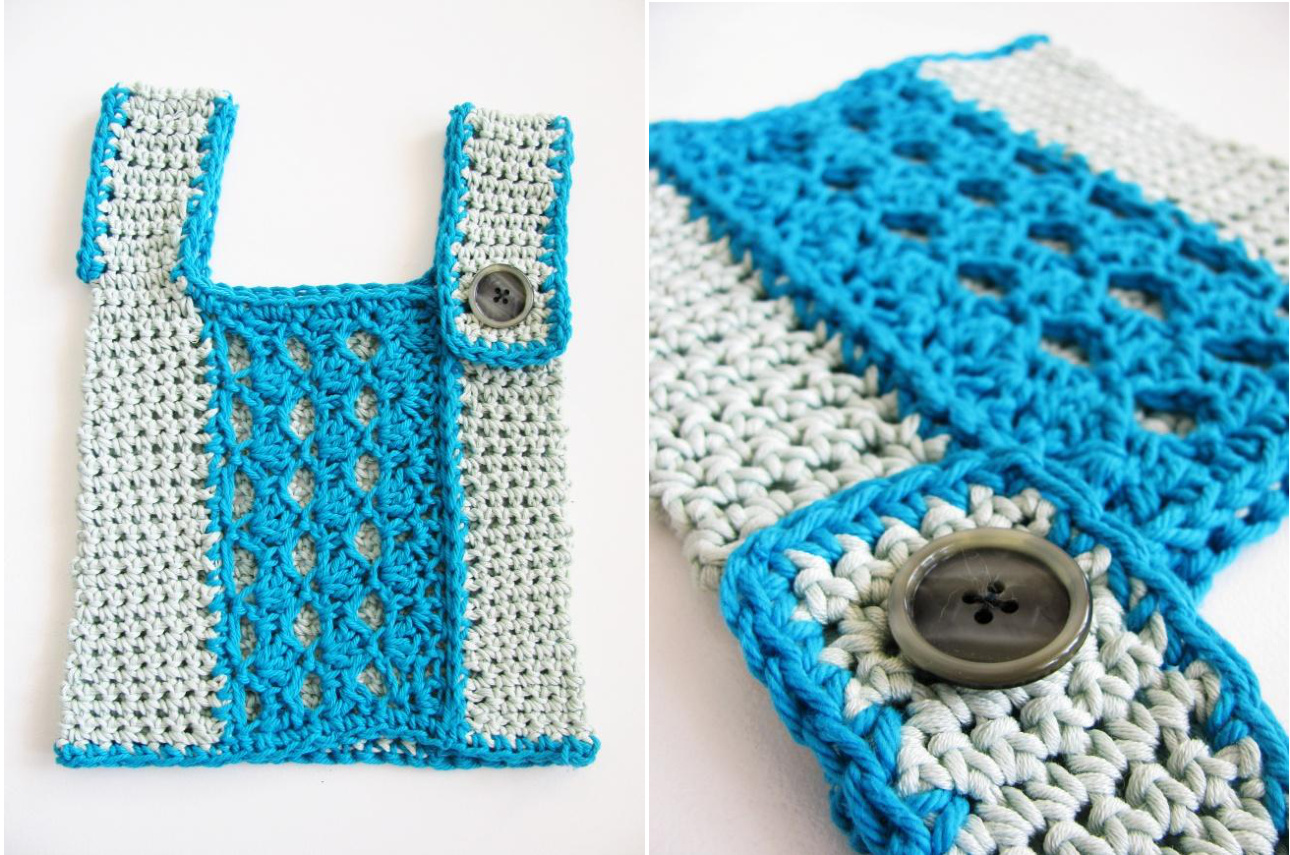
Photo 2 (Ws): Ch3, dc in same st, \*hdc in next st, 1sc in each of the next 3 sts, hdc in the next st, dc in the next st\*, repeat \*_\* to the end. · (RS) Sc front together with the other side of the front. (See photo 3 and 4) Don't break yarn - continue with Finish.

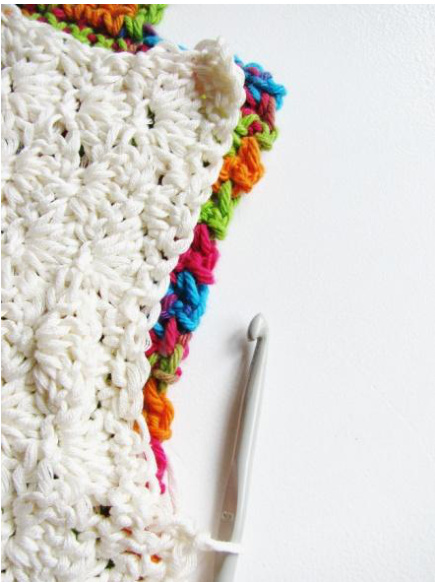
Photo3 and 4
Vest instructions
Body, part 2:
Ch1, sc in same st, sc in each sc across. Repeat the last row until work measure 23/25/28/32 (35/37/39/42) cm or 9.1/9.8/11/12.6 (13.5/14.6/15.4/16.5) inches from the top of the shoulder, or until desired length.
Shoulder strap #2:
At the top and on the RS, join MC 15/15/16/16 (19/19/22/22) sts in from the edge. Ch1, sc in same st, sc in the next 6/6/6/6 (7/7/8/8) sts. Turn work. [6/6/6/6 (7/7/8/8) sc] Work like the first shoulder strap, until reaching the same length. Attach to the front flap (vertical to the front edge, remember the added sts for the armhole), or work button hole as following; Button hole - Ch1, sc in same st, sc 2/2/2/2 (2/2/3/3), ch2/2/2/2 (3/3/2/2), sk2/2/2/2 (3/3/2/2), 2/2/2/2 (2/2/3/3). Work 2 more rows of sc. Break yarn.
Front flap:
(RS) Join CC at the bottom corner of the RS front, and from the Rs evenly crochet a number of sc that can be divided with 3 + 1 (for example 18 + 1, 21 + 1 etc). (WS) Ch1, sc in same st, \*ch2, sk2, sc in next st\*, repeat \*_\* to the end. Start working front pattern: Row 1 (Rs): Ch3, dc in same st, \*sc in ch2-loop, 3dc in sc\*, repeat \*-\*, ending with 2 dc in the last st. Row 2 (Ws): Ch1, sc in same st, \*ch2, sc in middle dc\*, repeat \*-\* to the end, ending with sc in 3rd ch of beg dc. Repeat these 2 rows until almost reaching the second front flap, ending with a RS row. (See photo 5) (WS): Ch1, sc in same st, \*2dc in sc, sc in middle dc\*, repeat \*-\* to last st, sc in 3'd ch of beg dc. (RS) Sc front together with the other side of the front. (See photo 6) Don't break yarn - continue with Finish.
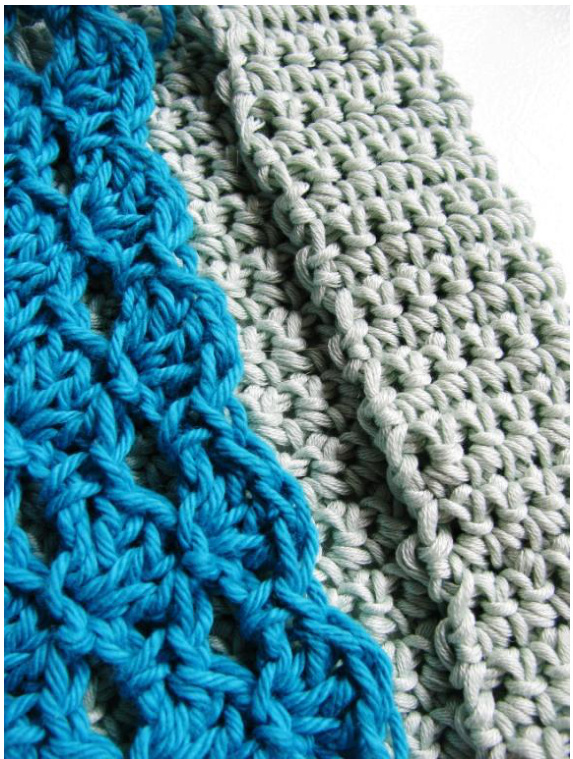
Photo 5
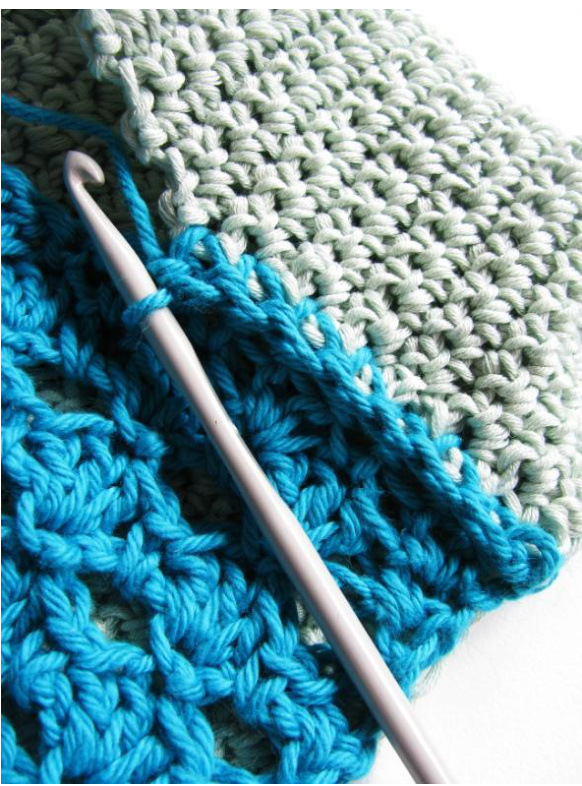
Photo 6
Finish:
With CC and starting along the top of the front flap, start to sc evenly around all the edges (neckline, sleeve opening, bottom). Optional bottom edging for dress version: Work row 1 of front pattern one time. (If the sts don't add up, it's easy to adjust at the front flap section where you don't have actual sts to work in.) :cure all ends and block garment to specified measurements, attach button and be happy
I'm so glad that you've found your way here!


