Loopy Spa Mitt by Gwynne Lassiter
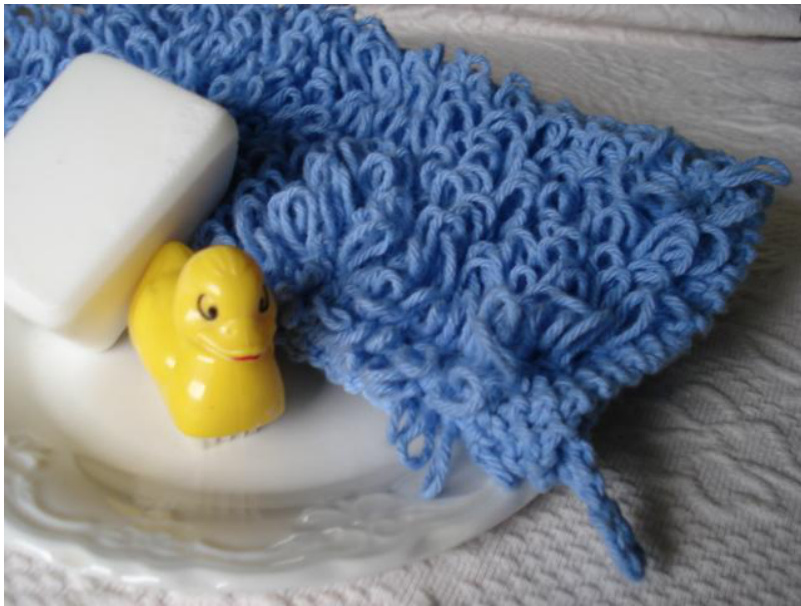
I wanted to make a loopy, lovely, luxurious spa-styleshower mittfor a newfriend during a swap. There are so many lovely spa washcloths to choose from, this mitt was heavily inspired by Karen Schoren's Luxurious Loops Washcloth. I thought a spa mitt that you can fit your hand into and adjust to fit by adding/subtracting stitches to the cast-on edge and/or knitting more/less rows would be something a little different and useful. It is very easy to personalize. You can use any worsted weight commercial 100% cotton yarn or your favorite organic cotton yarn.
Materials:
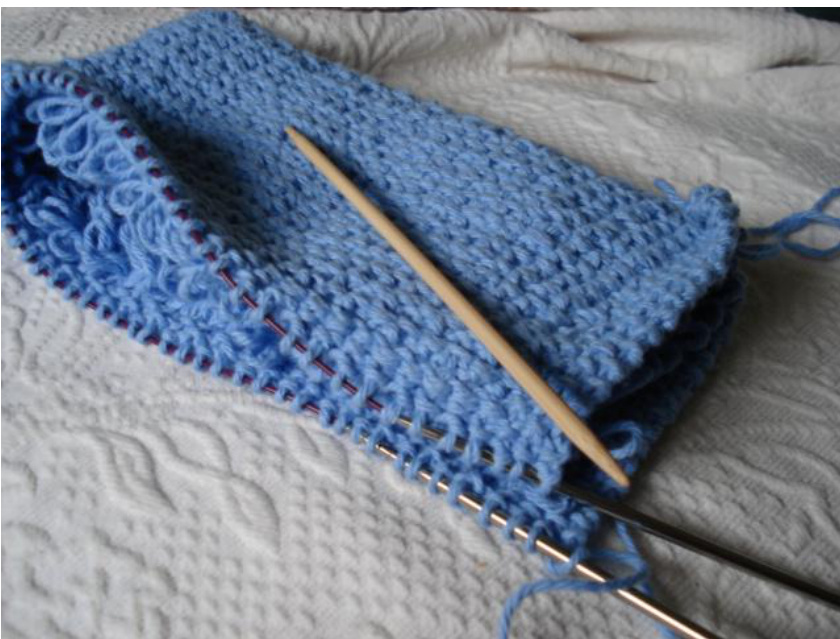
-1 ball of worsted weight cotton yarn (l used Sugar & Cream cotton, approx. 71g) in Cornflower blue and pink -size US 5 24" circular needle -size US 5 dpn (just 1) -scissors -tapestry needle -crochet hook in similar size to knitting needles (optional)
Gauge:
-6 sts/in.in stockinette stitch Finished size: About 7.5" x 5.5" Instructions:
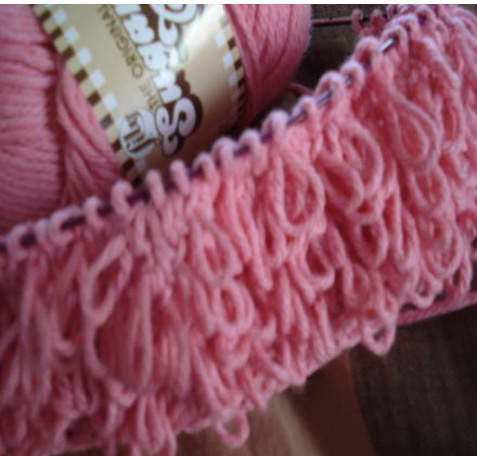
Cast on 51 sts. If you want a larger or smaller size, just make sure you use an odd number of stitches. I used the knitted on cast on. Work in seed st for 3 rows: \*k1, p1\*, ending with k1. Row 1(RS): K1, p1, k1, for border on all rows. \*k1 and leave st on LH needle, bring yarn to front and wrap clockwise around L thumb to make a loop, bring yarn to back, k into back of same st and remove from needle as per normal knitting\* to last three sts, k1, p1, k1. Row 2(Ws): K1, p1, K1,\* p2tog, p1\*, to last three sts, k1, p1, k1. Row 3 (Rs): K1, p1, k2, \*k1 and leave st on LH needle, bring yarn to front and wrap clockwise around L thumb to make a loop, bring yarn to back, k into back of same st and remove from needle as per normal knitting, k1\* to last four sts, k2, p1, k1. Row 4(ws): K1, p1, k1, p2, \*p2tog, p1\* to last three sts, k1, p1, k1. Repeat rows 1-4 until work measures almost 7.5 in. You will end after completing Row 2. Work in seed stitch for three more rows.
Bind-off Instructions:
To bind off, fold the knitted fabric in half with right-sides together so that the stitches are lined up evenly with the additional stitch next to the fold. Use the 3-needle bind-off using a DPN of the same size for the first side of the mitt. Cut yarn leaving enough to weave in. With crochet hook close up seam with single crochet stitch or use tapestry needle sew up the seam on the other side. Weave in all yarn ends.
Optionally, use crochet hook and chain 3", then attach back where chain began to form a loop for hanging. (This could also be done using DPNs and knitting a 3 stitch I-cord.) This is my first pattern for distribution, so please be gentle @. If you find any errors, please contact me through Ravelry.com. My name is gwynneknit. This pattern may be downloaded for your personal use only. You may not copy it for others, distribute, sell, or sell any products made from it unless permitted by the designer.


