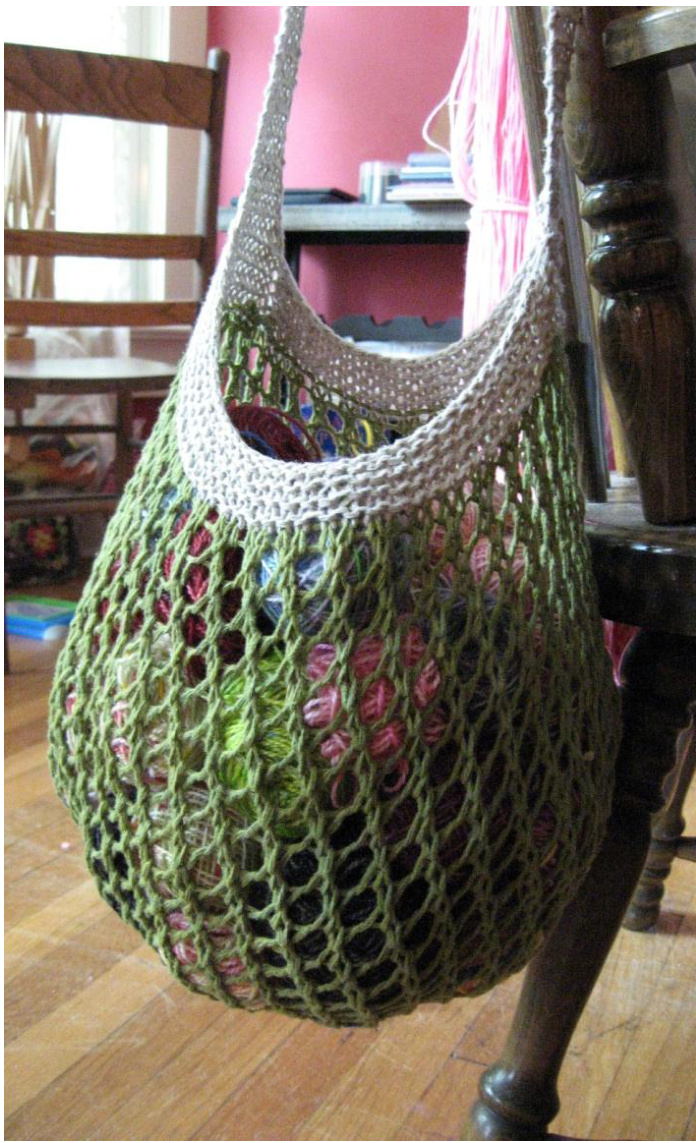
Grlfriend Market Bag
By Laura Spradlin www.sugarbunnyblvd.com
Sometimes it takes a Grrlfriend to save the day. This market bag had many sources of inspiration but truly came about because of a challenge issued by Sheri of The Loopy Ewe (www.theloopyewe.com). In early 2008 Sheri challenged her blog readers to knit something for another person who needed a lift - who could benefit from a random act of knitting kindness. About six months before creating this pattern a friend of mine phoned and said she had something she needed to give me - she had to get it out of her house. It was a sweater belonging to her ex husband. A heavily cabled aran sweater knit with a worsted weight undyed cotton linen blend yarn. She hoped I could recycle the yarn into something completely different from its former existence. When I read Sheri's challenge I knew that I could recycle that sweater into a market bag - but who would I give it to? I dyed some of the yarn, left some of it natural, and let the bag take shape on its own. The original Grrlfriend Market Bag was soon presented to my friend who gave me the sweater - in its new form - symbolic of what Grrlfriends do for each other. We help to lighten each other's load. We strive to share the burdens of life and aid in purging whatever might be weighing each other down by replacing it with something that lifts us up. The sweater has made three bags so far - who knows how many Grrlfriends it will touch?
I hope you enjoy knitting the Grrfriend Market Bag and maybe you can make an extra one for a Grrlfriend too. We can all use a little help sharing the burdens of life - even if it's just to help carry the groceries!
Grrlfriend Market Bag
Yarn: 100 - 150g fingering sport or worsted weight yarn (cotton, linen, hemp, other blends) Needles choose a size in the range given that works with your yarn weight and preferred gauge or whatever needles you happen to have on hand: 5 double pointed needles size 4-5-6 16" circular needle size 5-6-7-8 24" circular needle size 10-10.5-11 Crochet hook G-H-l
Finished Size:
The finished size of your bag will depend on the size of your needles, weight of yarn used, and gauge achieved while knitting. The body of the bag is very very stretchy with a more rigid upper band to help keep its shape. The pattern can make a larger or smaller by increasing or decreasing the number of stitches on each side of the base when changing to the body. Techniques used in the pattern: Circular knitting Double pointed needles K2tog YO Kitchener/grafting Emily Ocker's Beginning (small circular caston shown on pp 112-113 of Elizabeth Zimmermann's Knitting Workshop) Stitch Legend: KKnit PPurl K2tog Knit two stitches together YO Yarn Over Instructions:
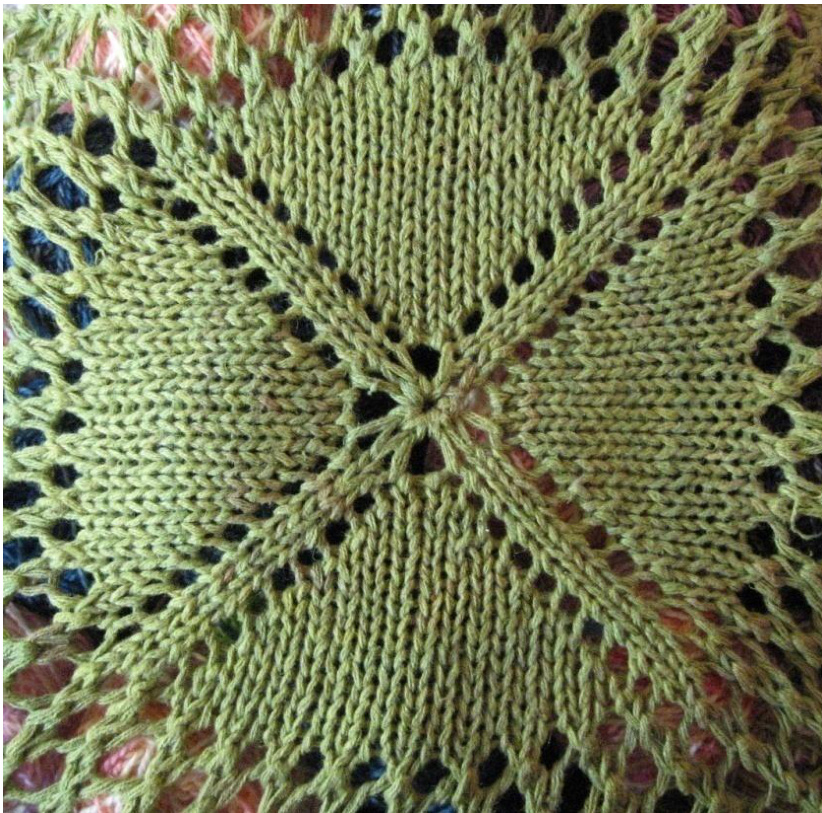
BOTTOM:
To begin at the center bottom of the bag, make a circle of yarn about two inches across. Using a crochet hook and Emily Ocker's Beginning, crochet 8 single crochet stitches into the circle. You are now finished with the crochet hook. You may alternately use your preferred method of circular caston for 8 stitches. Divide the eight stitches evenly (2 stitches per needle). This will be your most fiddly moment. Pull the tail of your yarn to close the circle at the center of your eight caston stitches.
Grrlfriend Market Bag
Round 1: Knit 1, YO, Knit 1. Repeat this for each needle. 12 stitches total. Round 2: Knit around. Round 3: Knit 1, YO, Knit 1, YO, Knit 1. Repeat this for each needle. Round 4: Knit around. Round 5: Knit 1, YO, Knit across until 1 stitch remains on the needle, YO, Knit 1. Repeat this for each needle around. Round 6: Knit around. Continue repeating rounds 5 and 6 until each needle has 25 stitches. Switch to the 16" circular needle when the DPNs start getting full (around 19 stitches on each needle at that point). Place a marker at the beginning of the round when you switch to circular needles.
BODY:
100 stitches on needles. Using the 24" circular (large size) needle Round 1: (K2tog, YO) around. Marker should be at this point if it was removed when changing needles. Round 2: Knit around. Repeat rounds 1 and 2 until body of bag is the length preferred. This lace pattern stretches aLoT!
TOP/CUFF:
This is where you will change colors if you want the top band/cuff and strap to be a contrasting color to the body of your bag. Using the 16" circular needle: Round 1: Knit around Round 2: Purl around Repeat these rounds until the cuff is the preferred width/length. Suggested length is 8 rows or four garter bumps ending with a purl row.
STRAP/HANDLE:
Continuing with the 16" circular needle: Cast off 40 stitches purlwise. Knit the next 10 stitches. Place these 10 stitches on a stitch holder, safety pin, or piece of wasteyarn. Cast off the next 40 stitches purlwise. Knit the next 10 stitches, continuing in garter stitch and knitting flat (back and forth rather than in the round), knit 2 more rows, ending on the wrong side of the strap/handle (inside of bag). Next row (right side): K1, K2tog, K4, K2tog, K1
Grrlfriend Market Bag
Switch to DPNs. Continue knitting the strap/handle in garter stitch until it is the desired length. Remember that it will S-T-R-E-T-C-H quite a lot when you load the bag! End with a wrong side row. Next row (right side): K1, M1, K6, M1, K1 Knit 2 more rows, ending with a right side row.
GRAFTING THE HANDLE:
Transfer 10 stitches from stitch holder to DPN. Hold the two DPNs, 10 stitches on each needle, so that the outside of the strap and outside of bag are together. Grafting these 10 stitches with kitchener stitch on the inside will make a purl bump on the outside, blending with the garter stitch of the band andstrap. Weave ends neatly. Please infect your family friends and neighbors with the love of knitting by giving them copies of this pattern! The Grrlfriend Market Bag is a free pattern and should never be sold for profit or as part of a kit. This pattern can be freely distributed and used as a teaching tool if it remains unaltered. Items made using this pattern can be sold for any purpose. Any questions or corrections regarding this pattern or its use should be addressed to the pattern designer Laura Spradlin via email at laura@sugarbunnyblvd.com.
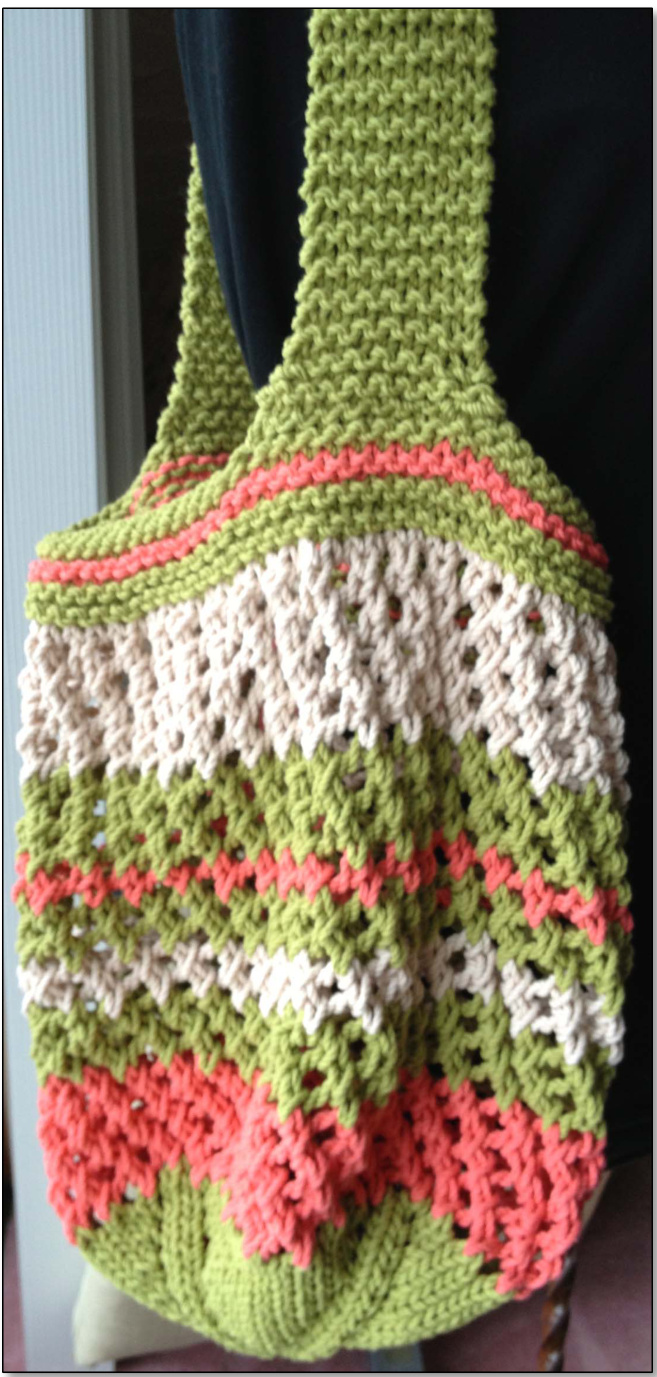
Grrlfriend Market Bag Chunky Yarn Version
The basic construction of this bag follows the original pattern written by Laura Spradlin. These are instructions for a chunky weight version using Ella Rae, Melbourne yarn in a striped pattern. Instructions are also given for the version pictured in the original pattern, using Melbourne yarn.
Materials:
5 balls of Ella Rae, Melbourne. (3 for main color, green; 1 for contrasting color 1, tangerine; 1for contrasting color 2, cream) OR 3 balls of a main color and 2 balls of a contrasting color, if not following striping pattern (as pictured in original pattern.) Size 8 DPNS; Size 8, 16" circular needles; Size 11, 24" circular needles; Size H crochet hook. Stitch Marker. Yarn needle. Scissors.
Directions for the Bottom:
Using MC (main color) green, follow directions from original pattern on page 2 for the cast on and knitting the bottom of the bag, and repeat Rounds 5 & 6 until the double pointed needles are getting full. At 15 stitches each, switch to 16" circular needles and place a marker at the beginning of the round. Repeat Rounds 5 & 6 until there is a total of 76 stitches on the circular needles.
Body:
Switch to the 24" size 11 needles. Round 1: (K2 TOG, YO) around. Round 2: Knit around. If the body of the bag is all the main color, Repeat Rounds 1 & 2 untildesiredlength. If striping with three colors, Repeat Rounds 1 & 2 in this color sequence: CC1 tangerine for 10 rounds. MC green for 6 rounds. CC2 cream for 4 rounds. MC green for 4 rounds. CC2 tangerine for 2 rounds. MC green for 6 rounds. CC2 for 10 rounds. Switch to the 16" size 8 needles. Top band: Round 1: Knit around. Round 2: Purl around. Ifthe body of the bag is all the main color, switch to contrasting color for the band. Repeat Rounds 1 & 2 for 8 rounds. If striping the body with three colors, Repeat Rounds 1 & 2 in this color sequence: MC green for 4 rounds. CC1 tangerine for 2 rounds. MC green for 2 rounds.
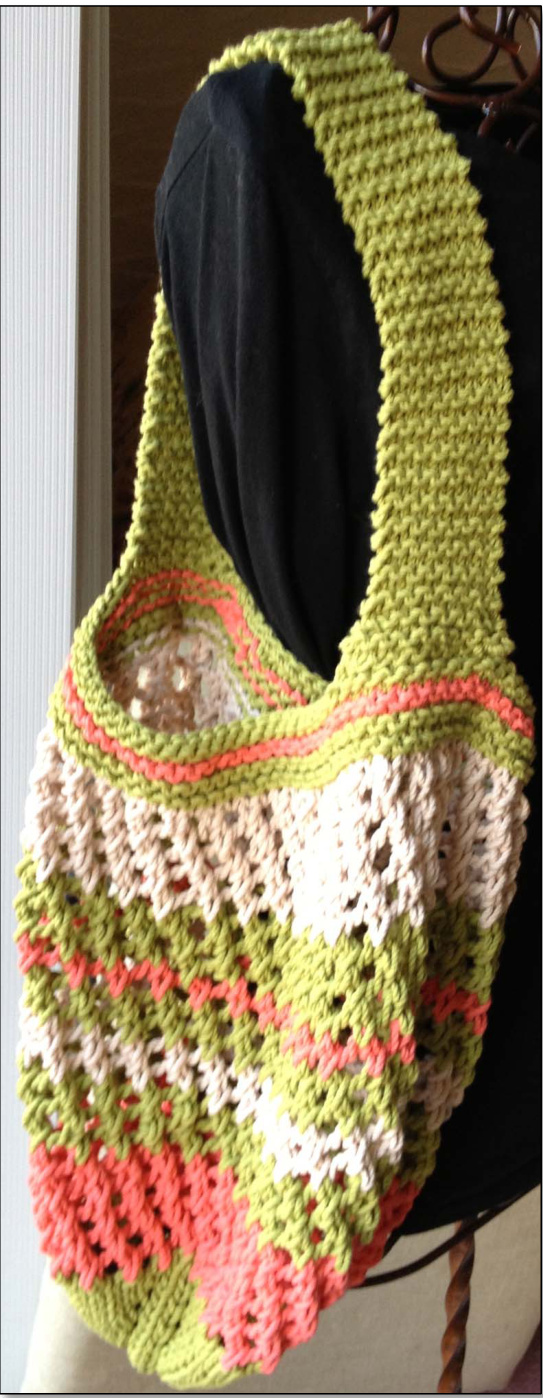
strap/Handle:
Using MC (main color) green, bind off 28 stitches purlwise. Knit the next 10 stitches and place them on a stitch holder. Bind off the next 28 stitches purlwise. Knit the next 10 stitches. These are the strap stitches, which will be knit flat (back & forth). Knit 3 more rows to end on the wrong side (inside of bag). Next row (right side): K1, K2tog, K4, K2tog, K1. You will have 8 stitches Switch to the DPNS and knit approximately 90 garter stitch ridges (180 rows), or desired length, for the handle. Remember the handle will stretch when the bag is full. End with a wrong side row.
Next row: (right side): K1, M1, K6, M1, K1. Knit 2 more rows, ending with a right side row. Grafting the Strap/Handle: Hold the two DPNS, 10 stitches of each needle, so that the outside of the strap and the outside of the bag are together. Garter stitch graft the strap to the bag. To prepare, draw the yarn through the first stitch on the front needle as if to purl (from back to front) and leave this stitch on the needle. Draw the yarn through the first stitch on the back needle as if to purl and leave this stitch on the needle. Proceed as follows: 1: Draw the yarn through the first stitch on the front needle as if to knit (from front to back), pull the yarn all the way through, and slip this stitch off the needle. (front needle knit off.) 2: Draw the yarn through the second stitch on the front needle as if to purl (from the back to the front), but leave the stitch on the needle. (front needle purl on.) 3: Draw the yarn through the first stitch on the back needle as if to knit (from front to back), pull the yarn all the way through, and slip this stitch off the needle. (back needle knit off.) 4: Draw the yarn through the second stitch on the back needle as if to purl (from the back to the front), but leave the stitch on the needle. (back needle purl on.) You can remember it by: Front 2 stitches, Knit off, Purl on. Back 2 stitches, Knit off, Purl on. Here is a link to a You Tube video which demonstrates this technique: http://www.youtube.com/watch?v=BAEloglli6o Sew tails of yarn where the handle attaches to the bag to add strength. Weave in ends. Dot the final ends with fray check fabric glue. Knit by Diane L. Augustin Yarn Happy \*Bead Happy dianelaugustin@mac.com www.yarnhappybeadhappy.com http://www.ravelry.com/designers/diane-l-augustin www.yarnhappybeadhappy.etsy.com


