Silly Monster Hat Pattern Yarn Artists Designs
Materials Needed:
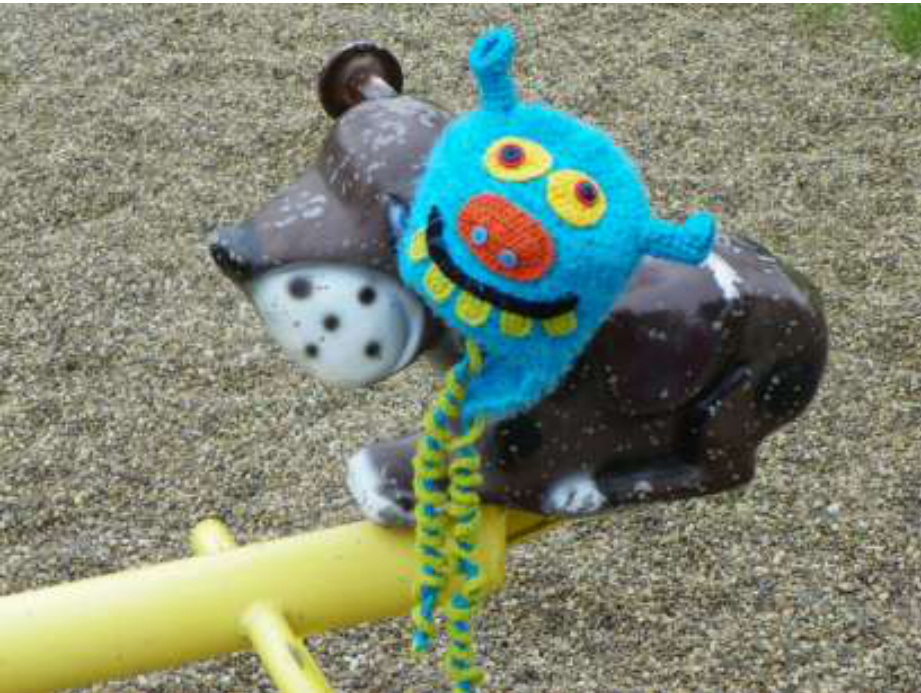
Boy Colors Lion Brand Vanna's Choice Aqua Sensations Angel Hair Turquoise (JoAnn Fabrics and Crafts) or any novelty hairy yarn in aqua Teeth - Grass Green Eyes -Yellow Nose - Orange Mouth - Black
Girl Colors
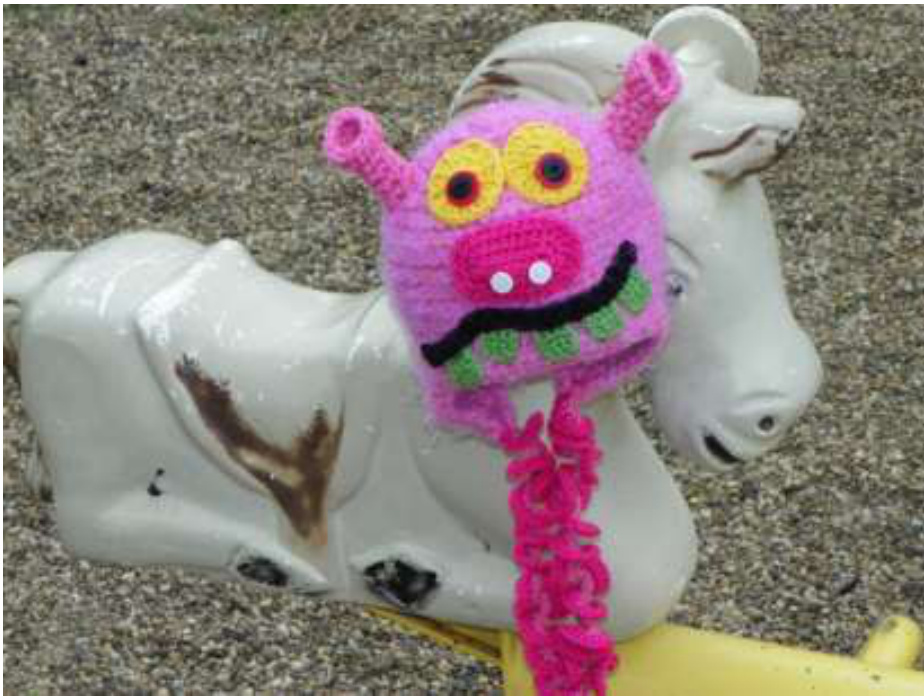
Lion Brand Vanna's Choice Baby Pink Poodle Sensations Angel Hair Posy (JoAnn Fabrics and Crafts) or any novelty hairy yarn in pink Teeth -Vanna's Choice Fern Green Eyes-Yellow Nose - Red Heart Shocking Pink Mouth-Black Yarn Needle and measuring tape 4 buttons that are %" , and 2 buttons that are %" (Use what you have, be creative..any color will do) F Hook (for baby instead of G) G Hook H Hook I Hook K Hook
Abbreviations:
st = stitch sts = stitches sc = single crochet hdc = half double crochet dc = double crochet sctog = single crochet two stitches together hdctog= half double crochet two stitches together dctog =double crochet two stitches together ch = chain Sl st = slip stitch Notes: Throughout the pattern, Chain 1 will equal a single crochet. Chain 2 will be equal to a half double crochet. I didn't work this hat in a continuous round, because you won't be able to see the seam. This also helps to keep track of your rows. We will be flipping the hat inside out when finished. J Trust me, it will be cute. Let's get started...
Stitch Gauge
Using the K hook and angel hair and vanna's choice yarn held together: Work a 4 inch square and check gauge. Use the hook that gets you to this gauge for the hat. It is more important that you have 11 hdc in 4 inches than the same height as me. Chances are that I squeezed more rows in my 4" than most of you...LOL I think it is stress that makes me do that. 11 hdc x 8 rows= 4 inches square
Finished Size:
3-6 Months - circum. 14"-17", hat height 6.5"-7" 6-12 Months -circum. 16"-19", hat height 7.5" 12-24 Months - circum. 18"-20", hat height 8" Child 3-10 years- circum. 19"-20.5" hat height 8.5" Teen /Adult- circum. 20.5"-22" hat height 9"-10" Hat Pattern for all sizes is made with K Hook. \*\* (see above) Hold both the worsted weight blue and the angel hair yarn at the same time and work the hat.

Hat Pattern 3-6 Months:
Ch 3, sl st to form ring Round 1: Ch 2, 5 hdc in ring, sl st to ch 2 (6) Round 2: Ch 2, hdc in same st, 2 hdc in each st around, sl st to ch 2 (12) Round 3: Ch 2, 2 hdc in next st, \*hdc in next st, 2 hdc in next stitch\* repeat from \* around, sl st to ch 2 (18) Round 4: Ch 2, hdc in next st, 2 hdc in next st, \*hdc in the next 2 sts, 2hdc in the next\* repeat from \* around, sl st to ch 2 (24) Round 5: Ch 2, hdc in next 2 sts, 2 hdc in next st, \*hdc in the next 3 sts, 2 hdc in the next\* repeat from \* around, sl st to ch 2 (30) Round 6: Ch 2, hdc in the next 3 sts, 2 hdc in the next st, \*hdc in the next 4 sts, 2 hdc in the next\* repeat from \* around, sl st to ch 2 (36) Round 7: Ch 2, hdc in each stitch around, sl st to ch 2 (36) Round 8: Repeat round 7 until the height of your hat measures 6.5"-7" Fasten off and leave a long tail to weave into hat.
Earflaps for 3-6 Months:
With the earflaps we want to leave 4 extra stitches empty in the front of the hat than the back. (Because our ears aren't centered on our heads) Holding the hat upside down with the front facing you, find the center count 7 dc to the left. We will start with a sl st in this stitch. Row 1: Ch 2, hdc in the next 7 sts, turn (8) Row 2: Ch 2, hdc across, turn (8) Row 3: Ch 2, hdctog, hdc in next 3 sts, hdctog, turn (6) Row 4: Ch 2, hdc across, turn (6) Row 5: Ch 2, hdctog, hdc in next st, hdctog, turn (4) Row 6: Ch 2, skip next st, hdctog (2) Fasten off and leave a tail to weave into earflap...continue on to second earflap. With the hat still upside down and the earflap you completed is facing you, we will count 9 empty stitches to the left. Slip stitch in the 9th stitch and work rows 1-6 again. You should now have 12 empty holes in front and 8 empty holes in the back of the hat..YAY!! Now we will work one row of sc all the way around hat and earflaps. Make sure to work 3sc around the point of each earflap.
Hat Pattern 6-12 Months:
Ch 3, sl st to form ring Round 1: Ch 2, 6hdc in ring, sl st to ch 2 (7) Round 2: Ch 2, hdc in same st, 2 hdc in each st around, sl st to ch 2 (14) Round 3: Ch 2, 2 hdc in next st, \*hdc in next st, 2 hdc in next stitch\* repeat from \* around, sl st to ch 2 (21) Round 4: Ch 2, hdc in next st, 2 hdc in next st, \*hdc in the next 2 sts, 2 hdc in the next\* repeat from \* around, sl st to ch 2 (28) Round 5: Ch 2, hdc in next 2 sts, 2 hdc in next st, \*hdc in the next 3 sts, 2 hdc in the next\* repeat from \* around, sl st to ch 2 (35) Round 6: Ch 2, hdc in the next 3 sts, 2 hdc in the next st, \*hdc in the next 4 sts, 2 hdc in the next\* repeat from \* around, sl st to ch 2 (42) Round 7: Ch 2, hdc in each stitch around, sl st to ch 2 (42) Round 8: Repeat round 7 until the height of your hat measures 7.5" Fasten off and leave a long tail to weave into hat.
Earflaps for 6-12 Months:
With the earflaps we want to leave 4 extra stitches empty in the front of the hat than the back. (Because our ears aren't centered on our heads) Holding the hat upside down with the front facing you, find the center and count 8 dc to the left. We will start with a sl st in this stitch. Row 1: Ch 2, hdc in the next 7 sts, turn (8) Row 2: Ch 2, hdc across, turn (8) Row 3: Ch 2, hdctog, hdc in next 3 sts, hdctog, turn (6) Row 4: Ch 2, hdc across, turn (6) Row 5: Ch 2, hdctog, hdc in next st, hdctog, turn (4) Row 6: Ch 2, skip next st, hdctog (2) Fasten off and leave a tail to weave into earflap...continue on to second earflap. With the hat still upside down and the earflap you completed is facing you, we will count 12 empty stitches to the left. Slip stitch in the 12th stitch and work rows 1-6 again. You should now have 15 empty holes in front and 11 empty holes in the back of the hat...YAy!! Now we will work one row of sc all the way around hat and earflaps. Make sure to work 3sc around the point of each earflap.
Hat Pattern for 12-24 Months:
Ch 3, sl st to form ring Round 1: Ch 2, 7 hdc in ring, sl st to ch 2 (8) Round 2: Ch 2, hdc in same st, 2 hdc in each st around, sl st to ch 2 (16) Round 3: Ch 2, 2 hdc in next st, \*hdc in next st, 2 hdc in next stitch\* repeat from \* around, sl st to ch 2 (24) Round 4: Ch 2, hdc in next st, 2 hdc in next st, \*hdc in the next 2 sts, 2 hdc in the next\* repeat from \* around, sl st to ch 2 (32) Round 5: Ch 2, hdc in next 2 sts, 2 hdc in next st, \*hdc in the next 3 sts, 2 hdc in the next\* repeat from \* around, sl st to ch 2 (40) Round 6: Ch 2, hdc in the next 3 sts, 2 hdc in the next st, \*hdc in the next 4 sts, 2 hdc in the next\* repeat from \* around, sl st to ch 2 (48) Round 7: Ch 2, hdc in each stitch around, sl st to ch 2 (48) Round 8: Repeat round 7 until the height of your hat measures 8" Fasten off and leave a long tail to weave into hat.
Earflaps for 12-24 Months:
With the earflaps we want to leave 4 extra stitches empty in the front of the hat than the back. (Because our ears aren't centered on our heads) Holding the hat upside down with the front facing you, find the center and count 9 dc to the left. We will start with a sl st in this stitch. Row 1: Ch 2, hdc in the next 9 sts, turn (10) Row 2: Ch 2, hdc across, turn (10) Row 3: Ch 2, hdctog, hdc in next 5 sts, hdctog, turn (8) Row 4: Ch 2, hdc across, turn (8) Row 5: Ch 2, hdctog, hdc in next 3 sts, hdctog, turn (6) Row 6: Ch 2, hdctog, hdc in next st, hdctog, turn (4) Row 7: Ch 2, skip next st, hdctog (2) Fasten off and leave a tail to weave into earflap...continue on to second earflap. With the hat still upside down and the earflap you completed is facing you, we will count 13 empty stitches to the left. Slip stitch in the 13th stitch and work rows 1-7 again. You should now have 16 empty holes in front and 12 empty holes in the back of the hat...YAy!! Now we will work one row of sc all the way around hat and earflaps. Make sure to work 3sc around the point of each earflap.
Hat Pattern Child 3-10 Years:
Ch 3, sl st to form ring Round 1: Ch 2, 8 hdc in ring, sl st to ch 2 (9) Round 2: Ch 2, hdc in same st, 2 hdc in each st around, sl st to ch 2 (18) Round 3: Ch 2, 2 hdc in next st, \*hdc in next st, 2hdc in next stitch\* repeat from \* around, sl st to ch 2 (27) Round 4: Ch 2, hdc in next st, 2 hdc in next st, \*hdc in the next 2 sts, 2 hdc in the next\* repeat from \* around, sl st to ch 2 (36) Round 5: Ch 2, hdc in next 2 sts, 2 hdc in next st, \*hdc in the next 3 sts, 2 hdc in the next\* repeat from \* around, sl st to ch 2 (45) Round 6: Ch 2, hdc in the next 3 sts, 2 hdc in the next st, \*hdc in the next 4 sts, 2 hdc in the next\* repeat from \* around, sl st to ch 2 (54) Round 7: Ch 2, hdc in each stitch around, sl st to ch 2 (54) Round 8: Repeat round 7 until the height of your hat measures 8.5" Fasten off and leave a long tail to weave into hat.
Earflaps for Child 3-10 Years:
With the earflaps we want to leave 6 extra stitches empty in the front of the hat than the back. (Because our ears aren't centered on our heads) Holding the hat upside down with the front facing you, find the center and count 11 dc to the left. We will start with a sl st in this stitch. Row 1: Ch 2, hdc in the next 9 sts, turn (10) Row 2: Ch 2, hdc across, turn (10) Row 3: Ch 2, hdctog, hdc in next 5 sts, hdctog, turn (8) Row 4: Ch 2, hdc across, turn (8) Row 5: Ch 2, hdctog, hdc in next 3 sts, hdctog, turn (6) Row 6: Ch 2, hdctog, hdc in next st, hdctog, turn (4) Row 7: Ch 3, skip next st, hdctog (2) Fasten off and leave a tail to weave into earflap...continue on to second earflap. With the hat still upside down and the earflap you completed is facing you, we will count 15 empty stitches to the left. Slip stitch in the 15th stitch and work rows 1-7 again. You should now have 20 empty holes in front and 14 empty holes in the back of the hat...YAy!! Now we will work one row of sc all the way around hat and earflaps. Make sure to work 3sc around the point of each earflap.
Hat Pattern Teen / Adult:
Ch 3, sl st to form ring Round 1: Ch 2, 9 hdc in ring, sl st to ch 2 (10) Round 2: Ch 2, hdc in same st, 2 hdc in each st around, sl st to ch 2 (20) Round 3: Ch 2, 2 hdc in next st, \*hdc in next st, 2 hdc in next stitch\* repeat from \* around, sl st to ch 2 (30) Round 4: Ch 2, hdc in next st, 2 hdc in next st, \*hdc in the next 2 sts, 2 hdc in the next\* repeat from \* around, sl st to ch 2 (40) Round 5: Ch 2, hdc in next 2 sts, 2 hdc in next st, \*hdc in the next 3 sts, 2 hdc in the next\* repeat from \* around, sl st to ch 2 (50) Round 6: Ch 2, hdc in the next 3 sts, 2 hdc in the next st, \*hdc in the next 4 sts, 2 hdc in the next\* repeat from \* around, sl st to ch 2 (60) Round 7: Ch 2, hdc in each stitch around, sl st to ch 2 (60) Round 8: Repeat round 7 until the height of your hat measures 9"-10" Fasten off and leave a long tail to weave into hat.
Earflaps for Teen / Adult:
With the earflaps we want to leave 6 extra stitches empty in the front of the hat than the back. (Because our ears aren't centered on our heads) Holding the hat upside down with the front facing you, find the center and count 11 dc to the left. We will start with a sl st in this stitch. Row 1: Ch 2, hdc in the next 11 sts, turn (12) Row 2: Ch 2,hdc across, turn (12) Row 3: Ch 2, hdctog, hdc in next 7sts, hdctog, turn (10) Row 4: Ch 2, hdc across, turn (10) Row 5: Ch 2, hdctog, hdc in next 5 sts, hdctog, turn (8) Row 6: Ch 2, hdctog, hdc in next 3 sts, hdctog, turn (6) Row 7: Ch 2, hdctog, hdc in next st, hdctog, turn (4) Row 8: Ch 2, skip next st, hdctog (2) Fasten off and leave a tail to weave into earflap...continue on to second earflap. With the hat still upside down and the earflap you completed is facing you, we will count 16 empty stitches to the left. Slip stitch in the 16th stitch and work rows 1-8 again. You should now have 21 empty holes in front and 15 empty holes in the back of the hat...YAY!! Now we will work one row of sc all the way around hat and earflaps. Make sure to work 3sc around the point of each earflap.
Finishing the hat
\*\*Now we willflip the hat inside out and tuck in all the loose strings. I think the inside of the hat is a little hairier and has a cute look to it. This is how we will leave it when attaching the face and twists
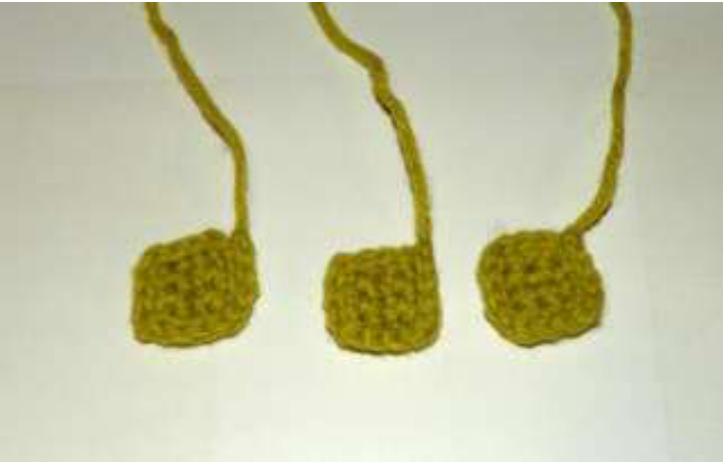
Twisty tails
Use the Vanna's choice or any worsted weight yarn in hat colol
Start with an I hook and sl st into the earflaps between the 2 hdc on the last row. Now we will chain 40. Switch to a smaller hook size...H hook. and slip stitch in the second chain from hook. Make 2 sc in that same stitch. Working back up towards your earflaps make 3 sc in each chain. When you get to the top of your twist slip stitch into the earflap between the 2 hdc on the last row of earflap, again. Fasten off, leave a tail to weave into the earflap. Now you can add a coordinating color if you want. Sl st into the earflap, 2sc in each sc all the way down the twist. Fasten off, leave a tail to weave in the end. (Repeat for second earflap) Teeth with grass green or fern green and G Hook (make 5) (For baby size use F Hook)
Row 1: Ch 4, sc in the 2nd ch from hook, sc in last 2 ch (4) Row 2: Ch 1, turn, sc in next 3 sts (4) Row 3-4: Repeat Row 2 Sl st around each tooth Leave a long tail for sewing to hat.
Mouth with black and G Hook (For baby size, shorten to ch 25)
Ch 30, hdc in the 3rd ch from hook, hdc in all sts across. Fasten off, leave a long tail for sewing. I like to attach the mouth before anything else. Start by sewing the top of the mouth onto the hat. Then tuck the tops of the teeth under the mouth and sew them in place. Then sew the bottom of the mouth over the teeth. 1 orange or shocking pink and G Hook. (For baby size use F Hook.
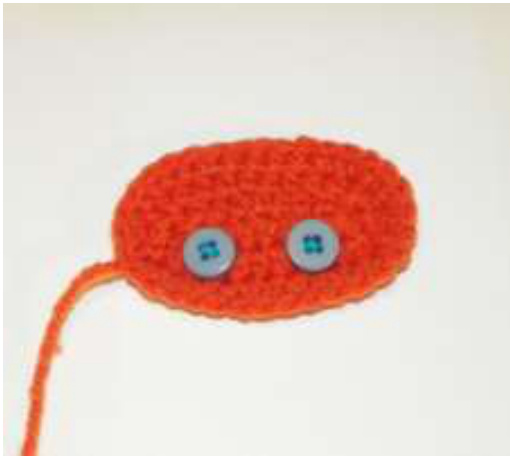
Rnd 1: Ch 10, hdc in 3rd ch from hook, hdc in the next 6 sts, 3 hdc in last st, turn upside down and work the bottom of the chains. Hdc in the next 6 ch, 2hd in the last st, sl st to the beginning. Rnd 2: ch 2, hdc in each stitch around, on the corners where 3hdc were made in one stitch from rnd 1, you will put 2hdc in each of those 3 sts on each end. So 6 hdc around the turns. When round is complete, sl st to ch 2. Rnd 3: ch 2, hdc in each stitch. Around the corners you will do 2 hdc, 1 hdc, 2 hdc, 1 hdc, 2 hdc, When your round is complete sl st to ch 2. Fasten off and leave a long tail Attach two %" buttons to nose to look like nostrils. You can crochet them instead by making two small circles. h 3, sl st to form a ring, ch 1, 5 sc in ring, sl st to ch 1. Leave a tail and sew to nose.
Eyes with yellow and G Hook (make 2) (For baby size use F Hook)
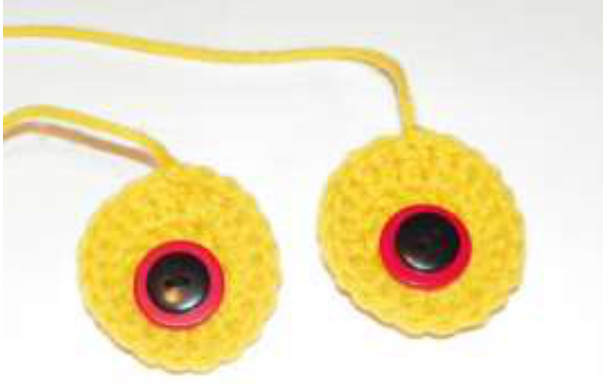
Ch 3, sl st to form a ring Round 1: ch 3, 10 dc in ring (11) Round 2 ch 3, dc in same st, 2 dc in each st around (22) Fasten off and leave a long tail for sewing. Attach a %" button in a color and a %" button in black to the front of each eye, like pictured. I used black yarn to sew them on the eye. Tie a secure knot in the back and weave in ends. No one will see this anyway, as the eye will be sewn to the hat.
Ears working with 2 strands of Vanna's Choice Aqua or Vanna's Choice Baby Pink Poodle and I hook (make 2)
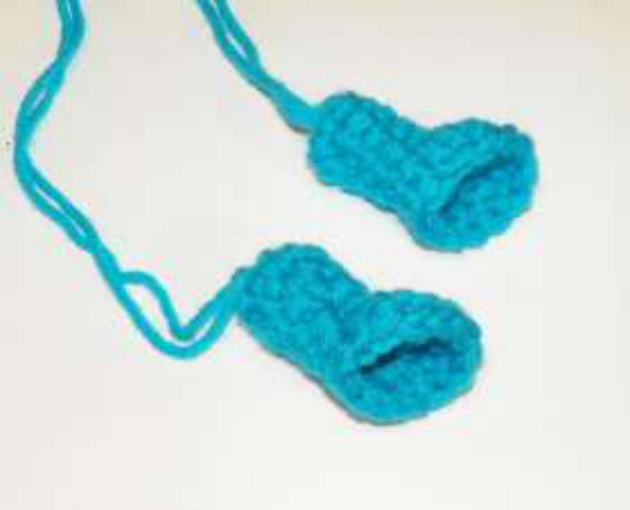
Leave a long tail at the beginning for sewing ear to hat. Ch 7, sl st to form a ring Round 1: Ch 1, sc in each chain around (7) Round 2: Ch 1, sc in each st around (7) Round 3-4: Repeat round 2 Round 5: Ch 1, hdc in next st, 3dc in next st, 3 triple crochets in next st, 3dc in next st, hdc in next, sc in last, sl st to first ch 1. Fasten off and weave in ends
Congratulations, your project is complete!! Pat yourself on the back for a job well done
@ Copyright Notice: You have permission to sell the finished product locally and online. Please mention Yarn Artists as the designer of the pattern. Rewriting, reselling, distributing, or copying this pattern isn't allowed. Thank you again for your purchase and have fun J