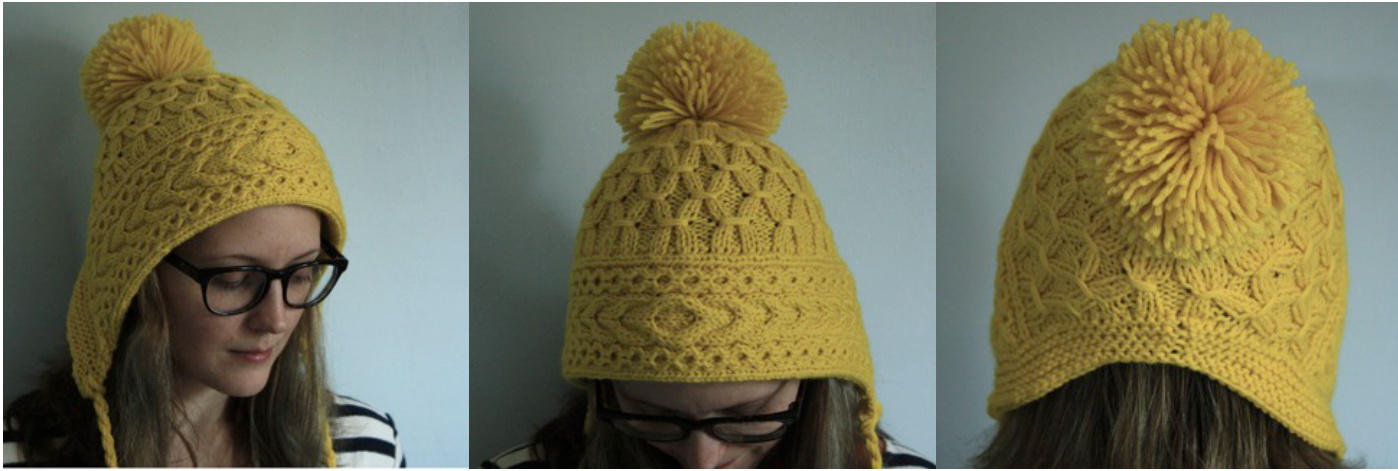
Neon Ski Bonnet // Version 2 August 2012
by Lacey Volk
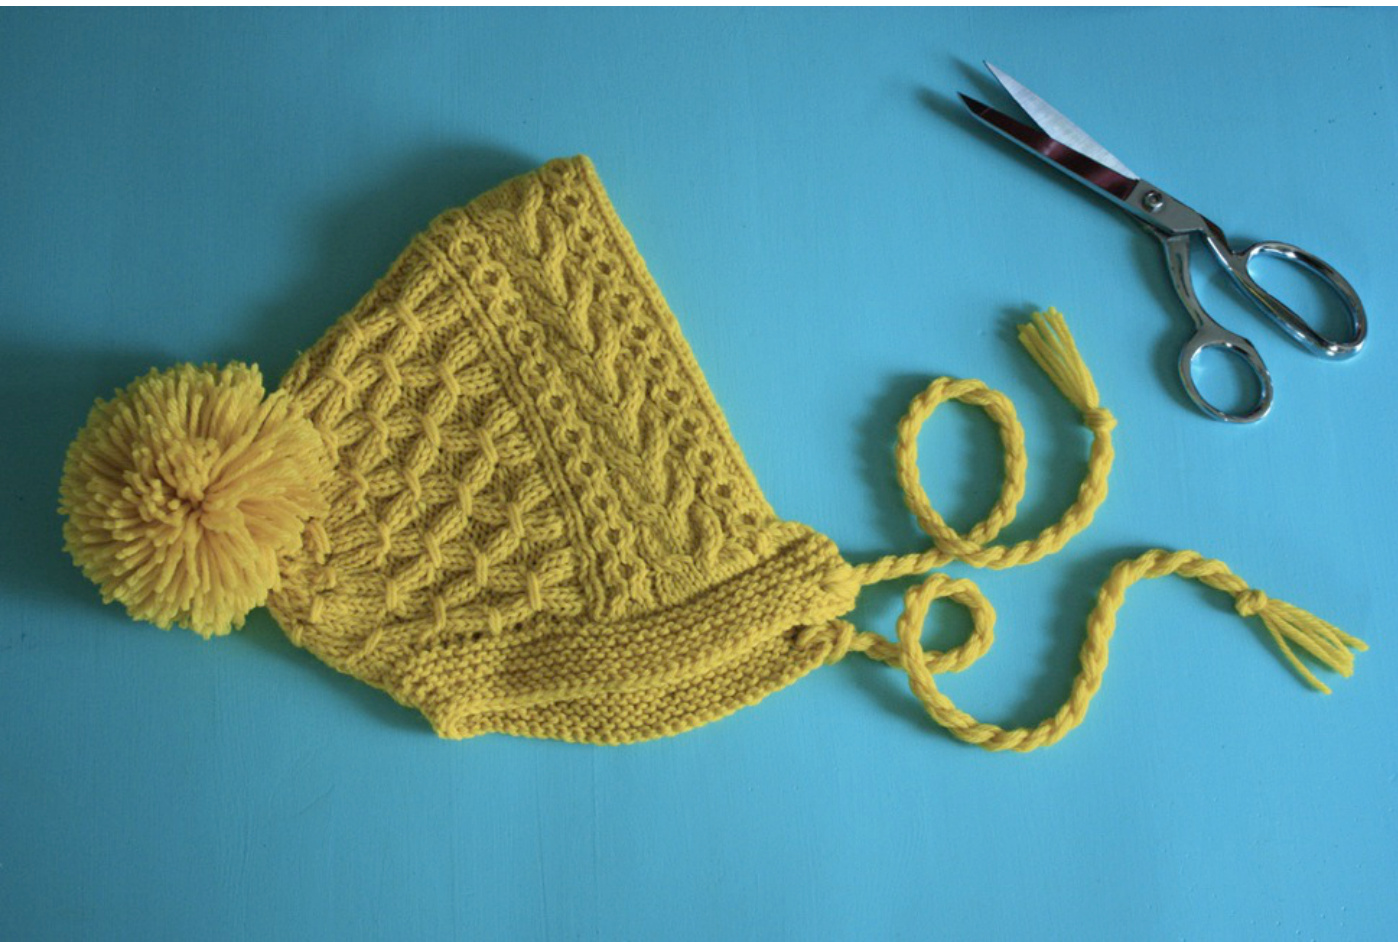
This hat is knit in two parts. First the band is knit circularly as a tube, to provide double thickness over the ears. Then the body of the hat is picked up and knit flat before joining in the round. The hat is trimmed with a garter band, giant pom-pom, and twisty ties. SIzEs, by head circumference at widest point: Small Child 18" (Teen 20", Small Adult 22", Large Adult 24") PicturedinSmallAdult22" YARN: 1 (2, 2, 2) skeins Cascade 220 in Neon Yellow, or 220 (440, 440, 440) yards of comparable worsted-weightyarn Without the pom-pom, you can make this hat in larger sizes with just 1 skein -- but that's really just no fun, isn't it? I used circular needles and knit the seamless “in the round" parts of the hat using the Magic Loop method. You may also use DPNs if you prefer, but you will need 1 extra DPN to create the wraps on the body of thehat. GAUGE: 20 sts / 25 rows = 4 inches in stockinette, 22 sts / 28 rows in Chart B pattern.
PATTERN NOTES
C4F: Cable 4 Front: Slip 2 stitches to a DPN and hold to the front, knit 2 stitches, knit 2 stitches fromDPN C4B: Cable 4 Back: Slip 2 stitches to a DPN and hold to the front, knit 2 stitches, knit 2 stitches fromDPN RT: Right Twist: Slip 1 stitch to a DPN and hold to the front, knit 1 stitch, knit 1 stitch from DPN LT: Left Twist: Slip 1 stitch to a DPN and hold to the front, knit 1 stitch, knit 1 stitch from DPN
Chart A1 (Band - First Half)
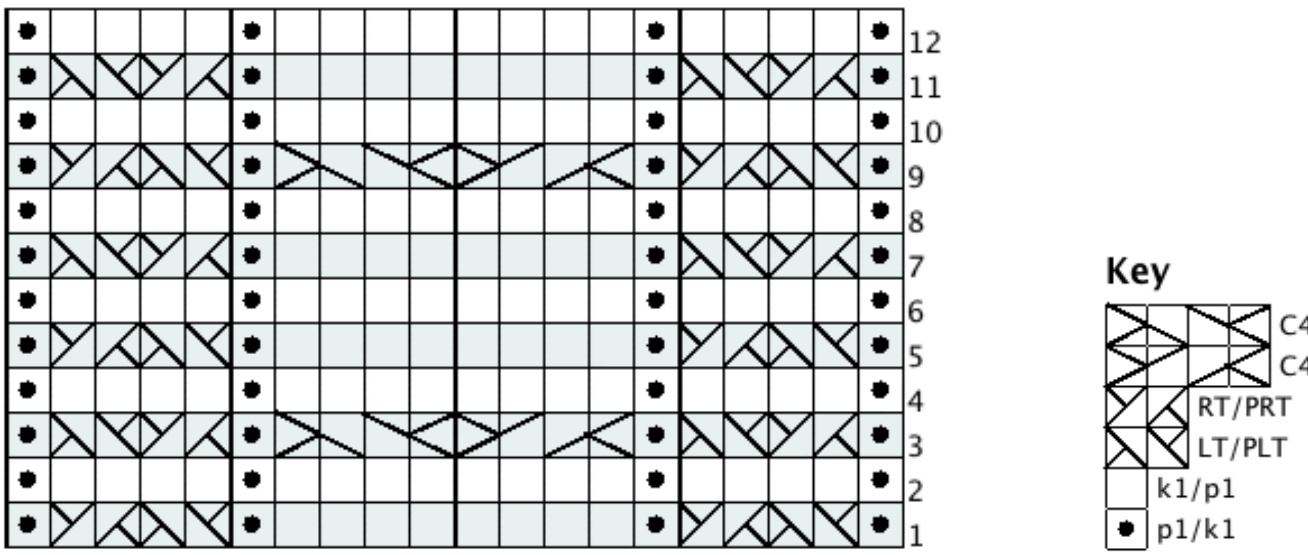
Chart A2 (Band - Second Half)
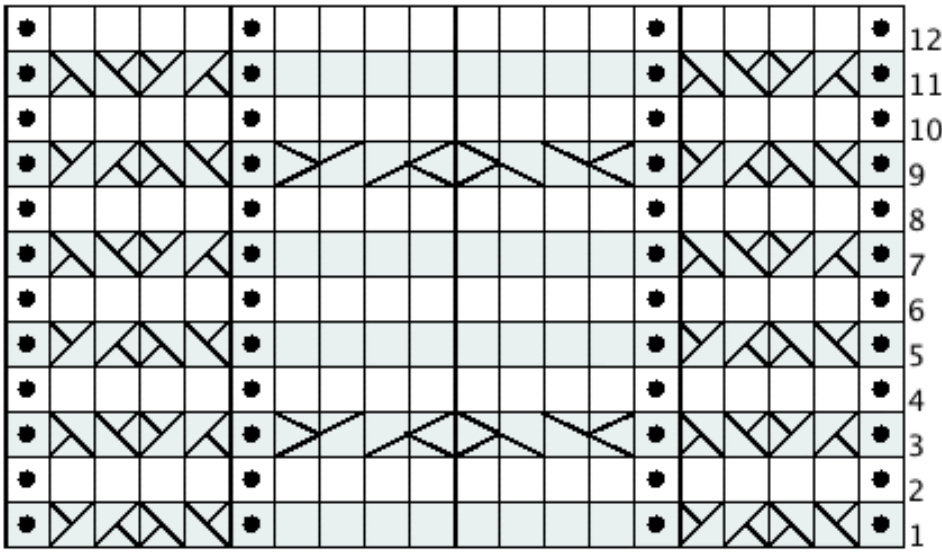
Chart B (Body)
Key k1/p1 No Stitch p1/k1 Special
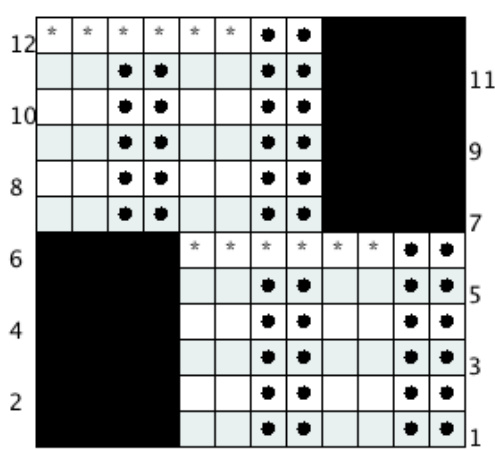
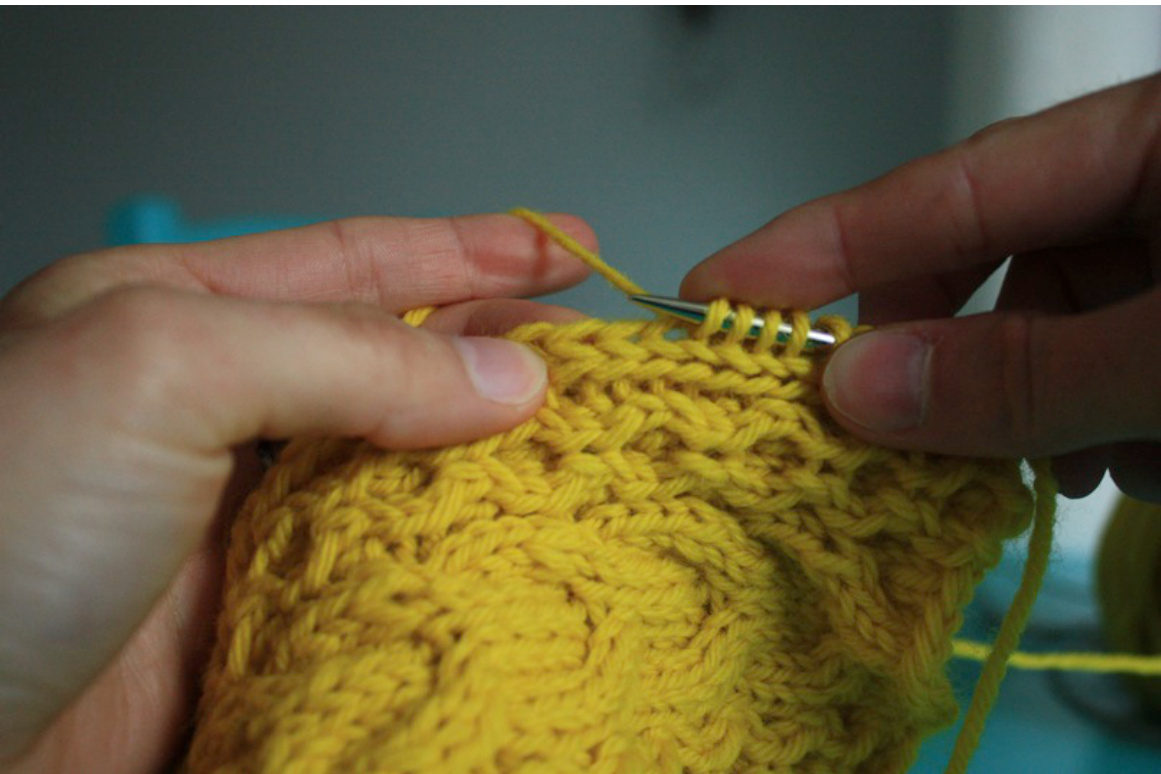
Written directions for Chart B (Body): Row 1 [WS]: k2, \*p2, k2\*, repeat \* until end. Rows 2 - 5: Continue knitting in 2x2 rib as established. Row 6 [RS]: p2, \*(k2, p2, k2) onto DPN, wrap yarn around 6 sts on DPN twice, slip 6 sts from DPN to your right needle, p2\*, repeat \* until end. Rows 7 - 11: Continue in 2x2 rib as established. Row 12 [RS]: (p2, k2) onto DPN, wrap yarn around 4 sts on DPN twice, slip 4 sts from DPN to right needle, p2, \*(k2, p2, k2) onto DPN, wrap yarn around 6 sts on DPN twice, slip 6 sts from DPN to your right needle, p2\*, repeat \* until 4 sts before end. (k2, p2) onto DPN, wrap yarn around 4 sts on DPN twice, slip 4 sts from DPN to right needle. Using this pattern, you should always be wrapping stitches from the RS of your work. To wrap, pull the working yarn in front of your DPN stitches from left to right, then across the back from right to left. Wrap each set of 6 stitches twice, then slip the stitches on the DPN back onto your right needle. Wraps should be snug enough to pull the ribs together, but not so tight that your stitches look strangled. :) This may take some practice if you've never used decorative wraps before.
DIRECTIONS
BAND:
All sizes: CO 38 stitches. Join to knit in the round; the first 20 stitches will form the cabled side of the band, and the last 18 stitches will be knit in stockinette throughout. Knit 42 (48, 54, 60) rounds following Chart A1. Knit 41 (47, 53, 59) rounds following Chart A2. Bind off. It may be helpful to gently steam block the band before proceeding.
BODY:
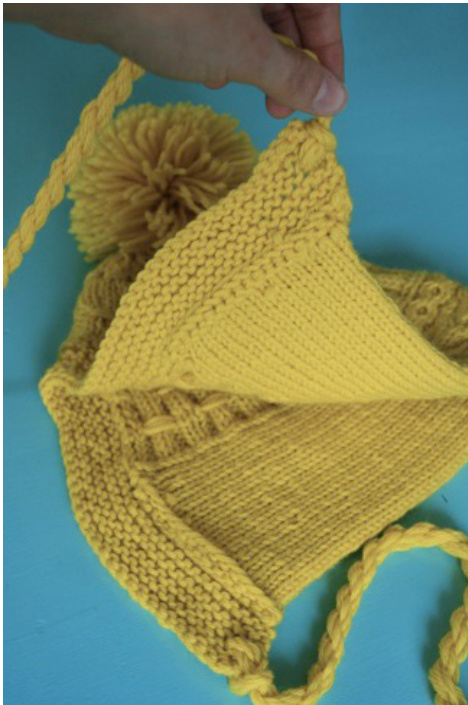
Using your circular needle, with the right side of the cable band facing you, pick up and knit 78 (90, 102, 114) stitches along the long side. You should leave one neat line of knit stitches intact on the front of the band, as shown below:
Row 1 [WS]: Work flat following first row of Chart B [body of hat], decreasing 12 stitches evenly in pattern. 6 (78, 90, 102) remaining. Work rows 2 through 14 (16, 18, 20) in pattern following Chart B [body of hat]. CO 6 stitches, pm, and join for knitting in the round. 72 (84, 96, 108) stitches. Work rounds 15 (17, 19, 21) through 19 (25, 25, 31) in pattern as established. Decrease Rounds: Round 1: \*p2tog, k2, p2, k2\*, repeat until end of row. Round 2: \*p1, k2, p2, k2\*, repeat until end of row. Round 3: \*p1, k2, p2tog, k2\*, repeat until end of row. Round 4: \*p1, k2\*, repeat until end of row. Round 5: Following 1x2 rib pattern, knit wraps across 5 stitches instead of 6. Round 6: \*p1, k1, (s1 as if to knit, k2tog, psso), k1\*, repeat until end of row. Round 7 and 8: \*p1, k3\*, repeat until end of row. Round 9: p1, \*(s1 as if to knit, k2tog, psso)\*, repeat until end of row. Round 10: \*p1, k1\*, repeat until end of row. Round 11: \*k2tog\*, repeat until end of row. Cut yarn and pull tail through remaining 6 (7, 8, 9) stitche You will now have a slightly ridiculous looking bonnet hat! Go ahead, steam block it a bit, put it on, feel a bit silly, wonder if it's actually going to look OK when it's done (it will- that garter edge does wonders!).
GARTER EDGE:
Pick up and knit 60 (68, 72, 76) stitches along the bottom edge. When picking up through the cast-on edge of the band, be sure to pick up through both the front and back of the tube. ow1:k30(34,36,38),pm,ktoend. yon Rows 2.o:k to 2 sthoforo markor csk.slin markor k2ts vehf Rows 2 - o. k to 2 st beiofe ihalkel, ssk, shp inalkel, kztog Dend DddRows3-9hit
FINISHING:
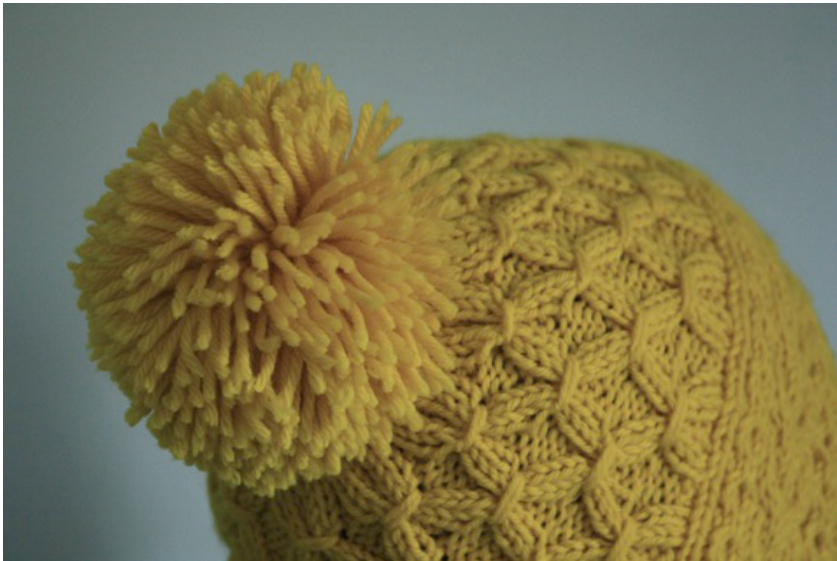
Weave in all ends. MAKE TWisis measure a long strand ot yarh by puling it out at maximum arm's length four has nne lnop and twn ends Lnan the end with tws. loons nvervour hig toe wra cabinet kng t the varn uptilit starts to kink up op itself then fold the length inhalf and allow it to curlup an x. Measure 18 inches from the TO ATTACH TWISTS pull the non-knotted end through the garter band on your hat, between the second and third garter ridge. Pull the knotted end through the loop to secure. MAKE A 4.5" PoM-POM using your favorite method - mine is the method described in this YouTube video (the video describes making lots of pom-poms at once, but you can easily move the nails closer together to make one at a time). I recommend attaching your pom-pom 1 to 1.5 inches above the gathered point of the hat, so that it sits more on top of your head (instead of behind it). The pom-pom should still be large enough to cover the gathered point where the hat was closed. Give it all a nice steam block, and you're done!
Pattern and images copyright 2012 Lacey Volk, aka Volkstricken. This free pattern is provided for personal use Only. CONTACT: lacey.volk@gmail.com http://blog.volkstricken.com


