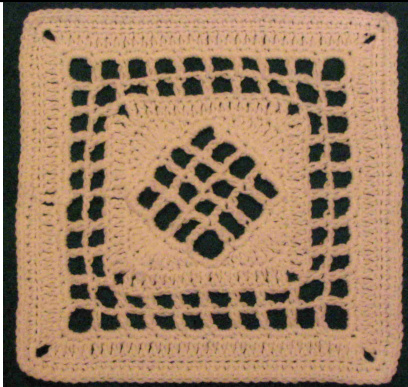
Windowpane
Copyright 2004 Chris Simon 12 inch square
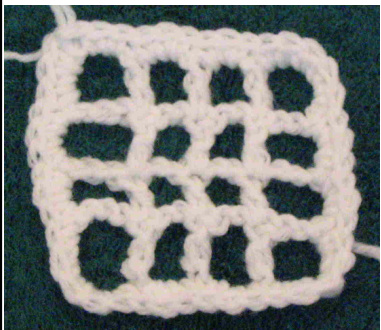
This pattern is published at www.yarncrazy.com. Please do not copy to any other site. Contact me at chrissimon@ verizon.net and let me know if you're linking to my patterns. H hook or size needed for gauge. Note: This square starts out with four rows worked side to side, then switches to working in rounds. Row 1: Ch 18, dc in 9th ch from hook. (Ch 2, skip next 2 ch, dc in next ch) 3 times. Row 2: Ch 5, turn. Skip next ch 2 sp, dc in next dc. (Ch 2, skip next ch 2 sp, dc in next dc) twice. Ch 2, dc in 3rd ch of ch sp at end of row. Row 3: Repeat row 2. Row 4: Repeat row 2. End of side-to-side part. Your square should look something like this:
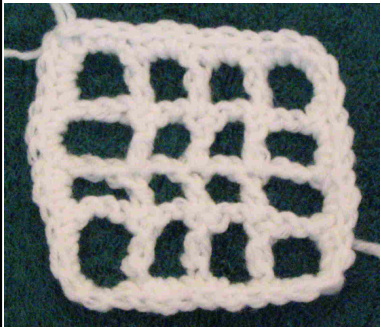
Rnd 1: Ch 1, 3 sc in same corner space. 3 sc in each ch 2 space to next corner. (5 sc in corner space, 3 sc in each ch 2 space to next corner) 3 times. 2 sc in same corner as starting. Sl st in starting sc. Your square should look something like this:
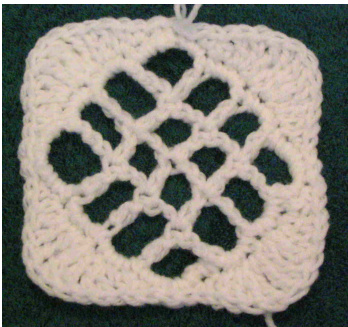
Note: Be careful not to make the slip stitches in Round 2 to0 tight. You'll need to be able to stitch into them! Rnd 2: (Sl st in next st, sc in next st, hdc in next st, 2 dc in next st, 2 tr in each of next 2 sts, 2 dc in next st, hdc in next st, sc in next st, sl st in next st, sl st in center sc of Rnd 1 corner) 3 times. Sl st in next st, sc in next st, hdc in next st, 2 dc in next st, 2 tr in each of next 2 sts, 2 dc in next st, hdc in next st, sc in next st, sl st in next st, sl st in starting sl st. Your square should look something like this:
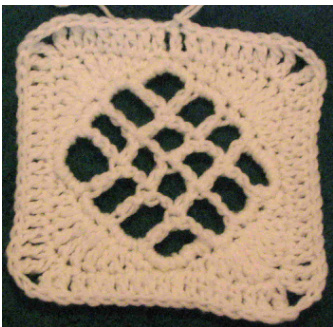
Rnd 3: Ch 3, dc in next 6 sts, 2 tr in next st. (Ch 2, 2 tr in next st, dc in next 13 sts, 2 tr in next st) 3 times. Ch 2, 2 tr in next st, dc in next 6 sts, sl st in 3rd ch of starting ch 3. Your square should look something like this:
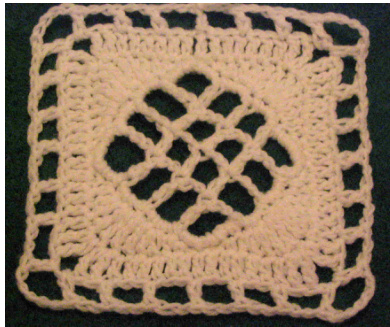
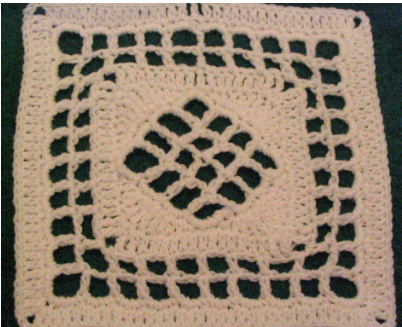
Rnd 4: Ch 5, skip next 2 sts, dc in next st, ch 2, skip next 2 sts dc in next st, ch 2, skip next 2 sts, (dc, ch 5, dc) in corner ch 2 space. \* (Ch 2, skip next 2 sts, dc in next st) 5 times, ch 2, skip next 2 sts, (dc, ch 5, dc) in corner ch 2 space. Repeat from \* 3 times. (Ch 2, skip next 2 sts, dc in next st) 2 times, ch 2, sl st in 3rd ch of starting ch 5. Your square should look something like this:
(Continued on page 2)
Windowpane
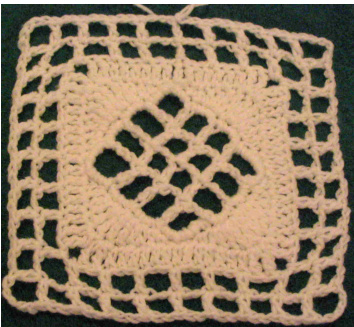
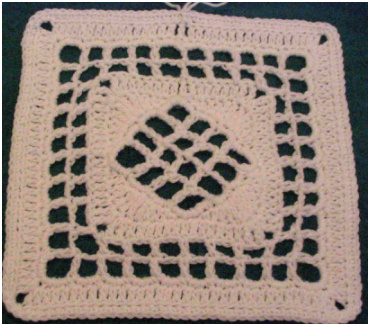
Page 2 Rnd 5: Ch 5, skip next ch 2 sp, dc in next dc, (ch 2, skip next ch 2 sp, dc in next dc) 2 times, ch 2, (dc, ch 5, dc) in corner ch 5 space. \* Ch 2, dc in next dc, (Ch 2, skip next ch 2 sp, dc in next dc) 6 times, ch 2, (dc, ch 5, dc) in corner ch 5 space. Repeat from \* 3 times. Ch 2, dc in next dc, (Ch 2, skip next ch 2 sp, dc in next dc) 2 times, ch 2, sl st in 3rd ch of starting ch 5. Your square should look something like this:
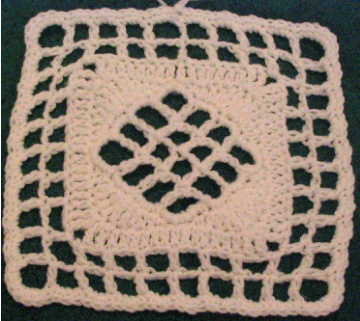
Rnd 6: S1 st into next ch 2 sp. Ch 1, 3 sc in same ch 2 sp. 3 sc in each ch 2 sp, 7 sc in each corner ch 5 space around. Sl st in starting sc. Your square should look something like this:
Rnd 7: Ch 3, dc in next 14 sts, \* (2 dc, ch 3, 2 dc) in next st, dc in next 30 sts. Repeat from \* 3 times. (2 dc, ch 3, 2 dc) in next st, dc in next 15 sts, sl st in 3rd ch of starting ch 3. Your square should look something like this:
Rnd 8: Ch 1, sc in back loop only (BLO) of same st, sc in BLO of next 16 dc. \* 3 sc in corner ch 3 sp, sc in BLO of next 34 dc. Repeat from \* 3 times. 3 sc in corner ch 3 sp, sc in BLO of next 17 dc, sl st in first sc. Your square should look something like this:
Measure your square. If square measures 11 inches, use Rnd 9A. If square measures 11 1/2 inches, use Rnd 9B. Rnd 9A: Ch 3, dc in next 17 sc. \* (2 dc, ch 2, 2 dc) in next sc, dc in next 36 sc. Repeat from \* 3 times. (2 dc, ch 2, 2 dc) in next sc, dc in next 18 sc. Finish off. Rnd 9B: Ch 1, sc in same st, sc in next 17 sc. \* 3 sc in next sc, sc in next 36 sc. Repeat from \* 3 times. 3 sc in next sc, sc in next 18 sc. Finish off.


