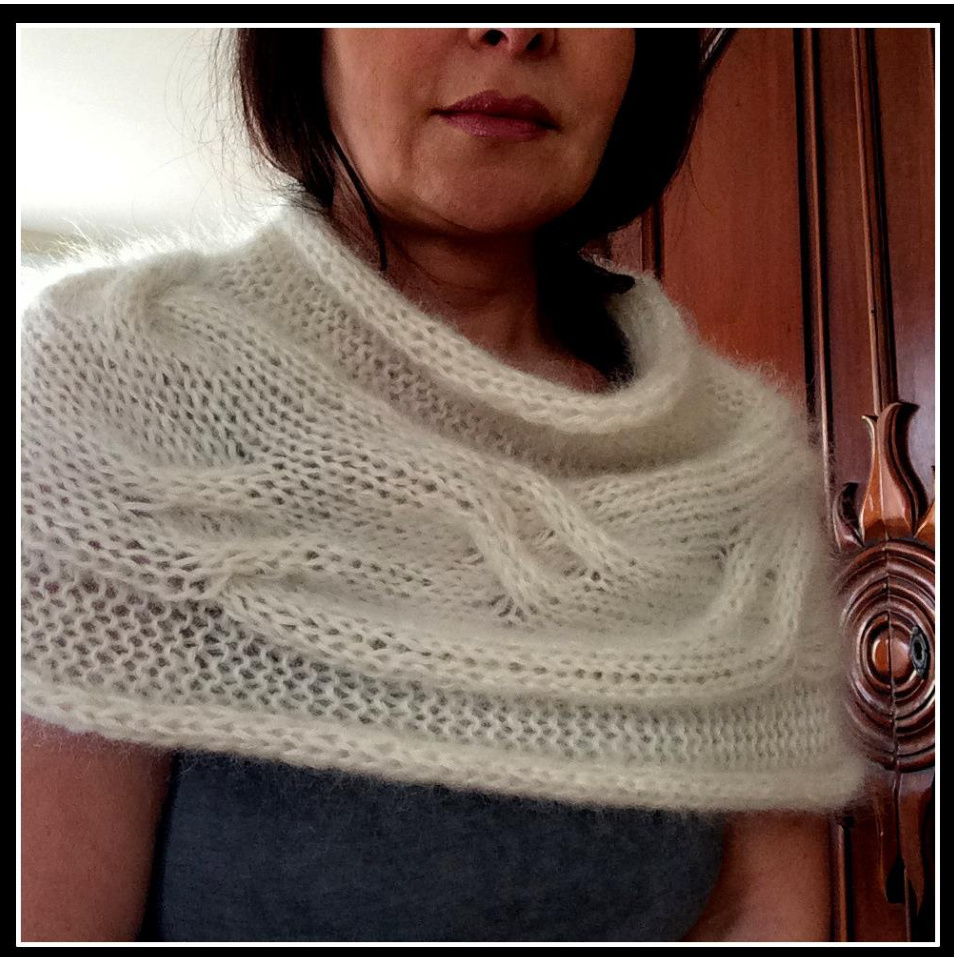
Star Dust Cowl S/M and L/ XL
An Original Absolute Knits Design. Copyright 2016 by Angela Juergens This airy cowl is worked sideways with 6 strands of lace weight yarn held together. Short rows will make the neck part tighter than the bottom section. You can of course use any other yarn that knits up to the same gauge.
Materials:
6 balls ROwAN Kidsilk Haze (70% Super Kid Mohair, 30% Silk, 229 yards/25g) Scrap yarn for provisional cast on, medium sized crochet hook, tapestry needle cable needle, tapestry needle 1 circular knitting needle to pick stitches from scrap yarn in same or smaller size 1 circular or straight knitting needle size Us 15 (10 mm) \*\*\*\*\*\*\*\*\*OR SIZE TO ACHIEVE GAUGE\*\*\*\*\*\*\*\*\*\*\*\*
STITCH PATTERN(S): Knit, purl
GAUGE:
10 sts and 11.5 rows = 4" x 4" in Stockinette Stitch with six strands held together.
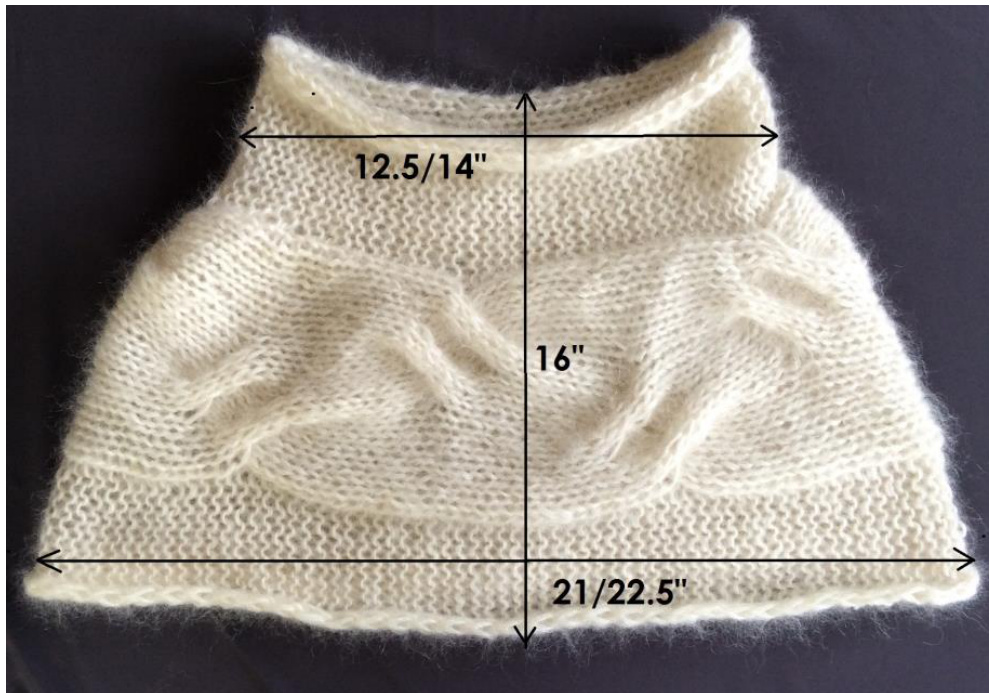
FINISHED MEASUREMENTS:
CIRCUMFERENCE: Bottom: 42/ 45" Neck: 25 / 28"WIDTH: 16"
SKILLS:
w&t: wrap & turn
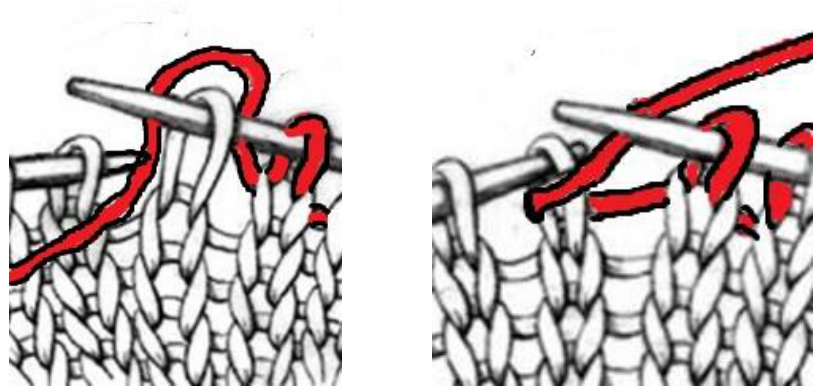
Leave yarn in back. Slip next stitch tip to tip from left hand needle to right hand needle, bring yarn to front between the slipped and the following stitch. Now transfer the slipped stitch tip to tip back to left hand needle. Turn your knitting piece so you are looking at the purl side. In the following row when you work over that stitch you will have to hide
Knitting the stitch with the wrap:
the wrap as explained You have to "hide" the wrap as follows: On the right side, work to just before wrapped stitch. Insert right needle from front, under the wrap from -bottom up, and then into wrapped stitch as usual. Knit them together, making sure new stitch comes out under wrap. TIP: When ataching a new ballof yarn orif you have a knot in your strand, felt the end of the old ball together with the end of the new ballby overlapping them for 3". Run hot water over this 3" area and using a bit of dish soap roll the two strands between your fingers until they are felted together.
Abbreviations: k: knit p: purl pm: place marker sm: slip marker st(s): stitch(es) RS: right side ws: wrong side Row(s): rows w&t: wrap and turn method sllpwyif: slip one st purlwise with yarn in front
Instructions:
vin provisionai casi on rmeinoa ana nol lelng scrap yan casi 4I sis. Change to main yarn. TIP:If you don't know how to make a provisional cast on you can also make youregular cast on with scrap yarn. It may take a litle longer to be taken out but it works well enough. Row 1(Rs): slip first stitch as if to purl with yarn in front (= sllp wyif), p9, pm, k18, pm, p12, k1. The last 13 stitches will be at the top (neck) of the cowl, the first 10 stitches will be at the bottom = 41 sts Row 2(Ws): slip first stitch as if to purl with yarn in front (=sllp wyif) k12, slip marker, p18, sm, k to end Row 3 (RS) SHOrT ROW: sllp wyif, p9, sm, k17, w&t Row 4 (ws): p to marker, sm, k to end Row 5 (Rs): sllp wyif, p9, sm, k9, slip next 3 sts on cable needle and hold to front, k3, k3 sts from cable needle, k to marker (knit/hide the wrap with the stitch together in this row, see SKILLS), sm, p12, k1 Row 6(ws): sllp wyif, k12, slip marker, p18, sm, k to end Row 7(Rs): sl1p wyif, p9, sm, k12, slip next 3 sts on cable needle and hold to front, k3, k3 sts from cable needle, sm, p12, k1 Row 8(ws): sllp wyif, k12, sm, p18, sm, k to end Row 9(RS) SHORT ROW: sll1p wyif, p9, sm, k6, slip next 3 sts on cable needle and hold to front, k3, k3 sts from cable needle, k to 1 st before marker, w&t Row 1o(ws): p to marker, sm, k to end Row 11 (Rs): sllp wyif, p9, sm, k9, slip next 3 sts on cable needle and hold to front, k3, k3 sts from cable needle, k to marker (knit the wrap with the stitch together in this row!), sm, p12, k1 Row 12(ws): sllp wyif, k12, sm, p18, sm, k to end Row 13(RS) SHOrt ROW: sllp wyif, p9, sm, k17, w&t Row 14 (ws): p to marker, sm, k to end Do not work row 15 and 16 for smaller size. Continue with row 17 to end. Row 15 (Rs): sllp wyif, p9, sm, k18 (knit the wrap with the stitch together in this row!), sm, p12, k1 Page 3 of 4 Row 16 (ws): sllp wyif, k12, sm, p18, sm, k to end Row 17 (Rs): sl1p wyif, p9, sm, k17, sm, p12, k1 Row 18 (ws): sllp wyif, k12, sm, p18, sm, k to end Row 19 (Rs) SHOrt ROW: sl1p wyif, p9, sm, k17, w&t, Row 20 (ws): p to marker, sm, k to end Row 21 (Rs): sllp wyif, p9, sm, k3, slip next 3 sts on cable needle and hold to back, k3, k3 sts from cable needle, k to marker (knit the wrap with the stitch together in this row), sm, p12, k1 Row 22(ws): sllp wyif, k12, slip marker, p18, sm, k to end Row 23 (RS) SHORT ROW: sllp wyif, p9, sm, slip next 3 sts on cable needle and hold to back, k3, k3 sts from cable needle, k to one stitch before marker, w&t Row 24(ws): p to marker, sm, k to end Row 25 (Rs): sllp wyif, p9, sm, k6, slip next 3 sts on cable needle and hold to back, k3, k3 sts from cable needle, k to marker (knit the wrap with the stitch together in this row), sm, p12, k1 Row 26(Ws): sllp wyif, k12, slip marker, p18, sm, k to end Row 27 (Rs): sl1p wyif, p9, sm, k3, slip next 3 sts on cable needle and hold to back, k3, k3 sts from cable needle, k to marker, sm, p12, k1 Row 28 (ws): sllp wyif, k12, sm, p18, sm, k to end Row 29 (RS) SHORT ROW: sl1p wyif, p9, sm, k to 1 st before marker, w&t Row 30 (ws): p to marker, sm, k to end Row 31(Rs): sllp wyif, p9, sm, k17, then (knit the wrap with the stitch together in this row), sm, p12, kl Row 32(ws): sllp wyif, k12, sm, p18, sm, k to end Repeat row 1-32 three times more. Do not bind off. FINISHING: Pick up stitches from scrap yarn, then remove scrap yarn. Combine both ends with Kitchener stitch. Weave in ends. TIP: Please remember that you have a knitted and a purled part which requires that you tun your kniting to the knitted side when you combine the purled sections if you use the general Kitchener stitch sequence which only works for the knit stitch part of Stockinette Stitch.


