Cherry Blossom Cowl
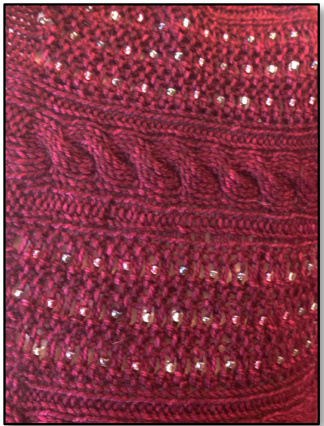
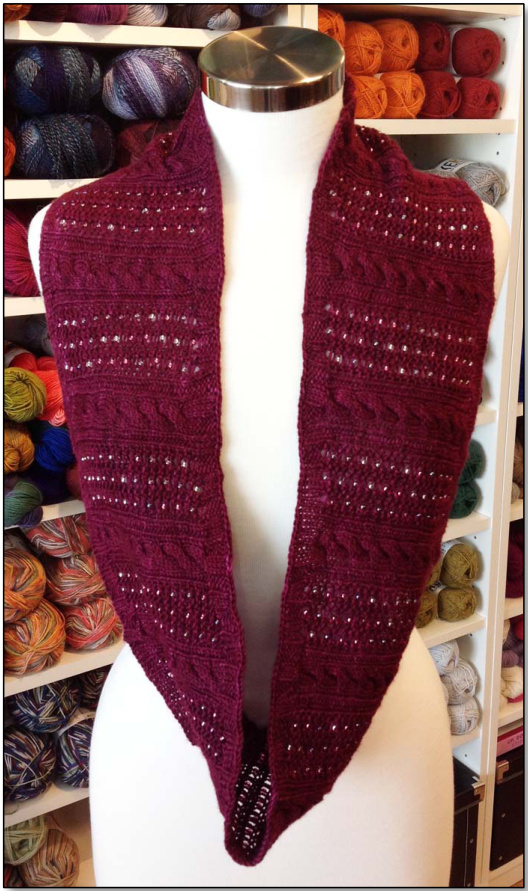
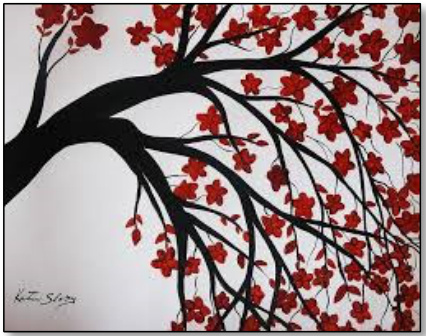
Celebrating the art of Kate slaby of Spencer,WI, our signature yarn inspiration is from her piece, Japanese Cherry Blosoms. The merino/cashmere blend yarn iz kettle dyed and produced by sweetgeorgia yarns. We have incorporated simple and optional bead knitting into the design with thiz easy bead placement technique. Cablez bordered by a bit of lace work and beads, twist throughout the cowl, resembling the tree trunk, branches, and blossoms ofthiz lovely painting. Please enjoy the pattern!
Materials
One skein (400 yards) of sweetgeorgia yarns, CASHLUXE. 70% superwash merino, 20% cashmere, 10% nylon 400 yards per 112g skein. Size 4 circular needles, 32" length. Stitch Markers, 6 the same color and one a different color or size.Cable needle or double pointed needle.Yarn needle. The cowl is 6" deep x 46" in circumference. Gauge is 6 sts./in.
Beady
462 TOHOround seedbeads,size 6/0 are used. Dental floss threader. Beading surface. Beads are available at Twisted Loop Yarn shop and online at: http://www.bobbybead.com If beading the cowl, pre-string the required number of beads onto the outside strand of the skein before casting on. This is a helpful U-Tube video for stringing beads onto the yarn using a dental floss threader: https://www.youtube.com/watch?v=RtTCeehuSFw I prefer to use a fleece mat on a flat table surface rather than hold the beads in my hand. Fleece fabric is available at any fabric store. Cut a small square to use for bead stringing.
Abbreviations
YO = Yarn Over P2TOG = Purl 2 stitches together PBFYO=Place bead next to the stitch just made and yarn over. Slide the bead forward and to the far right on the yarn over. C6F= Cable six front. All cables in this project are C6F. Slip three stitches onto a cable needle and hold it in front, K3, knit the three stitches off the cable needle. K2TOG = Knit 2 stitches together
Special Long Tail Cast On Directiong
Here's a different technique for the long tail cast on that ensures you will never run out of tail length during the cast on.
Rather than estimating how much yarn is needed for the tail, find the inside and outside ends of the skein and hold them together. Pull out many yards of yarn from the inside of the skein to prevent twisting. Make a slipknot with both the inside and outside strand, leaving a 6" tail, and place the inside strand over your index finger and the outside strand over your thumb. (If using beads, they will be on the outside strand and it is positioned over your thumb.) This method may be used with two separate balls of yarn, as well. Make sure to avoid twisting the inside and outside strands. Note: For a relaxed cast on edge, hold both needle tips together, follow above directions and cast on over them. Hold the stitches on at the needle tips and carefully pull on the cable to release one of the tips. OR cast on using a needle two sizes larger, and then switch to size 4 for the first round of knitting.
Directions
Using the long tail cast on method and the suggested technique, cast on 294 stitches, not counting the slipknot, as this willbe dropped later. Cut the non-beaded strand after you have cast on 294 stitches. Before joining in the round, remove the very first slipknot stitch. You will have three tails to weave in, but you won't need to calculate the amount of yarn for the long tail cast on. Distribute the stitches around the cable. Join in the round, making sure they are not twisted. OR try something different and join the work with the following direction. The pattern repeat is 42 stitches and there are seven sections. Make sure to move the markers as you work through the rounds to keep in the pattern. Within the 42-stitch pattern repeat, there are two cables, one on the right and one on the left. The cable twists are offset by three rounds. C6F on right side on rows 4, 10, 16, 22, 28, 34, 40. C6F on left side on rows 7, 13, 19, 25, 31, 37, 43.
Cris8-Cros8 Join
To join, criss-cross the first stitch and the last stitch. Lift the first cast on stitch onto the right needle and pass the last cast on stitch over it onto the left needle. Place your end of round marker in between these two stitches. (This eliminates the "stair-stepped" connection, and results in an evenjoin.)
Begin Knitting
Rounds 1-3: \*K3, P3, repeat from \* to the end of the rounds. Round 4: \*K1, P1, K1, P1, YO, P2TOG, P1, PBFYO (Place bead forward and yo. Slide the bead along the strand and hold it next to the stitch just made and yarn over. The bead will be forward on the yarn over to the right) P2TOG, P1, YO, P2TOG, K1, P1, K1, CF6, K1, P1, K1, P1, YO, P2TOG, P1, PBFYO (place bead forward on the yo in front of the work) P2TOG, P1, YO, P2TOG, K1, P1, K1, K6, PLACE MARKER, repeat from \* 6 more times. (Make sure to place all of the markers on in this round. The end of round marker is also used for the last pattern repeat.) Round 5: \*K1, P1, K1, [K1, Y0, K2T0G] 3 times, K1, P1, K1, K6, repeat from \* 13 more times. ke sure to slide the bead forward on the yarn over and position it to the right before you K2TOG.) Round 6: \*K1, P1, K1, P1, PBFYO (Place bead forward and yo. Slide the bead along the strand and hold it next to the stitch just made and yarn over. The bead will be forward on the yarn over to the right) P2TOG, P1, YO, P2TOG, P1, PBFYO (Place bead forward and yo. Slide the bead along the strand and hold it next to the stitch just made and yarn over. The bead will be forward on the yarn over to the right) P2TOG, K1, P1, K1, K6, repeat from \* 13 more times. Round 7: \*K1, P1, K1, [K1, YO, K2TOG] 3 times, K1, P1, K1, K6, K1, P1, K1, [K1, YO, K2TOG] 3 times, K1, P1, K1, CF6. Repeat from \* 6 more times. ke sure to slide the bead forward on the yarn over and position it to the right before you K2TOG.) Round 8: \*K1, P1, K1, P1, YO, P2TOG, P1, PBFYO (Place bead forward and yo. Slide the bead along the strand and hold it next to the stitch just made and yarn over. The bead will be forward on the yarn over to the right) P2TOG, P1, YO, P2TOG, K1, P1, K1, K6, repeat from \* 13 moretimes. Round 9: Repeat Round 5. Round 10: \*K1, P1, K1, P1, PBFYO (Place bead forward and yo. Slide the bead along the strand and hold it next to the stitch just made and yarn over. The bead will be forward on the yarn over to the right) P2TOG, P1, YO, P2TOG, P1, PBFYO (Place bead forward and yo. Slide the bead along the strand and hold it next to the stitch just made and yarn over. The bead will be forward on the yarn over to the right), P2TOG, K1, P1, K1, CF6, K1, P1, K1, P1, PBFYO (Place bead forward and yo. Slide the bead along the strand and hold it next to the stitch just made and yarn over. The bead will be forward on the yarn over to the right), P2TOG, P1, YO, P2TOG, P1, PBFYO (Place bead forward and yo. Slide the bead along the strand and hold it next to the stitch just made and yarn over. The bead will be forward on the yarn over to the right), P2TOG, K1, P1, K1, K6, repeat from \* 6 more times. Round 11: Repeat Round 5. Round 12: Repeat Round 8. Round 13: Repeat Round 7. Round 14: Repeat Round 6. Round 15: Repeat Round 5. Round 16: Repeat Round 4. Round 17: Repeat Round 5. Round 18: Repeat Round 6. Round 19: Repeat Round 7. Round 20: Repeat Round 8. Round 21: Repeat Round 5. Round 22: Repeat Round 10. Round 23: Repeat Round 5. Round 24: Repeat Round 8. Round 25: Repeat Round 7. Round 26: Repeat Round 6. Round 27: Repeat Round 5. Round 28: Repeat Round 4. Round 29: Repeat Round 5. Round 30: Repeat Round 6. Round 31: Repeat Round 7. Round 32: Repeat Round 8. Round 33: Repeat Round 5. Round 34: Repeat Round 10. Round 35: Repeat Round 5. Round 36: Repeat Round 8. Round 37: Repeat Round 7. Round 38: Repeat Round 6. Round 39: Repeat Round 5. Round 40: Repeat Round 4. Round 41: Repeat Round 5. Round 42: Repeat Round 6. Round 43: Repeat Round 7. Round 44: Repeat Round 8. Rounds 45-47: \*K3, P3, repeat from \* to the end of each round.
Relaxed Bind Off inPattern
K2, \*Slip both stitches back to the left needle; Knit them together through the back; K1, Slip both stitches back to the left needle; Knit them together through the back, K1; Slip both stitches back to the left needle, Knit them together through the back; P1, Slip both stitches back to the left needle, Knit them together through the back; P1, Slip both stitches back to the left needle, Knit them together through the back, P1, Slip both stitches back to the left needle, Knit them together through the back, K1, repeat from \*, ending with the last two purl stitches bound off. To finish, go under the first bound off stitch with the right needle and pull up the working yarn, pass over the last stitch with the one just made. Cut tail and pull through the remaining stitch.
Blocking
Soak the cowl for fifteen minutes in lukewarm water with a small amount of non-rinsing wool wash Saueeze out excess wate tina towel toblot out excess water Arrange thecowl on a dry towel and allow it to drv flat for a timeqTo avoidcreasesrenos periadically to allow air tc essw aher.gh thgerving cwwolf a ury tower and anow le to ury hlat 1or a time. To avold creases, Teposttion periouicanytoanowantohowtnrouglrtne ink you for participating in the 2015 Minnesota Yarn shop Hop! Have fun
2105 Minnesota Yarw Shop Hop Pattern for Twisted Loop Yarn shop Designed by Diane L. Augustin Copyright 2015. AU Rightz Reserved. dianelaugustin@mac.com www.yarnhappybeadhappy.com www.ravelry.com/designers/diane-l-augustin www.yarnhappybeadhappy.etsy.com